Advertisement
Quick Links
Istruzioni per il montaggio
structions pour le montage
tage
Montaj talimatları
Instructiuni de montaj
montagem
290555_Istruzioni_Up Restyling Alto con piedini_00_A5.indd 1
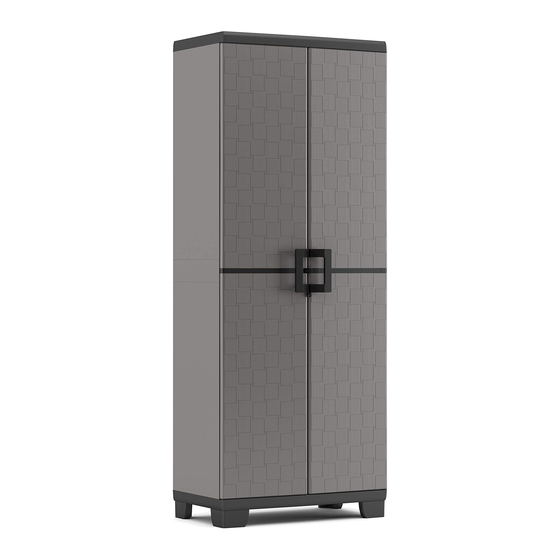
UP
9713000
cm 68x39x173 h
Assembly instruction
Istrucciòn para el montaje
Οδηγίε συναρ ολόγηση
Návod na montáž
Montageanleitungen
Instructies voor de mon-
Instrukcja montażu
Instruções de
In-
14/06/2016 11:35:02
Advertisement

Related Manuals for Kis UP 9713000


Summary of Contents for Kis UP 9713000
- Page 1 9713000 cm 68x39x173 h Istruzioni per il montaggio Assembly instruction Montageanleitungen structions pour le montage Istrucciòn para el montaje Instructies voor de mon- tage Montaj talimatları Οδηγίε συναρ ολόγηση Instructiuni de montaj Návod na montáž Instrukcja montażu Instruções de montagem 290555_Istruzioni_Up Restyling Alto con piedini_00_A5.indd 1 14/06/2016 11:35:02...
- Page 2 2x A/C8E 3x E1E 4x B1E 2x A/C7E 4x FMU1R C11E C12E C10E A10E 3x E2E A11E 2x D13E 2x B8E 10x [3,9x16 mm] 4x [5x35 mm] 2x JCPS 2x B11E 2x JCPD 2x B2E 290555_Istruzioni_Up Restyling Alto con piedini_00_A5.indd 2 14/06/2016 11:35:11...
- Page 3 Conservare il manuale d’uso per referenze future in prossimità del prodotto. Prima di iniziare l’assemblaggio leggere attentamente le avvertenze. Keep this instruction manual with the product for future reference. Read the instructions carefully before assembly. Bewahren Sie das Benutzerhandbuch in der Nähe des Produkts auf, damit Sie später jederzeit nachschlagen können.
- Page 4 BACK A/C8E click click A8E-A9E A6E-A7E A10E A11E click click 290555_Istruzioni_Up Restyling Alto con piedini_00_A5.indd 4 14/06/2016 11:35:14...
- Page 5 A/C7E 290555_Istruzioni_Up Restyling Alto con piedini_00_A5.indd 5 14/06/2016 11:35:15...
- Page 6 290555_Istruzioni_Up Restyling Alto con piedini_00_A5.indd 6 14/06/2016 11:35:19...
- Page 7 290555_Istruzioni_Up Restyling Alto con piedini_00_A5.indd 7 14/06/2016 11:35:21...
- Page 8 290555_Istruzioni_Up Restyling Alto con piedini_00_A5.indd 8 14/06/2016 11:35:22...
- Page 9 290555_Istruzioni_Up Restyling Alto con piedini_00_A5.indd 9 14/06/2016 11:35:36...
- Page 10 2x [3,9x16 mm] B11E B11E 290555_Istruzioni_Up Restyling Alto con piedini_00_A5.indd 10 14/06/2016 11:35:46...
- Page 11 JCPD JCPS FMU1R FMU1R D13E D13E FMU1R FMU1R JCPS JCPD 290555_Istruzioni_Up Restyling Alto con piedini_00_A5.indd 11 14/06/2016 11:35:47...
- Page 12 290555_Istruzioni_Up Restyling Alto con piedini_00_A5.indd 12 14/06/2016 11:35:55...
- Page 13 290555_Istruzioni_Up Restyling Alto con piedini_00_A5.indd 13 14/06/2016 11:36:08...
- Page 14 A/C8E A/C7E C11E BACK C12E C10E 290555_Istruzioni_Up Restyling Alto con piedini_00_A5.indd 14 14/06/2016 11:36:11...
- Page 15 4x [5x35 mm] 290555_Istruzioni_Up Restyling Alto con piedini_00_A5.indd 15 14/06/2016 11:36:14...
- Page 16 8x [3,9x16 mm] 290555_Istruzioni_Up Restyling Alto con piedini_00_A5.indd 16 14/06/2016 11:36:22...
- Page 17 click 290555_Istruzioni_Up Restyling Alto con piedini_00_A5.indd 17 14/06/2016 11:36:24...
- Page 18 290555_Istruzioni_Up Restyling Alto con piedini_00_A5.indd 18 14/06/2016 11:36:37...
- Page 19 Per garantire maggiore stabilità dell’armadio su superfici irregolari, utilizzare le viti di regolazione poste sotto i piedi anteriori. For optimum stability on uneven surfaces, regulate the cupboard using the screws under the front feet. Um dem Schrank auf unebenen Flächen mehr Stabilität zu verleihen, verwenden Sie bitte die Stellschrauben unter den vorderen Füßen.
- Page 20 Fixe o armário na parede (parafusos e buchas não incluídos). Escolher a bucha conforme a superfície de apoio. ABM Italia S.p.A. - Via Ing. G. Taliercio 2 - 31024 Roncadelle di Ormelle (TV) - Italia Tel. +39 0422 745900 - Fax +39 0422 745929 - info@abmitalia.com - www.kis.it 290555_Istruzioni_Up Restyling Alto con piedini_00_A5.indd 20...
Need help?
Do you have a question about the UP 9713000 and is the answer not in the manual?
Questions and answers