Table of Contents
Advertisement
Available languages
Available languages
Quick Links
Advertisement
Table of Contents

Related Manuals for Hermes MONACO Series

Summary of Contents for Hermes MONACO Series
- Page 8 „ ” (COOL STOP) 24 C 24 C...
- Page 10 Таймер и часы Использование таймера Установка таймера включения/отключения (ON/OFF) Нажмите кнопку Timer/cl, и в зависимости от того, работает кондиционер или выключен, Вы сможете настроить таймер включения или отключения в определенное время. При этом на дисплее пульта ДУ будет мигать значок и...
- Page 11 Вентиляция В режиме вентиляции наружный блок кондиционера не работает. Вентилятор внутреннего блока вращается, распределяя воздух по помещению. Задайте желаемое положение воздухораспределительных жалюзи при помощи кнопок “Жалюзи вверх-вниз” и “Жалюзи вправо-влево”. Нажмите кнопку Fan Speed, чтобы изменить скорость вентилятора внутреннего блока. Режим...
- Page 12 (Sleep) Режим “Сна“ Если кондиционер работает на охлаждение или осушение и 23 st 16 , то в течение 3 часов после запуска режима “Сон 1” температура повышается на 1 градус в час. Затем он работает при постоянной температуре, а через 8 часов заданная температура снова снижается на 2 Если...
- Page 13 Функция Самоочистки (не у всех моделей) CLEAN Когда кондиционер включен, нажмите кнопку CLEAN/PLASMA (Очистка/Плазма) на 3 секунды. Включится очистка кондиционера, при этом на дисплее пульта появится надпись CLEAN, которая исчезнет по окончании очистки.Внимание: после начала очистки теплообменник будет очищаться автоматически при выключении кондиционера. Более того, если система обнаружит загрязнение теплообменника, то...
- Page 23 45° )
- Page 25 . .)
- Page 27 CONTENTS SAFETY PRECAUTIONS .......................................... NAMES ......................................................................................
- Page 28 Before turning on the air conditioner, it is necessary to carefully familiarize with the following safety precautions to ensure the normal operation of the system. The figures below are shown for illustration only. The assemblies with cooling capacity of more than 4600 W (17 000 btu/h) have no plug of the power supply cable.
- Page 29 WARNING...
-
Page 30: Components' Names
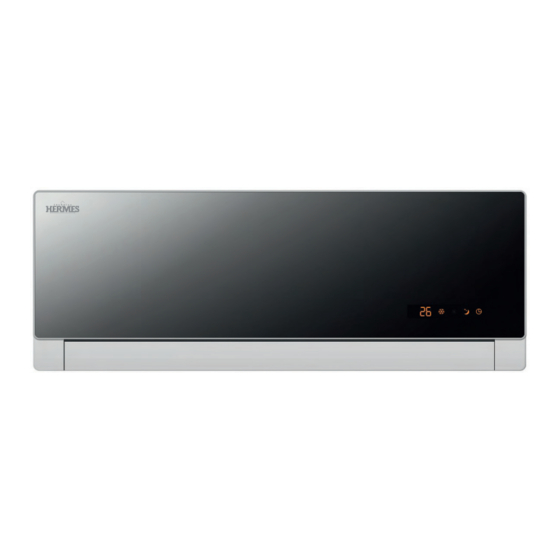
COMPONENTS' NAMES Indoor and outdoor unit Air inlet duct Connecting route Drainage hose Air distributing hole Condensation drainage hole Design of the indoor and outdoor unit may differ depending on the model. INDICATION The designations of indication for all types of air conditioners are shown below. Compare the designations with your model before the operation. - Page 31 COMPONENTS' NAMES...
- Page 32 COMPONENTS' NAMES Pictographs NIGHT-TIME MODE PRESCRIBED TEMPERATURE OR ROOM TEMPERATURE COOLING ELECTRIC HETING COIL DRAINING VENTILATION TEMPERATURE SETTING ROOM TEMPERATURE AUTOMATIC HEATING MODE REMOTE CONTOL SIGNALS RECEIVER OPERATION IONIZER TIMER MODE INDICATOR HIGH SPEED LOW SPEED MEDIUM SPEED The equipment is constantly upgraded and improved, so the manufacturer reserves the right to change specifications without prior notice.
-
Page 33: Remote Controller
REMOTE CONTROLLER OPERATION DISPLAY Signal ejecting window UP&DOWN SWING button It sends signals to the indoor unit. It displays the current Only apply to unit contains this function. settings. LEFT&RIGHT SWING button DISPLAY button Press this button , the swing Press it once to stop the indoor louvers will swing horizontally , unit displaying and press again... -
Page 34: Operation Of Air Conditioner
OPERATION OF AIR CONDITIONER Controller ELEC-HEAT/ELECTRON LOCK button OPERATION MODE button Press the button for 10 Press the button, the seconds can lock the operation mode change present condition the in the order of: auto cooling other buttons being dry fan heat (heat pump R B O ineffective during the time. -
Page 35: Temperature Setting
OPERATION OF AIR CONDITIONER L E F T / R I G H T A D J U S T S w i n g Press ?swing? button, ?swing? light light, ?swing? sign flashing, the left/right deflector starts swinging. ELEC- TIMER MODE D i r e c t i o n a l f a n... -
Page 36: Sleep Mode
OPERATION OF AIR CONDITIONER S L E E P M O D E “ ” Press ON/OFF button. “ ” Press MODE button, setting mode. “ ”“ ” Press buttons,setting temp. MODE TIMER ELEC- TIMER SLEEP HEAT ELECTRON TEMP SWING SPEED LOCK ON/OFF... - Page 37 OPERATION OF AIR CONDITIONER When 28 st 31 ,the unit will operate at the set temperature all along. ≤ ≤ ≥ ≥ When the air conditioner is in heat mode and18 st 16 , the unit will operate at the set temperature all along.
-
Page 38: Auto Start
OPERATION OF AIR CONDITIONER FUNCTION OF TIMER( under the controller in indoor unit) Timer off On running condition, the machine will stop when the time of setting reaches. Timer on On off condition, the machine will start running when the time of setting reaches. NOTICE: The time range of restarting the machine after stopping it must be no less than 3 minutes, for the delay restar control of the system. - Page 39 OPERATION OF AIR CONDITIONER FUNCTION OF TIMER( under the controller in remote controller) ON/OFF timer operation set 1) When the unit is on press the timer button once to start timer off function and ?1? will be shown on the display ,every press of this button increases the AUTO-OFF time by 1 hour(24 hours at most), after it accumulates to 24 the air conditioner will quit timer function.
-
Page 40: Installation Sketch
INSTALLATION SKETCH... -
Page 41: Installation Instructions
INSTALLATION INSTRUCTIONS Placement of the indoor unit. Keep the air inlet duct and the plug away from the obstructions. Maximum distance between indoor and outdoor unit should not be more than 5m. Wall mounting must be reliable to withstand the weight of the device and any impacts. Avoid exposure to the direct sunlight. - Page 42 NOTE: Holes in the solid surface must be secured safely. When using the expanding bolts, two holes (11x20 or 11x26) should be at a distance of 450mm from each other. Make sure that holes are marked correctly, and then drill holes in the wall. 2 Wiring Open the external side of the lattice.
- Page 43 hose must be repaired to prevent water leakage. Repair methods: Changing position of the outflow hose and the outflow closed with a rubber stopper. Do not allow any gaps while repairing, this may result in leakage. 4 Installation of the indoor unit Make sure that the pipe passes through a hole in the wall and connected to the indoor unit on the fixing plate (push down on the edge of the indoor unit to secure it on the fixing plate).
-
Page 44: Installation Of The Outdoor Unit
INSTALLATION OF THE OUTDOOR UNIT 1 Wiring Wiring for the model with power above 6000 W (model with power above 21 000 kW/h) 1 Remove the screws from the cover plate (2 pieces) and The cable may be laid from the rear hole for pipes or put the cover plate aside. - Page 45 Connection diagram Note: If you find that color of the connecting cable does not match with the upper diagram, please use real objects as the primary reference. But terminal of the same symbol must be fixed by connecting clamp and cable of the same color.
- Page 46 WARNING: Please refer to the wiring diagram of the circuit attached to the outdoor and indoor unit and use it as the main reference for the installation. Power cable and signal cable between the outdoor and indoor unit must be connected individually, according to the numbers on the terminal panel.
- Page 47 5 Pipe reeling process Use cutting for the pipes to cut off the damaged part. Remove burrs to reduce cuts. Insert the nut into the connecting pipe and do reeling with tools such as reamer. Outer diameter A (mm) 6.35mm (1/4") 2.0—2.5 9.52mm (3/8”) 3.0—3.5...
-
Page 48: Maintenance
MAINTENANCE Cleaning the front panel, mesh and filter should be performed every 2 weeks. Before performing the maintenance, make sure that the air conditioner is switched off and disconnected from the power supply. Schemes below are shown for illustration only. It is necessary to be guided by the current operating conditions during the maintenance. -
Page 49: Troubleshooting
TROUBLESHOOTING The situations described below are not a malfunction and do not affect the normal operation of the unit. Condition Possible cause The air conditioner does Check if the air conditioner is switched on. Check if the not function. plug is tightly connected; check the condition of circuit breakers and fuses.
Need help?
Do you have a question about the MONACO Series and is the answer not in the manual?
Questions and answers