
Subscribe to Our Youtube Channel
Related Manuals for LAWO ruby


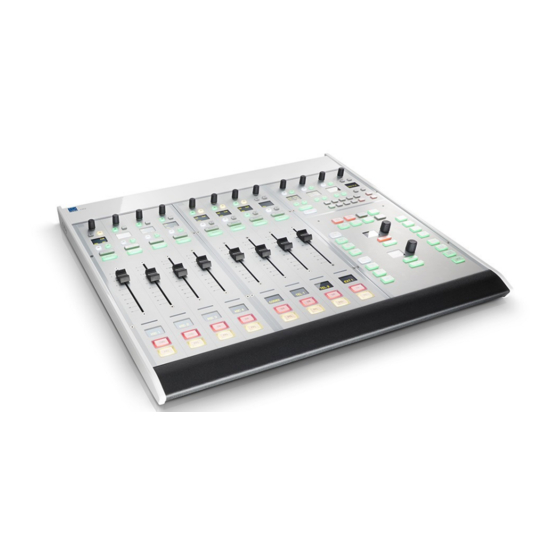
Summary of Contents for LAWO ruby
- Page 1 User Manual Version: 6.6.0/1 Edition: Tuesday, March 9, 2021 To obtain the latest documentation and software downloads, please visit: www.lawo.com/lawo-downloads...
- Page 2 All rights reserved. Permission to reprint or electronically reproduce any document or graphic in whole or in part for any reason is expressly prohibited, unless prior written consent is obtained from the Lawo All trademarks and registered trademarks belong to their respective owners. It cannot be guaranteed that all product names, products, trademarks, requisitions, regulations, guidelines, specifications and norms are free from trade mark rights of third parties.
-
Page 3: Table Of Contents
2. Important Safety Instructions ........................ 5 3. The Hardware ............................. 6 4. Installation ............................14 5. System Setup ............................ 22 6. Operation ............................28 7. Maintenance ............................. 60 8. Troubleshooting ..........................67 9. Appendices ............................70 ruby User Manual Version: 6.6.0/1 3/78... -
Page 4: Introduction
Welcome to ruby. About this Manual This document describes all aspects of the ruby control surface, including its hardware components, installation, connections, operation and maintenance. The surface requires a DSP Core such as Power Core and, optionally, may run with a VisTool MK2 touch- screen interface. -
Page 5: Important Safety Instructions
2. Important Safety Instructions Important Safety Instructions Please observe all of the instructions provided in the "General Safety Information for Lawo Equipment" booklet delivered with your devices. Double-click here to open the information as a pdf. ruby User Manual Version: 6.6.0/1... -
Page 6: The Hardware
3. The Hardware The Hardware This chapter describes the hardware components and options. Topics include: · System Components · DSP Core Compatibility · Controls Overview · Control Surface Variants 6/78 Version: 6.6.0/1 ruby User Manual... - Page 7 3. The Hardware System Components A complete system consists of up to four components: · ruby Control Surface (essential) – available in single or split-frame configurations. · DSP Core (essential) – all audio interfacing, routing, control and signal processing. ·...
- Page 8 3. The Hardware DSP Core Compatibility The ruby control surface is compatible with the following DSP Core products: 8/78 Version: 6.6.0/1 ruby User Manual...
- Page 9 The upper section includes a rotary control and four small MF Keys (1, 1a, 2, 2b). Their functions are labeled by the OLED displays. There are then three large MF Keys (3, 4, 5) with foil-printed labels. All MF Keys are defined by the configuration. ruby User Manual Version: 6.6.0/1 9/78...
- Page 10 Buttons are NOT supported. This means that there is no access to DSP parameters, bus assign, system options and snapshots. All MF Keys and VCAs are defined by the configuration. Note that the 12 Function Buttons cannot be reprogramed by the configuration and, therefore, will remain blank. 10/78 Version: 6.6.0/1 ruby User Manual...
- Page 11 If you change the MF Key functionality, then you will need to exchange the foil-printed labels. Printed sheets with the most common labels are included with each control surface frame. ruby User Manual Version: 6.6.0/1 11/78...
- Page 12 8-fader single frame 12-fader split-frame ruby can exist as a single or multi-frame control surface. A choice of four main and five extender frames are available. Frames can be combined to increase the fader count or create a split-frame surface.
- Page 13 Countersunk Short - the same as Countersunk but with shorter side profiles and no upper cover plate to hide the cables (i.e. the rear panel connectors will be visible). Table Top Surface (rear view) ruby User Manual Version: 6.6.0/1 13/78...
-
Page 14: Installation
4. Installation Installation This chapter describes how to install the control surface. Topics include: · Packing List · Preparation · Installing Countersunk Frames · Exchanging the MF Key Labels · Grounding & Power · Wiring 14/78 Version: 6.6.0/1 ruby User Manual... - Page 15 MF Keys. If the surface consists of multiple frames, then you will receive one set of accessories per frame (as every frame requires its own power, CAN bus and MF Key labels). ruby User Manual Version: 6.6.0/1 15/78...
- Page 16 Please check the contents of the shipping boxes, and in the event of any transport damage, contact your local Lawo representative or email support@lawo.com. A list of serial numbers for all components is included with the shipment. Please keep this list for your records.
- Page 17 All countersunk frames have flat side parts without edges. Therefore, the installer must provide some kind of support onto which the surface will rest. Please see the dimension drawings for details. ruby User Manual Version: 6.6.0/1 17/78...
- Page 18 Insert the foil plate between the button body and the transparent button cap. Fasten the button cap back onto the button body by pressing it! The photos below are taken from a ruby surface, but the procedure is identical for crystal and sapphire. Remove Button Cap...
- Page 19 4. Installation Grounding & Power 8-fader ruby Surface (rear view) 4.5.1 Grounding Although operator protection is guaranteed, it is best to establish an additional ground for EMC reasons. On the control surface, a grounding screw is provided beside the CAN bus connector: Use the M4x8 CASE screw to fasten the grounding cable to the housing.
- Page 20 To connect a single frame: Connect the DSP Core's CAN connector directly to the control surface CAN BUS IN. Fit the CAN bus terminator supplied with the system to the CAN BUS LINK OUT. 20/78 Version: 6.6.0/1 ruby User Manual...
- Page 21 Continue to loop the CAN bus through the remaining frames (and any optional key panels). They may be connected in any order. On the last frame or key panel in the chain, fit the CAN bus terminator supplied with the system. ruby User Manual Version: 6.6.0/1 21/78...
-
Page 22: System Setup
5. System Setup System Setup This chapter describes how to set up the control surface. Topics include: · Powering On the Device · Can Bus Settings 22/78 Version: 6.6.0/1 ruby User Manual... - Page 23 5. System Setup Powering On the Device The ruby surface has no on/off switch and starts automatically when power is applied. You will see an initial flicker of LEDs on the control surface modules. The console will be ready for operation once it is connected to the DSP Core (via CAN bus), and the DSP Core is booted and properly configured.
- Page 24 The CAN bus speed defines the maximum distance which you can run the cables. A CAN speed of 500 kbit/sec is recommended. Transfer Speed Maximum Distance 500 kbit/sec (recommended) 60 m 100 kbit/sec 300 m 24/78 Version: 6.6.0/1 ruby User Manual...
- Page 25 CAN Bus Addressing The CAN bus address, also known as the Frame ID, is a unique address which defines the role of each control surface module within the system. For ruby, the following options are supported: · Address 01 to 0F (hexadecimal) can be assigned to Fader Modules.
- Page 26 CAN bus addresses which define the functionality. In our example, the surface on the left controls faders 1 to 24 (in two layers); while the surface on the right controls faders 25 to 48. Frame -> Surface: CAN Bus Addresses (hexadecimal) Console: CAN Bus Addresses (hexadecimal) 26/78 Version: 6.6.0/1 ruby User Manual...
- Page 27 Each Fader Module supports two layers. This means that the module set to hex address 01 controls fader strips 1 to 4 (Layer 1) and 5 to 8 (Layer 2); the module set to hex address 02 controls fader strips 9-12 and 13-16; and so on. Fader Mappings ruby User Manual Version: 6.6.0/1 27/78...
-
Page 28: Operation
Input Gain & Pan · DSP Parameters · Metering · Monitoring & Talkback · Conference Bussing (N-1/Mix Minus) · VCA Grouping · Fader Mappings · Editing User Labels · Snapshots · The SYS Menu 28/78 Version: 6.6.0/1 ruby User Manual... - Page 29 In this instance, you should check the following: · The network cabling and IP settings of the control PC, see Configuring the Network Settings on the PC. · The IP address of the DSP Core, see Editing the System IP Settings. ruby User Manual Version: 6.6.0/1 29/78...
- Page 30 In a custom configuration, there may be more pages available from the DOCK. For example, to provide metering or advanced options. You can change page using the PAGE UP and PAGE DOWN keys on your PC keyboard. This will scroll through all of the available pages. 30/78 Version: 6.6.0/1 ruby User Manual...
- Page 31 Note that closing VisTool on the control PC only closes the current session, and is not the same as restarting the system. To do this you will need to restart the DSP Core (described later). ruby User Manual Version: 6.6.0/1...
- Page 32 User Labels software. MF Keys 3 & 4 The two large MF keys are programed by the configuration and are defined per source. In our example, they are channel ON and PFL. 32/78 Version: 6.6.0/1 ruby User Manual...
- Page 33 AGn - enable this key to turn on AutoGain for the DJ and GUEST mics. · On the TONE source, the 4 small keys select the frequency of the tone: 63Hz, 400Hz, 1kHz or 12.5kHz. ruby User Manual Version: 6.6.0/1 33/78...
- Page 34 The parameter value and button functions are shown in the OLED. MF Keys 45 & 46 These two MF Keys are programed by the configuration. On consoles with more than one layer, they usually provide global layer switching. 34/78 Version: 6.6.0/1 ruby User Manual...
- Page 35 Depending on the configuration, each rotary control can adjust two parameters: turn to adjust the first; push down and turn to adjust the second. Note that the 12 "Function Buttons" are not supported and cannot be programed. Therefore, they will remain unused. ruby User Manual Version: 6.6.0/1 35/78...
- Page 36 You cannot choose a red source as it is deemed to be on-air. In this instance, first find the source on the surface and close its fader - the button color changes from red to blue, and the source can be selected. 36/78 Version: 6.6.0/1 ruby User Manual...
- Page 37 Is the source already assigned to a different fader strip and the fader open? If so, the source is deemed to be on-air, and so you must find the source and close its fader. ruby User Manual Version: 6.6.0/1 37/78...
- Page 38 In our example, the three lines of text show the following information: · REWORK = the Group name (detected from the network). · CODEC 3 = the Stream name (detected from the network). · RAV 01 = the source Display Name (defined in the configuration). 38/78 Version: 6.6.0/1 ruby User Manual...
- Page 39 Since the flags are updated cyclically, the error should heal itself. If the issue persists, then check the RAVENNA pages (in the Web UI). The audio input will be muted while the error message is displayed. ruby User Manual Version: 6.6.0/1 39/78...
- Page 40 · MADI = the Group name (defined in the remote matrix). · In 3 = the Signal name (defined in the remote matrix). · Nova17 = the source Display Name (defined in the configuration). 40/78 Version: 6.6.0/1 ruby User Manual...
- Page 41 When the correct AUX is displayed, turn the control to adjust the level. Aux send levels can be adjusted from -120dB to +9dB. When you have finished editing the bus assignments, deselect BUS (on the Central Module) - the rotary controls and soft keys return to their default functions (described earlier). ruby User Manual Version: 6.6.0/1 41/78...
- Page 42 Assigning a Bus to an Output The configuration determines the default audio outputs for each summing bus. If you have VisTool, then it may be possible to change the output routing from an on-screen matrix. 42/78 Version: 6.6.0/1 ruby User Manual...
- Page 43 If a surround source is assigned to a mono bus, then the stereo downmix is converted to mono by subtracting 3dB from, and then summing, the L and R channels. ruby User Manual Version: 6.6.0/1 43/78...
- Page 44 To turn off AutoGain, press the AUTOGAIN button again - the button changes color (blue = off). The mic gain now reverts to its previous value (before AutoGain was enabled), and MIC gain can be adjusted manually. 44/78 Version: 6.6.0/1 ruby User Manual...
- Page 45 VisTool shows all available parameters, and so this is the best way to get an overview of a source. The surface controls are paged through different parameter sets using the INP, DYN, LIM, DLY and EQ keys on the Central Module. ruby User Manual Version: 6.6.0/1 45/78...
- Page 46 When you have finished adjusting the parameters, deselect the ACCESS key - the upper controls on the Central Module return to their default functions (described earlier), and the VisTool "Source Parameters" page closes. 46/78 Version: 6.6.0/1 ruby User Manual...
- Page 47 The integrated loudness measurement is controlled by the on-screen Start, Stop and Reset buttons. It is very useful for measuring loudness over a longer period - for example, for the duration of the show. The measurement is displayed in LUFS (Loudness Units Full Scale). ruby User Manual Version: 6.6.0/1 47/78...
- Page 48 PFL becomes active. Ø PFL Clear One of the MF Keys on the Central Module is usually programmed for PFL Clear. This provides a handy way of cancelling all active PFLs across the console. 48/78 Version: 6.6.0/1 ruby User Manual...
- Page 49 Close all three source faders. The CONF buttons become red and all sources will hear the conference bus minus themselves. In other words, they can hear each other, but not themselves, and chat off-air. ruby User Manual Version: 6.6.0/1 49/78...
- Page 50 PGM 1 mix minus. This state is reflected by the white CONF button. To cancel the conference for any of the sources, deselect the CONF button. The CONF buttons turn green (off) and the source’s monitor feed receives PGM 1 minus themselves at all times. 50/78 Version: 6.6.0/1 ruby User Manual...
- Page 51 VCA master to any fader strip in the usual manner, see Assigning Fader Strips. Once assigned, the fader strip label display and backlight update according to the display name and color coding defined in the configuration. ruby User Manual Version: 6.6.0/1 51/78...
- Page 52 If the Group Fader Values Fallback option is also enabled, then the displays will revert to their default mode (e.g. source name) after a certain time period. The time period is set by the Group Fader Value Hold Time (in seconds). 52/78 Version: 6.6.0/1 ruby User Manual...
- Page 53 To map invisible fader strips onto physical faders – to create additional "layers". The first two applications are particularly useful for multi-operator layouts, as faders can be cloned at different operator stations, or the control surface can be re-configured from single to multi-user. ruby User Manual Version: 6.6.0/1 53/78...
- Page 54 Thus, if a source is deleted from the configuration, the labels of all sources with a larger sys number are moved (shifted downwards). The sys numbers can be viewed in the Ember+ tree to see what affect this may have on your system. 54/78 Version: 6.6.0/1 ruby User Manual...
- Page 55 PC Labels function. It is important that the Station ID (defined for the "Logic -> VispageSwitch" element) matches the one entered in VisTool Sessions. If not, the trigger from the remote system will not work. ruby User Manual Version: 6.6.0/1...
- Page 56 By default, all parameters if source faders are closed, and do not load if source faders are open. By assigning control signals to the various load group inputs, you can modify this behaviour as you wish. See Selective Loading of Source Parameters. 56/78 Version: 6.6.0/1 ruby User Manual...
- Page 57 Keep holding SNAP RECALL and SNAP STORE and select a memory - e.g. number 4. The snapshot memory if cleared. To check if the operation has been succesful, press and hold SNAP RECALL - the memory number should now be clear (unlit). ruby User Manual Version: 6.6.0/1 57/78...
- Page 58 Enables or disables 'hot fader' mode. When disabled, the faders motors are active and so the faders will move when you turn a channel on or off. When enabled, the fader motors are inactive; this allows you to open faders without passing audio, and then start channels at a later stage. 58/78 Version: 6.6.0/1 ruby User Manual...
- Page 59 PFL bus. Multiple AFLs may be summed. AFL is only cancelled by deselecting the AFL button. · AFL/PFL - as for AFL, but the channel's PFL signal is heard when the fader is closed; when the fader opens, the listen bus receives AFL. ruby User Manual Version: 6.6.0/1 59/78...
-
Page 60: Maintenance
This chapter describes the maintenance procedures for the control surface frames and components. Topics include: · Checking the Hardware Status · Updating Firmware · The Special Functions Mode · Replacing Defective Parts · Locating the Control Surface Serial Number · Cleaning the Devices 60/78 Version: 6.6.0/1 ruby User Manual... - Page 61 In the example above, the system has detected two Fader Modules and one Central Module. A further six Fader Modules are configured, but either they are not fitted or their frame is not connected. For more details about the Web UI, please refer to your the DSP Core manual. ruby User Manual Version: 6.6.0/1 61/78...
- Page 62 The current revision of each system component (Surface, System and IOs) can be checked and, if necessary, updated by transferring files from a networked computer. Full details on how to use the tool can be found in your the DSP Core manual. 62/78 Version: 6.6.0/1 ruby User Manual...
- Page 63 Each of the control surface modules offers a “special functions” mode. This can be used to adjust system settings and test the module's components (lamps, buttons, etc.) Double-click on the links below to open the special functions mode documentation (as a pdf): · ruby Fader Module SF mode · ruby Central Module SF mode ruby User Manual Version: 6.6.0/1...
- Page 64 This allows fast replacement of a frame in the case of a hardware failure. Providing the replacement frame is set to the correct CAN bus addresses, it will immediately take over the same functions as the exchanged frame. 64/78 Version: 6.6.0/1 ruby User Manual...
- Page 65 The serial number of your control surface can be found on the product information sticker placed on the underside of the panel: Sticker Location The S/N field indicates the Serial Number: Product Information Sticker ruby User Manual Version: 6.6.0/1 65/78...
- Page 66 7. Maintenance Cleaning the Devices Lawo radio products are made from a variety of different materials, and each material might have specific cleaning requirements. Therefore, a general allowance for disinfection of product surfaces with disinfectants containing alcohol cannot be given.
-
Page 67: Troubleshooting
8. Troubleshooting Troubleshooting This chapter covers some typical problems and their solutions. Topics include: · Solving Connectivity Issues · Boot-up Issues ruby User Manual Version: 6.6.0/1 67/78... - Page 68 This can occur if the same CAN bus address is used for more than one module. Check the CAN bus addresses of each module using the special functions mode. Each address must be unique and match the one defined by the configuration. 68/78 Version: 6.6.0/1 ruby User Manual...
- Page 69 The default mode can be used to exit the loop and load an empty configuration. Once boot-up is complete, you can use SoP Explorer to reload all system firmware and the ON-AIR Designer to transfer a different configuration. ruby User Manual Version: 6.6.0/1 69/78...
-
Page 70: Appendices
This chapter includes further information which you may find useful. Topics include: · Part Numbers · System Reference Levels · Dimension Drawings · Connector Pin-Outs · The 12V DC Power Supply · The User Labels Software 70/78 Version: 6.6.0/1 ruby User Manual... - Page 71 RU8FCSS ruby 12-fader RU12FTT RU12FCS RU12FCSS ruby 16-fader RU16FTT RU16FCS RU16FCSS ruby 4-fader Extender RU4FEXTT RU4FEXCS RU4FEXCSS ruby 8 fader Extender RU4FEXTT RU8FEXCS RU8FEXCSS ruby 12-fader Extender RU12FEXTT RU12FEXCS RU12FEXCSS ruby 16-fader Extender RU16FEXTT RU16FEXCS RU16FEXCSS ruby Central Module Extender...
- Page 72 9. Appendices Dimension Drawings Please use the links below to open the dimension drawing as a pdf: · Ruby Table Top Dimension Drawing · Ruby Countersink Dimension Drawing · Ruby Countersink Short Dimension Drawing The drawings show an 8-fader main frame.
- Page 73 9. Appendices Connector Pin-Outs 9.3.1 8-pin RJ45 connector, female. 9.3.2 DC Power Input 4-pin Kycon connector, female. ruby User Manual Version: 6.6.0/1 73/78...
- Page 74 Weight Cable length without plug 1200 Electrical Specification Parameter Conditions Min. Typ. Max. Unit Input Voltage Frequency Input Current 1,85A/115VAC 1A/230VAC Inrush Current 120A/230VAC Efficiency Output Voltage 12±5% Output Current 11.5 Leakage Current 0,75 74/78 Version: 6.6.0/1 ruby User Manual...
- Page 75 By default, files are installed in the location: ‘C:\Program Files\DSA’. When the installation is complete, a confirmation window appears - click on Finish to exit the ‘Setup Wizard’. If you have any problems with the installation, please contact your local Lawo representative or email support@lawo.com. ruby User Manual Version: 6.6.0/1...
- Page 76 The application opens with an empty window: When online, the flag at the bottom left of the window indicates that the software is communicating correctly with the ruby system. If this flag does not appear, then check the network connection to the system.
- Page 77 Save to Desk - transfers user labels from the software to the console. o Export... - use this option to export the current user label table as an .xml file. You can use this to copy user labels from one system to another. ruby User Manual Version: 6.6.0/1 77/78...
- Page 78 Identifier - displays the internal System Number. This number cannot be modified and is for information only. o Font... - select to open the Font dialogue box. You can use this to adjust the on-screen font for the user labels table. 78/78 Version: 6.6.0/1 ruby User Manual...
Need help?
Do you have a question about the ruby and is the answer not in the manual?
Questions and answers