Table of Contents
Advertisement
Quick Links
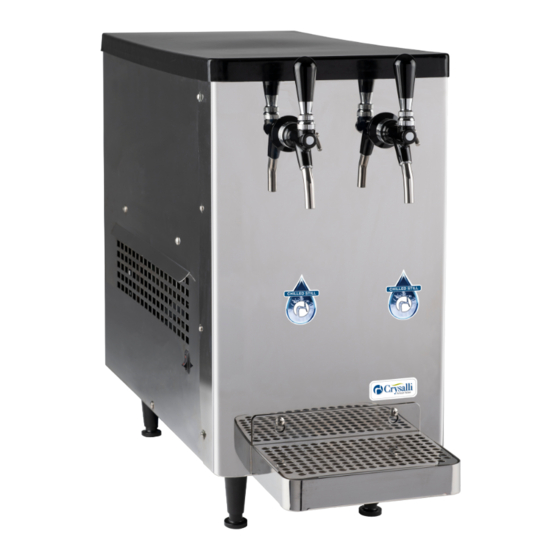
CR-1SW & CR-2SW Still Chilled Water Countertop
Select a location for you chilled water dispenser. Place unit as close as possible to
1.
water filter connection & 120-volt electrical outlet. Make sure there is sufficient space at
the back and between the unit and walls and overhead for proper air circulation and to
access the air filter.
Install Water Filter Assembly: Mount the CR-24FC water filter assembly on
2.
wall or other supporting structure or in side cabinet near the angle stop. Connect
water filter assembly to the angle stop water supply line using minimum 3/8" I.D.
water line. The outlet hose of the filter system should also be 3/8". CR-24FC
filter head assembly has a ¾" fmp inlet and outlet which must be reduced down.
Flush water filter system per filter instructions to purge air.
Water inlet Connection: Run your 3/8" water line from your water filter system to the
3.
CR-2SW. The CR-2SW has a 3/8" push-in John Guest fitting at the bottom of it. This
fitting will accept a 3/8" OD hose. Push in hose into fitting till it stops, then pull back a
little to make sure it is secure.
Overflow Drain line: The clear ½" hose out the bottom is the overflow drain hose which
4.
should be run to a floor drain or other waste drain.
Fill Water Bath: Remove lid of the unit and fill water bath with non-filtered tap water, fill
5.
to ¼" from top of white standpipe. This is the white tube in the water bath connected to
overflow hose. The unit will not work without water bath filled.
Turn on Water. Check connections for leaks.
6.
Plug unit power cord into 120-volt outlet. Toggle the ON/OFF rocker switch to the ON
7.
position. Fan and compressor will turn on. Fan and Compressor will automatically turn
off when a complete ice bank is made and cycle on and off to maintain it.
Pull open the still water faucets to run water through the system. Set adjustment arms
8.
located on the side of the faucets in a horizontal position for full flow. Adjust this little
arm up or down to restrict water flow as desired.
Unit will take between 3 & 4 hours to make a complete ice bank in the water bath area.
9.
Once unit has built the ice bank you are ready to dispense chilled still water.
1
Quick Install Guide
1739 Sabre St.
Hayward, CA 94545
800-229-4410 www.crysalli.com
02.13.14
Advertisement
Table of Contents

Subscribe to Our Youtube Channel
Related Manuals for Crysalli CR-1SW


Summary of Contents for Crysalli CR-1SW
- Page 1 1739 Sabre St. Hayward, CA 94545 800-229-4410 www.crysalli.com CR-1SW & CR-2SW Still Chilled Water Countertop Quick Install Guide Select a location for you chilled water dispenser. Place unit as close as possible to water filter connection & 120-volt electrical outlet. Make sure there is sufficient space at the back and between the unit and walls and overhead for proper air circulation and to access the air filter.
- Page 2 1739 Sabre St. Hayward, CA 94545 800-229-4410 www.crysalli.com Use if Water pressure exceeds 80psi, regulate to 60 psi. Flush valve and hose 02.13.14...
- Page 3 Reference the Crysalli Coutnertop system Quick Install Guide for part usage and install details CR-24FC Filter system to a Crysalli Countertop CR series with 3/8 John Guest Water Inlet Fitting. Connections: The Water Inlet is the 3/8" Quick Connect fitting on the botton of the chiller. Use the PP221212W The Clear hose is the overflow Drain hose Water bath must be manaully filled with water.
Need help?
Do you have a question about the CR-1SW and is the answer not in the manual?
Questions and answers