
Related Manuals for Rexing TL1


Summary of Contents for Rexing TL1
- Page 1 Time Lapse Camera タイムラプスカメラ User Manual 取扱説明書 The information in this manual is subject to change without notice. Rexing All Rights Reserved www.rexingusa.com...
- Page 2 We hope you love your new products as much as we do. If you need assistance, or have any suggestions to improve it, please contact us. care@rexingusa.com (877) 740-8004 Our support team will respond you as soon as possible. Always a surprise in Rexing. Check us out here. • https://www.facebook.com/rexingusa/ • https://www.instagram.com/rexingdashcam/ • https://www.rexingusa.com/support/registration/...
-
Page 3: Table Of Contents
Table of Contents Product Overview What’s in the box? Buttons and Description Specification Power Supply Inserting Storage Media Basic Operation Time Lapse Setting Using The Screw Mount Download Files To The Computer Notes and Maintenance Warranty & Support... -
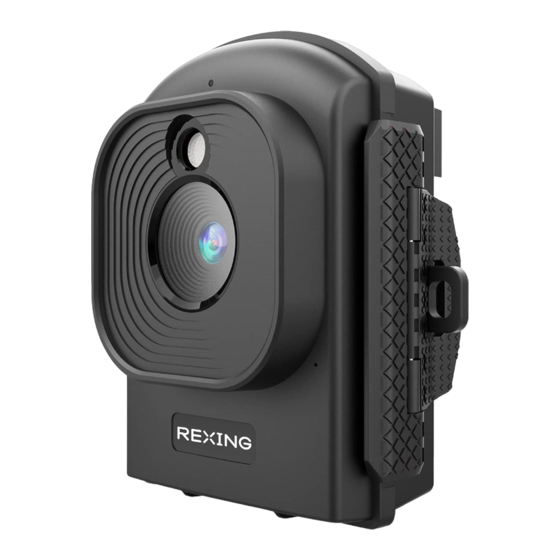
Page 4: Product Overview
Product Overview Display Screen Up Button / Manual Micro SD Card Slot Time-lapse Button USB Port Mode Button Power Button/Time-lapse Button Speaker Menu Button Down Button / OK Button Selfie Button Battery Compartment (4pcs) DC Port Status Indicator Fill Light Lens... -
Page 5: What's In The Box
タイムラプスカメラ User Manual 取扱説明書 The information in this manual is subject to change without notice. Rexing All Rights Reserved www.rexingusa.com Rexing TL1 Time Lapse Camera Installation Tool Strip Mount USB to Mini-USB Cable Screw Mount AV Cable Mounting Screws (3x) -
Page 6: Buttons And Description
Buttons and Description Button Function Power Button / Long press to turn On/Off; Time-lapse Button After starting up, press the button to enter the time-lapse mode; MENU Button Enter/Exit Menu MODE Button Switch between Camera Mode/Video Mode/Playback Mode OK Button Shooting/OK Confirmation Up Button / Upward/manual Time-lapse Photography Shortcut... -
Page 7: Specification
Specification LCD screen 2.4" LCD Lens Starlight lens Angle of view: 110° Image Sensor Starlight 2 Megapixels Resolution 1920*1080 / 1280*720 Shooting Distance 2 FT~infinity A single 2W white LED will enable the supplementary light Supplementary Light when the user is in a completely dark place. Customize the Shooting Cycle Set the shooting time flexibly according to the week and time ON/OFF;... -
Page 8: Power Supply
Power Supply Please install batteries before using the camera. • Open the camera case and remove the battery cover. Install 12 pieces of 1.5V AA batteries (4pcs in the left battery compartment, 8pcs in the right battery compartment).Please make sure the electrode is correct. Close the battery cover... -
Page 9: Inserting Storage Media
Please notice the protection for the camera when using it outdoor. • If the capacity of the memory card is full, the TL1 will stop recording automatically and the LEDs will go out. • Press the edge of the card gently to pop-up the Micro SD card. - Page 10 Adjustment Mode The TL1 has 3 different modes: Photo Mode, Video Mode and Playback Mode. Press the Mode button to change mode. Photo Mode Video Mode Playback Mode For taking still photos. For recording video. For playing the recorded files.
- Page 11 Press MODE button to switch the Video/Photo/playback mode. Press Menu button to open the setup menu. Press Up/Down button to review all menu. Then press OK button to enter the options interface. Press Up/Down button to review all options. And press OK button to confirm options.
- Page 12 Video Set the video resolution. The bigger the resolution is, the longer the video Resolution time can be stored. Options: 1920X1080P/1280 X 720P. Frequency Set the light source frequency to match frequency of electricity supply in local region to prevent interference. Options: 50Hz/60Hz.
-
Page 13: Time Lapse Setting
Time & Date Press the mode button to select the position to be modified, press the up/down button to modify the value, and press the OK button to confirm. Audio Open this function, the camera will record audio when recording video. Recording Options: On/Off. - Page 14 Mode Timelapse (Photo) Timelapse (Video) Timing Photo Timing Video Exit Select MENU • Timing Photo is Timing for photo, it can be set to take 1 photo every 3 seconds to 24 hours; • Timing Video is timing for video, it can be set to record a video from 3 seconds to 120 seconds every 3 seconds to 24 hours;...
-
Page 15: Using The Screw Mount
Up/MTL button again to stop the manual time-lapse video. 08447 Timelapse (Manual) REC Using the Screw Mount You can mount the TL1 permanently on a wall or tree using the supplied screw mount. Before mounting the screw mount you should ensure that all existing screws are tight. - Page 16 Components Tripod screws Bracket fixing screws Bracket support rod Wall plugs Screws Drill holes Mounting the Screw Mount Required Tools • Drill • 6 mm masonry/concrete drill bit • Phillips head screwdriver CAUTION • Ensure that there are no electric lines, water or heating pipes installed at the proposed drilling location.
-
Page 17: Download Files To The Computer
Installation Steps • Mark the drill holes by holding the foot of the Screw Mount at the desired mounting location and marking the hole positions. • Use a drill with a 6 mm drill bit to drill the required holes and insert the plugs and insert the wall plugs flush with the wall. -
Page 18: Notes And Maintenance
Connecting the Camera to a PC by the USB Cable • Connect the camera to the computer via USB cable. Turn on the camera, the screen will display “MSDC”. • Open My Computer or Windows Explorer. A "Removable Disk" appears in the drive list. -
Page 19: Warranty & Support
Warranty & Support Warranty The Rexing TL1 camera comes with a full 12-month warranty. If you register your product on our official site (https://www.rexingusa.com/support/registration), you can extend the warranty to 18 months. Support If you have any questions regarding your product, please do not hesitate to contact us at care@rexingusa.com, or call us at... - Page 20 はじめに REXINGを選んでいただきありがとうございます! お客様が 商品をご愛用いただくことを願っております。サポートが必要な場 合、ご意見をいただける場合は、以下までご連絡ください。 jpcare@rexingusa.com サポートチームが迅速に対応いたします。 いつもRexingに驚きを。 こちらもご確認ください。 • https://www.facebook.com/rexingjp • https://www.instagram.com/rexingdashcam/ • https://www.rexingusa.com/support/registration/ Facebook Instagram 製品サポート...
- Page 21 目次 製品概要 セット内容 ボタン機能説明 仕様 電源供給 記憶媒体 基本操作 タイムラプス設定 ネジ取り付け パソコンへのファイルダウンロード お手入れと注意事項 保証とサポート...
- Page 22 製品概要 ディスプレイ画面 アップボタン/ マイクロSDカードスロット 手動タイムラプスボタン USB端子 モードボタン 電源ボタン/タイムラプスボタン スピーカー メニューボタン ダウンボタン/ OKボタン 自撮りボタン バッテリーコンパートメント (電池4個) DC端子 ステータス表示 補助光 レンズ...
- Page 23 セット内容 Time Lapse Camera タイムラプスカメラ User Manual 取扱説明書 The information in this manual is subject to change without notice. Rexing All Rights Reserved www.rexingusa.com Rexing TL� タイムラプスカメラ 取りつけ用ツール USB-ミニUSBケーブル ストラップ取りつけマウント Sネジ取りつけマウント AVケーブル 取りつけ用ネジ(3本) 取扱説明書...
- Page 24 ボタン機能 ボタン 機能 電源ボタン/ 長押しでオン/オフ タイムラプスボタン 起動後、ボタンを押しタイムラプスモードにする メニューボタン メニュー開始/終了 モードボタン カメラモード/ビデオモード/再生モード切り替え OKボタン 撮影する/OK確認する アップ(上)ボタン/ 上向き/手動タイムラプスショートカット 手動タイムラプスボタン ダウン(下)ボタン/ 下向き/自撮り セルフィーボタン...
- Page 25 仕様 LCD画面 �.�インチLCD レンズ 広角レンズ 画角:���° イメージセンサー スターライト� �.�メガピクセル 解像度 ����x���� / ����x��� 撮影距離 ��㎝~∞ 補助ライト 真っ暗な状態になると、�WのLEDライトの補助光が点灯 撮影周期カスタマイズ 撮影時間を週や時間に応じて好みで設定可能 オン/オフ(オンにすると、カード容量がいっぱいになる ループ撮影 と古いものから削除されます) 露出補正 +�.� EV ~-�.� EV(�.�EV単位) ファイル形式 写真: JPG, ビデオ: AVI 電源 単三電池 (��個) バッテリー寿命 �ヶ月(�分間隔で���枚/日、����枚/月を撮影した場合) 記憶媒体 マイクロSDカード(最大���GB、ラス��以上) インターフェイス マイクロUSB �.� 取付方法...
- Page 26 電源供給 カメラを使用する前に電池を入れて下さい。 カメラケースを開け電池カバーを取り外します。 �.�Vの単三電池を��個(�個を左側、 � • 個を右側)に入れます。 電極が正しいことを確認して下さい。 バッテリーのフタ を閉じます...
- Page 27 記憶媒体 より多くのファイルを保存するために、 Micro SDードを準備しカメラに挿入して下さい 録画前に、 SDカードをフ ォーマッ トして ください。 • 最大���GBまでのマイクロSDカードに対応します。 クラス��以上の高速カードの使用を 推奨しています。 • 誤作動防止のためメモリカードを水、 強い振動、 埃、 熱及び直射日光から避けて下さい。 • メモリーカードを無理に挿入しないで下さい。 カメラの注意事項を参照して ください。 • 初回使用時は、 メモリーカードの温度が適切になるまでしばらくお待ち下さい。 カメラは 外部温度及び湿度の影響を受けます。 屋外での使用は十分にご注意下さい。 • メモリーカード容量がいっぱいになると、 自動的に録画を停止し、 LEDが消えます。 • SDカードを取り出す場合は、 SDカードの端をそっと押すと、 カードが出てきます。 基本操作 カメラのオン/オフ 電池を入れた後,電源ボタンを長押しし、 本体を起動します。 電源ボタンを再度長押 ししオフにします。...
- Page 28 • 写真撮影: モードボタンを押し写真モードに切り替えます。 OKボタンで撮影します。 • ビデオ録画: モードボタンを押しビデオモードに切り替えます。 OKボタンをを押して録 画を開始し、 再度押すと停止します。 • 再生:モードボタンを押し再生画面にします、 上/下ボタンで保存した写真やビデオを閲 覧します。 ビデオ再生時はOKボタンを押して再生し、 再度押すと一時停止、 メニューボ タンを押すと再生停止となります。 再生ボタンを再度押すと再生モードを終了します。 再生メニュー �. 既存ファイル削除:既存の写真やビデオを削除します。 オプション: 【キャンセル】 / 【 削除】 。 �. 全ファイルを削除:メモリカード内の全ての写真とビデオを削除します。 オプション: 【キャ ンセル】 / 【 削除】 。 �. スライドショーを起動: スライドショーで写真を再生します。 それぞれの写真が�秒間表 示されます。...
- Page 29 設定メニューと機能 写真及びビデオモードでは、 メニューボタンを押し設定を変更します。 メニュー 機能 設定 全体画面に現在の設定及び重要情報が表示されます。設定 モード、時間間隔、録画時間、電池残量、Micro SDカード空 き容量を表示します。 モード タイミング撮影かタイムラプス撮影を設定します。OKを押し、タイム ラプス撮影の週と時間間隔を設定します。モードボタンで切り替え、 上下ボタンでタイミング撮影間隔とビデオ再生時間を選択します。 オプション:【タイムラプス写真】/【タイムラプスビデオ】/【タイミ ング写真】/【タイミングビデオ】 LEDスイッチを設定。オプション:【オン】/【オフ】 露出 露出設定。 オプション:[+�.� EV]/[+�.� EV]/ [+�.� EV] /[+�.� EV]/ [-�.� EV]/[-�.� EV]/[-�.� EV] 画面の言語表示を設定。 言語 オプション:【英語】/【ドイツ語】/【デンマーク語】/【フィンランド語】/ 【 スウェーデン語】/【スペイン語】/【フランス語】/【イタリア語】/【オ ランダ語】/【ポルトガル語】/【中国語(簡体字)】/【中国語(繁体字)】/【日 本語】 画像解像度設定。 写真解像度 オプション:[�MP(����X����P)] / [�MP(���� X ���P)] ビデオ解像度...
- Page 30 ビデオの撮影間隔 ビデオクリップの録画時間を設定します。最短は�秒、最長���秒の撮 影間隔で録画します。 オプション: �秒~���秒 フォトスタンプ 日付と時刻を写真に表示するかどうかを選択します。 オプション:【時刻と日付】/【日付のみ】/【オフ】 設定録画 カメラの監視時間を設定、録画する特定の時間を設定します。録画開始時 時間� 間及び終了時間を設定可能です。設定完了後 、毎日設定した時間に記録 します。それ以外の時間はスタンバイ状態となります。 オプション:【オン】/【オフ】 設定録画 カメラの監視時間を設定、録画する特定の時間を設定します。録画開始時 時間� 間及び終了時間を設定可能です。設定完了後,毎日設定した時間に記録し ます。それ以外の時間はスタンバイ状態となります。 オプション:【オン】/【オフ】 通知音 ボタンプッシュ音のオン/オフ。 オプション:【オン】/【オフ】 ループ録画 ループ録画設定。 空き容量がない場合、自動的に一番古いデータが削除され、録画を 継続します。 オプション:【オン】/【オフ】 日付表示 カメラの日付/時刻設定。 フォーマット: 日/月/年、年/月/日、月/日/年 時刻と日付 モードボタンを押して修正する箇所を選びます。上/下ボタンを 押して数値を設定、完了後OKボタンで確定します。 音声録音 本機能を使用するとビデオ録画時に録音します。 オプション:【オン】/【オフ】 設定リセット カメラのパスワード、シリアルナンバー等を...
- Page 31 バージョン カメラのファームウェア情報を確認します。 メモリーカード メモリーカードを初期化すると全データが完全に削除されます。新しいメ フォーマット モリーカードまたは以前に他のデバイスで使用していたメモリーカードを 使用する場合は初期化して下さい。オプション:【はい】/【いいえ】。 タイムラプス設定 タイムラプス撮影時に、 自動または手動撮影を設定できます。 自動タイムラプス撮影設定 起動後 、 写真/ビデオモードでメニューボタンをクリ ックし上/下ボタンを押し てモードオプションに切り替えます。 タイムラプス(写真)は、 写真用です。 �秒~��時間ごとに�枚の写真を撮るよう • に設定できます。 自動的に写真に接続しリアルタイムでタイムラプスAVIビデ オを作成します。 タイムラプス(ビデオ)はビデオ用です。 �秒~��時間ごとに�秒~���秒のビデオ • を録画するよう設定できます。 また自動的にAVIビデオを作成します。 モード タイムラプス(写真) タイムラプス(ビデオ) タイミング写真 タイミングビデオ 終了 メニュー 選択...
- Page 32 タイミング写真は写真用です。 �秒~��時間ごとに�枚の写真を撮るように設定出来 • ます。 タイミングビデオはビデオ用です。 �秒~��時間ごとに�秒~���秒のビデオを録画す • るよう設定できます。 OKボタンを押し曜日を設定してタイミング撮影の間隔を設定します; 設定後、 メイン画面に戻り電源ボタンを軽く押します。 タイムラプス開始後、 ��秒のカウ ン トダウンが始まります。 カウン トダウン終了後、 タイムラプス及びタイミングモードとな ります。 タイムラプスモードでは、 設定した時間に応じて撮影を開始します。 電源ボタンを再度軽く押すとタイムラプス撮影を停止します。 タイムラプス 録画曜日設定 日曜日 月曜日 火曜日 水曜日 時 : 分 : 秒 木曜日 金曜日 00:02:00 土曜日 切り替え セッ ト 設定...
- Page 33 ����� �M タイムラプス(手動) REC ネジ取りつけ 付属のネジ取りつけ器具でてTL�を壁や木に取り付けることができます。 ネジ取りつけ 器具をご使用の際はしっかりと固定しネジが締ま っていることを確認して下さい。 付属部品 三脚用ネジ ブラケット固定ネジ ブラケットつっかえ棒 壁掛け用プラグ ネジ ドリルビット...
- Page 34 ネジ取り付け 必要工具 ドリル • �ミリ レンガ/コンクリート用ドリルビッ ト • プラスドライバー • 注意 設置予定場所に電線、 水道、 暖房配管がないことを確認して下さい。 • 付属の壁掛け用プラグはレンガ及びコンクリートに取り付け時のみ使用下さい。 取りつ • け前にプラグ取り付けに適しているかどうか、 取り付け場所の状態を良く確認して下さ い。 組み立て用金具は、 それぞれ適した場所で使用して下さい。 不明点がある場合は専門 家にご相談下さい。 取り付け手順 取り付け予定場所にネジ取りつけ器具の足を固定し、 穴あけ位置をマークします。 • • �mmドリルビッ ト及びドリルを使用し穴を開け、 プラグを挿入し壁にしっかりと固定し ます。 • 付属のネジを使用しネジ取りつけ器具を取り付けます。 • 三脚用ネジにカメラを取り付けカメラを軽く固定します(約�回転)。 • カメラを希望する位置に向けナッ トで固定します。 •...
- Page 35 パソコンへのファイルダウンロード メモリーカードからパソコンへダウンロードするには以下の�つの方法があります。 メモリーカードをカードリーダーへ挿入する 。 • 付属のUSBケーブルを使ってカメラをパソコンに接続する。 • カードリーダーを使用する場合 カメラからメモリーカードを取り出し、 カードリーダーに挿入します。 次にカードリーダ ーをパソコンに接続します。 【マイコンピューター】 または 【ウインドウズエクスプローラー】 を開きメモリーカードを 表すリムーバブルディ スクをダブルクリ ックします。 写真またはビデオファイルをメモリーカードからパソコンにコピーします。 USBケーブルでカメラをパソコンに接続する場合 USBケーブルでカメラとパソコンをつなぎます。 カメラの電源をオンにすると画面 に 【MSDC】 が表示されます。 【マイコンピューター】 または 【ウインドウズエクスプローラー】 を開く。 ドライブに 【リ ムーバブルディスク】 が表示される。 【 リムーバブルディスク】 をダブルクリックして開 く。 全てのファイルは 【DCIM】 に入っています。 写真写真またはビデオファイルをパソコンにコピーします。...
- Page 36 お手入れと注意事項 お手入れする前にデバイスから電池を取り外して下さい 。 必ず乾いた布を使用してデバイスの表面を拭いて下さい。 製品の故障を避けるため、 洗 浄液等は使用しないで下さい。 マイクロファイバー等の糸く ずが出ない素材の布を使用 してレンズを拭いて下さい。 レンズを傷つけないように力を入れず軽く拭いて下さい。 埃や湿気にご注意下さい。 袋または箱に入れ保管し長期間使用しない場合は、 デバイス から電池を取り外して下さい。 保証とサポート 保証 Rexing TL�は、��か月間の保証付きです。オフィシャルサイト (https://www.rexingusa.com/support/registration) で製品をご登録いただくと 保証を��か月間に延長できます。 サポート 製品に関する質問は、jpcare@rexingusa.comまでご連絡ください。通常、��時 間以内に返答いたします。 お客様のご意見を大切にします Rexingは 製品・サービス・ユーザー体験の改善に努めております。改善のため のご意見、ご提案をお待ちしております。 今後とも、Rexingをどうぞよろしくお願いいたします。...
Need help?
Do you have a question about the TL1 and is the answer not in the manual?
Questions and answers