Chapters
Table of Contents

Related Manuals for Nostalgia Electrics NCCRT510PK


Summary of Contents for Nostalgia Electrics NCCRT510PK
- Page 1 All products are trademarks of Nostalgia Products LLC. Worldwide design & utility patented or patents pending. © 2022 Nostalgia Products LLC. www.nostalgiaproducts.com (rev. 05/25/22 DJ)
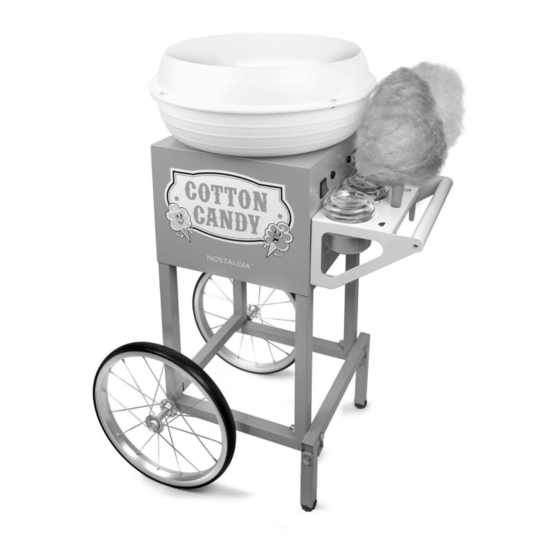
- Page 2 Professional Cotton Candy Cart Fabricante Profesional de Algodón de Azúcar Fabricant Professionnel de Barbe à Papa Instructions and Recipes Instrucciones y Recetas Instructions et Recettes...
-
Page 4: Table Of Contents
Make everyday a party! Visit www.nostalgiaproducts.com for more fun products. CONTENTS SAFETY ......... 2 IMPORTANT SAFEGUARDS . -
Page 5: Important Safeguards
IMPORTANT SAFEGUARDS A person who has not read and understood all operating and safety instructions is not qualified to operate this appliance. All users of this appliance must read and understand this Instruction Manual before operating or cleaning this appliance. When using electrical appliances, basic safety precautions should always be followed, including: Read all instructions before operating this appliance. -
Page 6: Introduction
This unit must be on a level surface to operate properly. Instructions for the Electrical Cord and Plug ELECTRICAL SHOCK HAZARD: Failure to follow these instructions can result in death, fire, or electrical shock. • Plug into a grounded 3 prong outlet. •... -
Page 7: Parts & Assembly
PARTS & ASSEMBLY HARDWARE PARTS... - Page 9 ASSEMBLY OF BASE SUPPORT 1. Attach Push Handle (E) from inside Main Unit (A) using supplied #1 Screws. 2. Insert Cross Bar (J) into the square inserts on the inside of Base Support (I) and secure from below with two #1 Screws. Insert the Leg Assembly (K) over the protruding ends of the Base Support (I) and fasten from the inside of Base Support (I) using four #2 Bolts, and four #6 Nut Caps 3.
- Page 10 5. Attach wheel to base using instructions below. (N°6) Flat (N°11) (N°7) Washers Flat Washer Axle Bolt Wheel Base Support Assembly of Wheels Slide one #4 Flat Washer onto Axle Bolt (F) and insert Axle Bolt (F) into Wheel (G). Put on one #5 Flat Washer.
- Page 11 5. Attach Bowl(B) using 3 - #3 Nut Caps. 6. Attach the Lid(C) with 4 - #2 Bolts to the Base(B).
-
Page 12: How To Operate
HOW TO OPERATE Before first use, clean the inside of the unit by wiping with a moist, non-abrasive sponge, towel or cloth and then wipe with a non-abrasive dry towel. Wipe down the inside of the Kettle and be sure it is properly placed in the brackets before starting. First, position PROFESSIONAL COTTON CANDY CART close to an electrical outlet before starting. -
Page 13: Cleaning & Maintenance
CLEANING & MAINTENANCE When you have finished making cotton candy, run unit for about five minutes until all sugar has been released through the extractor head. When all remaining sugar is gone, unplug unit and allow to cool down before cleaning. Make sure the unit is unplugged and has had time to cool down before cleaning. -
Page 14: Returns & Warranty
SHOULD YOUR UNIT NOT WORK OR IF DAMAGED WHEN YOU FIRST TAKE IT OUT OF THE BOX, PLEASE RETURN IT TO THE PLACE OF PURCHASE IMMEDIATELY. PROFESSIONAL COTTON CANDY CART / NCCRT510PK Should you have any questions, please contact us via email or at the customer service number listed below between the hours of 9:00 AM and 4:00 PM, Monday through Friday, Central Standard Time. - Page 15 REVIEW & REGISTRATION WELCOME TO THE NOSTALGIA PARTY! Do you love our product? Give us your product REVIEW, REGISTER for updates, and get entered to WIN PRIZES! You can also gain access to exclusive discounts, fresh new recipes, monthly specials & more! To leave a review: •...
- Page 16 ¡Convierta todos los días en una fietsa! Visite www.nostalgiaproducts.com para ver más productos divertidos. CONTENIDO SEGURIDAD ........14 SALVAGUARDIAS IMPORTANTES .
-
Page 17: Salvaguardias Importantes
SALVAGUARDIAS IMPORTANTES Una persona que no haya leído y comprendido todas las instrucciones de uso y seguridad no está calificada para utilizar este aparato. Todos los usuarios de este dispositivo deben leer y comprender este Manual de instrucciones antes de utilizar o limpiar este aparato. Cuando utiliza aparatos eléctricos, siempre se deben seguir algunas medidas básicas de seguridad que incluyen las siguientes: Lea todas las instrucciones antes de utilizar este aparato. -
Page 18: Introducción
extractor. El sobrellenado puede causar que el azúcar vuele desde la cabeza del extractor. NO vierta agua ni ningún otro líquido en la cabeza del extractor. El cabezal extractor alcanzará una temperatura elevada. Evite el contacto hasta que se enfríe. Esta unidad debe estar en una superficie nivelada para que funcione bien. -
Page 19: Piezas Y Ensamblaje
PIEZAS Y ENSAMBLAJE HARDWARE #3 Tapa de tuerca #2 Perno (60mm) Tornillo #1 (8mm) Cantidad. 3 Cantidad. 4 Cantidad.10 #6 Tapa de tuerca #7 Tornillo (10mm) #4 Arandela plana #5 Arandela plana Cantidad. 6 Cantidad. 4 Cantidad. 2 Cantidad. 4 (D) Conos (A) Unidad (B) Tazón... - Page 21 MONTAJE DEL SOPORTE DE LA BASE 3. Fije la unidad principal (A) al soporte de la base (I) con cuatro tornillos del nº 2 4. Monte el soporte de la base (I) en la parte inferior de la unidad principal (a) y asegúrelo con cuatro pernos del nº...
- Page 22 Fije la rueda a la base siguiendo las instrucciones siguientes. (N°6) (N°7) Arandelas (N°11) Tuercas Planas Arandelas Ciegas Planas (F) Pernos Soporte Ruedas Base ARMADO DE LAS RUEDAS 1. Deslice una arandela plana (nº 4) sobre el perno del eje (F) e inserte el perno del eje (F) en la rueda (G).
- Page 23 6. Fije el tazón (B) usando 3 - tapas de tuerca #3. 7. Fije la tapa (C) con 4 pernos #2 a la base (B).
-
Page 24: Cómo Funciona
CÓMO FUNCIONA Antes del primer uso, limpie el interior de la unidad con una esponja, toalla o paño húmedo y no abrasivo, y luego pase una toalla seca no abrasiva. Limpie el interior del hervidor y asegúrese de que está bien colocado en los soportes antes de empezar. 1. -
Page 25: Consejos Útiles
CONSEJOS ÚTILES Cómo se Elabora el Algodón de Azúcar El algodón de azúcar se elabora calentando azúcar. Convierte el azúcar a estado líquido. Luego el líquido de azúcar sale por la pequeña malla con orificios que se encuentra en la boca del extractor mediante una fuerza centrífuga a medida que va girando la boca del extractor. -
Page 26: Devoluciones Y Garantía
DE LA CAJA, DEVUÉLVALA AL LUGAR DE COMPRA INMEDIATAMENTE. FABRICANTE PROFESIONAL DE ALGODÓN DE AZÚCAR / NCCRT510PK Si tiene preguntas, contacte con nosotros por correo electrónico o por el número telefónico de servicio al cliente que aparece a continuación en el horario de 9:00 AM a 4:00 PM, de lunes a viernes, Hora Estándar del Este. - Page 28 Faire une fête tous les jours! Visiter le site Web www.nostalgiaproducts.com pour d’autres produits agréables. TABLE DES MATIÈRES SÉCURITÉ ........26 PRÉCAUTIONS IMPORTANTES .
-
Page 29: Précautions Importantes
PRÉCAUTIONS IMPORTANTES Une personne n'ayant pas lu et compris toutes les instructions de fonctionnement et de sécurité n'est pas qualifiée pour faire fonctionner cet appareil. Tous les utilisateurs de cet appareil doivent lire et comprendre ce mode d'emploi avant d'utiliser ou de nettoyer cet appareil. Lorsque l'on utilise un appareil électrique, il faut toujours respecter des précautions de base, y compris celles-ci : Lisez toutes les instructions avant d'utiliser cet appareil. -
Page 30: Introduction
NE JAMAIS verser le sucre directement dans l'élément chauffant. Le sucre est INFLAMMABLE et peut causer de la fumée ou d'incendie. NE JAMAIS surchargez ou utiliser plus que la quantité dirigée de sucre dans la Tête de l'extracteur. Le fait de trop remplir peut provoquer le sucre de ressortir de la Tête de l'extracteur. -
Page 31: Pièces Et Assemblage
PIÈCES ET ASSEMBLAGE Matériel #1 Vis (8mm) #2 Boulon (60mm) #3 Capuchon d'écrou Qté.10 Qté. 4 Qté. 3 #4 Rondelle plate #5 Rondelle plate #4 Coupe d'écrou #4 Vis (10mm) Qté. 2 Qté. 4 Qté. 6 Qté. 2 Les pièces (D) Cônes (A) Unité... - Page 33 MONTAGE DU SUPPORT DE BASE Fixez la poignée de poussée (E) depuis l'intérieur de l'unité principale (A) à l'aide des vis #1 fournies. Insérez la barre transversale (J) dans les inserts carrés situés à l'intérieur du support de base (I). et fixer par le bas avec deux vis #1. Insérez l'assemblage de la jambe (K) over the protruding ends of the Base Support (I) and fasten from the inside of Base Support (I) using four #2 Bolts, and four #6 Nut Caps Fixez l'unité...
- Page 34 5. Fixez la roue à la base en suivant les instructions ci-dessous. ASSEMBLAGE DES ROUES (N°6) (N°7) Rondelles (N°11) Chapeau plates Rondelles d'écrou plates (N°3) Boulon essieu Roues Base Faire glisser une Rondelle de plate (nº4) sur le Boulon d'essieu (nº 3), puis insérer le Boulon d'essieu (nº...
- Page 35 6. Attach Bowl(B) using 3 - #3 Nut Caps. 7. Attach the Lid(C) with 4 - #2 Bolts to the Base(B).
-
Page 36: Comment Faire Fonctionner
COMMENT FAIRE FONCTIONNER Avant la première utilisation, nettoyez l'intérieur de l'appareil en l'essuyant avec une éponge, une serviette ou un chiffon humide et non abrasif, puis essuyez-le avec une serviette sèche non abrasive. Essuyez l'intérieur du bol et assurez-vous qu'il est bien placé dans les supports avant de commencer. Tout d'abord, placez le FABRICANT PROFESSIONNEL DE BARBE À... -
Page 37: Conseils Pratiques
CONSEILS PRATIQUES Confection de la barbe à papa La barbe à papa est confectionnée à partir de sucre monté à température. Ceci transforme le sucre en liquide. Le liquide de sucre est ensuite forcé à travers un grillage de trous minuscules dans la tête de l'extracteur grâce à... -
Page 38: Retours Et Garantie
SI VOTRE APPAREIL NE FONCTIONNE PAS OU S'IL EST ENDOMMAGÉ QUAND VOUS LE RETIREZ DE LA BOÎTE, VEUILLEZ LE RETOURNER IMMÉDIATEMENT À L'ENDROIT OÙ IL A ÉTÉ ACHETÉ. FABRICANT PROFESSIONNEL DE BARBE À PAPA / NCCRT510PK Pour toute question, communiquer par courriel ou au numéro de téléphone du service à...
Need help?
Do you have a question about the NCCRT510PK and is the answer not in the manual?
Questions and answers