Table of Contents
Advertisement
Thank you for your purchase of the Memorex Ultra TravelDrive. This user's guide will help you get the maximum
use and enjoyment from your new Ultra TravelDrive. The guide describes in detail the Ultra TravelDrive features as
well as the TotalMedia Backup software that is included with the drive. The software is designed to make backing
up your files as quick, safe, and easy as possible – as simple as pushing a button!
Advertisement
Table of Contents

Related Manuals for Memorex 32020012483


Summary of Contents for Memorex 32020012483
- Page 1 Thank you for your purchase of the Memorex Ultra TravelDrive. This user’s guide will help you get the maximum use and enjoyment from your new Ultra TravelDrive. The guide describes in detail the Ultra TravelDrive features as well as the TotalMedia Backup software that is included with the drive. The software is designed to make backing...
-
Page 2: Table Of Contents
1. INTRODUCTION 2. SAFETY AND HANDLING GUIDELINES 3. PRODUCT DESCRIPTION a. Package Contents b. Drive Features c. System Compatibility 4. GETTING STARTED Microsoft Windows™ a. Connecting the Ultra TravelDrive b. Removing the Ultra TravelDrive c. Using the Ultra TravelDrive Apple Macintosh a. -
Page 3: Introduction
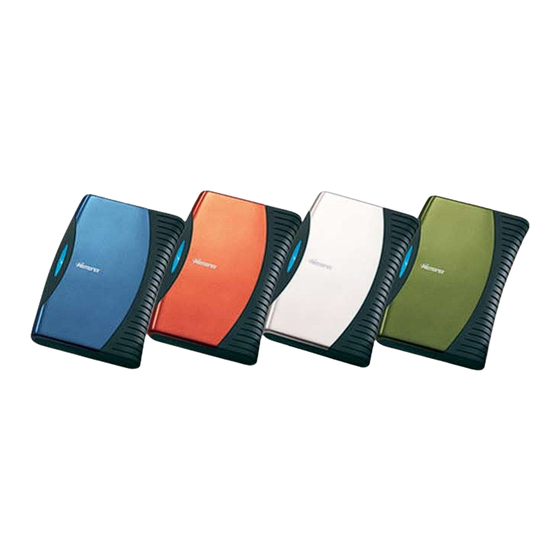
3. PRODUCT DESCRIPTION The Memorex Ultra TravelDrive is a portable storage device that fits in the palm of your hand. It incorporates a 2.5-inch hard drive available in various capacities in an ergonomic and stylish design that can be personalized with interchangeable, nature-inspired color faceplates. -
Page 4: Package Contents
PC—Windows 2000 (Service Pack 4)/ XP (Service Pack 2)/ Vista • The drive will work only as a storage device in Windows 98SE or Windows Me operating systems. The TotalMedia Backup software included with the drive does not support these older operating systems. -
Page 5: Getting Started
4. GETTING STARTED MICROSOFT WINDOWS ® A. CONNECTING YOUR DRIVE 1. Turn on your computer and wait for it to finish loading. 2. Connect the USB data cable to the rear of the Ultra TravelDrive (Figure 1). 3. Connect the other end of the USB data cable to a USB port on your computer. Once you have connected the cable into the USB port, the blue Power and Activity LED will light up and your operating system will detect the drive. - Page 6 Letter assigned to your Ultra TravelDrive. (If there is more than one USB device active, double-click on the USB devices and select the drive letter associated with the Memorex Ultra TravelDrive (Figure 4). c. Select “Stop” and wait for the notice that it is safe to remove the Ultra TravelDrive. If a notice appears that the device cannot be stopped, close any software that had been using the device to open or to save files and repeat the process.
-
Page 7: Using Your Drive
C. USING YOUR DRIVE 1. You may now use your Ultra TravelDrive as you would any other hard disk drive on your computer. You can drag and drop files to or from the drive in the same way as copying or saving files to your main hard drive. 2. -
Page 8: Totalmedia Backup Software
2. The installation should begin automatically. a. If it does not, open “My Computer” and click on the drive letter that shows the Memorex icon (Figure 10). b. Click on the “Memorex Software Installer.exe” file to start the installation process. - Page 9 “Install” to start the installation process. 5. The Memorex Button Manager installs itself first in a very short time. Once the software has installed itself, a mes sage confirming a successful installation appears. Click “Next” to start the TotalMedia Backup software installation.
- Page 10 Select the installation language (Figure 14). English is the default language, but French, Portuguese (Brazilian), and Spanish are options. The InstallShield Wizard will load very quickly and opens a welcome screen to install TotalMedia Backup (Figure 15). Click “Next>.” A user license agreement of TotalMedia Backup appears (Figure 16). Read the agreement, and click “Yes” if you want to continue installing the backup software.
- Page 11 11. You also have the choice of folders for the program icons. The default, and best choice, is the software folder; but you can select a different folder or create a different folder (Figure 18). Click “Next>” to continue. 12. An installation status screen appears for a short time, followed by a notification of completion (Figures 19 and 20).
-
Page 12: Apple Macintosh
2. A Memorex installation icon appears on the desktop. 3. Double-click on the installer icon. a. The Memorex Software Installer opens (Figure A1). Double-click on the “Memorex Software Installer” to start the installation. b. The welcome page to the installer (Figure A2). Click on “Continue.”... - Page 13 e. If you agree with terms of the software agreement and want to continue installing the software, click on “Agree” (Figure A5). f. Select a destination for the software program (Figure A6). g. The Easy Installation screen appears (Figure A7) to confirm the installation. Click on “Install.” h.
-
Page 14: Using Totalmedia Backup Software
j. The Installation Process Screen appears (Figure A10) with a progress bar displaying the status of the installation. k. Once the installation is complete, a restart notice appears (Figure A11) informing you that the installation was successful and that you must restart the computer. Click on “Restart.” l. - Page 15 A full back up screen displays the number of files in each selected category and the size of the data in each category (Figure 27). Several other options appear on this screen: 1. The back up destination—click on “Browse…” to designate the Memorex Ultra TravelDrive letter or any other storage medium for the back up.
- Page 16 d. Click on “Back up” to start the back up process. A progress report bar appears on the screen. e. Once the back up is complete, a text message appears in Microsoft Notepad that summarizes the back up information (Figure 28). Close the Notepad report. The ArcSoft software also displays the note the back up was successful (Figure 29).
- Page 17 1. If you want to add a new category, click on the “Add New Category…” tab at the bottom of the list (Figure 32). 2. Name the new category and click on “Next>.” 3. A dialogue box requesting the formats in the New Category appears. Click the “Add New Format” button (Figure 33).
- Page 18 c. Click on the box next to the folder you want to backup and click Next (Figure 37). 7. Scheduling a Backup a. Click on the “Schedule Backup” tab to make the settings for an automatic back up. b. The schedule settings appear. Once again you can pick “Photo, Video, Music,” “Personal Document,” or “Advanced Backup”...
- Page 19 e. The scheduled backup appears on the information page (Figure 39). You can make changes with the following options: • Deleting a scheduled backup by highlighting it and then clicking on the garbage can in the lower right corner. • Changing a scheduled backup by highlighting it and clicking “Reschedule.” •...
- Page 20 b. Select the backup you want to restore from the list of backups available (Figure 41). The names, sizes, and dates of the backups appear in the list as well as any comments added that can help identify the files. 1.
- Page 21 e. Step 2: Check the file types (Easy Restore) or files (Advanced Restore) you want to restore from the choices available. Easy Restore shows only those files (“Photo/Video/Music,” “Personal Documents,” or “Advanced Backup”) recorded in the selected backup (Figure 43). Advanced Restore allows you to search the folder tree for the file(s) you want to restore from those files in the original backup (Figure 44).
-
Page 22: Reformatting
7. REFORMATTING THE ULTRA TRAVELDRIVE A. Windows The Memorex Ultra TravelDrive comes pre-formatted with FAT32 (File Allocation Table 32-bit) File System. FAT32 is the standard file system for Windows 98SE and Me and is supported in Windows 2000, XP and Vista. However, FAT32 file system has 4GB limitation for the largest supported file. -
Page 23: Troubleshooting
Restart your computer and attempt to access your drive. Otherwise, you may need to attempt to use some recovery software to rescue some files on the drive. Memorex at this time does not have specific software that it can endorse or support to perform this operation. If this is not required or the files on your drive are not needed, you will have to reformat your Ultra TravelDrive to regain its fully functionality. -
Page 24: Faqs
E. I don’t get a drive letter or an icon in My Computer for the drive even though it’s plugged in. How can I fix this? If you have other drives installed on the system, Windows may try to install the Ultra TravelDrive with an existing drive letter. This issue can happen in Windows 2000 and Windows XP. To correct this, follow these steps (You must have administrative level access.): a. -
Page 25: Technical Support
877-Is It Live… (1-877-474-8548). Be sure to register your product under the “New Customers” section. 12. WARRANTY Memorex Products warrants this product against defects for one year from the date of original purchase. The purchas- er’s exclusive remedy is limited to replacement of any defective product. This warranty applies only to this product and excludes bundled software, connected equipment, or data recorded in any form.
Need help?
Do you have a question about the 32020012483 and is the answer not in the manual?
Questions and answers