Advertisement
Quick Links
Advertisement

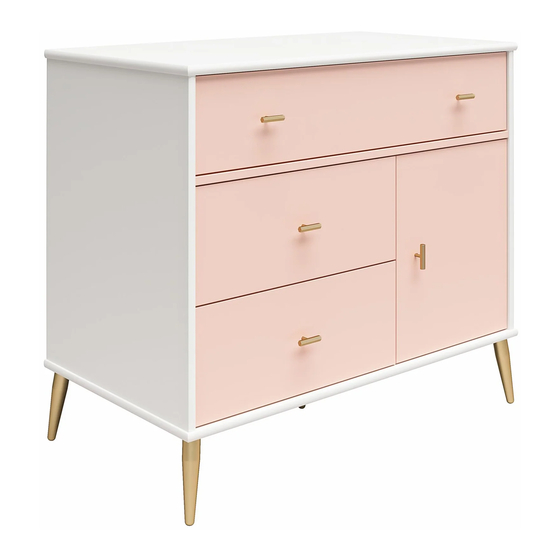
Related Manuals for Little Seeds 2530015COM


Summary of Contents for Little Seeds 2530015COM
- Page 1 B342530015COM0 Date of Purchase ___ / ___ / ___ Lot Number:...
- Page 2 - Call 1-800-489-3351 Serious or fatal crushing injuries can occur from tipping furniture. Follow little seeds on WARNING: Manufacturer assumes no liability for improper installation or excessive loads placed on screws or bracket. This wall anchor is not a substitute for proper adult supervision.
-
Page 3: Helpful Hints
Do NOT return this product! Contact our friendly customer service team first for help. Call us! Assembly Tips 1-800-489-3351 Monday-Friday 9am - 5pm CST Tube Visit littleseedskids.com to view the limited warranty valid in the U.S. and Canada. Helpful Hints PEOPLE NEEDED FOR ASSEMBLY: 1-2 - Open your item in the area you plan to keep it for less heavy lifting - Identify, sort and count the parts before attempting assembly... - Page 4 Please Note: You may need to lightly tap the wood dowels into the holes during your assembly process. littleseedskids.com...
-
Page 5: Board Identification
Board Identification Partition 32530015030 32530015040 Left Panel Right Panel 32530015010 32530015020 Adjustable Shelf Shelf 32530015070 Bottom 32530015060 32530015050 SIDE Upper Drawer Front Drawer Front Left Upper Drawer Side Door 32530015090 32530015100 39991120346510L 32530015080 littleseedskids.com... - Page 6 Board Identification SIDE SIDE SIDE Right Upper Drawer Side Left Drawer Side Right Drawer Side 39991120346510R 39991167346510L 39991167346510R BACK BACK Upper Drawer Back Drawer Back 39991120080518B Upper Drawer Bottom 39991167045317B 39991340081610D Back Panel Drawer Bottom K253001500 39991340046510D This piece is paperboard construction. It is not made from wood but is required for the assembly of your unit.
- Page 7 Board Identification This piece is paperboard construction. It is not made from wood but is required for the assembly of your unit. SIDE SIDE BACK BACK SIDE SIDE Upper Drawer Lower Drawers littleseedskids.com...
-
Page 8: Parts List
Parts List Please Note: Your model may contain extra hardware. Actual Size #A11080 #A22700 #A22710 #A21670 #A23030 7/16" flat head cam lock cam bolt wood dowel confirmat #A17400 #A21975 #A89370 #A14220 #A12120 7/8" truss head drive fastener 1/2" pan head door bumper 7/16"... - Page 9 Parts List Not Actual Size #A54900 #A44680 drawer brace #A65640 hinge left right left right cabinet cabinet drawer drawer member member runner runner #A56770 drawer slide package littleseedskids.com...
-
Page 10: Before You Start
Before You Start Read through each step carefully and follow the proper order Separate and count all your parts and hardware Parts are labeled on the surface or edge of part Give yourself enough room for the assembly process Have the following tools: Flat Head Screwdriver, Phillips Head Screwdriver and Hammer Cam Lock Fastening System This Cam Lock Fastening System will be used throughout the assembly process. - Page 11 Step 1 Caution: If you are using a power drill or a power screwdriver for screwing, please be aware to slow down and stop when the screw is tight. Failure to do so may result in stripping the screw. marked with a "L" (x3) (x9) marked with a "L"...
- Page 12 Step 2 Quick Assembly (x2) Proper orientation of CAM LOCK (x2) (x2) littleseedskids.com...
- Page 13 Step 3 marked with a "R" (x1) (x3) (x2) (x2) (x2) Quick Assembly Proper orientation of CAM LOCK littleseedskids.com...
- Page 14 Step 4 marked with a "R" (x2) (x6) finished edge Note: Slides will stick out 3mm from edge littleseedskids.com...
- Page 15 Step 5 Quick Assembly (x4) (x4) Proper orientation of CAM LOCK littleseedskids.com...
- Page 16 Step 6 (x2) finished edge littleseedskids.com...
- Page 17 Step 7 finished edged face up littleseedskids.com...
- Page 18 Step 8 (x6) finished edged face up littleseedskids.com...
- Page 19 Step 9 (x1) (x4) Do not fully tighten this screw in this step. littleseedskids.com...
- Page 20 Step 10 finished edged face up littleseedskids.com...
- Page 21 Step 11 IMPORTANT! THE BACK PANEL IS A STRUCTURAL PART OF THIS UNIT AND MUST BE INSTALLED PROPERLY. (x28) 2 people are required for this step. Carefully turn the unit over onto its front as shown. Assure that the unit is square. Distance from corner to corner must be equal as shown.
- Page 22 Step 12 (x5) Do not get screw #8 and #9 mixed up. (x20) Screw #9 has a larger head and body. littleseedskids.com...
- Page 23 Step 13 SIDE SIDE Insert the "claws" at the end of drawer sides into the holes of drawer front and while keeping slight downward pressure, swing out until drawer side is straight up. NOTE: The drawer sides will be slightly unstable until the drawer bottom is installed (step 14).
- Page 24 Step 14 SIDE finished surface SIDE littleseedskids.com...
- Page 25 Step 15 You will need to tap with a hammer to fasten. (x4) SIDE BACK SIDE littleseedskids.com...
- Page 26 Step 16 (x2) (x1) (x4) (x2) Attach the handles after the slides are mounted. SIDE SIDE littleseedskids.com...
- Page 27 Step 17 BACK littleseedskids.com...
- Page 28 Step 18 SIDE SIDE Insert the "claws" at the end of drawer sides into the holes of drawer front and while keeping slight downward pressure, swing out until drawer side is straight up. NOTE: The drawer sides will be slightly unstable until the drawer bottom is °...
- Page 29 Step 19 SIDE finished surface SIDE littleseedskids.com...
- Page 30 Step 20 You will need to tap with a hammer to fasten. (x8) BACK SIDE SIDE littleseedskids.com...
- Page 31 Step 21 (x2) (x2) (x8) (x2) Attach the handles after the slides are mounted. SIDE SIDE littleseedskids.com...
- Page 32 Step 22 (x1) (x1) (x2) (x1) littleseedskids.com...
- Page 33 Step 23 For Masonry, Concrete, or other wall materials: Consult your local hardware store for appropriate anchors to securely attach the safety bracket. IMPORTANT: THIS UNIT MUST BE SECURE TO THE WALL TO HELP PREVENT TIPOVER. FOLLOW THESE INSTRUCTIONS TO INSTALL THE ANTI-TIPPING SAFETY BRACKET PROVIDED WITH THIS PRODUCT. WARNING Serious or fatal crushing injuries can occur from furniture tipover.
- Page 34 Step 24 littleseedskids.com...
- Page 35 Step 25 (x4) finished surface finished edge littleseedskids.com...
- Page 36 Step 26 roller cabinet member rodillo corredera de mueble rouleau coulisse du cabinet drawer runner deslizador de cajón roller coulisse du tiroir rodillo rouleau littleseedskids.com...
- Page 37 Step 27 Door Adjustment To adjust the vertical height: Loosen the screws "A" on both hinges. They are usually in slotted holes which allows you to adjust up or down by a few mm. Then tighten back up. To adjust side to side: Loosen the screw "C"...
- Page 38 This unit has been designed to support the maximum loads shown. Exceeding these load limits could cause sagging, instability, product collapse, and/or serious injury. 30 lbs. 13.6 kg 75 lbs. 30.0 kg 15 lbs. 6.8 kg 20 lbs. 9.1 kg 30 lbs.
- Page 39 Visit your local retailer's website, rate your purchased product and leave us some feedback! We would like to extend a big "Thank You" to all of our customers for taking the time to assemble this Little Seeds product, and to give us your valuable feedback. littleseedskids.com...
- Page 40 Consejos Útiles (página 3) - Abra su artículo en el área donde usted planea utilizarlo para evitar levantar y moverlo menos pesado - Identificar, ordenar y contar las piezas antes de intentar ensamblar - Las clavijas de compresión se golpean con un martillo - Las diapositivas están marcadas con una R (derecha) y L (izquierda) para la colocación correcta - Asegúrese de que siempre el punto localizado en la parte superior de bloqueador de leva este volteadohacia borde exterior...
- Page 41 Paso 11 ¡IMPORTANTE! EL PANEL TRASERO CONSTITUYE UNA PARTE ESTRUCTURAL DE ESTA UNIDAD Y DEBE INSTALARSE CORRECTAMENTE. Se necesitan 2 personas para este paso. Voltear la unidad cuidadosamente y colocarla sobre su frente como se muestra. Asegurarse de que la unidad esté en escuadra. La distancia de una esquina a la otra debe ser la misma, como se muestra aquí.
- Page 42 Paso 20 Tendrá que martillar un poco para que queden bien colocados. Paso 21 Colocar los tiradores después de haber montado las guías. Paso 23 En el caso de mampostería, concreto u otros materiales de pared: Consulte en su ferretería local para que le proporcionen los elementos apropiados para asegurar el soporte de seguridad.
- Page 43 OPCIÓN 2: Montaje en una placa de yeso Coloque su unidad donde lo desee contra la pared y marque la pared a través del soporte de seguridad, luego corra la unidad a un costado. Taladre un agujero de 3/16” (5 mm) de diámetro en la placa de la pared.
-
Page 44: Astuces Utiles
Astuces Utiles -Ouvrez votre article dans la zone que vous prévoyez de le garder pour moins de levage lourd -Identifier, trier et compter les pièces avant d'essayer d'assembler -Les goujons de compression sont taraudés avec un Marteau -Les glissières sont marquées d'un R (droit) et d'un L (gauche) pour un bon placement -Assurez-vous toujours de faire face la pointe situé... - Page 45 Étape 11 IMPORTANT! LE PANNEAU ARRIÈRE EST UNE PARTIE STRUCTURELLE DE CET APPAREIL ET DOIT ÊTRE INSTALLÉ CORRECTEMENT. Deux personnes sont nécessaires pour cette étape. Retournez délicatement l'appareil sur sa face avant, comme indiqué. Assurez-vous que l'unité est carrée. La distance d'un coin à l'autre doit être égale, comme illustré. Alignez le bord inférieur du panneau arrière avec le bord inférieur de la tablette inférieure (E).
- Page 46 Étape 20 Vous devrez taper avec un marteau pour fixer. Étape 21 Fixez les poignées après le montage des glissières. Étape 23 Pour la maçonnerie, le béton ou d'autres matériaux muraux : Consultez votre quincaillerie locale pour obtenir des ancrages appropriés afin de fixer solidement le support de sécurité.
- Page 47 OPTION 2 : Fixation dans le mur sec Placez votre appareil à l'endroit souhaité contre un mur et marquez le mur à travers le support de sécurité, puis mettez votre appareil de côté. Percez un trou de 3/16 pouces de diamètre (5 mm) dans le panneau mural.
Need help?
Do you have a question about the 2530015COM and is the answer not in the manual?
Questions and answers