Table of Contents
Advertisement
Quick Links
Advertisement
Table of Contents

Related Manuals for Bosch HBG934A.1


Summary of Contents for Bosch HBG934A.1
- Page 1 Oven HBG934A.1 User manual and installation instructions [en]...
-
Page 2: Table Of Contents
en Safety Futher information and explanations are available on- line: Table of contents INSTALLATION INSTRUCTIONS ....... 36 27.1 General installation instructions....... 36 INFORMATION FOR USE 1 Safety Safety .............. 2 Preventing material damage ....... 4 Observe the following safety instructions. Environmental protection and saving en- 1.1 General information ergy ............... -
Page 3: Safety
Safety en The telescopic shelves become hot when the Keep children under the age of 8 years away appliance is in use. from the appliance and power cable. ▶ Allow hot telescopic shelves to cool down 1.4 Safe use before touching them. Always place accessories in the cooking com- ▶... -
Page 4: Preventing Material Damage
en Preventing material damage If the insulation of the power cord is dam- WARNING ‒ Risk of suffocation! aged, this is dangerous. Children may put packaging material over ▶ Never let the power cord come into contact their heads or wrap themselves up in it and with hot appliance parts or heat sources. -
Page 5: Environmental Protection And Saving En- Ergy
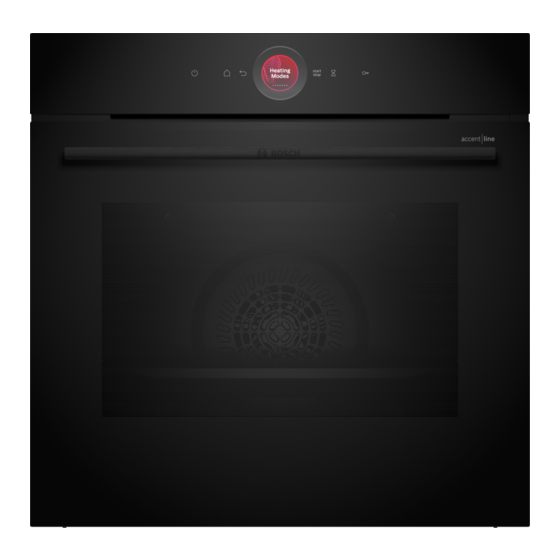
Environmental protection and saving energy en Leaving the appliance to cool down with the door open Using oven cleaner in a hot cooking compartment will damage the front of neighbouring kitchen units over damages the enamel. time. Never use oven cleaner in the cooking compartment ▶... - Page 6 en Familiarising yourself with your appliance 4 Familiarising yourself with your appliance 4.1 Control panel 4.3 Display You can use the control panel to configure all functions The display is divided into different areas. of your appliance and to obtain information about the Digital setting ring operating status.
- Page 7 Operating modes en When the appliance is in operation, the self-cleaning 4.4 Cooking compartment surfaces absorb splashes from roasting or grilling and Various functions in the cooking compartment provide break them down. support when operating your appliance. If the self-cleaning surfaces no longer clean themselves adequately during operation, heat up the cooking com- Shelf supports partment specifically to the right temperature.
- Page 8 en Operating modes For temperature settings above 275 °C and grill set- ting 3, the appliance reduces the temperature to ap- prox. 275 °C or grill setting 1 after approx. 40 minutes. Symbol Type of heating Temperature What it's used for and how it works range 3D hot air 30 - 275 °C Bake or roast on one or more levels.
-
Page 9: Accessories
Accessories en 6 Accessories Use original accessories. These have been made espe- The accessories supplied may differ depending on the cially for your appliance. appliance model. Note: Accessories may become deformed if they get hot. Deformation has no effect on function. As the ac- cessory cools down, it will regain its original shape. -
Page 10: Before Using For The First Time
Note: Take any accessories that you will not be using your appliance in our brochures and online: out of the cooking compartment while the appliance is www.bosch-home.com in operation. Accessories vary from one appliance to another. When purchasing accessories, always quote the exact Combining accessories product number (E no.) of your appliance. - Page 11 Basic operation en 8 Basic operation When the food is ready, use to switch the ap- 8.1 Switching on the appliance ‒ pliance off. Press to switch the appliance on. ▶ Note: You can save your settings as "Favourites" ...
- Page 12 en Rapid heating → "Time-setting options", Page 12 8.8 Sabbath-compliant use Use "End time" to set the time at which the opera- If you want to operate your appliance so that it is Sab- tion should end. bath-compliant, use the time-setting options and → "Setting the end time", Page 13 change the basic setting for the lighting.
- Page 13 Time-setting options en Press to start the operation. 10.1 Setting the cooking time a The display shows the time remaining until the oper- You can set the cooking time for the operation up to ation starts. The appliance is in standby mode. 24 hours.
- Page 14 en Dishes Change the timer using the setting ring. If the timer is running in the background, use to Press to confirm. select the timer beforehand. Press . Cancelling the timer Reset the timer using ...
- Page 15 Favourites en Press the required dish. If required, you can select other settings and re- ‒ start the operation. a The settings for the dish appear on the display. When the food is ready, use to switch the ap- Adjust the settings if required.
-
Page 16: Rapid Heating
en Basic settings 14 Basic settings You can configure the basic settings for your appliance Personalisa- Selection to meet your needs. tion Brand logo ¡ Display 14.1 Overview of the basic settings ¡ Do not display Here you can find an overview of the basic settings Operation after ¡... -
Page 17: Home Connect
Home Connect en 15 Home Connect This appliance is network-capable. Connecting your ap- 15.1 Setting up Home Connect pliance to a mobile device lets you control its functions Requirements via the Home Connect app, adjust its basic settings ¡ The appliance is connected to the power supply and and monitor its operating status. - Page 18 en Cleaning and servicing stalling it via the Home Connect app if you are in your 15.3 Operating the appliance with the WLAN home network (Wi-Fi). The Home Connect app Home Connect app will inform you once installation is successful. You can use the Home Connect app to set and start Notes the appliance remotely.
-
Page 19: Cleaning And Servicing
Cleaning and servicing en Using oven cleaner in a hot cooking compartment If different cleaning agents are mixed together, there damages the enamel. may be a chemical reaction between these. Never use oven cleaner in the cooking compartment Do not mix cleaning agents. ▶... - Page 20 en Cleaning and servicing Area Suitable cleaning agents Information Glass cover for ¡ Hot soapy water Use oven cleaner to remove very heavy soiling. the oven light Shelf supports ¡ Hot soapy water Soak any heavily soiled areas and use a brush or steel wool. Note: To clean thoroughly, detach the shelf supports.
-
Page 21: Drying
Cleaning aid en 17 Cleaning aid The cleaning aid is a quick alternative for occasion- Confirm the message. ally cleaning the cooking compartment. The cleaning a The cleaning aid starts and the duration counts aid softens dirt by evaporating the soapy water. It is down. - Page 22 en Appliance door 19 Appliance door To clean the appliance door thoroughly, you can disas- Close the appliance door fully . Grab hold of the semble the appliance door. appliance door with both hands (on the left and right) and pull it upwards and out . 19.1 Detaching the appliance door WARNING ‒ Risk of injury! Components inside the appliance door may have sharp...
- Page 23 Appliance door en Open the appliance door fully. If necessary, you can remove the condensate Open the locking levers on the left- and right-hand trough for cleaning. hinges . Open the appliance door. ‒ a The locking levers are open. The hinges are now se- Tilt the condensate trough upwards and remove ‒...
- Page 24 en Rails Slide the intermediate pane into the left- and right- Push the inner pane upwards until it is in the left- hand retainers . and right-hand retainers . Push the intermediate pane upwards until it is in the Put the door cover into position ...
-
Page 25: Rails
Rails en Pull the whole rail to the front and remove it. Push on the side of the tab marked PUSH behind the rail, and push the rail to the rear. Clean the rail. Press and hold PUSH and swing the rail out- wards ... -
Page 26: Troubleshooting
en Troubleshooting Press and hold PUSH and swing the pull-out rail Note: Further information: inwards until the retainer is attached in the lower rod. 20.4 Attaching the pull-out rail Note: The pull-out rails only fit on the right or left. Make sure when you fit them that you can pull them out to- wards the front. - Page 27 Troubleshooting en 21.1 Malfunctions Fault Cause and troubleshooting The appliance is not The circuit breaker in the fuse box has tripped. working. Check the circuit breaker in the fuse box. ▶ There has been a power cut. Check whether the lighting in your kitchen or other appliances are working. ▶...
-
Page 28: Disposal
Next time, set lower or higher values. ▶ Tip: A lot of other information about the food preparation and corresponding adjustment values can be found in the Home Connect app or on our website www.bosch-home.com. 21.2 Replacing the oven light bulb Requirements ¡ The appliance is disconnected from the power sup- If the light in the cooking compartment fails, change ply. -
Page 29: Customer Service
Dir- ective 2014/53/EU. A detailed RED Declaration of Conformity can be found online at www.bosch-home.com among the additional documents on the product page for your appliance. Hereby, BSH Hausgeräte GmbH declares that the ap- pliance with Home Connect functionality is in compli-... - Page 30 Tip: A lot of other information about the food prepara- tion and corresponding adjustment values can be Shallow baked items/baking tray found in the Home Connect app or on our website www.bosch-home.com. Baking on two or more levels Height 26.1 General cooking tips 2 levels...
-
Page 31: How It Works
How it works en ¡ Add up to ½ litre of water to the universal pan, de- The "Grill" type of heating is good for cooking thinner pending on the size and type of food that you want pieces of poultry, meat and fish such as steaks, drum- to roast. - Page 32 en How it works Food Accessory/cookware Shelf pos- Type of Temperature in Cooking time in ition heating °C/grill setting mins → Page 7 Sponge cake, 2 levels Ring-shaped tin 140-150 70-85 Loaf tin Fruit tart or cheesecake with Springform cake tin, 170-190 55-80 shortcrust pastry base...
- Page 33 How it works en Food Accessory/cookware Shelf pos- Type of Temperature in Cooking time in ition heating °C/grill setting mins → Page 7 Fillet of beef, medium, 1 kg Wire rack 210-220 40-50 Universal pan Pot-roasted beef, 1.5 kg Covered cookware 200-220 130-150 Sirloin, medium, 1.5 kg...
- Page 34 en How it works Issue Issue You want to slow ¡ Place the cold duck breast You want to serve ¡ Preheat the serving plate. cook a duck breast. into a pan. your slow-cooked ¡ Make sure that the sauces ¡ Sear the skin side first. meat as hot as pos- that accompany the duck sible.
- Page 35 How it works en 26.7 Test dishes The information in this section is provided for test institutes to facilitate testing of the appliance in accordance with EN 60350‑1. Baking ¡ The setting values apply to food that is placed into a Baking tray: Shelf position 1 cold cooking compartment.
-
Page 36: Installation Instructions
en Installation instructions Grilling Recommended settings for grilling Food Accessory/cookware Shelf pos- Type of Temperature in Cooking time in ition heating °C/grill setting mins → Page 7 Toasting bread Wire rack Do not preheat the appliance. 27 Installation instructions Observe this information when installing the appliance. ¡... - Page 37 Installation instructions en 27.2 Appliance dimensions 27.3 Installation below a worktop You will find the dimensions of the appliance here Observe the installation dimensions and the installation instructions when installing below a worktop. ¡ To ventilate the appliance, the intermediate floor must have a ventilation cut-out. ¡...
- Page 38 en Installation instructions ¡ Ensure that air exchange is guaranteed in accord- 27.5 Installation in a tall unit ance with the diagram. Observe the installation dimensions and the installation instructions when installing in a tall unit. ¡ Only fit appliances up to a height that allows ac- cessories to be easily removed.
- Page 39 Installation instructions en ¡ Contact protection must be guaranteed by the in- Screw the appliance into place. stallation. ¡ If the display on the appliance remains dark, it has not been connected correctly. Disconnect the appli- ance from the mains and check the connection. Electrically connect the appliance with the protective contact plug Note: The appliance must only be connected to a pro-...
- Page 40 Expert advice for your Bosch home appliances, help with problems or a repair from Bosch experts. Find out everything about the many ways Bosch can support you: www.bosch-home.com/service Contact data of all countries are listed in the attached service directory.
Need help?
Do you have a question about the HBG934A.1 and is the answer not in the manual?
Questions and answers