Table of Contents
Advertisement
Quick Links
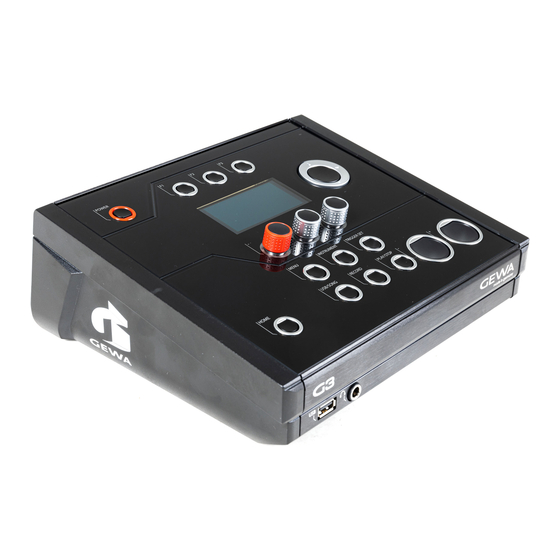
G3 & G5 Drum Module
Model
Document
Version
Release Date
Please read this owner´s manual carefully before
operating the device and take note of the safety
information! Keep this document available for immediate
reference.
Download the complete owner´s manual at
gewadrums.com/service
G3 & G5
Quick Start Guide
1.0
2022-11-04
www.gewadrums.com
ENGLISH
Manufacturer
GEWA music GmbH
Oelsnitzer Straße 58
D-08626 Adorf
GERMANY
1
Advertisement
Table of Contents
Troubleshooting

Related Manuals for Gewa G3


Summary of Contents for Gewa G3
- Page 1 ENGLISH G3 & G5 Drum Module Model G3 & G5 Document Quick Start Guide Version Release Date 2022-11-04 Manufacturer Please read this owner´s manual carefully before GEWA music GmbH operating the device and take note of the safety Oelsnitzer Straße 58...
-
Page 2: Table Of Contents
SCOPE OF SUPPLY ..................13 2.1 GEWA G3 ......................13 2.2 GEWA G5 ......................14 MOUNTING INSTRUCTIONS G3 & G5 ............15 3.1 Connecting external equipment to the G3 & G5 Module ........15 3.1.1 Front G3 ......................... 15 3.1.2 Rear Panel G3 ...................... - Page 3 G3 .........................31 6.3.2 G5 .........................33 6.4 Bluetooth ......................34 USER INTERFACE - BASICS ................. 37 7.1 General functions G3 & G5 ................... 37 7.2 Loading and saving from presets G3 & G5 ............38 7.2.1 Load ........................38 7.2.2 Save ........................39 7.2.3 Name ........................39...
- Page 4 11.1 Warranty ....................... 49 11.2 Troubleshooting and possible solutions G3 ............50 11.3 Troubleshooting and possible solutions G5 ............51 Technical Data ..................52 12.1 G3 ......................... 52 12.2 G5 ......................... 53 4 I GEWA G3 & G5 Quick Start Guide...
-
Page 5: Safety Information
Dear customer, Thank you for purchasing our top-quality GEWA G3/G5 Module! The GEWA G3/G5 is an E-Drum that gives you a highly impressive sound and playing experience, while offering a huge extra set of additional and easy-to-use sounds and features. - Page 6 It is essential to have the drum console checked by your GEWA customer service team. Damaging the Apparatus CAUTION ...
-
Page 7: Proper Handling
Accessories must match the relevant technical specifications (see “Technical Date” section. Only and always use GEWA certified power adapters, and make sure that they are properly attached and connected. The power supply used must also meet the country’s voltage specifications (check plate on the adapter). -
Page 8: Ce Label
Compliance with the above directives is confirmed by the CE label on the device. The declaration of conformity can be viewed at the following address: GEWA music GmbH Oelsnitzer Straße 58 08626 Adorf GERMANY 8 I GEWA G3 & G5 Quick Start Guide... -
Page 9: Fcc Label/Fcc Mark
Consult the dealer or an experienced radio/TV technician for help. Warning: Any changes or modifications not expressively approved by GEWA music GmbH could void the user's authority to operate this equipment. GEWA G3 & G5 Quick Start Guide I 9... -
Page 10: Regulatory Information - Canada
(MPE). Standards to which compliance is declared can be found under the following links: RSS-Gen: http://www.ic.gc.ca/eic/site/smt-gst.nsf/eng/sf08449.html RSS-102: http://www.ic.gc.ca/eic/site/smt-gst.nsf/eng/sf01904.html RSS-247: http://www.ic.gc.ca/eic/site/smt-gst.nsf/eng/sf10971.html 10 I GEWA G3 & G5 Quick Start Guide... - Page 11 CNR-102. Cet équipement possède niveaux d’énergie de radiofréquences bas que sont considérés d’être conforme sans l’évaluation des valeurs d’intensité maximale de champ des RF. Conformité déclarée aux normes suivantes: CNR-Gen: http://www.ic.gc.ca/eic/site/smt-gst.nsf/fra/sf08449.html CNR-102: http://www.ic.gc.ca/eic/site/smt-gst.nsf/fra/sf01904.html CNR-247: http://www.ic.gc.ca/eic/site/smt-gst.nsf/fra/sf10971.html GEWA G3 & G5 Quick Start Guide I 11...
-
Page 12: Recycling
Please help us with your contribution to protect the environment by not depositing your old electrical equipment with the general household waste. 12 I GEWA G3 & G5 Quick Start Guide... -
Page 13: Scope Of Supply
SCOPE OF SUPPLY GEWA G3 The GEWA G3 Drum Set is made up of the following parts. Please check the package contents is complete: G3 Drum Module 10.5 – 12.7 mm module bracket Product ID card Quick start guide USB Stick (multilingual) Power cable 1.8 m (IEC C8) -
Page 14: Gewa G5
GEWA G5 The GEWA G5 Drum Set is made up of the following parts. Please check the package contents is complete: G5 Drum Module 10.5 – 12.7 mm module bracket Product ID card Quick start guide USB Stick (multilingual) Power cable 1.8 m (IEC C8) -
Page 15: Mounting Instructions G3 & G5
MOUNTING INSTRUCTIONS G3 & G5 G3 & G5 M ONNECTING EXTERNAL EQUIPMENT TO THE ODULE 3.1.1 RONT GEWA G3 & G5 Quick Start Guide I 15... -
Page 16: Rear Panel G3
3.1.2 ANEL Make sure that the unit is switched off before connecting the equipment. 16 I GEWA G3 & G5 Quick Start Guide... -
Page 17: Front G5
3.1.3 RONT GEWA G3 & G5 Quick Start Guide I 17... -
Page 18: Rear Panel G5
3.1.4 ANEL Make sure that the unit is switched off before connecting the equipment. 18 I GEWA G3 & G5 Quick Start Guide... -
Page 19: Cymbals
GEWA C YMBALS GEWA cymbals are equipped with two stereo jacks (6.35 mm - 1/4" TRS standard). In operation with GEWA modules, only the jack that is closer to the center hole of the cymbal is relevant. GEWA G3 & G5 Quick Start Guide I 19... -
Page 20: Other Manufacturers
Bell 3-Way separate bell output For the correct operation of cymbals from other manufacturers, select the appropriate trigger type in the module (Look at “Trigger Settings“ in the owner’s manual). NOTE 20 I GEWA G3 & G5 Quick Start Guide... - Page 21 Bell 3-Way separate bell output For the correct operation of cymbals from other manufacturers, select the appropriate trigger type in the module (Look at “Trigger Settings“ in the owner’s manual) NOTE GEWA G3 & G5 Quick Start Guide I 21...
-
Page 22: Analog Cymbal Pads With Separate Output For The Bell
NALOG CYMBAL PADS WITH SEPARATE OUTPUT FOR THE BELL Cymbal pads with their own output for the bell can be connected to GEWA modules in various ways. See the table below for all possible combinations of Bow/Edge and Bell input channel assignments:... -
Page 23: User Interface
USER INTERFACE The function of the dials and keys may vary depending on the active level based on the software. This section describes the default assignment when the unit is started. GEWA G3 & G5 Quick Start Guide I 23... - Page 24 Starts and stops selected songs from USB-stick. [ - ] Key Different applications depending on what is shown in the display. [ + ] Key Different applications depending on what is shown on the display. 24 I GEWA G3 & G5 Quick Start Guide...
- Page 25 The function of the dials and keys may vary depending on the active level based on the software. This section describes the default assignment when the unit is started. GEWA G3 & G5 Quick Start Guide I 25...
- Page 26 [ - ] Key Different applications depending on what is shown in the display. [ + ] Key Different applications depending on what is shown on the display. Preview Pre-listen to the selected sound 26 I GEWA G3 & G5 Quick Start Guide...
-
Page 27: Switching The Device On And Off
When the mains cable is connected, the [Power] key lights up red. The unit is in stand-by mode. Press the [Power] key to start the unit. Wait while the unit starts up. GEWA G3 & G5 Quick Start Guide I 27... -
Page 28: Before You Start
At the first start - and after every factory reset - you are offered a configuration help so you can quickly and easily set your GEWA module in the basics. Of course you can quit the process by pressing [F3] [CANCEL] and set it manually. - Page 29 Press the hi hat together with your foot and press [F2] “NEXT”. [F2] NEXT Open the hi hat completely and press [F2] “NEXT”. [F2] NEXT Test the hi hat and press [F2] “SAVE”. [F2] SAVE Setup completed. Press [F3] “DONE”. [F3] DONE GEWA G3 & G5 Quick Start Guide I 29...
-
Page 30: Trigger Setup
GEWA G3 STUDIO GEWA G5 STUDIO I GEWA G5 PRO Should you use the G3 or G5 module with the pad configurations of the G9, then please select one of the following trigger presets: GEWA G9 STUDIO | GEWA G9 PRO 5 | GEWA G9 PRO 6 Observing the safety instructions of the Quick Start or operating instructions, proceed as follows (example G3): Turn on the power by pressing the [POWER] [P] button. -
Page 31: Hi Hat Calibration
[F1] Preset Use the dial [5] or the navigation keys [8] to select your GEWA set from the list and confirm via [F1]. The process is now complete and your GEWA drum set is optimally tuned to the G3 module. - Page 32 Now the hi hat is fully calibrated and playable. With the hi hat symbol you can directly test whether the mechanism works. Then confirm the setting by pressing the button [F1] ”DONE“ [F1] DONE If you want to leave the calibration without saving, press the button [F3]. 32 I GEWA G3 & G5 Quick Start Guide...
- Page 33 Close the hi hat to the lowest position. Follow the instruction and press [F1] “NEXT”. [F1] NEXT Open the hi hat completely. Confirm the action by pressing the button [F1] “FINISH”. [F1] FINISH GEWA G3 & G5 Quick Start Guide I 33...
-
Page 34: Bluetooth
[F3]. LUETOOTH Setting up the Bluetooth connection. Figure 1.1 describes the first step of connecting to the G3. Figure 1.2 describes the first step of connecting to the G5. Please continue with step 2 afterwards. Press [10] [MENU] “SETUP“. - Page 35 Press [F2] ”BLUETOOTH“ [F2] BLUETOOTH [F1] PAIRING You’ll see the pairing code on your display 4392 Switch your device to Bluetooth search mode and select the "GEWA G3"/”GEWA G5” module. GEWA G3 GEWA G3 & G5 Quick Start Guide I 35...
- Page 36 After a successful connection, you have the possibility to choose between different Bluetooth-functions with the dial [5]: Function Audio + MIDI Audio & MIDI connection Audio Audio only MIDI MIDI only 36 I GEWA G3 & G5 Quick Start Guide...
-
Page 37: User Interface - Basics
ENERAL FUNCTIONS The GEWA G3/G5 module is equipped with buttons and dials that make it easy for you to operate. You can reach each main menu by pressing the corresponding button on the module. To exit a menu, you can press another menu button. -
Page 38: Loading And Saving From Presets G3 & G5
Unsaved settings will otherwise be discarded. 7.2.1 Use the dial [5] or the navigation control [8] to select the desired preset from the list. Press the button [F1] or [ENTER], for loading the preset. 38 I GEWA G3 & G5 Quick Start Guide... -
Page 39: Save
Delete individual characters by pressing the button [F2]. Cancellation is possible at any time by pressing the button [F3]. Save the file name by pressing the button [F1] GEWA G3 & G5 Quick Start Guide I 39... -
Page 40: Home G3 & G5
X-Fade -> X-Fade (Edit) -> Rimshot -> X-Stick If "X-FADE" is selected, then press [F2] again to set the desired threshold with the dial [6]. The threshold value determines the change between the X-stick and the rimshot. 40 I GEWA G3 & G5 Quick Start Guide... - Page 41 Set the headphone volume to a low level before use to avoid damaging your hearing. Especially with in- ear headphones, the volume is perceived differently and it can cause hearing damage if the volume is too high. GEWA G3 & G5 Quick Start Guide I 41...
-
Page 42: Drum-Kit Presets
You can find a detailed description of how to load presets, save and overwrite at: “Loading and saving from presets Presets G3 & G5” As soon as you make changes to the settings that are not automatically saved, a [*] is displayed next to the corresponding name to indicate this. -
Page 43: Metronome Settings / Click
Parallel to this, you can select a trigger input (pad) with which you can determine the tempo by playing on the pad (tap input). The tap channel settings can be found under "Options" [F1]. [ENTER] = START & STOP GEWA G3 & G5 Quick Start Guide I 43... -
Page 44: Other Modes And Features
OTHER MODES AND FEATURES This section gives an overview of the possibilities of the G3 Module. Please download the owner´s manual for more information regarding the outlined modes. 9.1.1 [MENU] contains the possibility to access many different setting options. -
Page 45: Effects
USB L The GEWA Digital-Drumsets are designed to allow you to use your drum kit settings in other modules as well. In the menu, you can export your drum-kit and import it, for example, into another GEWA G-series module. Of course you can also import wav-files to create drum-kits with your own sounds. -
Page 46: Usb/Song / Player
In the "Trigger Select" mode, you select the sensors (triggers) for your drum kit. In addition, you have the option to load factory GEWA trigger sets here. In the menu you also calibrate the hi hat. 46 I GEWA G3 & G5 Quick Start Guide... -
Page 47: Trigger Settings
9.2.10 USB L The GEWA Digital-Drumsets are designed to allow you to use your drum kit settings in other modules as well. In the menu, you can export your drum kit and import it, for example, into another GEWA G-series module. Of course you can also import wav-files to create drum-kits with your own sounds. -
Page 48: 10 Update
10 UPDATE GEWA is constantly working on updates to give you the most enjoyment out of your instrument in the future. Under [SETUP] -> INFO you will find the version and serial number of your GEWA module. Updated files can be found at: www.gewadrums.com/en/service Follow the installation steps from the website and load the update into the root directory of your USB-stick. -
Page 49: 11 Useful Information
If you suspect to have a claim covered by the warranty terms regarding your GEWA digital Drum Console, please contact your dealer during regular business hours. -
Page 50: Troubleshooting And Possible Solutions G3
Make sure that the stereo cables connecting pad and console are plugged I can only hear one pad component (e.g. Head OR in completely. Regarding GEWA cymbals and modules, the stereo cable Rim). needs to be connected to the socket facing the cymbal piezo. -
Page 51: Troubleshooting And Possible Solutions G5
Make sure that the stereo cables connecting pad and console are plugged I can hear only one pad component (e.g. Head OR in completely. Regarding GEWA cymbals and modules, the stereo cable Rim). needs to be connected to the socket facing the cymbal piezo. -
Page 52: 12 Technical Data
This document represents the technical data of the product as of the publication date of the document. Possible updated information can be obtained by downloading the operating instructions in the device or at the following link: gewadrums.com/service 52 I GEWA G3 & G5 Quick Start Guide... - Page 53 This document represents the technical data of the product as of the publication date of the document. Possible updated information can be obtained by downloading the operating instructions in the device or at the following link: gewadrums.com/service GEWA G3 & G5 Quick Start Guide I 53...
Need help?
Do you have a question about the G3 and is the answer not in the manual?
Questions and answers