
Related Manuals for Oceanled EXPLORE Series


Summary of Contents for Oceanled EXPLORE Series
- Page 1 INSTALLATION & OPERATION MANUAL EXPLORE SERIES E6 & E7 TH L I G H T. Y E A R S A H E A D . WWW.OCEANLED.COM OceanLED MANUAL / EXPLORE SERIES/ E6 & E7 TH/ REVISION 1...
- Page 2 Failure to follow safety warnings and instructions can result in property damage, severe injury or even death. Before installing your OceanLED Light, check local laws for restrictions regarding the use of coloured lights in your area. Do not operate lights out of water for a period longer than 5 minutes followed by an OFF period of at least 1 hour.
-
Page 3: Table Of Contents
Attention Installer: This manual contains important information about the installation, operation and safe use of this product. This information should be given to the owner and/ or operator of this equipment. WARRANTY COVERAGE Please refer to www.oceanled.com/warranty for full warranty statement. -
Page 4: Installation Checklist
Decide on light spacing – OceanLED recommendations available. Rear of lights must never be exposed to wet environments inside the hull. Decide on light angles (only applies for E7 installs)– OceanLED Personalised Service available on request. The Explore E6/E7 TH lights can also be mixed with the Explore E6/E7 XFM – Please refer to Appendix Section 7.7 for the installation example. -
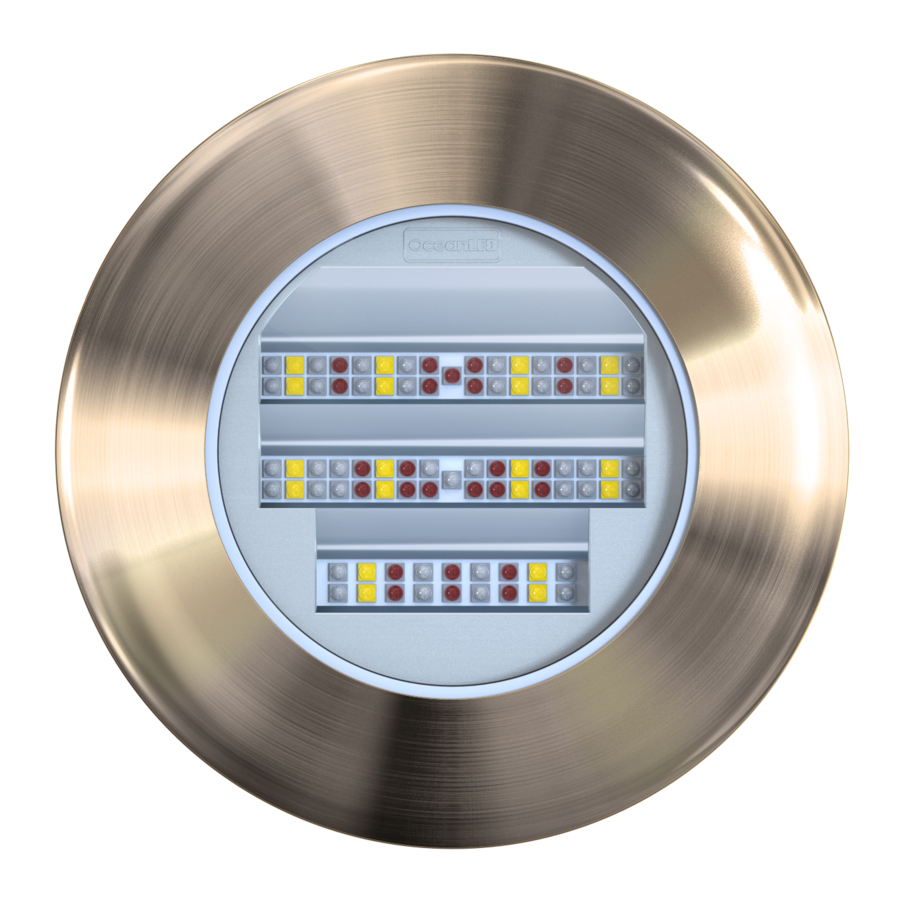
Page 5: Overview
EXPLORE E6 & E7 INSTALL & OPERATION MANUAL Overview Identifying your model Explore E6/E7 TH Explore E6/E7 TH Kit Includes Power Cable 1.5m Fuse Explore TH Light (with 2m Connection Cable) Clamping Kit AC Power Pack (110/220V AC to 24V DC) Power Link Cable 1.5m DC Driver... - Page 6 Power Kit should be purchased. If AC power is being used on the vessel, an Explore AC Power Kit must be purchased. Please check the Explore E6/E7 TH Light Choice Diagram available in the Appendix (Section 7.3) to evaluate all the options currently offered by OceanLED. Use the chart below to determine the power supply requirements.
-
Page 7: Preparing The Hull
OceanLED recommends using a qualified installer / technician when making modifications to your vessel. Please also consult the manufacturer for more detail on modifications and installation. If lights are to be fitted to a conductive or wooden hull, an Isolation Kit must be used. Contact OceanLED for additional details. -
Page 8: Installation
When installing, be sure that the light fits the area and secures to the hull using the appropriate hardware before applying any sealant. When applying sealant to the light fixture, use OceanLED packaging material such as the light cardboard box when placing the light on the ground face down to prevent lens damage. - Page 9 EXPLORE E6 & E7 INSTALL & OPERATION MANUAL Installation Overview: Exploded view of the assembly Exploded view of the assembly with the Delrin Isolation Kit...
- Page 10 Make sure sealant fills in the recess groove on the reverse of the light head. 4. To guarantee correct light orientation ensure the OceanLED logo on the reflector is in the correct orientation before inserting it in the hull (typically the logo is located at the top). For Explore E7 TH angled fitment, ensure the light angle is correct for the location before fitting the light.
- Page 11 EXPLORE E6 & E7 INSTALL & OPERATION MANUAL 5. Insert the light body into the hull, feeding the stem through first and seat into place. Press the light hard into the hull and twist slightly to spread the sealant around behind the light to ensure good adhesion. *Installation With Delrin Isolation Kit This process is made much easier if a second person is inside the hull to receive the light and install the clamping equipment whilst supporting the light from the outside.
- Page 12 EXPLORE E6 & E7 INSTALL & OPERATION MANUAL 6. If using a Delrin Isolation Kit, insert the isolation kit rear washer over the stem and locate it flush with the hull. 7. Insert the stainless-steel compression washer over the stem at the back. *Installation With Delrin Isolation Kit The stainless-steel compression washer does not need to be flat to the hull, the washer can compensate a slightly uneven surface.
- Page 13 EXPLORE E6 & E7 INSTALL & OPERATION MANUAL 9. Locate the latches into the appropriate grooves (depending on hull thickness) on outside of the stem so that the end of the bolt is close to the washer. Fix the two latches together and screw down the joining bolt to the same position as the others.
-
Page 14: Installation Of The Driver With The Ac Power Kit
Never use power tools to secure the DC Driver or Explore AC Power Pack: hand tighten only. When connecting light units, please note that all OceanLED lights will operate within a specific voltage range. Please check the electrical information to ensure cable gauge, fuse and breakers size follow the recommendations. - Page 15 EXPLORE E6 & E7 INSTALL & OPERATION MANUAL Light 1 Light 2 Light 3 Driver 1 Driver 2 Driver 3 Light Input Light Input Light Input Control Link Control Link Cable Cable Momentary Switch AC Power AC Power AC Power Pack Pack Pack...
- Page 16 EXPLORE E6 & E7 INSTALL & OPERATION MANUAL Example of the AC Installation (i.e. with the AC Power Kit)
-
Page 17: Installation Of The Driver With The Dc Power Kit
*Optional 4-Way Junction box available from OceanLED. Please contact OceanLED or your representative for further information. Always consult a qualified electrician when connecting OceanLED light fixtures. When connecting light units, please note that all OceanLED lights will operate within a specific voltage range. Please check the electrical information to ensure cable gauge follow the recommendations. - Page 18 Connecting the DC Power Kit 1. It is imperative that either the OceanLED supplied fuse is fitted to the power circuit of each light or a suitable protection device is used to protect the cable/light unit. It is important to also ensure the polarity is correct.
- Page 19 EXPLORE E6 & E7 INSTALL & OPERATION MANUAL Example of the DC Installation (i.e. with the DC Power Kit) Use the tables in the Appendix (Section 7.4 & 7.5) as a guide to the required cable gauge.
-
Page 20: Control System Installation
E6 & E7 INSTALL & OPERATION MANUAL 4.4 CONTROL SYSTEM INSTALLATION Switch Control Additional items required not supplied by OceanLED: • Push switch (Normally open, momentary type). To use Switch Control, the Explore Control Input Cable and Terminator Kit is required. - Page 21 INSTALL & OPERATION MANUAL OceanLED DMX Control Kits To use OceanLED DMX Control, one of our DMX kits must be purchased from OceanLED. Please consult the Explore E6/E7 TH Light Choice Diagram for details (see Chapter 7.3). To enable the DMX Control of all lights, Explore E6 & E7 Control Link Cables must be used. The quantity of Control Link Cables required per installation is equal to the number of lights minus 1 (Example: If 10 lights are used, 9 control link cables are required).
- Page 22 DMX512 network. To use a 3rd Party RDM Controller, the Explore Control Input Cable and Terminator Kit is required (this is the same kit as used for 3rd Party DMX Control). Please contact your OceanLED representative for more information.
- Page 23 EXPLORE E6 & E7 INSTALL & OPERATION MANUAL Light Configurator Features: • Set unique light name/device label • Change DMX Start Address • Change Control Mode (Switch, DMX or Switch/DMX) • Enable/Disable Strobe Mode (Switch version) • Change Fix Colour (Colour palette for Colours Light) Light 1 Driver 1 Control Link...
-
Page 24: Finalising The Installation
The glass is pre-coated with a specialized Tritonium® coating which makes the surface of the glass lens a non-stick layer. OceanLED does not recommend that bottom paint or any type of anti-fouling agent is applied to the glass and/or bezel, as damage may occur due to chemical incompatibility. If bottom painting of the bezel is deemed essential,... -
Page 25: Operation / Maintenance
Marine growth can build up quickly on the light and can reduce the light’s performance in just a few weeks. To help prevent this, all OceanLED lights have been coated with a specialized Tritonium® coating which helps to prevent marine growth from adhering to the glass. Lights should be cleaned with a boat brush or similar bi-weekly, or as needed to keep the lens of the light clean. -
Page 26: Replacement Parts
The light source of this luminaire is not replaceable; when the light source reached its end of the life the whole luminaire shall be replaced. If the external flexible cable from the back of the light is damaged, contact your local OceanLED representative to arrange for replacement (cable must only be replaced by OceanLED, service agent or a similar qualified person). -
Page 27: Troubleshooting
EXPLORE E6 & E7 INSTALL & OPERATION MANUAL Troubleshooting 6.1 TROUBLESHOOTING PROBLEMS AND THEIR SOLUTIONS The Explore TH driver have a built-in LED Indicator that will confirm that the light is working inside the designed parameters and will give information if a fault has been detected. LED Indicator The Indicator should be lit when light is powered and on. - Page 28 Cable will require This is not covered by the warranty. damage to the cable replacing Only use genuine OceanLED parts Checked all factors that are above, Contact your dealer for a Light faulty and the light still does not work...
- Page 29 EXPLORE E6 & E7 INSTALL & OPERATION MANUAL EXPLORE E6/E7-TH PROBLEM CHECK CAUSE Check that the electrical connections Poor electrical Remake connection and seal between the driver and the supply cable connection joint correctly have been made correctly Damaged light Check the cable connection between the cable, damaged Contact your dealer...
- Page 30 EXPLORE E6 & E7 INSTALL & OPERATION MANUAL EXPLORE E6/E7-TH PROBLEM CHECK CAUSE Solid Green DMX not Remake connection connected or Check that the DMX electrical connections poor electrical between the DMX controller and the driver connection have been made correctly (the green LED on the driver/s should be blinking when receiving the DMX signal) No Green...
-
Page 31: Appendix
EXPLORE E6 & E7 INSTALL & OPERATION MANUAL Appendix 7.1 OVERALL DIMENSIONS... -
Page 32: Essential Test
Perform this bonding check after installation of the light and before moving the vessel back into the water. Refer to bonding information in the installation sections in this manual. If in doubt, please contact OceanLED. 1. Connect the light assembly to the cathodic protection system as explained in Chapter 4. -
Page 33: Light Setup
EXPLORE E6 & E7 INSTALL & OPERATION MANUAL 7.3 LIGHT SETUP The Explore Light Choice Diagram is also available at www.oceanled.com Continued on the next page... - Page 34 EXPLORE E6 & E7 INSTALL & OPERATION MANUAL...
-
Page 35: Cable Gauge Chart 12V
EXPLORE E6 & E7 INSTALL & OPERATION MANUAL 7.4 CABLE GAUGE CHART 12V Supply & Return Cable Conductor Size Chart 3% drop for when using 12V DC supply Cable Circuit Current length (feet)* 2 Amp 4 Amp 6 Amp 8 Amp 10 Amp 15 Amp 20 Amp... -
Page 36: Cable Gauge Chart 24V
EXPLORE E6 & E7 INSTALL & OPERATION MANUAL 7.5 CABLE GAUGE CHART 24V Supply & Return Cable Conductor Size Chart 3% drop for when using 24V DC supply Cable Circuit Current length (feet)* 2 Amp 4 Amp 6 Amp 8 Amp 10 Amp 15 Amp 20 Amp... -
Page 37: Explore Th Angled Beam Details
E7-TH (10°) E7-TH (20°) E7-TH (30°) E7-TH (40°) E7-TH (50°) Representation only for explanatory purposes. OceanLED Logo pointing upwards Light Beam pointing upwards NOTE: Rotating the light by 180° on its longitudinal axis will result in a downwards orientated light beam. -
Page 38: Example Of The Dc Installation Of Mixed Xfm And Th E6 & E7 Lights
EXPLORE E6 & E7 INSTALL & OPERATION MANUAL 7.7 EXAMPLE OF THE DC INSTALLATION OF MIXED XFM AND TH E6 & E7 LIGHTS → Use the tables in the Appendix (Section 7.4 & 7.5) as a guide to the required cable gauge. - Page 39 EXPLORE E6 & E7 INSTALL & OPERATION MANUAL...
-
Page 40: Warranty
E6 & E7 INSTALL & OPERATION MANUAL Warranty Please remove this page and keep for your files For technical assistance: Europe: service@oceanled.com The Americas: warranty@oceanledusa.com Warranty Serial Code(s): Ocean LED Marine LTD Ocean LED USA LLC © 2022 Ocean LED Marine LTD...
Need help?
Do you have a question about the EXPLORE Series and is the answer not in the manual?
Questions and answers