
Related Manuals for ZACO V6


Summary of Contents for ZACO V6
- Page 1 ZACO-V6 Robot Vacuum Cleaner User Manual English Deutsch Español Français Find more information at English Italiano www.zaco.eu...
- Page 2 ZACO V6 robot vacuum cleaner! You‘ve joined the millions of people who clean with robots - the smarter way You are now part of the ZACO Family! You‘ve joined the millions of people to get it down.
-
Page 3: Table Of Contents
................24 Side brush maintenence ....................24 Dust bin and filters maintenance ................25 Dust bag use ........................26 Water tank maintenance ....................27 Drop sensors and charging pin maintenence ............28 Troubleshooting ..................29 Product Specifications ................. 30 Find more information at www.zaco.eu... -
Page 4: Safety Instructions
12. Do not let hair, cloth or fingers come close to the product‘s openings or operating parts. 13. Do not let the robot suck in any material or items that might get stuck in the device, such as stones, paper, etc. Find more information at www.zaco.eu... - Page 5 Keep the power adapter away from heat sources. 19. If the power adapter is damaged, replace it with an official ZACO power adapter only. Do not use uncertified replacement parts from third parties.
-
Page 6: Product Parts
English Product parts Main body and parts Main body and parts Anti bumper sensors Auto clean button Cliff sensor Charging pins Nose Wheel Side brushes Battery lid Left / right wheel Dust bin Find more information at www.zaco.eu... -
Page 7: Main Body / Dust Bin / Water Tank / Charging Dock / Remote Control
English Product parts Dust bin Power switch Cleaning tool Dust bin High performance filter Dustbin cover Handle Cleaning tool Find more information at www.zaco.eu... - Page 8 Power supply socket Remote control Display screen Direction Direction AUTO mode / Pause Schedule setting Clock setting Spot mode MAX mode Return to Edge mode charging station Note: cannot be used during a cleaning cycle. Find more information at www.zaco.eu...
-
Page 9: Accessories
Cleaning tool ZACO-A10 ZACO-A10 ZACO-A10 ZACO V6 Robot Vacuum Cleaner Robot Aspirador Robotdammsugare Robot Vacuum Cleaner User Manual Manual del Usuario Bruksanvisning User Manual User manual 2 Dust bags InvisibleWall transmitter InvisibleWall transmitter (2) Ekstra sidebørster Find more information at www.zaco.eu... -
Page 10: Product Operation
The power switch is inside the robot. Press “I” to turn on the robot; Press “O” to turn it off. Note: After the robot finished cleaning, it is recommended to not turn it off, and let it charge for the next use. Find more information at www.zaco.eu... -
Page 11: Charging
2. If the robot will not be used for a long time, please charge it completely before turning off the power switch. Store the robot in a dry and ventilated place. Find more information at www.zaco.eu... -
Page 12: Remote Control
Press this button to start MAX mode cleaning, where the robot cleans with maximum power output. Note: Please place two AAA/R03 batteries into the remote control before using it. Please take out the batteries if the remote control is not used for a long time. Find more information at www.zaco.eu... -
Page 13: Starting Up / Pause / Sleep
Sleep mode To enter sleep mode: Press and hold the button on the robot for 3 seconds. The robot will then switch to sleep mode if no further instructions are given within 10 minutes. Find more information at www.zaco.eu... - Page 14 • During the cleaning process, the robot will pause for a short time to calculate the uncleaned areas and plan a new path. Please wait patiently. The times and duration of the pauses depend on the complexity of the home environment. Find more information at www.zaco.eu...
- Page 15 This mode is good for cleaning the edges and corners of a room. In edge cleaning mode, the robot drives along a border (e.g. the wall) to clean and will stop working after running a whole circle. Find more information at www.zaco.eu...
- Page 16 Schedule A cleaning time can be scheduled. When the remote control’s Schedule icon and the first two numbers on the display are flashing, the robot enters schedule mode. Find more information at www.zaco.eu...
-
Page 17: Scheduling
After setting the time, press the button to save the changes. When a prompt tone can be heard, the current time setting was saved successfully. Find more information at www.zaco.eu... - Page 18 After setting the time, press the button to save. The robot will begin to work at the scheduled time. Find more information at www.zaco.eu...
- Page 19 If no prompt tone is heard, it means the change was not saved. • You need to setup the current time and the scheduled time again when you change the batteries of the remote control. Find more information at www.zaco.eu...
-
Page 20: Invisiblewall
English Product operation InvisibleWall The InvisibleWall creates an invisible barrier which the V6 will not cross. This can be used to prevent the robot from entering certain areas. Power switch Infrared Indicator Transmitter Battery storage InvisibleWall operation • Install the batteries before turning the power on. -
Page 21: Water Tank Operation
English Product operation Water tank operation Using the water tank is optional. The V6 can vacuum and mop at the same time. Please follow the following instructions when using the mopping function: WARNING • If the robot is stopped during the mopping process (e.g. to add water or to rinse out the mop cloth), the robot will reprogram its cleaning path and already cleaned areas will be mopped again. - Page 22 Remove the water tank by sliding the Open the water injection cap and fill it component back. with water. Tightly close the cap once finish water injecting. Install water tank Insert the water tank again by sliding it under the Roboter. Find more information at www.zaco.eu...
-
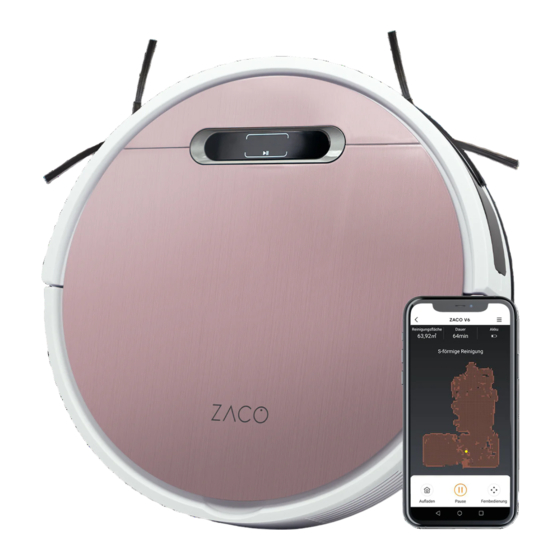
Page 23: App Download And User Instruction
Now the robot can be operated by voice control. The robot will then listen to the name you gave it via the ZACOHome App Why not try the following commands: „Alexa, turn on ZACO.“ or „Ok Google, turn on ZACO.“ „Alexa, turn off ZACO.“ oder „Ok Google, turn off ZACO.“ Connecting the robot Make sure the smartphone is connected to the home Wi-Fi network and has good signal. -
Page 24: Product Maintenance
Using the water tank is optional. After vacuuming is completed, the dust bin can be replaced by the water tank for mopping. Remove side brushes. Wipe clean with a clean cloth. Note: When replacing the side brush, please distinguish the corresponding installation position of the „L“ „R“ side brush. Find more information at www.zaco.eu... -
Page 25: Dust Bin And Filters Maintenance
Empty the dust bin over a trash can. Take out the filters and clean them. Use the cleaning brush to clean the tank. Assemble the parts of the tank. Find more information at www.zaco.eu... -
Page 26: Dust Bag Use
Product Operation How to use the dust bags The ZACO V6 is also operational with disposable dust bags. The dust bags are throwaway articles and can not be cleaned. Please replace the dust bag once the dust bag in use is all filled up. -
Page 27: Water Tank Maintenance
Pour out the remaining water. Clean the water tank with a mildly wet and clean cloth. Let the water tank air dry by keeping the rubber plug open. WARNING: Never immerse the tank completely in water! Find more information at www.zaco.eu... -
Page 28: Drop Sensors And Charging Pin Maintenence
3 times. After that, charge the device for 3-5 hours. • This product uses a long-life battery that does not require frequent replacement. If you want to replace it anyway, please contact the ZACO Customer Service. Find more information at www.zaco.eu... -
Page 29: Troubleshooting
Note: If the problem is still not solved, please follow the instructions below: • Please turn off and turn on the power switch to restart the robot. • If the problem is not solved after a restart, please contact our ZACO Customer Service. Find more information at www.zaco.eu... -
Page 30: Product Specifications
>90 min. Main Body Touch button TX Frequency 2.412 ~ 2.484 MHZ RX Frequency 2.412 ~ 2.484 MHZ Antenna Gain 1.5 dBi 802.11b:+16±2 dBm (@11Mbps) RF Output Power 802.11g:+14±2 dBm (@54Mbps) 802.11n:+13±2 dBm (@HT20, MCS7) Find more information at www.zaco.eu...
Need help?
Do you have a question about the V6 and is the answer not in the manual?
Questions and answers