
Related Manuals for Samsung FlexDry DVG60M9900V/A3-01


Summary of Contents for Samsung FlexDry DVG60M9900V/A3-01
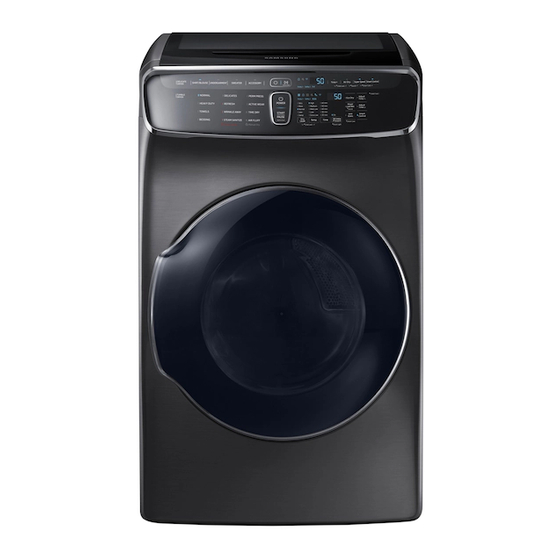
- Page 1 FlexDry™ User manual DV*60M9900** FlexDry_DM9900M_DC68-03381F-07_EN.indd 1 2019-06-03 2:28:31...
-
Page 2: Table Of Contents
Step-by-step installation Vent blockage test Exhaust ducting guide Door reversal Before you start Sort and load Lint filter Drying guidelines Rack guidelines Operations Delicate Dryer Tumble Dryer Simple steps to start Samsung Smart Home Special features English FlexDry_DM9900M_DC68-03381F-07_EN.indd 2 2019-06-03 2:28:31... - Page 3 Maintenance General cleaning and maintenance instructions Delicate Dryer Tumble Dryer Troubleshooting Checkpoints Samsung Smart Home Information codes Specifications Fabric care chart Protecting the environment Specification sheet Cycle chart English 3 FlexDry_DM9900M_DC68-03381F-07_EN.indd 3 2019-06-03 2:28:31...
-
Page 4: Safety Information
Safety information Congratulations on your new Samsung dryer. This manual contains important information on the installation, use and care of your appliance. Please take some time to read this manual to take full advantage of your dryer’s many benefits and features. -
Page 5: California Proposition 65 Warning
CALIFORNIA PROPOSITION 65 WARNING WARNING Cancer and Reproductive Harm - www.P65Warnings.ca.gov. WARNING - Risk of Fire • Clothes dryer installation must be performed by a qualified installer. • Install the clothes dryer according to the manufacturer’s instructions and local codes. •... -
Page 6: Important Safety Precautions
Safety information Important safety precautions WARNING To reduce the risk of fire, electric shock, or injury to persons when using your appliance, follow basic precautions, including the following: Read all instructions before using this appliance. Do not dry articles that have been previously cleaned in, washed in, soaked in, or spotted with gasoline, dry-cleaning solvents, or other flammable or explosive substances, as they give off vapors that could ignite or explode. - Page 7 16. Do not place items exposed to cooking oils in your dryer. Items contaminated with cooking oils may contribute to a chemical reaction that could cause a load to catch fire. To reduce the risk of fire due to contaminated loads, the final part of a tumble dryer cycle occurs without heat (cool down period).
-
Page 8: Warnings
Safety information WARNING - What to do if you smell gas: • Do not try to light any appliance. • Do not turn on the appliance. • Do not touch any electrical switch. • Do not use any phone in your building. •... - Page 9 • Do not use fabric softeners or products to eliminate static unless the softener or product is recommended for dryer use by the manufacturer of the fabric softener or product. • Clean the lint screen before or after each load. •...
-
Page 10: Regulatory Notice
Regulatory notice FCC Notice CAUTION Any changes or modifications not expressly approved by the party responsible for compliance could void the user’s authority to operate the equipment. This device complies with Part 15 of FCC Rules. Operation is Subject to following two conditions: This device may not cause harmful interference, and This device must accept any interference received including interference that cause... - Page 11 IC Notice The term “IC” before the radio certification number only signifies that Industry Canada technical specifications were met. Operation is subject to the following two conditions: This device may not cause interference, and This device must accept any interference, including interference that may cause undesired operation of the device.
- Page 12 The software included in this product contains open source software. You may obtain the complete corresponding source code for a period of three years after the last shipment of this product by sending an email to mailto:oss.request@samsung.com. It is also possible to obtain the complete corresponding source code in a physical medium such as a CD-ROM;...
-
Page 13: Installation
Make sure all the supplied parts and accessories are included in the product package (see page 14). If you have a question about the dryer or the accessories, contact a local Samsung service center or the retailer. Dryer at a glance... - Page 14 Installation Accessories (supplied) Y connector Water hose (Canadian elec. Short water hose models only) Flexible rack Dryer-sheet case Accessories (not supplied) You must purchase these items at a local service center. Pedestal WARNING Packing materials can be dangerous to children. Keep all packing materials (plastic bags, polystyrene, etc.) out of children’s reach.
-
Page 15: Installation Requirements
Installation requirements Location considerations Read through the following instructions before installing the dryer and keep this The dryer should be located where there manual for future reference. is enough space at the front for loading the dryer, and enough space behind for WARNING the exhaust system. - Page 16 Installation Alcove or closet installations WARNING • The dryer must be exhausted to the outside to reduce the risk of fire when installed in an alcove or closet. • No other fuel-burning appliance should be installed in the same closet as the dryer. •...
- Page 17 Side by side installation 1 in. (25 mm) 32.5 in. (825 mm) 27 in. (686 mm) 2 in. (50 mm) 21 in. (533 mm) 5.9 in. (150 mm) 61 in. (1550 mm) English 17 FlexDry_DM9900M_DC68-03381F-07_EN.indd 17 2019-06-03 2:28:35...
- Page 18 Installation Ducting requirements Recommended Use only for short-run installation Weather hood type 4” (10.2 cm) 2.5” (6.4 cm) No. of 90° Rigid Rigid elbows 80 ft. (24.4 m) 74 ft. (22.6 m) 68 ft. (20.7 m) 62 ft. (18.9 m) 57 ft.
- Page 19 Exhausting requirements Outside the United States and Canada • Refer to the local codes. The dryer must not be exhausted into a chimney, a wall, a ceiling, an attic, a crawl WARNING space, or a concealed space of a building. •...
- Page 20 Installation • Gas dryers are equipped with a burner NOTE vent for use with natural gas. If you • Your dryer uses an automatic ignition plan to use your dryer with LP (liquid system to ignite the burner. There is no propane) gas, it must be converted constant burning pilot.
- Page 21 Electrical requirements Grounding This dryer must be grounded. In the event The wiring diagram is located on the plate of a malfunction or breakdown, the ground under the control panel or rear frame. will reduce the risk of electrical shock by WARNING providing a path of least resistance for the •...
- Page 22 Installation • If a power cord is not used and the WARNING electric dryer is to be permanently Risk of Electric Shock wired, the dryer must be connected to When local codes allow, you can connect a permanently grounded metal wiring the dryer’s electrical supply with a new system, or an equipment grounding power supply cord kit, marked for use with...
-
Page 23: Step-By-Step Installation
Step-by-step installation Make sure you have a qualified technician install the dryer. Step by step installation instructions start below. STEP 1 Install the exhaust system Select a location and move the dryer to the site. For easy access, we recommend you install the dryer in the same location as your washer. - Page 24 Installation STEP 3 Connect the electrical wiring First, read through the Electrical requirements section, and then follow these steps. 3-wire system Loosen or remove the center terminal block. Connect the neutral wire (white or center wire) of the power cable to the center, silver-colored terminal screw of the terminal block.
- Page 25 4-wire system Remove the external ground connector’s screw, and connect the ground wire (green or unwrapped) of the power cable to the screw. CAUTION • To connect the ground wire to the neutral position without through contact A (cabinet ground), contact a technician.
- Page 26 Installation • A strain relief must be used. Do not loosen the nuts already installed on the terminal block. Be sure they are tight. Use a 3/8” (1 cm) deep well socket. STEP 4 Connect the water hose (applicable models only) The dryer must be connected to a cold water tap using the provided water hoses.
- Page 27 Using the short hose as an extension Close the cold water tap. If you have a washer cold water hose attached to the cold water faucet, unscrew and remove the hose. Then, connect the short hose (B) to the cold water tap. Turn the coupling by hand until it is tight.
- Page 28 Installation STEP 5 Level the dryer To ensure optimal performance, the dryer must be level. Using a level (A), check if the dryer is level side to side and then front to back. If the dryer is not level, adjust the leveling feet (B) at the bottom of the dryer.
- Page 29 STEP 6 Power on (Gas models) Make sure all gas connections, the exhaust line, and all wiring is connected correctly. Then, plug the power cord into a power source and check the dryer’s installation and operation using the final checklist in Step 7 below. STEP 7 Final check When installation is complete, confirm that: •...
-
Page 30: Vent Blockage Test
Installation Vent blockage test After the dryer is installed, start the Vent Blockage Test to check if the duct system is properly installed. The Vent Blockage Test automatically detects the status of the ducts and reports any blockage or problems. Proper ducting can reduce drying time and save energy. -
Page 31: Exhaust Ducting Guide
NOTE • During or after the test, the internal drum is hot. Use caution to prevent burns. The Vent Blockage Test is used to check for problems to the current duct system when the dryer is installed for the first time. •... -
Page 32: Door Reversal
Installation Door reversal Unplug the power cord. Remove two door hinge screws. Lift the door and remove it. NOTE There is a screw on the back side of the hinge that will support the door as you unscrew the hinge screws. Remove the two screws that are above and below the cut-out in the frame front. - Page 33 Re-insert the two screws that held the lever holder into the same screw holes, and then tighten. Remove the single screw from the back of the door hinge. NOTE This is the screw that supports the door against the frame so you can unscrew or screw in the hinge without needing to support the door yourself.
- Page 34 Installation 11. Push the lever holder into the cut out on the other side of the door opening. Insert screws, and then tighten as shown. 12. Re-attach the remaining screws to the remaining holes above and below the lever holder, and then tighten. English FlexDry_DM9900M_DC68-03381F-07_EN.indd 34 2019-06-03...
-
Page 35: Before You Start
Before you start Here are a few things you should know before starting your dryer. Sort and load • Put one wash load in the dryer at a • Overloading causes uneven drying and time. wrinkling. • Do not mix heavy and lightweight items •... -
Page 36: Drying Guidelines
Before you start Drying guidelines The best way to dry items is to follow the instructions on the care label. If no drying instructions are provided, see the following table for reference. Cycle Description Follow the care label instructions or dry using NORMAL. •... -
Page 37: Rack Guidelines
WARNING Do not dry: • Fiberglass items (curtains, draperies, etc.) • Wool, silk items, unless recommended on the label • Items spotted or soaked with vegetable or cooking oils Rack guidelines Flexible rack The flexible rack is designed to dry delicate items that are not suitable for or cannot be dried in the Tumble Dryer. - Page 38 Before you start Insert a folded dryer sheet in dryer- sheet case (B), and then put the case at the top center of the rack. Make sure the dryer-sheet case faces against the triangle mark on the Delicate Dryer because only the arrow area has the built-in magnet to secure the filter.
-
Page 39: Operations
Operations This FlexDry™ dryer features the Delicate Dryer and the Tumble Dryer for your convenience. The Delicate Dryer is a top load dryer that is designed to dry relatively small loads while the Tumble Dryer is a drum loader you can use to dry normal or relatively heavy loads. - Page 40 Press to turn the Smart Control function on or off. You can control 08 Smart Control or monitor the dryer remotely. When started, the Smart Control (Elec.) / Smart (Smart Monitor) indicator blinks. For details, see the Samsung Monitor (Gas) Smart Home section later in this manual. Cycle overview...
- Page 41 Recommended for the Delicate Dryer • The drying time depends on the load and the item type. To shorten the drying time, use Super Speed. • Overloads may delay the drying time. To extend the drying time, use Time+. • For manual-wash items, use a towel to remove moisture from the items before drying. •...
- Page 42 Operations Caution Clothing with accessories or hooks may get stuck in the mesh of the rack. • Clothing with accessories must face upwards. • Clothing with hooks must be hooked up before being placed. Not Recommended for the Delicate Dryer Do not dry shoes, bags, down/fur products, rugs, carpets, or bulky items in the Delicate Dryer.
-
Page 43: Tumble Dryer
Tumble Dryer Control panel Press a cycle name to select a cycle. • Sensor Dry cycles: The dryer senses its internal humidity and shuts off when the internal humidity level indicates that the load is dry. This category includes NORMAL, HEAVY DUTY, TOWELS, BEDDING, DELICATES, PERM PRESS, and ACTIVE WEAR. - Page 44 Operations Press Temp. to change the temperature of the current cycle. High: For sturdy cottons or those labeled Tumble Dry. Medium: For permanent press, synthetics, lightweight cottons, or items labeled Tumble Dry Medium. Med Low: For heat lower than Medium. Use to dry synthetic or 06 Temp.
- Page 45 After connecting the Tumble Dryer to your home network using 13 Smart Control the Samsung Smart Home app, you can control or monitor the (Elec.) / Smart dryer remotely. When started, the Smart Control (Smart Monitor) Monitor (Gas) indicator blinks.
- Page 46 Operations Steam Dry cycles Cycle Description • Use to smooth out wrinkles and reduce odors in loads of one to four items. With this cycle selected, a small amount of water is REFRESH sprayed into the dryer drum after several minutes of tumbling with heat.
-
Page 47: Simple Steps To Start
Simple steps to start Press POWER on the control panel of a desired dryer (Delicate, Tumble) to turn the dryer on. Put the items you want to dry into the dryer. Select a cycle. Change the cycle settings (temperature and/or dry level) as appropriate to the items. Select cycle options as needed. -
Page 48: Samsung Smart Home
Electronics to your smart device. NOTE • The Samsung Smart Home app is designed for Android 4.0 (ICS) or higher, or iOS 8.0 or higher, and is optimized for Samsung smartphones (Galaxy S and Galaxy Note series). • On other devices, some functions may operate differently. - Page 49 Getting started Using Samsung Smart Home, you can control your dryer from your smart device remotely. For improved performance, the content and design of the app is subject to change without notice. Launch the Samsung Smart Home App on your smartphone.
-
Page 50: Special Features
Operations Special features Child Lock To prevent children or infants from accidently starting the dryer or setting any of the dryer’s functions, Child Lock locks all buttons except for the POWER button. Note that each dryer operates independently and has its own Child Lock function. To activate the Child Lock •... - Page 51 3 seconds to enter the Smart Care mode. Run the Samsung Smart Dryer app on your mobile device, and then tap Smart Care. Hold the mobile device so that the mobile device and the dryer’s status bar face each other.
-
Page 52: Maintenance
Maintenance Keep your FlexDry™ dryer clean to prevent decreased performance and to lengthen its life. WARNING Certain internal parts are intentionally not grounded and may present a risk of electric shock only during servicing. Service Personnel - Do not contact the following parts while the appliance is energized: Control board and inlet valve. - Page 53 Vent sensor The dryer features a vent sensor that detects and notifies you when it is time to clean the ductwork. The indicator lets you know the status of the duct. Level Status Action Indicator The ductwork is not clogged. •...
-
Page 54: Delicate Dryer
Maintenance Delicate Dryer Flexible rack • If you use the flexible rack, make sure to clean the rack after every use so that it is readily available for future use. • Clean the rack with neutral cleaning agents and running water. Upper recesses •... -
Page 55: Tumble Dryer
Tumble Dryer Stainless steel drum • Clean the drum after every use. • To clean the stainless steel drum, use a damp cloth with a mild, non-abrasive cleaner suitable for easily marred surfaces. Remove cleaner residue and dry with a clean cloth. Drying rack •... -
Page 56: Troubleshooting
Troubleshooting Checkpoints If the dryer operates abnormally, first check the list of problems in the table below and try the suggested actions. Symptom Action • Make sure the door is latched shut. • Make sure the power cord is plugged into a live electrical outlet. - Page 57 Symptom Action • Check the load for objects such as coins, loose buttons, nails, etc. Remove promptly. • It is normal to hear the dryer gas valve or heating element cycle on and off during the drying cycle. Is noisy. •...
- Page 58 Extended time. reached. The drying time can change according to the type and amount of laundry. See the cycle chart for reference. If a problem persists, contact a local Samsung service center. English FlexDry_DM9900M_DC68-03381F-07_EN.indd 58 2019-06-03 2:28:43...
-
Page 59: Samsung Smart Home
• The old Samsung Smart Dryer app cannot connect with operate. Samsung Smart Home models. • You must log into your Samsung account to use the app. The Samsung Smart Home app is installed • Use the Samsung Smart Home app to connect and register but is not connected the dryer with your home network access point (AP). -
Page 60: Information Codes
• Make sure laundry is not caught in the door. Invalid power source frequency. • Try restarting the cycle. 1 FC • If this information code remains, contact a Samsung service center. Electronic control problem [Invalid Communication (SUB PBA <-> MAIN PBA)]. - Page 61 Code Action Delicate Dryer Tumble Dryer Electronic Control Problem [Invalid Communication 1 AC7 (Delicate Dryer MAIN <-> Tumble MAIN PBA)]. If any information code keeps appearing on the screen, contact a Samsung service center. English 61 FlexDry_DM9900M_DC68-03381F-07_EN.indd 61 2019-06-03 2:28:43...
-
Page 62: Specifications
Specifications Fabric care chart Bleach The following symbols provide garment care direction. The clothing care labels Any bleach (when needed) include symbols for drying, bleaching, Only non-chlorine (color-safe) ironing, and dry cleaning. The use of bleach (when needed) symbols ensures consistency among garment manufacturers of domestic Tumble dry and imported items. -
Page 63: Protecting The Environment
Iron dry or steam temperatures Dry-clean High Dry-clean Medium Do not dry-clean Line dry / Hang to dry Drip dry Warning symbols for laundering Dry flat Do not wash Do not wring Do not bleach Do not tumble dry No steam (added to iron) Do not iron Protecting the environment This appliance is manufactured from... -
Page 64: Specification Sheet
Specifications Specification sheet Front loading dryer Type DV*60M9900** Product-inches (cm) 61 (155.0) A. Height-top door opened Required for Installation-inches 63.5 Product-inches (cm) 46.9 (119.2) B. Height-top door closed Required for Installation-inches Product-inches (cm) 27 (68.6) C. Width Required for Installation-inches Dimensions Product-inches (cm) 32.5 (82.5) -
Page 65: Cycle Chart
Cycle chart NOTE For best results, follow the load size recommendations for each dry cycle. • Large load: Fill the drum to about ¾ full. Do not add items over this level as they need to tumble freely. • Medium load : Fill the drum to about ½ full. •... - Page 66 Specifications NOTE • : factory setting, : can be selected Temperature setting Time Cycle setting High Medium Med Low Extra Low NORMAL HEAVY DUTY BEDDING PERM PRESS DELICATES ACTIVE WEAR TIME DRY ...
- Page 67 If the product is located in an area where service by a SAMSUNG authorized servicer is not available, you may be responsible for a trip charge or required to bring the product to a SAMSUNG authorized service center for service.
- Page 68 Visits by an authorized servicer to explain product functions, maintenance or installation are not covered by this limited warranty. Please contact SAMSUNG at the number below for assistance with any of these issues. English FlexDry_DM9900M_DC68-03381F-07_EN.indd 68...
- Page 69 PROFITS, FAILURE TO REALIZE SAVINGS OR OTHER BENEFITS REGARDLESS OF THE LEGAL THEORY ON WHICH THE CLAIM IS BASED, AND EVEN IF SAMSUNG HAS BEEN ADVISED OF THE POSSIBILITY OF SUCH DAMAGES. Some states do not allow exclusion or limitation of incidental or consequential damages, so the above limitations or exclusions may not apply to you.
- Page 70 If service is not available, SAMSUNG may elect to provide transportation of the product to and from an authorized service center. SAMSUNG will repair, replace, or refund this product at our option and at no charge as stipulated herein, with new or reconditioned parts or products if found to be defective during the limited warranty period specified above.
- Page 71 God; use of products, equipment, systems, utilities, services, parts, supplies, accessories, applications, installations, repairs, external wiring or connectors not supplied or authorized by SAMSUNG that damage this product or result in service problems; incorrect electrical line voltage, fluctuations and surges; customer adjustments and failure to follow operating instructions, maintenance and environmental instructions that are covered and prescribed in the instruction book;...
- Page 72 (English) www.samsung.com/ca_fr/support (French) Visits by a Service Engineer to explain functions, maintenance, or installation is not covered by warranty. Please contact the Samsung call center at the number above for help with any of these issues. English FlexDry_DM9900M_DC68-03381F-07_EN.indd 72...
- Page 73 Memo FlexDry_DM9900M_DC68-03381F-07_EN.indd 73 2019-06-03 2:28:47...
- Page 74 Memo FlexDry_DM9900M_DC68-03381F-07_EN.indd 74 2019-06-03 2:28:47...
- Page 75 Memo FlexDry_DM9900M_DC68-03381F-07_EN.indd 75 2019-06-03 2:28:47...
- Page 76 Scan this with your smartphone QUESTIONS OR COMMENTS? COUNTRY CALL OR VISIT US ONLINE AT U.S.A 1-800-SAMSUNG (726-7864) - Consumer Electronics www.samsung.com/us/support 1-844-SAM-PAYS (726-7297) - Mobile Phones 1-800-SAMSUNG(726-7864) www.samsung.com/ca/support (English) CANADA 1-844-SAM-PAYS (726-7297) www.samsung.com/ca_fr/support (French) DC68-03381F-07 FlexDry_DM9900M_DC68-03381F-07_EN.indd 76 2019-06-03 2:28:47...
Need help?
Do you have a question about the FlexDry DVG60M9900V/A3-01 and is the answer not in the manual?
Questions and answers