
Related Manuals for Zanussi ZWS614B4S


Summary of Contents for Zanussi ZWS614B4S
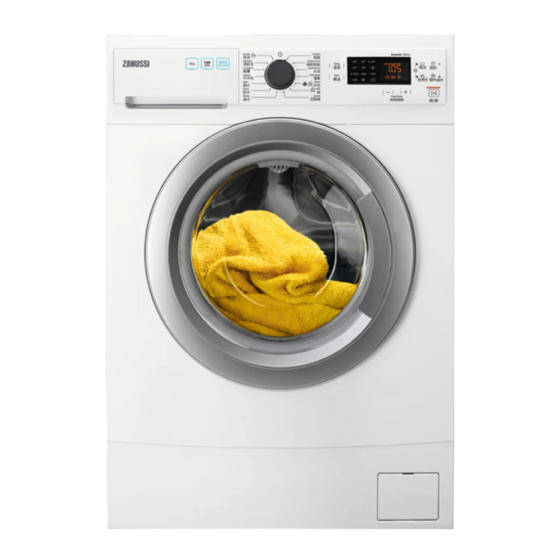
- Page 1 User Manual GETTING STARTED? EASY. ZWS614B4S ZH 用户手册 洗衣机 EN User Manual Washing Machine...
- Page 2 造訪我們的網站可以: 獲得使用建議、手冊、故障解決方案、服務和維修資訊: www.zanussi.com/support 安全資訊 請務必依據提供的指示操作本機,否則會發生安全事件。請在安 裝和使用本機之前,仔細閱讀所提供的指示。對於安裝和使用錯 誤所造成的人身傷害或損害,製造商概不負責。務必將說明書擺 放在安全可觸及的地方,以便將來參考。 青少年和易受傷者的安全 未滿 8 歲的青少年不得使用本機。8 歲 (含) 以上之青少年、身 • 體官能或心智能力衰退者,或是經驗與使用知識缺乏者,在負 責其安全的人員在旁看護或指示本機的使用方法,並讓他們了 解可能之危險的情況下,方可使用本機。 除非監護人持續在旁監看,否則青少年、身體官能或心智能力 • 衰退者應遠離本機。 請勿讓青少年將本機器成玩具。 • 將洗衣劑放在青少年不易觸及的地方。 • 打開機門時,請讓青少年和寵物遠離這部機器。 • 體格、感官或精神能力不健全,或者是缺少經驗和知識的青少 • 年和人士不得清潔和維護本機。 一般安全需知 本機僅供一般家庭使用。 • 請勿變更本機的規格。 • 本機衣物量上限為 6 kg。請勿超過每個程序的衣物量上限(請 •...
- Page 3 如果主電源線已損壞,則必須由製造商、其維修代理商或類似 • 的合格人員更換,以避免發生觸電危險。 在進行任何保養前,請先停止本機,並從電源插座將電源插頭 • 拔下。 請勿使用高壓噴霧和/或蒸氣清潔機器。 • 以濕布清潔本機。僅限使用中性清潔劑。請勿使用研磨性產 • 品、研磨性清潔抹布、溶劑或金屬物體。 安全說明 安裝 • 如果雙手潮濕,請勿接觸電源線或電源插座。 • 請勿以拉扯電源線的方式拔掉本機電源線。請 安裝必須符合相關國家規範。 一律從電源插頭處拔下。 • 本機配有 13 安培的電源插頭。如果必須更換 電源插頭的保險絲,請使用 13 安培 ASTA (BS • 拆除所有包裝和搬運用螺栓, 包含具有塑膠套筒 1362) 的保險絲。 的橡膠刷。 • 將搬運用螺栓存放在安全的場所。將來如果要 水源連接 移動本機,必須將滾筒上鎖以避免內部損傷。 • 切勿損壞水管。 •...
- Page 4 廢棄處理 • 剪斷本機附近的主電源線並丟棄。 • 移除機門門閂,以防止兒童或寵物被關在滾筒 警告! 受傷或窒息的風險。 內。 • 丟棄本機時,需依據當地廢棄電氣與電子設備 (WEEE) 的棄置規定。 • 拔除本機的主電源線和水源。 安裝說明 4. 在本機後方放置其中一個聚苯乙烯包裝元件於 警告! 請參閱「安全性」一章。 地板上。小心地將本機的後背放置在地上。 拆除包裝 1. 卸除外部薄膜。如有必要可使用美工刀。 5. 拆除底部聚苯乙烯保護膜。 2. 移除紙盒頂端和聚苯乙烯包裝材料。 6. 將本機重新放回直立位置。取下電源線和排水 軟管。 3. 打開機門。將所有衣物自滾筒內取出。 警告! 可看見水從排水軟管流出。 這是因為洗衣機已在原廠進行過 測試。...
- Page 5 7. 拆下四顆運輸用螺栓,然後拉出塑料墊片。 1. 將進水軟管連接到本機背面。 45º 45º 20º 20º 8. 將使用者手冊包中隨附的橡膠蓋放入孔洞中。 2. 依據水龍頭的位置,將之放在左側或右側。確定 進水軟管不是位於垂直位置。 3. 如有需要,鬆開環形螺帽以將其固定在正確位 置。 4. 使用 3/4'' 吋管線將進水軟管連接至冷水龍頭。 排水 排水軟管高度必須在 60 公分以上、100 公分以下。 建議您保存包裝及搬運螺絲以便於運 排水軟管可以延伸至 400 cm。請聯 輸本機。 絡授權服務中心, 取得更多排水軟管與 延長部分。 安裝資訊 定位與平衡調節 可透過不同方法連接排水軟管: 正確調整本機,以防止本機在運行時發生振動、噪 1. 將排水軟管彎成 U 型, 然後將之圍繞塑膠軟管導 音和移動。...
- Page 6 6. 將軟管直接放入房間牆壁內部的排水軟管,並以 當本機排水且排水軟管末端未浸入水 扣夾固定。 中時, 確保塑料導軌不能移動。這可能 導致髒水回流至本機。 3. 如果排水軟管的末端看起來像這樣 (請參閱圖 片),您可以直接將此插入儲水塔。 電氣連接 在安裝結束時,您可以將電源插頭連接到電源插 座。 銘牌和「技術資料」一章指示必要的電功率額定 值。請確定與主電源相容。 請檢查您的家用電氣安裝是否可承受所需的最大 負載,並且考慮任何使用中的其他電器。 4. 若要將管道固定在通氣孔 - 將排水軟管直接插 入排水管道中。請參閱圖例。 將設備連接到接地插座。 安裝設備後,必須易於接拔電源線。 有關安裝此設備所需的任何電氣工作,請聯絡我們 的授權服務中心。 針對不遵守上述安全預防措施而造成的損壞或傷 害,製造商概不負責。 排水軟管的末端必須保持通風, 即排水 管道的內徑 (最小 38 公釐 - 最小 1.5 吋) 必須大於排水軟管的外徑。 5.
- Page 7 產品說明 本機概述 操作台 排水軟管 洗衣劑分配器 進水軟管連接 控制板 電源纜線 機門手把 搬運用螺栓 銘牌 軟管支撐 排水泵過濾器 調整本機高度的機腳 銘牌上顯示機型名稱 (A)、產品編號 (B)、電功率額定 值 (C) 和序號 (D)。 Mod. xxxxxxxxx Prod.No. 910000000 00 000V ~ 00Hz 0000 W 00000000 控制面板 特殊功能 最佳的洗衣結果。如需更多詳細資訊,請參閱 「AutoAdjust 衣物量偵測」段落。 全新的洗衣機符合低水量、耗電量和洗衣劑使用 量,且兼顧布料處理之有效衣物處理的所有現代要 求。 AutoAdjust System 會根據滾筒中的衣物量自動...
- Page 8 控制面板說明 設定程序旋鈕 Extra Rinse 觸控板 Spin 減少觸控板 Easy Iron 觸控板 Temp 觸控板 Start/Pause 觸控板 顯示項目 FlexiTime Prewash 觸控板 Delay Start 觸控板 顯示器 A. 時間區域: • 程序時間。 • 警告代碼。請參閱「疑難排解」一章以取得 其說明。 • FlexiTime 的等級。 B. 預約啟動指示燈。 C. 兒童安全鎖指示燈。 D. 門鎖指示燈: • 亮起時,您無法打開機門。 •...
- Page 9 程序 程序表 程序 參考脫水轉速 程序說明 預設溫度 最大洗衣量 脫水轉速範圍 (衣物類型和髒污程度) 溫度範圍 棉質 1000 rpm 6 公斤 白色和有色棉質衣物。一般嚴重或輕微髒污的 40°C (1000- 400 衣物。 90°C - 冷洗 rpm) 1000 rpm 6 公斤 白色和不易褪色的棉質衣物。一般髒污的衣 棉質節能 (1000- 400 物。耗電量減少,且清洗程序的時間延長,以 40°C rpm) 確保理想的清洗結果。 60°C - 40°C 合成 1000 rpm 3 公斤...
- Page 10 程序 參考脫水轉速 程序說明 預設溫度 最大洗衣量 脫水轉速範圍 (衣物類型和髒污程度) 溫度範圍 清新洗 800 rpm 2 公斤 合成和質地纖細的衣物。輕微髒污的衣物或欲 30°C (800- 400 清新的衣物。 rpm) 800 rpm 1 公斤 合成纖維和混合布料衣物。輕度髒污衣物與欲 (800- 400 清新的衣物。 快洗 rpm) 30°C 1) 此程序為 60 °C 和衣物量為 6 kg,是能源標籤上輸入之資料的參考程序,並符合 IEC 60456。 2) 此程序期間,滾筒會緩慢旋轉,以確保能輕柔地洗滌。這可能看起來像是滾筒並未旋轉或未適當旋 轉,但這對此程序而言是正常的。...
- Page 11 各洗衣程序適用的洗衣劑 一般粉狀洗衣 普通液體洗衣 紅色衣物液體 程序 纖細羊毛衣物 特殊 液 洗衣液 劑 棉質 ▲ ▲ ▲ 棉質節能 ▲ ▲ ▲ 合成 ▲ ▲ ▲ 纖柔 ▲ ▲ ▲ ▲ 羊毛 羊毛 ▲ ▲ ▲ 內衣 ▲ ▲ ▲ ▲ 絲 窗簾 ▲ ▲...
- Page 12 預約 適合裝滿髒污程度一般的衣物。 藉由此功能, 您可將洗衣程序延後 30 分鐘至 20 小 快速程序,適合裝滿髒污程度一般的衣物。 時後開始。 顯示器會顯示相關指示燈。 極快程序, 適用於較少的輕微髒污衣物 (建議 最多放入一半的衣物量) 。 額外過水 是最短的程序,適合使少量衣物恢復清新。 藉由此特別功能,您可以將某些過水階段加入洗衣 僅能在表內的程序中使用「FlexiTime」 。 程序中。 對洗衣劑敏感的人士或在水質極軟的地區可使用 此特別功能。 相關指示燈會亮起。 易燙洗 本機會仔細清洗衣物並進行脫水,以防止衣物皺 摺。 本機會減少脫水轉速,用更多的水,依照衣物類型 ■ ■ ■ ■ ■ 調整程序持續時間。 相關指示燈會亮起。 ■ ■ ■ ■ ■...
- Page 13 第一次使用前 2. 請打開水龍頭。 在安裝期間或首次使用之前, 您可能會 3. 將 2 公升的水放入洗衣階段的洗衣劑盛載格。 發現本機中有一些水。這是在工廠中 此動作會啟動排水系統。 執行完整功能測試之後, 本機中殘留的 4. 將小量的洗衣劑放入洗衣階段的盛載格。 水份, 如此可確保本機是以完美運作狀 5. 設定一個無衣物且在最高溫度清洗棉質衣物的 態提供給客戶, 而且沒有使用方面的疑 程序,並開始運作。 慮。 這會清除滾筒和洗衣筒內所有可能的污垢。 1. 將電源插頭連接到電源插座。 日常使用 警告! 請參閱「安全性」一章。 放入衣物 1. 打開本機門蓋。 2. 掏空所有口袋並且攤開衣物,然後將其放入本 機。 3. 將衣物逐件放入滾筒。 不要在滾筒中放太多衣物。 4. 將機門關緊。 警告...
- Page 14 2. 若要使用洗衣液/添加劑或漂白水:從位置 A 移 關閉盛載格時,確定已適當插入清潔劑隔板且板子 除清潔劑隔板,然後將之插入位置 B。 不會堵塞。 設定程序 1. 轉動程序旋鈕並設定程序: • 指示燈 閃爍。 • 顯示器顯示「時間管理器」的水位、程序持 續時間、程序各階段的指示燈。 2. 必要時,改變溫度和脫水轉速,或加入可用的 選項。當您啟用選項時,設定選項的指示燈會 亮起。 如果您設定不正確, 顯示器會顯示訊息 。 後方隔間之清潔劑隔板的位置 B,洗衣液/添加 劑或漂白水的位置則位於前方隔間。 開始程序,而不設定延遲開始。 3. 如欲只使用洗衣液:在位置 C 中插入清潔劑隔 板。 按下 。 • 指示燈會停止閃爍,並一直亮著。 • 指示燈會在顯示器上開始閃爍。 • 程序開始、機門上鎖、顯示器會顯示...
- Page 15 當您在程序已啟動時暫停本機, 但是指 您可以在按下 前,取消或改變延 遲開始的設定。取消延遲開始: 示燈 沒有閃爍且機門無法開啟, 請關閉本機以開啟機門。請參閱 「在程 • 按下 以設定本機暫停。 序運作時開啟機門」 。 • 按下 直到顯示器顯示 ’。 當程序運作時,打開上蓋 • 再次按下 以立即開始程 序。 程序運作時,機門會鎖定且指示燈 亮起。 AUTOADJUST SYSTEM 衣物量偵測 警告 如果滾筒的溫度和水位過高,您 將無法打開機門。 觸碰 Start/Pause 按鈕之後: 1. AutoAdjust System 會開始預估衣物量的重 1. 轉動程序旋鈕至 位置以停用本機。...
- Page 16 如果您設定的程序或特別功能會於結 束時使滾筒內殘留清水, 則節能狀態功 能未啟用以提醒您排水。 提示與訣竅 洗衣衣物 可使用的特殊去漬產品 使用該類型的污漬及布料 適用的特殊去漬產品。 • 將衣物分為:白色、有色、合成纖維、纖細和羊 毛。 洗潔劑類型和用量。 • 請遵守衣物護理標籤上的洗衣說明。 • 請勿將白色及有色衣服放在一起洗。 洗潔劑的選擇和正確用量不僅會影響您的洗衣效 • 第一次洗滌時, 一些有色衣物會褪色。建議您在 果,還有助於避免浪費和保護環境: 前幾次單獨清洗。 • 僅使用洗衣機專用的洗潔劑和其他處理劑。首 • 將多層織物、 毛織品以及印製圖案的衣物由內向 先,請按照這些通用規則: 外翻。 – 適用於各類衣物的洗衣粉 (纖幼衣物除外)。 • 使用適當的清潔劑來清洗和預先處理嚴重髒污, 偏好包含白色衣物的漂白劑和洗衣消毒劑 然後再將之放入滾筒中。 的粉狀洗潔劑、 • 請小心清洗窗簾。拆下鉤子, 將窗簾放在洗衣袋 –...
- Page 17 • 為所選的洗衣程序設定最大脫水轉速後, 再將 若要知道您當地的水質硬度,請聯絡當地負責自來 衣物放入滾筒乾衣機烘乾。這樣一來就能在烘 水的機關。 乾時節省能源! 請使用正確的軟水劑用量。請遵守這些產品包裝 上的說明。 水質硬度 如果您的水質硬度很高或適中,我們建議您使用洗 衣機專用的軟水劑。對於水質極軟的地區,沒有必 要使用軟水劑。 保養與清潔 警告! 請參閱「安全性」一章。 警告 請勿使用甲基性酒精、溶劑或化 學產品。 警告 請勿使用含氯的洗衣劑來清潔金 定期清潔排程 屬表面。 定期清潔有助於延長設備的使用壽命。 在每次程序結束後,保持機門和洗衣劑分配器稍微 除垢 半開狀態,使空氣流通並讓設備內部的濕氣消散。 這能防止發霉和異味。 如果您的水質硬度很高或適中,我們建議您使用洗 衣機專用的除水垢產品。 如果長時間不使用設備,請關閉水龍頭並拔下電源 插頭。 定期查看滾筒以防止水垢及微粒。 建議定期清潔排程: 僅以洗衣機專用的產品去除塵粒。請和洗衣程序 分開處理。 除垢 一年兩次 請務必遵守您在這些產品包裝上找到 保養洗滌 每月一次...
- Page 18 除累積洗衣劑的任何殘留物。清潔之後,將頂 請務必遵守產品包裝上的說明。 端部分放回原位。 檢查並移除可能會夾在折疊衣物中的物品(若有任 何物品) 。 確認密封圈和機門之間沒有衣物。 在程序週期完成之後,使用濕布擦除任何殘存在機 門門封之後的汙垢或水漬。 清潔滾筒 定期查看滾筒以防止產生微粒。 利用特殊不鏽鋼產品清潔滾筒。 請務必遵守產品包裝上的說明。 3. 確定已經從凹槽的上方和下方移除所有洗衣劑 殘留物。使用小刷子清潔凹槽。 如需徹底洗滌: • 將所有衣物自滾筒內取出。 • 以最高溫度執行 Cottons 程序。將少量粉 狀洗衣劑加入空的滾筒中, 以便脫水掉任何 餘留下來的殘留物。 清潔洗衣劑分配器 若要乾掉的洗衣劑沉澱或阻塞的棉質衣物軟化劑 及/或洗衣劑分配器中形成黴菌, 請偶爾執行下列清 潔程序: 1. 打開抽屜盒。依照圖片所示,向下按下把手, 4. 將洗衣劑盛載格插入滑軌並予以關閉。執行脫 然後向外拉出。 水程序,而不要在滾筒內放入任何衣物。 2. 移除添加劑盛載格的頂端部分,以協助在注入 持續流動的溫水時,清潔和沖出添加劑,以移 清潔排水泵...
- Page 19 警告! • 將電源插頭從電源插座拔出。 • 本機運作時,切勿卸下濾網。 • 如果本機內為熱水,請勿清潔排水泵。等待直到水變冷為止 • 關閉和打開閥,直到水停止流出為止,重複步驟 3 數次。 卸下濾網時身邊應準備一塊布隨時抹乾任何流出來的水。 按照下列指示以清潔排水泵:...
- Page 20 警告! 請確認泵的葉輪能旋轉。如果並未旋轉,請聯絡授權服務中心。也確認已將濾網正確 旋緊,防止洩漏。 依照緊急排水程序排水時,必須再次啟動排水系統: 1. 將 2 公升的水倒入洗衣劑分配器的主洗盛載格。 2. 開啟程序將水排出。 清潔進水軟管和閥過濾器...
- Page 21 45° 20° 緊急排水 1. 將電源插頭從電源插座拔除。 2. 關閉水龍頭。 因為故障,本機無法排水。 3. 將進水軟管兩端放在容器內, 並讓水排出軟管。 如果發生此情況,請執行「清潔排水過濾器」中 (1) 4. 清空排水泵。請參閱緊急排水程序。 至 (10) 的步驟。必要時,清潔排水泵。 5. 當排水泵清空時,再一次安裝進水軟管。 依照緊急排水程序排水時,必須再次啟動排水系 統: 警告! 當您再次使用本機時,請確定溫 1. 依照緊急排水程序排水時,必須再次啟動排水 度大於 0 °C。 系統:將 2 公升的水倒入洗衣劑分配器的主洗 對於低溫造成的損害,製造商概不負 盛載格。 責。 2. 開啟程序將水排出 預防霜凍 如果將本機安裝在溫度可能低於 0° C 的位置,請 從進水軟管和排水泵排出剩餘的水。...
- Page 22 • 請確定排水龍頭未阻塞。 • 請確定排水軟管未扭結或彎曲。 設備沒有排水。 • 請確定排水過濾器未阻塞。如有需要,請清潔過濾器。請參閱「保 養與清潔」章節。 • 請確定已正確連接排水軟管。 • 如果設定無排水階段的程序,請設定排水程序。 • 如果您設定的選項會在結束時使洗衣筒內殘留清水,請設定排水程 序。 • 請確定機門已關妥。 機門已開啟或未關妥。 • 程序並未適當完成,或是過早停止本機。再次關閉並開啟設備。 • 如果警示代碼再次出現,請聯絡「授權服務中心」。 內部故障。本機的電子 元件之間無通訊。 • 請等待直到主電源穩定。 主電源不穩定。 如果顯示器顯示其他警示代碼,則停用並啟用本機。如果問題持續存在,請聯 絡「授權服務中心」。 如果洗衣機有其他問題,請檢查下表以尋找可能的解決辦法。 問題 可能的解決辦法 • 請確定電源插頭已經連接至電源插座。 • 請確定機門已關閉。 • 請確定保險盒中的保險絲沒有損壞。 程序未開始。 • 請確定...
- Page 23 問題 可能的解決辦法 • 透過 AutoAdjust System 可依據類型和洗衣量大小而調整程序持續 程序持續期間在程序執 時間。請參閱「日常使用」一章的「 AutoAdjust System 衣物量偵 行期間增加或減少。 測」。 • 請增加洗衣劑用量或使用其他洗衣劑。 • 在洗滌衣物之前,請先使用特殊產品去除頑強污漬。 清洗效果不理想。 • 請確定您設定正確的溫度。 • 減少洗衣量。 洗衣程序期間滾筒內產 • 減少洗衣劑的用量。 生太多泡沫。 洗滌程序之後,分配器 • 確定翻蓋位於正確位置 (「上」適用於粉狀洗衣劑 -「下」適用於液 中有一些洗衣劑殘留 體洗衣劑)。 物。 • 請確定您已經依據此使用者手冊提供的指示來使用洗衣劑分配器。 檢查後,啟動本機。程序會從中斷處繼續運轉。 如果問題再次出現,請聯絡「授權服務中心」。 服務中心的必要資料位於銘牌上。 服務...
-
Page 24: Safety Information
VISIT OUR WEBSITE TO: Get usage advice, brochures, trouble shooter, service and repair information: www.zanussi.com/support SAFETY INFORMATION Please be sure to operate the appliance in accordance with the supplied instructions otherwise safety incidents may occur. Before the installation and use of the appliance, carefully read the supplied instructions. -
Page 25: Safety Instructions
The appliance maximum load is 6 kg. Do not exceed the • maximum load of each programme (refer to the "Programmes" chapter). The operating water pressure at the water entry point from the • outlet connection must be between 0.5 bar (0.05 MPa) and 8 bar (0.8 MPa). -
Page 26: Electrical Connection
ELECTRICAL CONNECTION • Make sure that there is access to the tap after the installation. WARNING! Risk of fire and electric shock. WARNING! Risk of injury, electric • The appliance must be earthed. shock, fire, burns or damage to the •... - Page 27 UNPACKING 5. Remove the polystyrene protection from the bottom. 1. Remove the external film. If necessary, use a cutter. 6. Put the appliance back into an upright position. Remove the power supply cable and the drain 2. Remove the cardboard top and the polystyrene hose from the hose holder.
-
Page 28: Information For Installation
8. Put the plastic caps, that you find in the user 1. Connect the water inlet hose to the back of the manual bag, in the holes. appliance. 45º 45º 20º 20º We recommend that you keep the packaging and the transit bolts for any transport of the appliance. - Page 29 2. On the edge of a sink - Fasten the guide to the The end of the drain hose must always water tap or to the wall. be ventilated , i.e. the inner diameter of the drain pipe (min. 38 mm - min. 1.5") must be larger than the external diameter of the drain hose.
-
Page 30: Product Description
For any electrical work required to install this The manufacturer does not accept any appliance, contact our Authorised Service Centre. responsibility for damage or injury through failure to comply with the above safety precaution. PRODUCT DESCRIPTION APPLIANCE OVERVIEW Worktop Drain hose Detergent dispenser Inlet hose connection Control panel... -
Page 31: Control Panel Description
achieve perfect washing results in the minimum possible. Read the paragraph "The AutoAdjust load detection " for more details. CONTROL PANEL DESCRIPTION Programme knob Extra Rinse touchpad Spin reduction touchpad Easy Iron touchpad Temp touchpad Start/Pause touchpad Display FlexiTime Prewash touchpad Delay Start touchpad DISPLAY A. -
Page 32: Programme Chart
PROGRAMMES PROGRAMME CHART Programme Reference spin Default temper- speed Programme description ature Maximum load Spin speed (Type of load and level of soiling) Temperature range range Cottons 1000 rpm 6 kg White cotton and coloured cotton. Normal- 40°C (1000- 400) ly, heavily and lightly soiled items. - Page 33 Programme Reference spin Default temper- speed Programme description ature Maximum load Spin speed (Type of load and level of soiling) Temperature range range Curtains 800 rpm 1 kg Special programme for curtains. The prewash 40°C (800- 400) phase is activated automatically. 40°C - Cold Duvet 800 rpm...
- Page 34 Pre- Delay Extra Programme FlexiTime Easy wash Start Rinse Iron ■ ■ ■ ■ ■ ■ ■ Curtains ■ ■ ■ Duvet ■ ■ ■ Refresh ■ ■ ■ Quick Suitable detergents for washing programmes Universal Liquid Uni- Liquid for Delicates Programme Special...
- Page 35 Additional spin options: The appliance decreases the spin speed, uses more water and adapts the programme duration to No Spin the type of laundry. • Set this option to deactivate all spin phases. The related indicator comes on. Only the drain phase is available. •...
-
Page 36: Before First Use
ACOUSTIC SIGNALS You can activate this option: The acoustic signals operate when: • After you press : the options and the • The programme is completed. programme knob are locked. • The appliance has a malfunction. • Before you press : the appliance cannot To deactivate/activate the acoustic signals, start. -
Page 37: Using Detergent And Additives
USING DETERGENT AND ADDITIVES 1. Measure out the detergent and the fabric conditioner. 2. Put the detergent and the fabric conditioner into the compartments. 3. Carefully close the detergent drawer 2. To use also liquid detergent/additive or bleach: Remove detergent divider from the position A and insert it in position B. -
Page 38: The Autoadjust System Load Detection
STARTING A PROGRAMME WITH THE DELAY START 1. Press again and again until the display shows the delay you want to set. The related indicator comes on the display. 2. Press • The appliance starts the countdown. • The door locks, the display shows the indicator •... -
Page 39: Cancelling A Running Programme
CANCELLING A RUNNING PROGRAMME 4. Set the programme again. 1. Turn the programme knob to position AT THE END OF THE PROGRAMME cancel the programme and to deactivate the • The appliance stops automatically. appliance. • The acoustic signal operates (if it is activated). 2. -
Page 40: Hints And Tips
If you set a programme or an option that ends with water in the drum, the energy saving status function doesn't activate to remind you to drain the water. HINTS AND TIPS THE LAUNDRY LOAD • Divide the laundry in: white, coloured, synthetics, delicates and wool. -
Page 41: Care And Cleaning
– you are washing a small load, helps to reduce energy and water – the laundry is lightly soiled, consumption. – there is large amounts of foam during • With adequate pre-treatment, stains and limited washing. soiling can be removed; the laundry can then be •... - Page 42 EXTERNAL CLEANING Always obey the instructions that you Clean the appliance with mild soap and warm water find on the packaging of the product. only. Fully dry all the surfaces. Do not use a scouring pads or any scratching material. Check and remove objects (if there are any) that could be trapped in the fold.
-
Page 43: Cleaning The Drain Pump
cleaning, put the top part back into position. 4. Insert the detergent drawer into the guide rails and close it. Run the rinsing programme without any clothes in the drum. 3. Make sure that all detergent residue is removed from the upper and lower part of the recess. Use a small brush to clean the recess. - Page 44 Proceed as follows to clean the pump:...
-
Page 45: Cleaning The Inlet Hose And The Valve Filter
WARNING! Make sure that the impeller of the pump can rotate. If it does not rotate, contact the Authorised Service Centre. Make sure also that you tighten the filter correctly to prevent leakages. When you drain the water with the emergency drain procedure, you must activate the drain system again: 1. -
Page 46: Frost Precautions
2. Start the programme to drain the water 4. Empty the drain pump. Refer to the emergency drain procedure. FROST PRECAUTIONS 5. When the drain pump is empty, install the inlet hose again. If the appliance is installed in an area where the temperature can be less than 0°... - Page 47 • The programme was not finished properly or the appliance stopped too early. Switch the appliance off and on again. Internal fail. No commu- • If the alarm code appears again, contact the Authorised Service Cen- nication between elec- tre. tronic elements of the appliance.
-
Page 48: Technical Data
Problem Possible solution The programme dura- • The AutoAdjust System is able to adjust the programme duration ac- tion increases or de- cording to the type and the laundry load size. Refer to "The AutoAdjust creases during pro- System load detection" in "Daily Use" chapter. gramme execution. -
Page 49: Environmental Concerns
ENVIRONMENTAL CONCERNS with the symbol with the household waste. Recycle materials with the symbol . Put the Return the product to your local recycling facility or packaging in relevant containers to recycle it. Help contact your municipal office. protect the environment and human health by recycling waste of electrical and electronic appliances. - Page 52 WWW.ZANUSSI.COM/SHOP...
Need help?
Do you have a question about the ZWS614B4S and is the answer not in the manual?
Questions and answers