Table of Contents
Advertisement
Advertisement
Table of Contents

Related Manuals for HIKVISION DS-2CD2463G0-IW


Summary of Contents for HIKVISION DS-2CD2463G0-IW
- Page 1 Network Cube Camera Quick Start Guide...
- Page 2 Network Cube Camera·Quick Start Guide Quick Start Guide © 2020 Hangzhou Hikvision Digital Technology Co., Ltd. All rights reserved. This Manual is the property of Hangzhou Hikvision Digital Technology Co., Ltd. or its affiliates (hereinafter referred to as "Hikvision"), and it cannot be reproduced, changed, translated, or distributed, partially or wholly, by any means, without the prior written permission of Hikvision.
- Page 3 SATISFACTORY QUALITY, OR FITNESS FOR A PARTICULAR PURPOSE. THE USE OF THE PRODUCT BY YOU IS AT YOUR OWN RISK. IN NO EVENT WILL HIKVISION BE LIABLE TO YOU FOR ANY SPECIAL, CONSEQUENTIAL, INCIDENTAL, OR INDIRECT DAMAGES, INCLUDING, AMONG OTHERS, DAMAGES FOR LOSS OF BUSINESS PROFITS,...
- Page 4 Network Cube Camera·Quick Start Guide PARTIES, INCLUDING WITHOUT LIMITATION, RIGHTS OF PUBLICITY, INTELLECTUAL PROPERTY RIGHTS, OR DATA PROTECTION AND OTHER PRIVACY RIGHTS. YOU SHALL NOT USE THIS PRODUCT FOR ANY PROHIBITED END-USES, INCLUDING THE DEVELOPMENT OR PRODUCTION OF WEAPONS OF MASS DESTRUCTION, THE DEVELOPMENT OR PRODUCTION OF CHEMICAL OR BIOLOGICAL WEAPONS, ANY ACTIVITIES IN THE CONTEXT RELATED TO ANY NUCLEAR EXPLOSIVE OR UNSAFE NUCLEAR FUEL-CYCLE, OR IN...
- Page 5 Network Cube Camera·Quick Start Guide encouraged to try to correct the interference by one or more of the following measures: —Reorient or relocate the receiving antenna. —Increase the separation between the equipment and receiver. —Connect the equipment into an outlet on a circuit different from that to which the receiver is connected.
- Page 6 Network Cube Camera·Quick Start Guide designated collection points. For more information see: www.recyclethis.info 2006/66/EC (battery directive): This product contains a battery that cannot be disposed of as unsorted municipal waste in the European Union. See the product documentation for specific battery information.
- Page 7 Network Cube Camera·Quick Start Guide Under Industry Canada regulations, this radio transmitter may only operate using an antenna of a type and maximum (or lesser) gain approved for the transmitter by Industry Canada. To reduce potential radio interference to other users, the antenna type and its gain should be so chosen that the equivalent isotropically radiated power (e.i.r.p.) is not more than that necessary for successful communication.
- Page 8 Network Cube Camera·Quick Start Guide Warnings Cautions Warnings Follow these Cautions Follow these safeguards to prevent precautions to prevent serious injury or death. potential injury or material damage. Warnings ● Proper configuration of all passwords and other security settings is the responsibility of the installer and/or end-user. ●...
- Page 9 Network Cube Camera·Quick Start Guide ● If smoke, odor or noise rise from the device, turn off the power at once and unplug the power cable, and then please contact the service center. Cautions ● CAUTION: Hot parts! Burned fingers when handling the parts. Wait one-half hour after switching off before handling parts.
- Page 10 Network Cube Camera·Quick Start Guide ● The sensor may be burned out by a laser beam, so when any laser equipment is in using, make sure that the surface of sensor will not be exposed to the laser beam. ● Do not place the camera in extremely hot, cold (the operating temperature shall be -10°C to +40°C (14°F to 104°F)), dusty or damp locations, and do not expose it to high electromagnetic radiation.
- Page 11 Network Cube Camera·Quick Start Guide ● Improper replacement of the battery with an incorrect type may defeat a safeguard (for example, in the case of some lithium battery types). ● Do not dispose of the battery into fire or a hot oven, or mechanically crush or cut the battery, which may result in an explosion.
-
Page 12: Table Of Contents
Network Cube Camera·Quick Start Guide Table of Contents 1 Appearance Description ............12 1.1 Type I, II ................12 1.2 Type III ................15 2 Notice ..................19 3 Installation ................21 3.1 Memory Card Installation ..........21 3.1.1 Type I, II ..............22 3.1.2 Type III .............. -
Page 13: Appearance Description
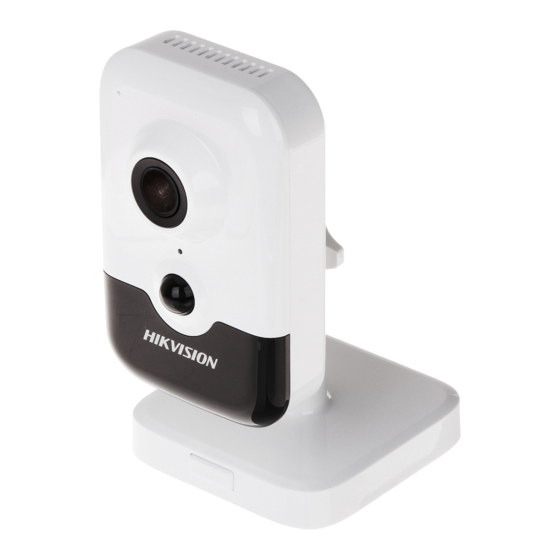
Network Cube Camera·Quick Start Guide 1 Appearance Description There are three types of appearances. Please refer to the figure below. And one appearance will be taken as an example in the chapter below. Type I, II Type I Appearance Type II Appearance... - Page 14 Network Cube Camera·Quick Start Guide Overview...
- Page 15 Network Cube Camera·Quick Start Guide Description Description Lens Microphone IR LED Alarm: Solid red when the camera is armed; Solid blue when the camera is unarmed Status: Solid blue when the camera is Indicator added to the Hik-Connect Link: Flashing amber when network is connected;...
-
Page 16: Type Iii
Network Cube Camera·Quick Start Guide Description O: Alarm Output Interface Power supply interface (12 VDC) Speaker Type III Type III Appearance... - Page 17 Network Cube Camera·Quick Start Guide Type III Overview Description Description Memory Card Slot RESET/WPS*...
- Page 18 Network Cube Camera·Quick Start Guide Description 1 RJ45 10M/100M self-adaptive Ethernet port & PoE Power Interface (12 VDC) Speaker Microphone Lens ● Solid red: the camera is starting ● Slow flashing red: the network connection failed ● Quick flashing red: the memory card error or other malfunctions Indicator ●...
- Page 19 Network Cube Camera·Quick Start Guide � Press RESET about 10 s when the camera is power on or rebooting to restore the default settings, including the user name, password, IP address, port No., etc. � Only certain models support WPS function. �...
-
Page 20: Notice
Network Cube Camera·Quick Start Guide 2 Notice � Do not install the camera � Do not touch the lens with in the extreme whether your finger. condition. � Do not install the camera � Do not subject the camera towards the strong light or to vibration, shock or in the unstable lightening heavy pressure. - Page 21 Network Cube Camera·Quick Start Guide � High humidity may � Under no circumstances damage the camera should you submerge the hardware; put it in dry and camera in any type of well-ventilated place. liquid. � Electromagnetic radiation may affect the video data transmission and the image quality.
-
Page 22: Installation
Network Cube Camera·Quick Start Guide 3 Installation Before you start: ● Make sure the device in the package is in good condition and all the assembly parts are included. ● The standard power supply is 12V DC, please make sure your power supply matches with your camera. -
Page 23: Type I, Ii
Network Cube Camera·Quick Start Guide 3.1.1 Type I, II Steps: 1. Insert the memory card into the card slot on the side of the camera. 2. (Optional) Push the inserted memory card to get it sprung out. Memory Card Install Memory Card 3.1.2 Type III Steps: 1. -
Page 24: Type Iii
Network Cube Camera·Quick Start Guide Slot Cover Install Memory Card Type I, II Camera Mounting 3.2.1 Stand Mounting Steps: 1. Take the bracket out from the package. Bracket... -
Page 25: Ceiling Mounting
Network Cube Camera·Quick Start Guide 2. Align the camera body to the bracket, and rotate the camera body to fix it with the bracket. Install the Camera Body 3. Assemble the camera as the steps above, and put the camera on the flat surface. - Page 26 Network Cube Camera·Quick Start Guide Drill Template Screw hole All:for Mounting Base Drill Template 2. Disassemble the 3-axis bracket. Hold the base with one hand, and rotate the pole anticlockwise to disassemble the pole from the base. Knob Pole Base Fixed Tray Disassemble the Bracket...
- Page 27 Network Cube Camera·Quick Start Guide 3. Install the fixed tray to the ceiling with the supplied screws. 4. Install the base to the fixed plate. Install the Fixed Plate and Mounting Base 5. Install the camera to the bracket. Install the Camera 6.
-
Page 28: Type Iii Camera Mounting
Network Cube Camera·Quick Start Guide Knob 360° 90° Figure 3-9 Adjust the Camera Type III Camera Mounting This type of camera supports ceiling mounting and wall mounting. The following describes the steps for the wall or ceiling mounting. Steps: 1. Install the adapter plate to the wall or ceiling with the supplied screws. - Page 29 Network Cube Camera·Quick Start Guide 2. Buckle the camera base into the adapter plate. Note: You are recommended to push into two buckles 1 and 2 first and then the third buckle 3. Then the camera can be fastened firmly on the base.
- Page 30 Network Cube Camera·Quick Start Guide Adjusting Knob 1 Rotation: 0° to 360° Adjusting Knob 2 Panning: 0° to 360° Tilting: 0° to 90° Figure 3-12 Adjust the Camera...
-
Page 31: Activate And Access Network Camera
Network Cube Camera·Quick Start Guide 4 Activate and Access Network Camera Scan the QR code to get Activate and Access Network Camera. Note that mobile data charges may apply if Wi-Fi is unavailable. - Page 32 UD07738B-F...
Need help?
Do you have a question about the DS-2CD2463G0-IW and is the answer not in the manual?
Questions and answers