
Related Manuals for Hoover HOC3E3858IN


Summary of Contents for Hoover HOC3E3858IN
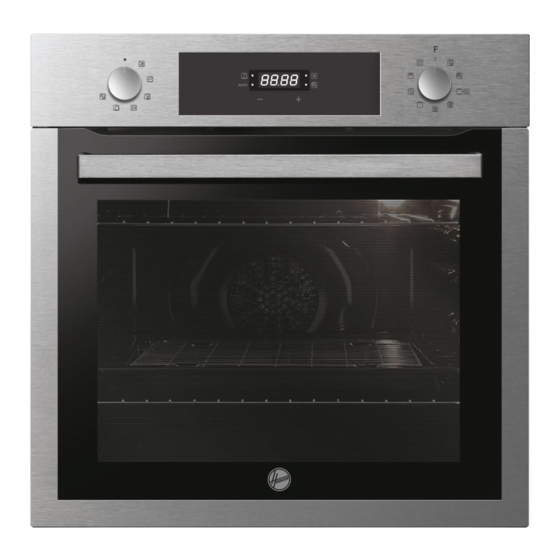
- Page 1 USER INSTRUCTIONS OVENS INSTRUCCIONES DE USO HORNOS EMPOTRABLES CANDY HOOVER GROUP S.R.L. • Via Comolli 16 • 20861 Brugherio (MB) - Italy...
- Page 2 Safety Indications • During cooking, moisture may condense inside the oven cavity or on the glass of the door. This is a normal condition. To reduce this effect, wait 10-15 minutes after turning on the power before putting food inside the oven. ln any case, the condensation disappears when the oven reaches the cooking temperature.
- Page 3 • The oven must be switched off before removing the removable parts. After cleaning, reassemble them according the instructions. • Only use the meat probe recommended for this oven. • Do not use a steam cleaner for cleaning operations. IF THE OVEN IS PROVIDED BY THE MANUFACTURER WITHOUT PLUG: •...
- Page 4 Connection to the power source can also be made by placing an omnipolar breaker, with contact separation compliant to the requirements for overvoltage category III, between the appliance and the power source that can bear the maximum connected load and that is in line with current legislation. The yellow-green earth cable should not be interrupted by the breaker.
- Page 5 Aluminium foil or any other protection, in direct contact with the hot enamel, risk melting and deteriorating the enamel of the insides. • WARNING: Never remove the oven door seal. • CAUTION: Do not refill the cavity bottom with water during cooking or when the oven is hot.
-
Page 6: Table Of Contents
Summary General Instructions 1.1 Safety indications 1.2 Electrical safety 1.3 Recommendations 1.4 Installation 1.5 Waste management 2.1 Overview Product Description 2.2 Accessories 2.3 First use Use of the Oven 3.1 Display description 3.2 Cooking modes Oven Cleaning and Maintenance 4.1 General notes on cleaning 4.2 Pyrolysis 4.3 Hydro Easy Clean Function 4.4 Maintenance... -
Page 7: General Instructions
1. General Instructions We thank you for choosing one of our products. For the best results with your oven, you should read this manual carefully and retain it for future reference. Before installing the oven, take note of the serial number so that you can give it to customer service staff if any repairs are required. -
Page 8: Recommendations
NOTE: as the oven could require maintenance work, it is advisable to keep another wall socket available so that the oven can be connected to this if it is removed from the space in which it is installed. The power cable must only be substituted by technical service staff or by technicians with equivalent qualifications. -
Page 9: Product Description
2. Product Description 2.1 Overview 1. Control panel 2. Shelf positions (lateral wire grid if included) 3. Metal grill 4. Drip pan 5. Fan (behind the steel plate) 6. Oven door 2.2 Accessories Grill pan set Metal grill Holds baking trays and plates. Drip pan The simple shelf can take moulds and dishes. -
Page 10: First Use
2.3 First Use PRELIMINARY CLEANING Clean the oven before using for the first time. Wipe over external surfaces with a damp soft cloth. Wash all accessories and wipe inside the oven with a solution of hot water and washing up liquid. Set the empty oven to the maximum temperature and leave on for about 1 hour, this will remove any lingering smells of newness. - Page 11 HOW TO FUNCTION HOW TO ACTIVATE WHAT IT DOES WHY IT IS NEEDED DEACTIVATE • Rotate the left function SILENCE • Rotate the function • To turn off the sound of the • Enables you to turn off selector to the position selector to the position minute minder MODE...
-
Page 12: Cooking Modes
3.2 Cooking Modes T °C T °C Function Function range default Dial LAMP: Turns on the oven light. DEFROST: When the dial is set to this position. The fan circulates air at room temperature around the frozen food so that it defrosts in a few minutes without the protein content of the food being changed or altered. -
Page 13: Oven Cleaning And Maintenance
4. Oven cleaning and maintenance 4.1 General notes on cleaning The lifecycle of the appliance can be extended through regular cleaning. Wait for the oven to cool before carrying out manual cleaning operations. Never use abrasive detergents, steel wool or sharp objects for cleaning, so as to not irreparably damage the enamelled parts. -
Page 14: Hydro Easy Clean Function
Using the pyrolitic cycle: 1- Rotate the function selector to the position " ". On the display, appears the indication " ECO " or " SUP ". The preset time is 90 min, this can be varied from 90 min (Eco mode) to 120 min (Sup mode) via the programmer (setting button "... -
Page 15: Maintenance
4.4 Maintenance INSTRUCTİON FOR REMOVAL AND CLEANİNG OF THE SİDE RACKS 1. Unscrew the bolt in an anti-clockwise direction. 2. Remove the side racks by pulling them towards you. 3. Clean the side racks in a dishwasher or with a wet sponge and then dry them immediately. 4. -
Page 16: Removal And Cleaning Of The Glass Door
REMOVAL AND CLEANING OF THE GLASS DOOR 1. Open the oven door. 2.3.4. Lock the hinges, remove the screws and remove the upper metal cover by pulling it upwards. 5.6. Remove the glass, carefully extracting it from the oven door (NB: in pyrolytic ovens, also remove the second and third glass (if present)). -
Page 17: Changing The Bulb
CHANGING THE BULB 1. Disconnect the oven from the mains supply. 2. Undo the glass cover, unscrew the bulb and replace it with a new bulb of the same type. 3. Once the defective bulb is replaced, replace the glass cover. 5. - Page 18 Indicaciones de seguridad • Durante la cocción, podría condensarse humedad dentro de la cavidad del horno o en el cristal de la puerta. Esto es normal. Para reducir este efecto, espere de 10 a 15 minutos antes de introducir alimentos en el horno una vez que lo encienda. De todos modos, la condensación desaparece cuando el horno alcanza la temperatura de cocción.
- Page 19 • Use solamente el sensor de temperatura recomendado para este horno. • No utilice limpiadores de vapor para la limpieza del aparato. Si el horno es suministrado por el fabricante sin enchufe: • EL ELECTRODOMÉSTICO NO DEBE CONECTARSE A LA FUENTE DE ALIMENTACIÓN MEDIANTE ENCHUFES O TOMAS DE CORRIENTE, SINO QUE DEBE CONECTARSE DIRECTAMENTE A LA RED ELÉCTRICA.
- Page 20 con una separación de contacto que cumpla con los requisitos de la categoría de sobretensión III, que pueda soportar la carga máxima conectada y que cumpla la legislación vigente. El cable de tierra amarillo-verde no debe ser interrumpido por el interruptor. Cuando se instala el electrodoméstico, la toma de corriente o el interruptor omnipolar utilizado para la conexión deben ser fácilmente accesibles.
- Page 21 Resumen Advertencias generales 1.1 Recomendaciones de seguridad 1.2 Seguridad eléctrica 1.3 Recomendaciones 1.4 Instalación 1.5 Gestión de residuos 2.1 Descripción general Descripción del producto 2.2 Accesorios 2.3 Primer uso 3.1 Descripción de la pantalla Utilización del horno 3.2 Modalidades de cocción Limpieza y mantenimiento 4.1 Notas genéricas de limpieza 4.2 Pirólisis...
- Page 22 1. Advertencias Generales Le agradecemos que haya elegido uno de nuestros productos. Para utilizar el horno de forma óptima es aconsejable leer con atención este manual y conservarlo para poder consultarlo en el futuro. Antes de instalar el horno, anote el número de serie para poder facilitárselo al personal del servicio de asistencia técnica en caso de solicitar su intervención.
- Page 23 NOTA: puesto que el horno podría requerir la intervención del servicio de asistencia, es aconsejable prever la disponibilidad de otro enchufe de pared al que conectar el horno después de extraerlo del espacio donde se ha instalado. El cable de alimentación debe sustituirse únicamente por personal de asistencia técnica o por técnicos con una cualificación análoga.
- Page 24 2. Descripción del producto 2.1 Descripción general 1. Panel de control 2. Posiciones de las bandejas (y del soporte elevado si corresponde) 3. Rejilla metálica 4. Bandeja 5. Ventilador (detrás de la placa de acero) 6. Puerta del horno 2.2 Accesorios Juego de sartén para parrilla Rejilla metálica Sostiene fuentes y platos.
- Page 25 2.3 Primer uso LIMPIEZA PRELIMINAR Limpie el horno antes de utilizarlo por primera vez. Limpie las superficies externas con un paño suave levemente humedecido. Lave todos los accesorios y limpie el interior del horno con detergente lavavajillas y agua caliente. Compruebe que el horno esté...
- Page 26 FUNCIÓN CÓMO SE ACTIVA QuÉ HACE PARA QUÉ SIRVE CÓMO SE DESACTIVA •Gire perilla MODALIDAD •Gire la perilla hasta la •Esta función se utiliza para •Permite apagar el sonido programador hasta posición Off. apagar el sonido del SILENCIOSA del programador. “Modalidad Silenciosa”.
- Page 27 3.2 Modalidades de cocción T°C Rango Mando FUNCIÓN ( dependiendo del modelo establecida de T°C selector LAMPARA: Conecta la luz interior DESCONGELACIÓN: Funcionamiento de la turbina de cocción que hace circular el aire dentro del espacio del horno. Ideal para realizar una 40 ÷...
- Page 28 4. Limpieza y mantenimiento del horno 4.1 Notas genéricas de limpieza La vida útil del aparato se prolonga si se limpia a intervalos regulares. Espere a que el horno se enfríe antes de llevar a cabo las operaciones de limpieza manuales. No utilice nunca detergentes abrasivos, estropajos metálicos ni objetos puntiagudos para la limpieza con el fin de no dañar de forma irreparable las piezas esmaltadas.
- Page 29 Antes de llevar a cabo un ciclo pirolítico: • Extraiga todos los accesorios del horno, ya que no son capaces de resistir las elevadas temperaturas utilizadas durante el ciclo de limpieza pirolítico; en especial, extraiga las rejillas y el soporte elevado (véase el capítulo EXTRACCIÓN DE REJILLAS Y SOPORTE ELEVADO). En hornos dotados de la sonda de carne es necesario, antes de efectuar el ciclo de limpieza, cerrar el horno con la tuerca suministrada de serie.
- Page 30 4.3 Función Hydro Easy Clean El procedimiento de limpieza “HYDRO EASY CLEAN” utiliza vapor para facilitar la eliminación de grasa y restos de alimentos del horno. 1- Introduzca 300 ml de agua destilada o potable en el contenedor de HYDRO EASY CLEAN del fondo del horno.
- Page 31 EXTRACCIÓN Y LIMPIEZA DE LA PUERTA DE VIDRIO 1. Abra la puerta del horno. 2.3.4. Bloquee las bisagras, desenrosque los tornillos y extraiga la cubierta metálica superior tirando hacia arriba. 5.6. Extraiga el vidrio con mucho cuidado de la contrapuerta del horno (N. B.: si se trata de un horno pirolítico, extraiga también el segundo y el tercer vidrio si los hubiera).
- Page 32 SUSTITUCIÓN DE LA BOMBILLA 1. Desenchufe el horno de la red eléctrica. 2. Suelte la cubierta de vidrio, desenrosque la bombilla y sustitúyala por una nueva del mismo modelo. 3. Una vez sustituida la bombilla defectuosa, vuelva a atornillar la cubierta de vidrio. 5.
- Page 33 INSTALLATION INSTALACIÓN 560 mm Opening / Apertura 460 mm x 15 mm 580 mm 595 mm 546 mm 595 mm 22 mm If the furniture is coverage with a bottom at the back part, provide an opening for the power supply cable. Si el mueble tiene panel posterior, haga un orificio para el cable de alimentación.
Need help?
Do you have a question about the HOC3E3858IN and is the answer not in the manual?
Questions and answers