MEDIATEK LinkIt Smart 7688 Get Started Manual
Hide thumbs
Also See for LinkIt Smart 7688:
- Developer's manual (97 pages) ,
- Get started manual (18 pages) ,
- User manual (38 pages)
Table of Contents
Advertisement
Quick Links
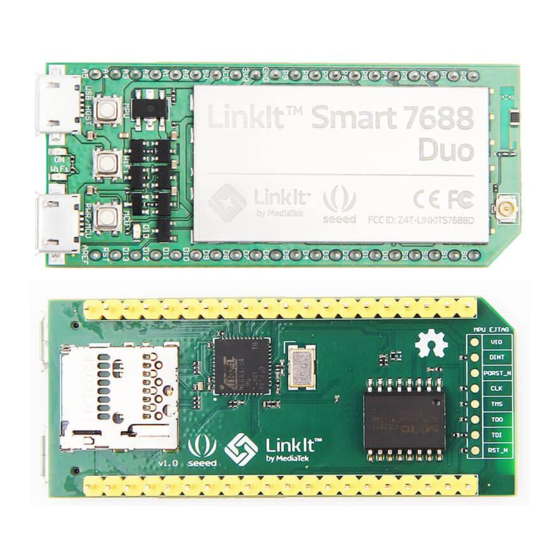
MediaTek LinkIt™ Smart 7688 Get Started
Guide
Version:
Release date:
Specifications are subject to change without notice.
This document contains information that is proprietary to MediaTek Inc.
Unauthorized reproduction of this information in whole or in part is strictly prohibited.
0.92
November 2015
© 2015, 2016 MediaTek Inc.
Advertisement
Table of Contents

Related Manuals for MEDIATEK LinkIt Smart 7688


Summary of Contents for MEDIATEK LinkIt Smart 7688
- Page 1 0.92 Release date: November 2015 Specifications are subject to change without notice. © 2015, 2016 MediaTek Inc. This document contains information that is proprietary to MediaTek Inc. Unauthorized reproduction of this information in whole or in part is strictly prohibited.
- Page 2 0.92 Nov 2015 Closed beta release © 2015, 2016 MediaTek Inc. Page 2 of 19 This document contains information that is proprietary to MediaTek Inc. Unauthorized reproduction or disclosure of this information in whole or in part is strictly prohibited.
-
Page 3: Table Of Contents
Get Started With the LinkIt™ Smart 7688 Development Platform ..........5 1.1. Get the Hardware and Software ........................5 1.2. Sign into the LinkIt Smart 7688 development boards Web UI ............6 1.3. Update Your Board’s Firmware ........................10 1.4. - Page 4 Figure 13 Changing to Station mode in Web UI ......................17 Figure 14 LinkIt Smart 7688 in Station Mode ....................... 18 Figure 15 LinkIt Smart 7688 in Station mode connected to a Wi-Fi AP ............18 © 2015, 2016 MediaTek Inc.
-
Page 5: Get Started With The Linkit™ Smart 7688 Development Platform
Get Started With the LinkIt™ Smart 7688 Development Platform Welcome to the LinkIt Smart 7688 development platform quick start guide, this guide is based on using Windows with examples created in Python, however the same steps apply to Mac and Linux and for node.js —... -
Page 6: Sign Into The Linkit Smart 7688 Development Boards Web Ui
Step 1: Power up your board with a micro-USB cable Plug in one end of a Micro USB cable to the power connector of the LinkIt Smart 7688 and the other end of the cable to a USB power source, such as your computer as shown in Figure 1, or a USB power adaptor. - Page 7 MediaTek LinkIt™ Smart 7688 Get Started Guide Figure 1 Providing power to the LinkIt Smart 7688 board After boot loader initialization, the boot up process begins, which takes about 30 seconds. Next, the Wi-Fi LED turns off; this means the system is ready to accept a Wi-Fi connection. Figure 2 shows how the Wi-Fi LED status matches the system state.
- Page 8 The red LED will blink three times per second after you’ve connected to the LinkIt_Smart_7688 AP. If you have multiple LinkIt Smart 7688 boards, power only one of them to prevent a name collision. An alternative is to insert a micro SD card with a file that will change the name of the access point after the board has booted up.
- Page 9 MediaTek LinkIt™ Smart 7688 Get Started Guide Figure 4 LinkIt Smart 7688 in AP mode You’ll learn how to connect LinkIt Smart 7688 to the Internet in later steps. But first, you need to configure the board. Step 3: Access the LinkIt Smart 7688 Web UI configuration tools You now setup the LinkIt Smart 7688 Web UI, a tool for configuring the settings of you board.
-
Page 10: Update Your Board's Firmware
Keep in mind if you use either of these methods, it will restore to board’s default settings and all user data will be removed from the device. For more information on how to upgrade firmware using a USB drive or use the buttons please refer to LinkIt Smart 7688 Developer’s Guide. 1.3. - Page 11 Step-by-step Step 1: Install LinkIt Smart 7688 SDT The latest LinkIt Smart 7688 SDT from the MediaTek Labs website includes the firmware, bootloader, and toolchain you need to develop applications for LinkIt Smart 7688. Download and unzip the SDT into a permanent location on your computer, such as D:\{SDT package} 2) Note the location of the firmware file lks7688.img, for example:...
-
Page 12: Access The Linkit Smart 7688 System Console Through Ssh
The new firmware version details will be displayed under Software Information, as shown Figure 8. Figure 8 Firmware version You now have the latest firmware on your LinkIt Smart 7688 development board. Next: Access the LinkIt Smart 7688 system console using SSH. 1.4. - Page 13 MediaTek LinkIt™ Smart 7688 Get Started Guide LinkIt Smart 7688 system console enables you to enter text commands and get system administration messages. Quick steps: • Open your terminal emulator and sign in Next: Run the Blink Example. Step 1: Open a Terminal Emulator and Sign in.
- Page 14 Web UI. © 2015, 2016 MediaTek Inc. Page 14 of 19 This document contains information that is proprietary to MediaTek Inc. Unauthorized reproduction or disclosure of this information in whole or in part is strictly prohibited.
-
Page 15: Run The Blink Example
You now have access to system console using SSH. 1.5. Run the Blink Example You are now ready to run your first example on the LinkIt Smart 7688 development board. This example switches the board’s Wi-Fi LED on and off every half second. Quick steps: •... -
Page 16: Connecting To The Internet
Next: What’s Next? Step-by-step Step 1: Connecting LinkIt Smart 7688 to a Wi-Fi Access Point for Internet Access Open a browser with URL mylinkit.local,and sign-in to the Web UI with the password you have set. Click Network on upper right as shown Figure 12. - Page 17 Wi-Fi Access Point you connected to, as shown Figure 14. © 2015, 2016 MediaTek Inc. Page 17 of 19 This document contains information that is proprietary to MediaTek Inc. Unauthorized reproduction or disclosure of this information in whole or in part is strictly prohibited.
- Page 18 AP. The Wi-Fi LED will blink once every second indicating Station mode. If the ping utility reports errors such as unreachable destination, check the setting of your Wireless AP. Figure 15 LinkIt Smart 7688 in Station mode connected to a Wi-Fi AP © 2015, 2016 MediaTek Inc. Page 18 of 19 This document contains information that is proprietary to MediaTek Inc.
-
Page 19: What's Next
LinkIt Smart 7688 & MediaTek Cloud Sandbox Python LinkIt Smart 7688 & MediaTek Cloud Sandbox Node.js 2.3. Seeed Studio Starter Tutorial Create projects using LinkIt Smart 7688 applications for your LinkIt Smart 7688 HDK and see other Get Started Guide in Node.js 2.4. Hackster.io See what other developers have created with LinkIt Smart 7688 and get inspired ©...
Need help?
Do you have a question about the LinkIt Smart 7688 and is the answer not in the manual?
Questions and answers