Advertisement
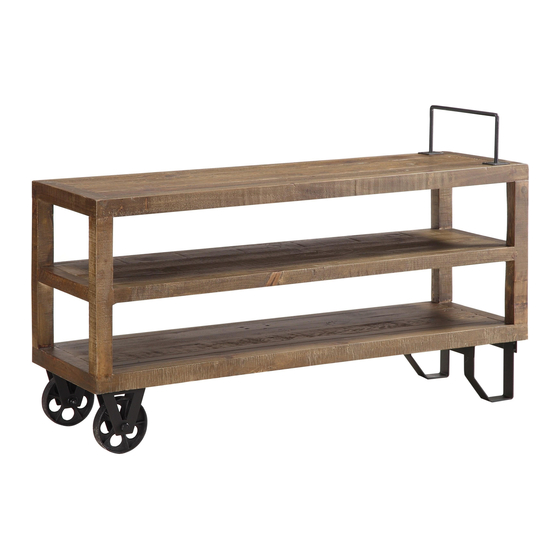
COALBURN MEDIA CONSOLE
BOX#1
A. BODY 1PC
COALBURN MEDIA CONSOLE ASSEMBLED
Following the illustration, attach the Stand (B)
to the bottom of the Body (A) with four Bolts (H1).
Tighten completely with provided Allen Key (H6).
NOTE! Stand can be installed on either
side of the Body.
Attach one Wheel Bracket (C) to the Body with two Bolts.
Tighten completely. Repeat for second Wheel Bracket.
ASSEMBLY INSTRUCTIONS
PARTS AND FITTING PACKAGING DETAIL
B. STAND 1PC C. WHEEL 2PCS
D. WHEELS 2PCS
BRACKET
HARDWARE * PACKED IN BOX #1
H1
H3
H5
H6
H1
C
E. HANDLE 1PC
H2
H4
H6
B
H6
H1
A
C
A
PAGE 1 OF 2
Advertisement
Table of Contents

Related Manuals for Modus COALBURN 8QQ526


Summary of Contents for Modus COALBURN 8QQ526
- Page 1 COALBURN MEDIA CONSOLE ASSEMBLY INSTRUCTIONS PARTS AND FITTING PACKAGING DETAIL BOX#1 A. BODY 1PC B. STAND 1PC C. WHEEL 2PCS D. WHEELS 2PCS E. HANDLE 1PC BRACKET COALBURN MEDIA CONSOLE ASSEMBLED HARDWARE * PACKED IN BOX #1 Following the illustration, attach the Stand (B) to the bottom of the Body (A) with four Bolts (H1).
- Page 2 COALBURN MEDIA CONSOLE ASSEMBLY INSTRUCTIONS Attach Wheels (D) to Wheel Brackets (C) using Wheel Axels (H2), Washers (H3) and Nuts (H4).Tighten each Nut with Hex Wrench (H5). Flip assembled Body right-side up. Attach Handle (E) to the top of the Body with four Bolts. Tighten completely. NOTE! The Handle should be installed on the same side as the stand.
Need help?
Do you have a question about the COALBURN 8QQ526 and is the answer not in the manual?
Questions and answers