Table of Contents
Advertisement
Advertisement
Table of Contents

Subscribe to Our Youtube Channel
Related Manuals for DS Maref DVT-2600


Summary of Contents for DS Maref DVT-2600
-
Page 2: Table Of Contents
TABLE OF CONTENTS * Refer to the DVT-2600 User's Manual please. 1. Purpose 2. Scope 3. Directive 4. Term Definitions 5. Related Documents 6. Technical specification 7. Exploded View & Parts Listing 8. Battery replacement method 9. Block diagram 10. Attaching the tubing and user guide p.10... -
Page 3: Purpose
- The documents is valid as per effective date, previous revision become invalid by that date. 3-2. Requirements Relating to Persons, Performing this Service Manual - The service on DVT-2600 must be performed by qualified staff. The qualification can be achieved by professional, experience and acquaintance with relevant technologies, design standards and local regulations. -
Page 4: Technical Specification
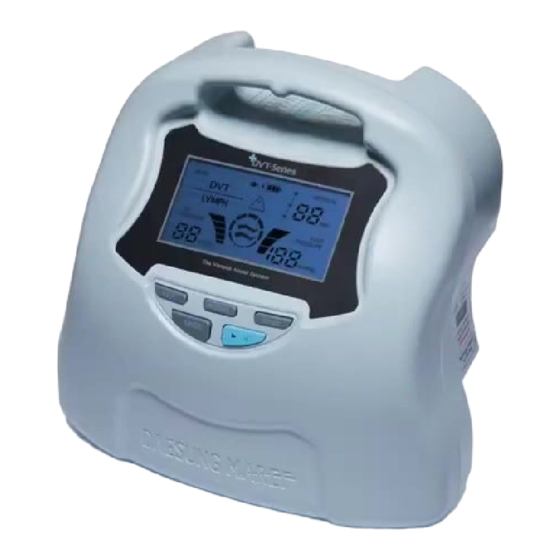
6. Technical specification 6-1. Device specifications Items Specifications Model Name DVT-2600 Rated Voltage AC100-240V, 50/60Hz Power consumption 90-110VA Rated Fuse T3.15A/250V Leg : 20 - 60mmHg ±20mmHg (Unit : 10mmHg) Setting Pressure Foot : 120 - 140mmHg ±20mmHg (Unit : 10mmHg) -
Page 5: Exploded View & Parts Listing
7. Exploded View & Parts Listing 7-1. Sub ASM FRONT Parts List Description 1-1. FRONT_COVER 1-2. KNOB_BUTTON 1-3. SUB_KEY_PCB Part Number [60120024] [60123032] [5035AP02] Description 1-4. MAIN_BOARD_LCD 1-5. M3XL6 TT 1-6. WINDOW_SHEET Part Number [50352P02] [40021013] [7060011] 7-2. Sub ASM FRAME Parts List Description 2-1. - Page 6 [22903003] Description 3-5. M3XL8 TP 3-6. HOLDER_CODE 3-7. AC_CODE 3-8. M3XL6 TT Part Number [40011029] [60131017] [23061003] [40021013] 7-4. DVT-2600 assy Parts List Description 4-1. SMPS 4-2. M3XL6 S 4-3. STICKER 4-4. LABEL Part Number [50353P02] [40051001] [70600113] [72DVT320] Description 4-5.
-
Page 7: Battery Replacement Method
8. Battery replacement method 1) Turn off the product and place it on a flat, stable surface or in a safe place. 1) Turn off the product and place it on a flat, stable surface or in a safe place. 2) Remove the screw from the battery cover on the back of the device, open the cover and remove the used battery. -
Page 8: Block Diagram
9. Block diagram 9-1. Whole System Block Diagram 9-2. PCB diagrams 9-2-1. Main system Layout 9-2-2. Main board layout 1) Main B’D top layout... - Page 9 2) Main B’D bottom layout 3) MAIN B’D Removal/Installation * CAUTION : Use a grounded strap when handling any electronic components. - The user can’t fix the MAIN BOARD. There will be malfunction or damage if the user fixes it arbitrarily.
-
Page 10: Attaching The Tubing And User Guide
2) POWER B’D Removal/Installation * CAUTION : Use a grounded strap when handling any electronic components. - The user can’t fix the POWER BOARD. There will be malfunction or damage if the user fixes it arbitrarily. - Please replace the power board in case of BOARD fails. - Please refer to 3. -
Page 11: Controller Maintenance And Test Methods
11. Controller Maintenance and test methods 11-1. Test mode Set-up When you press 'LEG' and 'MODE' buttons for 2 seconds at the same time, test method mode including 10 test programs starts. Whenever you press the 'mode' button, the test number is changed from 1 to 10 and when you press the 'START', you can change the selected value or do the test. - Page 12 MODE 4 - Check the current voltage of battery · maximum voltage : 12.6V±0.2V - The battery’s voltage marking is below , connect AC power and recharge the battery completely.. MODE 5 - Pressure calibration can be operated. - Start pumping with Manual Pump manually and check the pressure value from DVT machine and pressure gauge.
- Page 13 while running. · Regarding the standard of the discharge voltage, refer to the below table. minimum average maximum 18mmHg 23mmHg 28mmHg MODE 8 - Check the performance of the air pump - The left number indicates the steps of pump operation - The right number indicates the discharge voltage of pump while running.
-
Page 14: Maintenance Check List
11-4. Device error test code Error test method Sleeve connection - Press start key for 40 seconds to check the condition of wearing sleeves while the controller is not connecting to error sleeves. The error will occur if the controller doesn’t recognize the sleeves after 40 seconds. - Page 15 [FOOT 120mmHg] 2 Chamber - 1ch (102 ~ 138mmHg) Check the program TEST MODE 1 Visual Inspection version Check voltage for Visual Inspection TEST MODE 3 charging battery (14.5V ~ 15.5V) Check battery Visual Inspection TEST MODE 4 voltage (9V ~ 12.6V±0.2) LCD Test TEST MODE 6 Visual Inspection...
- Page 16 RND-R-MSM-102-03 (Rev.06)
Need help?
Do you have a question about the DVT-2600 and is the answer not in the manual?
Questions and answers