Clesana C1 Installation Instructions Manual
Hide thumbs
Also See for C1:
- Operating instructions manual (17 pages) ,
- User manual ,
- Installation manual (32 pages)

Related Manuals for Clesana C1


Summary of Contents for Clesana C1
- Page 1 All documents and information on proper installation of the Clesana C1 are available in Clesana manufacturer/dealer area at clesana.com/retailersection. Installation instructions Clesana C1 Version 2 22.08.22...
- Page 2 Clesana AG Werdenstrasse 72 CH-9472 Grabs Email: info@clesana.com...
-
Page 3: Table Of Contents
................3. Delivery scope ....................................4. Tools and consumables ................................. 5. Overview ......................................5.1. Measurements Clesana C1 with L-Adapter .................. 5.2. Measurements Clesana C1 with round base ................6. Preparation ....................................6.1. First steps ..................................6.2. Choose the installation location ......................6.3. Dismantle the existing toilet ........................ -
Page 4: Introduction
2. Safety 1.1. About this manual This chapter contains important information on safety of the device. Read the safety instructions thoroughly before installation and start-up. These installation instructions are intended for qualified persons authorised for the installation of the Clesana C1. 2.1. Proper use Read the documents carefully before the installation and start-up. The waterless toilet Clesana C1 is used for sanitary bagging of excrements and personal Observe all safety and warning instructions. hygiene articles. The Clesana C1 is exclusively intended for use in mobile recreational This manual is continuously improved, but it may happen that document enclosed with vehicles in non-public areas. A different use is not allowed. Clesana C1 does not correspond to the current version. We recommend that you check on our website https://clesana.com/retailersection whether a newer version of this 2.2. -
Page 5: Component Damage Due To Short Circuit
– from 8 m: 16 mm² No. Part Check the clamping and screw connections for correct installation before switching on the power supply. Base body Clesana C1 Do not clamp or excessively bend the cables. L-Adapter or round base Control panel with cable 2.4.3 Component damage due to short circuit Crimp contact, Anderson SB50 50 Amp Contact 5952 Reversing the polarity of the power cable can damage the electrical components. -
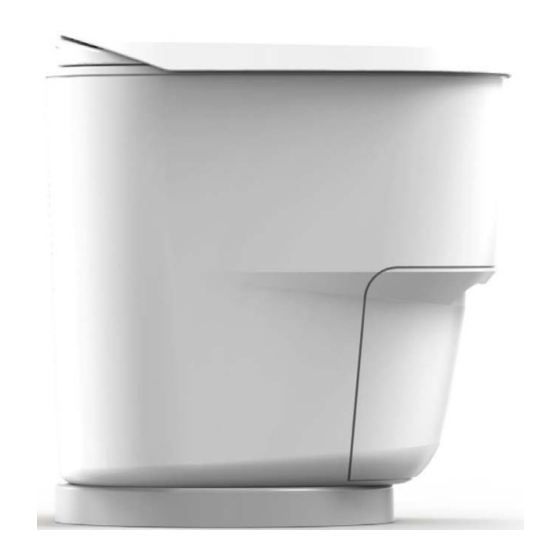
Page 6: Overview
5. Overview 5.1. Measurements Clesana C1 with L-Adapter Main dimensions Rotating the toilet 341 mm Max. 90° Max. 90° 461 mm 509 mm ≥ 225 mm 363 mm Bracket: Floor - wall 48 mm 90° ±0.5 397 mm 10/32 11/32... -
Page 7: Measurements Clesana C1 With Round Base
5.2. Measurements Clesana C1 with round base Main dimensions Rotating the toilet 461 mm Max. 90° Max. 90° 509 mm ≥ 225 mm 363 mm 42 mm 317 mm 378 mm 12/32 13/32... -
Page 8: Preparation
6.2. Choose the installation location 2. Shut down the water line as close as possible at the pipe connection. 3. Ensure that the shut-down water line does not allow any standing water in the line. The Clesana C1 can be installed both with the round base and with the L-Adapter. The L-Adapter is used to cover existing openings in the wall, e.g. due to a previously installed 4. Check the shut-down water lines for leaks. -
Page 9: Electrical Installation
5. If the toilet is installed in a shower tray, remove the aperture (2) of the 7.1. Overview L-Adapter. 30 A Fig. 2: Connection diagram Clesana C1 No. Description Function Clesana C1 User Electro-block (EBL) • Central unit for power distribution in the electri- cal system • Controls the relay. Fuse 30A Interrupts the circuit in case of overload or short circuit... -
Page 10: Perform The Electrical Installation
≥ 10 mm2 cable ( ≥ 10 mm²) and the control cable Clesana C1 Battery (≥ 1.5 mm²) as shown in the image. (here Crouzet GND Series 84137870N) Note: The control cable requires a 12-V continuous voltage e.g. directly from the electro-block (EB). – ≥ 1.5 mm2 7. Crimp the ends of the power cable to the Clesana C1 with crimp contacts Anderson SB50 and route in the con- nector housing Anderson SB50. 18/32 19/32... -
Page 11: Install The L-Adapter
8. Install the L-Adapter 8.2. Screw the L-Adapter to the wall 8.1. Screw the L-Adapter on the floor 145 mm 145 mm ø4.4 Fig. 4: Bores for screwing on the wall ø8.1 If C263-S or C223-S Thetford toilettes have been previously installed, you can use the same bores for mounting on the wall. Fig. 3: Installation bores for screwing on the floor No. Tools and consumables No. -
Page 12: Finishing Works
8.3. Finishing works 9. Install the round base 1. Pull the power cable and the control 9.1. Prepare the round base cable for the control panel into the L-Adapter from behind. 1. Break out the covering at the specified breaking point. 2. Place the base body on the L-Adapter. 2. -
Page 13: Install The Control Panel
10. Install the control panel 3. Place the round base on the L-Adapter. 10.1. Flush mounting 1.8 mm 128 mm 114 mm Fig. 6: Control panel measurements If a Thetford toilette has been previously installed, you can use the same opening in the wall to install the control panel. 1. Choose a suitable installation location for the control panel, ensure the following points: – The display is clearly legible. –... -
Page 14: Wall Mounting
5. Connection the cable to the control panel. 6. Push the control panel on the housing until it fully snaps into place and is flush. 128 mm Hole in the wall min. ø 16 mm Fig. 8: Measurements of the wall-mounted housing We do not carry out the wall-mounted housing as component. If needed, you can make the housing yourself. The design data (CAD and design drawings) are available in the dealer area https://clesana.com/retailersection. 26/32 27/32... -
Page 15: Connection And Functional Test
No. Tools and consumables Width Screwdriver Torx TX20 L-Adapter/round base length 516/461 Seat height 1. Connect the control cable of the control Weight of C1 with L-Adapter/with round 13.8/13.1 panel with the control cable from the base base body. Supply voltage 11.8–15 2. - Page 16 Declaration of conformity Manufacturer: Clesana AG Werdenstrasse 72 9472 Grabs Switzerland hereby declares that the following product Waterless toilet Clesana C1 Series based on the following applied standard: • E N 50498-2010 EMC Aftermarket Electronic Equipments in Vehicles meets the basic requirements of the following directives: • 2011/65/EU RoHS 2 • Motor Vehicle EMC Directive 2004/104/EC The product in question does not have any disruptive functions in accordance with Vehicle EMC Directive 2004/104/EG.
- Page 17 clesana.com...
Need help?
Do you have a question about the C1 and is the answer not in the manual?
Questions and answers