Advertisement
Quick Links
Find Quality Products Online at:
IMPORTANT:
Read Before Using
Operating/Safety Instructions
Consignes de sécurité/d'utilisation
Instrucciones de funcionamiento
y seguridad
GLM 50 C
Call Toll Free for
Pour obtenir des informations
Consumer
et les adresses de nos centres
Information and
de service après-vente, appelez
Service Locations
For English Version
See page 8
GlobalTestSupply
www.
IMPORTANT :
Lire avant usage
ce numéro gratuit
IMPORTANTE:
Leer antes de usar
Llame gratis para obtener
información para el con-
sumidor y ubicaciones de
servicio
.com
sales@GlobalTestSupply.com
Advertisement

Related Manuals for Bosch 3601K72C10


Summary of Contents for Bosch 3601K72C10
- Page 1 IMPORTANT: IMPORTANT : IMPORTANTE: Read Before Using Lire avant usage Leer antes de usar Operating/Safety Instructions Consignes de sécurité/d’utilisation Instrucciones de funcionamiento y seguridad GLM 50 C Call Toll Free for Pour obtenir des informations Llame gratis para obtener Consumer et les adresses de nos centres información para el con- Information and...
- Page 2 ft/m 0"⅓2 4'02" 27⁄32 0.0° W 8'05" 12'08" 17⁄32 456.45ft GlobalTestSupply www. .com Find Quality Products Online at: sales@GlobalTestSupply.com...
- Page 3 GlobalTestSupply www. .com Find Quality Products Online at: sales@GlobalTestSupply.com...
- Page 4 7.620 0.0° 8.890 10.160 m 11.430 m 7.620 0.0° 8.890 10.160 m 11.430 m GlobalTestSupply www. .com Find Quality Products Online at: sales@GlobalTestSupply.com...
- Page 5 GlobalTestSupply www. .com Find Quality Products Online at: sales@GlobalTestSupply.com...
- Page 6 2.00 ft 4'00" Func 2.000 ft GlobalTestSupply www. .com Find Quality Products Online at: sales@GlobalTestSupply.com...
- Page 7 GlobalTestSupply www. .com Find Quality Products Online at: sales@GlobalTestSupply.com...
-
Page 8: General Safety Rules
General Safety Rules Read all instructions. Failure to follow all instructions listed below may result in hazardous radiation exposure, electric shock, fire and/or serious injury. The term “laser measure” in the warnings listed below refers to your battery-operated (cordless) laser mea- suring tool. - Page 9 Never aim the beam at a workpiece with a reflective surface. Bright shiny reflective sheet steel or similar reflective surfaces are not recommended for laser use. Reflective surfaces could direct the beam back towards the operator. Use of controls or adjustments or performance of procedures other than those specified herein may result in hazardous radiation exposure.
- Page 10 Electrical safety Batteries can explode or leak, cause injury or fire. To reduce this risk, always follow all instructions and warnings on the battery label and package. DO NOT short any battery terminals. DO NOT charge alkaline batteries. DO NOT mix old and new batteries. Replace all of them at the same time with new batteries of the same brand and type.
-
Page 11: Fcc Caution
(e.g., cardiac pacemakers, hearing aids) may occur. The Bluetooth® word mark and logos are registered trademarks owned by Bluetooth SIG, Inc. and any use of such marks by Robert Bosch Tool Corporation is under license. FCC Caution The manufacturer is not responsible for radio inter- ference caused by unauthorized modifications to this... - Page 12 is no guarantee that interference will not occur in a particular installation. If this equipment does cause harmful interference to radio or television reception, which can be determined by turning the equipment off and on, the user is encouraged to try to correct the interference by one or more of the following measures: and receiver.
- Page 13 This device and its antenna must not be co-located or operating in conjunction with any other antenna or transmitter. This device has been shown to be capable of compli- ance for localized specific absorption rate (SAR) for uncontrolled environment / general public exposure limits specific in ANSI/IEEE C95.1-1992 and had been tested in accordance with the measurement proce- dures specified in IEEE 1528-2003.”...
-
Page 14: Technical Data
Technical Data Laser Measure GLM 50 C Article Number 3601K72C10 Measuring range (typical): 6 in – 165 ft (0.15 – 50 m) Measuring accuracy (typical) ±1/16 in (±1.5 mm) Lowest indication unit ±1/32 in (0.5 mm) Indirect Distance Measurement and Vial Measuring range 0°–360°... - Page 15 Automatic switch-off after approx. – Laser 20 s – Laser measure (without mea- 5 min surement) Degree of protection IP 54 (dust and splash proof) Batteries 2 x 1.5 V AAA (LR03) Data transmission Bluetooth® Bluetooth® 4.0 (Classic and Low Energy) The working range increases depending on how well the laser light is reflected from the surface of the target (scattered, not...
-
Page 16: Intended Use
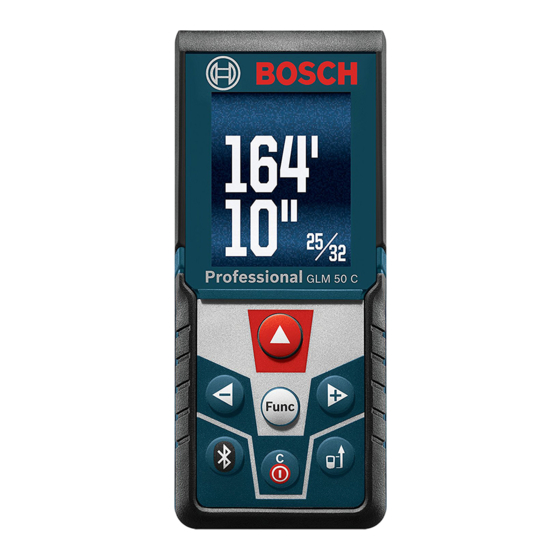
Battery compartment not included. For Bluetooth ® low energy devices, establishing a connection may not be possible, depending on model and operating system. Bluetooth ® devices must support the SPP profile. The laser measure can be clearly identified with the serial number 11 on the type plate. - Page 17 Features The numbering of the product features shown refers to the illustration of the laser measure on the graphic page. 1 Display 12 Laser warning label 2 Measure button [ ] 13 1/4” tripod thread 3 Plus button [ ] 14 Reception lens 4 Measuring reference 15 Laser beam outlet...
- Page 18 Display elements a Status Bluetooth® Indirect height measurement Bluetooth® activated, no Double indirect connection height measure- established ment Bluetooth® acti- Indirect length vated, connec- measurement tion established Wall-surface b Measuring reference measurement point Stake out function c Battery indicator Memory functions d Measured-value lines g Indicator for angle of e Result line...
- Page 19 Assembly Inserting/Replacing the Batteries AAA Alkaline batteries are recommended for the laser measure. To open the battery lid 9, press the latch 10 and re- move the battery lid. Insert the batteries. When insert- ing, pay attention to the correct polarity according to the representation on the inside of the battery com- partment.
-
Page 20: Operation
Operation Do not leave the switched-on laser measure unattended and switch the laser measure off after use. Other persons could be blinded by the laser beam. Protect the laser measure against moisture and di- rect sun light. Do not subject the laser measure to extreme temper- atures or variations in temperature. - Page 21 ing the function button 7 [Func] and using the plus button 3 [ ] and minus button 8 [ ] to scroll through the measuring functions. (see Measuring Functions, page 22) After switching on, the rear edge of the laser measure is preset as the reference point for the measurement.
- Page 22 Menu “Basic Settings” To access the “Basic Settings” Menu, hold down the function button 7 [Func]. Use the plus button 3 [ ] or minus button 8 [ ] to cycle through the settings. Turn sound or Off Calibration Turn Spirit level or Off...
- Page 23 For real time measurements, press the function button 7 [Func] and use the plus button 3 [ ] or minus button 8 [ ] to cycle through the measurement functions until the highlighted square appears over the indicator for real time measurement and the words “Real Time”...
- Page 24 Length Measurement For length measurement, press the function button 7 [Func] and use the plus button 3 [ ] or minus but- ton 8 [ ] to cycle through the measurement functions until the highlighted square appears over the indicator for length measurement and the word “Length”...
- Page 25 tor for area measurement and the word “Area” ap- pears in the status bar. Select area measurement by pressing the measure button 2 [ ]. Activate the laser by pressing the measure button 2 [ ]. The laser will be switched on. Aim and press the measure button 2 [ ] again to take the measurement for length which will appear on the...
- Page 26 Indirect Measurement For indirect measurement, three mea- Indirect Height suring modes are available. Each mea- suring mode can be used for determin- ing distances. The indirect measurement is used to measure distances that cannot be measured directly because an obstacle is obstructing the laser beam or no tar- get surface is available as a reflector.
- Page 27 C at which you took the measurement will display in the measured-value lines d. b. Double indirect height measurement (see figure C) The laser measure can measure a vertical distance on a surface, by taking two indirect measurements to that surface.
- Page 28 rect length and the words “Indirect Length” ap- pear in the status bar. Press the measure button 2 [ ] to select double indirect length measurement. Press the measure button 2 [ ] to ac- tivate the laser. Tilt the laser measure while keeping the base of the laser 16'11"...
- Page 29 Press the measure button 2 [ ] to measure the length of the first wall. The surface area is automatically calculated and displayed in the result line e. The length measurement value is displayed in the middle and bot- tom measured-value lines d. The laser remains active. Press the measure button 2 [ ] to measure the length of the second wall.
- Page 30 Press the measure button 2 [ ] to go to the stake out measurement display. Press the measure button 2 [ ] again to start the stake out measurement function. Move the laser measure slowly from the starting point. The laser measure continuously mea- sures the distance to the starting point.
- Page 31 Inclination measurement is used to measure a slope or incline. The left side of the laser measure serves as the reference level for inclination mea- surement. 32.0° Memory Function The last 30 measurements are automatically stored (can be any type of measurement: length, area, vol- ume, etc.).
- Page 32 Adding/Subtracting Values Adding Values Measured or calculated values can be added or sub- tracted. The following example shows how to add areas: Measure an area as described in the “Area Measure- ment” section (page 24). Press the plus button 3 [ ]. The calculated area and the symbol “+”...
- Page 33 To activate Bluetooth®, press the Bluetooth® button 6. Press the plus button 3 [ ] to activate as indicated by Bluetooth® symbol appearing white and the number 1 highlighted. Special Bosch apps are available to use with your laser measure to record transfer...
- Page 34 The connection between your mobile device and the laser measure is established after the Bosch applica- tion has started. If multiple active laser measures are found, select the appropriate laser measure based on the serial number. The connection status and the active connection sym- bol (a) are displayed in the status bar (h) of the laser measure.
-
Page 35: Working Advice
Further information on laser measure and apps can be found on the Bosch product page by scanning the QR code on Page 3 or the QR code on the box. General Information The reception lens 14 and the laser beam outlet 15 must not be covered when taking a measurement. - Page 36 in figure G. Place the laser measure on a table or sur- face and measure the grade. Turn the laser measure 180° and measure the grade again. The difference of the indicated reading may not exceed 0.3°. If the devi- ation is greater, the laser measure must be recalibrat- .
-
Page 37: Maintenance And Service
If the laser measure should fail despite the care tak- en in manufacturing and testing procedures, repair should be carried out by an authorized after-sales ser- vice center for Bosch power tools. Do not open the laser measure yourself. In all correspondence and spare parts orders, please always include the 10-digit article number given on the type plate of the laser measure. - Page 38 If you are not completely satisfied with the performance of your laser and laser measures, for any reason, you can return it to your Bosch dealer within 30 days of the date of purchase for a full refund or replacement.
- Page 39 THIS WARRANTY PROGRAM DOES NOT APPLY TO TRIPODS AND RODS. Robert Bosch Tool Corporation (“Seller”) warrants tripods and leveling rods for a pe- riod of one (1) year from date of purchase. THIS LIMITED WARRANTY DOES NOT APPLY TO OTH- ER ACCESSORY ITEMS AND RELATED ITEMS.
Need help?
Do you have a question about the 3601K72C10 and is the answer not in the manual?
Questions and answers