Table of Contents
Advertisement
Quick Links
Advertisement
Table of Contents

Related Manuals for Roca L30-E


Summary of Contents for Roca L30-E
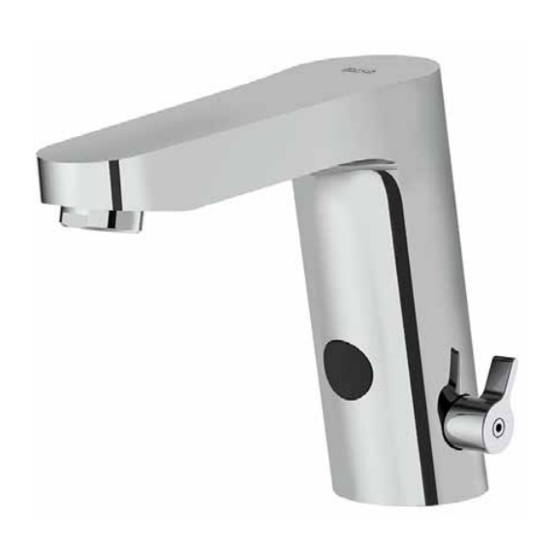
- Page 1 L30-E Electronic Faucet...
-
Page 2: Instalación
1. INSTALACIÓN 1. INSTALLATION 1.1. ANTES DE INSTALAR BEFORE INSTALLATION Purgar a fondo las tuberías antes y después de la instalación Flush pipes throughly before and after installation. 1.2. MONTAJE ASSEMBLY... - Page 3 1.2. CONEXIONADO ALIMENTACIÓN AGUA WATER SUPPLY CONNECTING Rojo Azul Blue CERRADO CLOSED Llaves de paso no suministradas Stopcocks not supplied 5 MAX MIN 0,5 80 MAX...
-
Page 4: Power Supply
1.3. CONEXIONADO ALIMENTACIÓN ELÉCTRICA: DC or AC (ambas incluidas) POWER SUPPLY CONNECTION: DC or AC (both included) BATTERIES DC 4 x LR6/1.5V/AA ALCALINAS / ALKALINES Ø6 > 5s. POWER SUPPLY 230V, 50Hz > 5s. -
Page 5: Uso Básico
2. UTILIZACIÓN OPERATING INSTRUCTIONS 2.1. USO BÁSICO BASIC USE Abierto Cerrado Opened Closed... -
Page 6: Ajuste De Temperatura
2.2. AJUSTE DE TEMPERATURA TEMPERATURE ADJUSTMENT Se realiza a través de la maneta lateral. It can be adjusted through lateral handle. 2.3. AJUSTE DE LA DISTANCIA DE DETECCIÓN DETECTION DISTANCE ADJUSTMENT El modo de ajuste de distancia de detección solo está disponible durante 10 min tras realizar el conexionado a la fuente de alimentación. - Page 7 Colocar el imán en la posición indicada. El LED rojo comenzará a parpadear Después del tercer parpadeo y antes del quinto, retirar el imán. El parpadeo incrementa su frecuencia. Modo ajuste de distancia activado. Colocar las manos para ajustar a la nueva distancia deseada y mantenerla en la posi- ción hasta que el LED deje de parpadear.
- Page 8 2.4. AUTOSTOP El flujo de agua se interrumpirá automáticamente pasados 60 segundos de su activación, como medida de seguridad, ante la invasión prolongada del campo de detección por parte de algún objeto. El grifo volverá a quedar operativo al retirar el objeto causante de la activación. El grifo incorpora además un sistema que asegura el cierre del paso de agua al quedarse sin alimentación eléctrica durante el uso del mismo.
- Page 9 2.6 ACTIVACION MODO FLUJO CONTINUO (para Tratamientos legionela) CONTINUOUS FLOW MODE ACTIVATION (for Legionella Treatments) Flujo continuo Continuous flow Colocar el imán en la posición indicada. El LED rojo comenzará a parpadear Después del quinto parpadeo, la grifería se activa saliendo agua. Retirar el imán.
-
Page 10: Mantenimiento
3. MANTENIMIENTO MAINTENANCE 3.1. LIMPIEZA DEL GRIFO TAP CLEANING Cerrado Abierto Closed Opened Hard neutral soft Limpiar el grifo solo con detergentes líquidos no ácidos. No utilizar ningún tipo de estropajo. Mantener limpio el visor cuidando de no rayarlo. Clean the tap using only non-acid liquid detergents. Do not use any kind of scouring pad. Keep sensor window clean, taking care not to scratch it. - Page 11 3.2. LIMPIEZA DE AIREADOR AEREATOR CLEANING Descalcificar periódicamente el aireador introduciendo el bloque interior en vinagre. Limpiar el aireador ante una reducción clara del caudal suministrado por el grifo. Decalcify the aerator at intervals by placing the interior unit in vinegar. Clean the aerator whenever any marked reduction of tap flow is noted.
- Page 12 3.3. LIMPIEZA DE FILTROS FILTERS CLEANING Cerrado Closed Descalcificar periódicamente el filtro introduciendo el bloque interior en vinagre. Limpiar el filtro ante una reducción clara del caudal suministrado por el grifo. Decalcify the filter at intervals by placing the interior unit in vinegar. Clean the filter whenever any marked reduction of tap flow is noted.
-
Page 13: Sustitución De Baterías
3.4. SUSTITUCIÓN DE BATERÍAS BATTERIES REPLACEMENT LR6/1.5V/AA 4 x1,5V LR6 AA ALCALINAS ALKALINE El grifo avisa de la necesidad de de reemplazar las pilas mediante destellos intermitentes del LED rojo en el visor inferior cada vez que se utilice el grifo. Ud. dispondrá de varios días para realizar el cambio de pilas. - Page 14 4. CASOS DE FUNCIONAMIENTO INCORRECTO CAUSES OF A FAULTY OPERATION Problema Posible causa Solución Objeto obstruye el campo de detección Comprobar que no hay objetos en el campo de detección Colocar las manos enfrente del visor y dentro de la distan- Manos colocadas fuera del área de detección cia de detección ajustada El visor no está...
-
Page 15: Spare Parts
SPARE PARTS AG0238700R AG0239000R 2 un AG0239200R AG0238800R AG0239300R AG0236300R AG0239100R AG0239400R AG0055000R AG0238900R... - Page 16 At ROCA we are committed to protecting the environment. Please help us by discarding this pro- duct at the end of it life-cycle in a responsible manner, to prevent that certain substances contai- ned in electrical or electronic equipment may cause harm to human health and the environment.