
Related Manuals for Bosch WDU8H541NL


Summary of Contents for Bosch WDU8H541NL
- Page 1 Translated from Dutch to English - www.onlinedoctranslator.com Washer/dryer WDU8H541NL [NL] User manual and installation instructions...
-
Page 2: Table Of Contents
Refer to the Digital User's Guide for more information. Index 1 Safety..........4 6 Before using for the first time ....20 1.1 General instructions ....4 6.1 Starting a wash cycle without 1.2 Destination of the device laundry..........20 rate ........ - Page 3 20.3 Restarting the 14.13 Canceling the drying device ........ 54 programme......... 35 20.4 Disposal of your old 14.14 Taking out the laundry ....35 appliance ........55 14.15 Switching off the appliance..35 21 Customer Service......55 15 Child Lock ........35 21.1 Product number (E no.) and 15.1 Activating child lock ...
-
Page 4: Safety
NLSafety 1 Safety Observe the following safety regulations. 1.1 General instructions sRead this manual carefully. sKeep the operating instructions and product information for future reference. for use or for subsequent owners. sDo not connect the device in case of transport damage. 1.2 Destination of the device Only use the device: sto wash machine-safe textiles and wool by hand... -
Page 5: Secure Installation
SafetyNL 1.4 Secure installation Observe the safety regulations when installing the device. WARNING ‒ Risk of electric shock! Improper installations are dangerous. ▶ Only connect and use the device in accordance with the information on the type plate. ▶ Only connect the device to a mains supply with alternating current via a properly installed earthing socket. - Page 6 NLSafety WARNING ‒ Risk of fire! Using an extended power cord and unauthorized adapters is dangerous. ▶ Do not use extension cords or multiple sockets. ▶ If the power cord is too short, contact customer service. ▶ Only use adapters approved by the manufacturer. WARNING ‒...
-
Page 7: Safer Use
SafetyNL ▶ Use protective gloves when installing and transporting the device. 1.5 Safer use WARNING ‒ Risk of electric shock! A damaged appliance or damaged power cord is dangerous. ▶ Never use a damaged device. ▶ Never pull on the power cord to disconnect the device from the power supply. - Page 8 NLSafety WARNING ‒ Risk of explosion! Coal dust or flour in the vicinity of the device can cause explosions. ▶ Keep the area around the device clean during use. WARNING ‒ Risk of poisoning! Detergents and care products can lead to poisoning if ingested. ▶...
-
Page 9: Safe Cleaning And Maintenance
SafetyNL ▶ Remove and spread out the laundry immediately if drying is interrupted prematurely. CAUTION ‒ Risk of injury! The cover plate may break when climbing or clambering on the device. ▶ Do not climb or scramble on the device. The appliance may tip over when sitting or leaning on the open door. - Page 10 NLSafety ▶ Only original spare parts may be used for repair of the device. ▶ If the power cord of this appliance is damaged, it must be replaced by the manufacturer, its service agent or a similarly qualified person in order to avoid a hazard. Penetrating moisture can cause a shock.
-
Page 11: Avoiding Material Damage
Avoid material damageNL Make sure that the valve housing of ▶ 2 Material damage the water inlet hose is installed avoid without contact with the environment and that it is not exposed to external forces. Follow this instruction to avoid Make sure that the internal material damage and damage to the ▶... -
Page 12: Environmental Protection And Saving
NLEnvironmental protection and saving Do not use strong alcohol-based ▶ Reduce washing temperature for cleaning agents. lightly and normally soiled laundry. ▶ Do not use hard scouring or aAt low temperatures, it consumes dishwashing sponges. device less energy. For light to Clean the device only with water ▶... -
Page 13: Set-Up And Connection
Set up and connectNL Remark:The device has been checked 4 Set up and connect at the factory for correct operation. Water stains may remain in the device. The stains disappear after the 4.1 Unpacking device first wash. PAY ATTENTION! The delivery consists of: Objects that remain in the drum and sWasher-dryers that are not intended for use with the... -
Page 14: Removing Transport Locks
NLSet up and connect If the device is tilted more than 40°, 4.4 Removing transport locks residual water can run out of the device and cause material damage. The device is secured for transport Carefully tilt the device. ▶ with transport locks at the rear of the Transport the device upright. -
Page 15: Connecting The Device
Set up and connectNL Push the 4 cover caps down. Remove the mains connection cable from the holder. Remove the 4 sleeves. 4.5 Connecting device Connect water supply hose WARNING Risk of electric shock! The device contains live parts. Touching live parts is dangerous. Do not immerse the electric ▶... -
Page 16: Adjusting The Device
NLSet up and connect 4.6 Adjusting the device PAY ATTENTION! When draining, the water drain hose is To reduce noises and vibrations and to under pressure and can come loose prevent the device from walking, place from the installed connection position. the device horizontally. -
Page 17: Connecting The Appliance Electrically
Set up and connectNL Tighten the lock nuts against the housing with an open-end wrench SW17 hand-tight. Hold the appliance foot while doing so and do not adjust the height. 4.7 Connecting the appliance electrically Remark:Your home electrical installation for this appliance must comply with local legal and safety regulations and must include an earth leakage circuit breaker. -
Page 18: Getting To Know Your Device
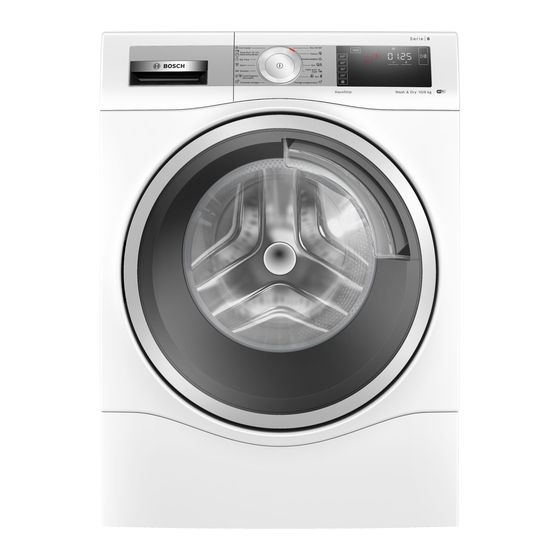
NLGetting to know your device 5 Getting to know your device 5.1 Device Here you will find an overview of the components of your device. Depending on the device type, details in the picture may differ, e.g. the color and o m. the V and pump Transport protections... -
Page 19: Detergent Drawer
Getting to know your deviceNL 5.2 Detergent drawer Dosing aid for liquid detergent → "Insert the dosing aid for liquid detergent", Page 33 Detergent dispenser II: sDetergent for the main used to be, ssoftener sBleach sStain salt Compartment : sfabric softener sLiquid starch sImpregnating agent Detergent dispenser I:... -
Page 20: Operating Logic
NLusage The power-on process takes a few 5.4 Operating logic seconds. Some areas of the display respond to The program Cleaning the drumSet touch. You activate settings by pressing the keys. The activated Close the door. settings are clearly highlighted on the Pull out the detergent drawer. -
Page 21: Display
DisplayNL 7 Display The display shows the current setting values, options or information texts. Example display indication name Description Indication 0:40 Approximate expected program duration Program duration / remaining time of or time remaining in the program. the program → "Buttons", Page 23 Ready in time 6.0 kg Recommended load Maximum load amount for the... - Page 22 NLDisplay name Description Indication WiFi slights up: the appliance is connected to the home network work connected. sflashes: the device is trying to connect thing to do with the home network. → "Home Connect", page 35 The device is connected to the Smart Energy manager Energy System (energy manager).
-
Page 23: Buttons
ButtonsNL 8 Buttons Knob Description Choice (net sSwitch Turn the device on or off. cellar) sSwitch off - 90° (Tem- - 90 °C Adjust the temperature in °C. temperature) - 1400 - 1400 rpm Adjust the spin speed or deactivate (Centrifuge the spin. - Page 24 NLButtons Knob Description Choice sactivate Activate or deactivate washing with less (Anti wrinkle) crease. sdeactivate To reduce creasing in the laundry, the spin process and spin speed are adjusted. The laundry is so damp after washing that it hangs out well on the washing line.
- Page 25 ButtonsNL Knob Description Choice sactivate The drying target determines how damp sdeactivate or dry the laundry is after the program (cupboard dry) has ended. sactivate The drying target determines how damp sdeactivate or dry the laundry is after the program (cupboard dry+) has ended.
-
Page 26: Drying Target
NLDrying target 9 Drying target A drying target is specified in some programs. The drying target determines how dry or damp your laundry is after the program has ended. laundry Drying result Drying target The laundry is dry. Multi-layer thick laundry that dries hard. -
Page 27: Programs
ProgramsNL 10 Programs Remark:The care labels on the laundry give you additional information on program selection. Max. max. Program Description bela- bela- thing thing (kg) (kg) Dro- Used to be- gene 10.0 Cotton Wash hard-wearing cotton, linen and blended fabrics. Also suitable as a shortened program for normally soiled laundry if you activate Speed. - Page 28 NLPrograms Max. max. Program Description bela- bela- thing thing (kg) (kg) Dro- Used to be- gene Wash textiles made of synthetic and blended wrinkle recovery loin fabrics. Program setting: smax. 60 °C smax. 1400 rpm Wash textiles made of cotton, linen, synthetic materials and blended fabrics.
- Page 29 ProgramsNL Max. max. Program Description bela- bela- thing thing (kg) (kg) Dro- Used to be- gene Program setting: max. 1400 rpm – – Other pro- Select other programs directly via the Home grammes Connect app. The description of the programs can be found in the Home Connect app.
- Page 30 NLPrograms Max. max. Program Description bela- bela- thing thing (kg) (kg) Dro- Used to be- gene – Reduce creases and airborne odors from wool Iron Assist suits and textiles. Tip:To avoid creasing, remove the textiles immediately after the end of the programme. Comments sThe textiles are not dried or cleaned.
-
Page 31: Accessories
QR code in the table of contents or on – use a laundry net for small items of laundry, e.g. children's socks www.bosch-home.com. 12.1 Preparing the laundry – some stubborn, dried-on stains can be removed by washing... -
Page 32: Detergent And Fabric Care Ginger
Comments connecting", Page 13 sComprehensive directions for the Press . ▶ Use can be found at www.bosch- home.com or by scanning the QR The power-on process takes a few code on the title page of these seconds. instructions for use. -
Page 33: Laundry
ServiceNL Press to save it Place the dosing aid. to call up the program. Remark:To overwrite the saved program, repeat the steps. 14.5 Filling the drum with laundry Remark:To avoid creasing, keep the maximum load of the → "Programs", Page 27 heed. Insert the detergent drawer. -
Page 34: Dosing Detergent And Care Agent
NLService Fold the dosing aid downwards and aThe display shows whether the program click into place. maduur or the ready in time displayed. aAfter the program end, it shows display: End. If is selected, the laundry is not spun and the water is drained after rinsing. -
Page 35: Program Cancel
Child lockNL Remark:When appears Wipe the rubber sleeve dry and it is not possible to add laundry. remove any foreign objects. When goes out, then it is filling of laundry possible. Open the appliance door. Reload or remove the laundry. Close the appliance door. -
Page 36: Device With Wlan Home
QR code function. in the table of contents or on sWi-Fi on the router is activated. sThe www.bosch-home.com. basic WiFi setting on the device rate is activated. The Home Connect services are not → "Activate WiFi on the device", available in every country. -
Page 37: Function
Home ConnectNL Enter the network name (SSID) and 16.2 Connecting device to password (key) of your home WLAN home network network in the Home Connect app. (WiFi) without WPS function Follow the steps in the Home Connect app to connect the If your router does not have WPS appliance. -
Page 38: Activating Wifi On The Device
NLHome Connect As soon as the appliance is Set program to position 5. displayed in the Home Connect aThe display shows "rES" app, follow the last steps in the to give. Home Connect app. to press. aWhen the display shows "con" aThe display shows "YES"... -
Page 39: Protection Of Personal Data
QR code in the table of contents or on Please observe the information www.bosch-home.com. regarding the protection of personal data. When your appliance is connected to a 18 Cleaning and care... -
Page 40: Cleaning The Detergent Drawer
NLCleaning and maintenance 18.2 Cleaning the detergent Place the insert and click into place. drawer Pull out the detergent drawer. Press the insert down and remove the detergent drawer. Clean the opening for the detergent drawer. Pull out the insert from bottom to top. - Page 41 Cleaning and maintenanceNL Open and remove the service door. CAUTION - Risk of burns!The soap gets hot when washing at high temperatures. ▶ Do not touch the hot soapy water. Pull off the sealing cap to allow the wash water to flow into the collection container.
- Page 42 NLCleaning and maintenance Tighten the pump cover as far as Cleaning the drain pump it will go. Required:The drain pump is empty. → Page 40 As there may still be residual water in the pump, carefully 90° unscrew the lid. The pump cover handle must be vertical.
-
Page 43: Troubleshooting
TroubleshootingNL 19 Troubleshooting You can remedy minor faults on the device yourself. Before contacting customer service, please refer to the troubleshooting information. This way you avoid unnecessary costs. WARNING Risk of electric shock! Improper repairs are dangerous. Only trained specialist personnel may carry out repairs on the device. ▶... - Page 44 NLTroubleshooting Cause and Troubleshooting Malfunction Odor has formed in Humidity and detergent residue can encourage the appliance bacterial growth. → "Cleaning the drum", page 39 ▶ Pine tree. ▶ When you are not using the appliance, leave the door and detergent drawer open to allow the residual water to dry out.
- Page 45 TroubleshootingNL Cause and Troubleshooting Malfunction The unbalance detection system has interrupted the "H:32" spin cycle due to uneven distribution of the laundry. Redistribute the laundry in the drum. ▶ Remark:If possible, place large and small items of laundry together in the drum. Different sized laundry is more evenly distributed during the spin cycle.
- Page 46 NLTroubleshooting Cause and Troubleshooting Malfunction "H:95" lights up alternately Water pressure is low. end with end. ▶ → " ", page 45 All other error codes. Malfunction Please contact customer service. ▶ → "Customer Service", page 55 Device not working. Mains plug of the power cable is not plugged in.
- Page 47 TroubleshootingNL Cause and Troubleshooting Malfunction Drain pipe or water drain hose is clogged. Washing water is not pumped out. Clean the drain pipe and the water drain hose. ▶ Drain pipe or water drain hose is kinked or pinched. Make sure that the drain pipe and the water ▶...
- Page 48 NLTroubleshooting Cause and Troubleshooting Malfunction Start several times The imbalance control system eliminates the imbalance by distributing the laundry several times. with centrifugation. No error - no action required. ▶ Remark:When loading, place large and small items of laundry together in the drum. Different sized laundry is more evenly distributed during the spin cycle.
- Page 49 TroubleshootingNL Cause and Troubleshooting Malfunction High spin speed Remark:If possible, place large and small items of rental is not laundry together in the drum. Different sized laundry reached. is more evenly distributed during the spin cycle. Start the programCentrifuge . ▶...
- Page 50 NLTroubleshooting Cause and Troubleshooting Malfunction Spin result is Drain pipe or water drain hose is kinked or not to satisfaction- pinched. ness. The laundry is Make sure that the drain pipe and the water ▶ too wet / too damp. drain hose are not kinked or pinched.
- Page 51 TroubleshootingNL Cause and Troubleshooting Malfunction The water inlet hose is not correctly / firmly At the water supply connected. feed hose is leaking water. Connect the water supply hose correctly. → "Connecting the water inlet hose", page 15 Tighten the coupling properly. Water drain hose is damaged.
- Page 52 NLTroubleshooting Cause and Troubleshooting Malfunction Laundry is too damp. Make sure that the water tap remains open ▶ during the drying phase. Ambient temperature is higher than 30°C. Make sure the ambient temperature is below 30°C. ▶ Insufficient air circulation at the location of the device.
- Page 53 TroubleshootingNL Cause and Troubleshooting Malfunction Too much detergent/fabric softener in the detergent Detergent or laundry detergent softer drips from drawer. the cuff and collects on When dosing the liquid detergent and fabric softener, ▶ the door or in the cuff pay attention to the marking in the detergent drawer fold.
-
Page 54: Emergency Release
"Setting up and Remark:More information can be found connecting", Page 13 and → clue in the digital usage by "Before using for the first scanning v in the table and the QR code time", Page 20 . of contents or on www.bosch-home.co... -
Page 55: Disposal Of Your Old
customer serviceNL 20.4 Disposal of your old chemical equipment (waste electrical and electronic device equipment - WEEE). Environmentally friendly disposal The directive sets the allows valuable raw materials to be framework for the take- reused. back valid in the EU and disposal of old appliances. -
Page 56: Product Number (E No.) And Production Number (Fd)
NLcustomer service 21.1 Product number (E no.) and production number (FD) The product number (E-Nr.) and the production number (FD) can be found on the type plate of the device. The type plate is located depending on the model: son the inside of the door. -
Page 57: Consumption Values
Consumption valuesNL 22 Consumption values The following information is provided in accordance with the EU Ecodesign Regulation. The specified values for programs other thanEco 40-60are only guide values and have been determined in accordance with the applicable standards EN60456 and EN62512. Pro- Program bela-... -
Page 58: Technical Data
24 Declaration of Conformity set (Wi-Fi ring Fi): 5 min snetwork Robert Bosch Hausgeräte GmbH unions standing hereby declares that the appliance by (WiFi): with Home Connect functionality 2.00 W complies with the basic requirements sAt least:... - Page 59 Declaration of ConformityNL 5 GHz band (5150–5350 MHz + 5470–5725 MHz): max. 100 mW UK (NI) 5 GHz WLAN (WiFi): for indoor use only. ALREADY 5 GHz WLAN (WiFi): for indoor use only.
- Page 60 Contact data of all countries are listed in the attached service directory. BSH Hausgeräte GmbH Carl-Wery-Straße 34 81739 Munich, GERMANY www.bosch-home.com A Bosch Company * 9001692877* 9001692877(020608)
Need help?
Do you have a question about the WDU8H541NL and is the answer not in the manual?
Questions and answers