
Related Manuals for MuscleSquad P100


Summary of Contents for MuscleSquad P100
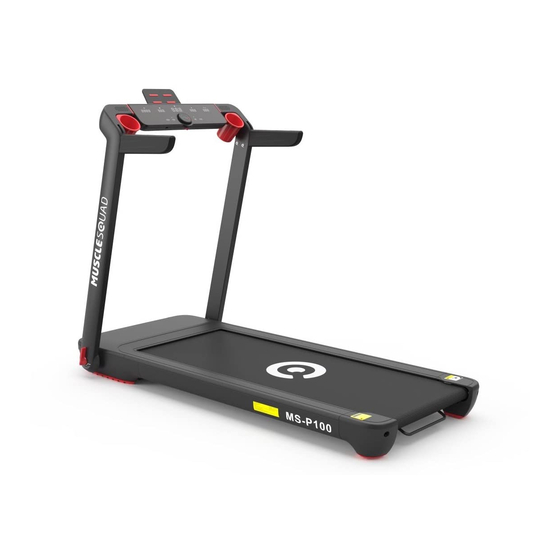
- Page 1 MuscleSquad P100 Treadmill Assembly & User Manual Important – Please read these instructions fully before assembly and use. These Instructions contain important information for assembly, safe use, and maintenance.
-
Page 2: Table Of Contents
CONTENTS Warranty Safety Assembly Contents & Setup 6-10 Getting Started Moving 12-14 Storage How to use 16-21 Warm up & Cool down 22-23 Error Codes Programmes Parts 26-29 Maintenance 30-32 Terms & Conditions... -
Page 3: Warranty
– and all this in a familiar environment. WARRANTY MuscleSquad assures you that this device was manufactured from high quality materials. A prerequisite of the machine’s warranty is a proper setup of the device in accordance with the operating instructions. -
Page 4: Safety
4. Stop exercising immediately should you feel unwell or if you feel pain in your joints or muscles. In particular, keep an eye on how your body is responding to the exercise programme. Dizziness is a sign that you are exercising too intensively with the device. -
Page 5: Assembly
or similarly qualified persons in order to avoid any danger. This appliance is not intended for use by persons (including children) with reduced physical, sensory, or mental capabilities. Children should be supervised to ensure that they do not play with the appliance. ASSEMBLY Before starting with the assembly of this fitness device carefully read the set up steps found on pages 5 to 8. - Page 6 UNPACK AND VERIFY THE CONTENTS OF THE BOX 1. Lift up and remove the box that surrounds the Treadmill. 2. Check the following items are present. If any of the parts are missing, contact the dealer. This product is an installation-free product. Open the package, take out the treadmill, fold the post and armrests, and turn on the power to use.
- Page 7 NOTE: Before the device is assembled, please do not let elderly persons or children approach the device to prevent injury. Step 1: Take out the machine from the box and put it on a flat floor. (As shown) Step 2: Use an Allen key to unlock the left and right column fastening screws (4 to 5 turns counter clockwise) Step 3:...
- Page 8 Step 4: Use an Allen key to tighten the left and right column upright screws. Step 5: Rotate the dial and armrests in the direction of the arrow. Step 6: Rotate the dial and armrests on both sides to the position shown in the figure.
- Page 9 Step 7: Place the cup in the slot. Step 8: Put the phone holder into the card slot. Step 9: After inserting the power cord.
- Page 10 Step 10: Add the safety key. Complete assembly. SETTING UP YOUR TREADMILL PLACEMENT IN YOUR HOME To make exercise a desirable daily activity for you, the treadmill should be placed in a comfortable and convenient setting. This treadmill is designed to use minimal floor space and to fit nicely in your home.
-
Page 11: Getting Started
Read this manual fully, before operating this treadmill. GETTING STARTED TURN POWER ON Put the power cord into a 13amp electrical outlet. Flip this switch to the “ON” position. The screen lights up and there is a prompt sound. SAFETY KEY AND CLIP The safety key is designed to cut the main power to the treadmill should you fall. -
Page 12: Moving
WARNING! Never use this treadmill without first securing the safety tether clip to your clothing. CAUTION! For your safety, step onto the belt when the speed is no more than 3km/h. INSTRUCTIONS FOR MOVING The treadmill is equipped with wheels for easy movement. Note: Unplug the power cord before moving. - Page 13 Step 2: Remove the phone holder from the card slot. Step 3: Remove the cup. Step 4: Rotate the dial and armrests in the direction of the arrow. Step 5: Rotate the dial and armrests on both sides to the position shown in the figure.
- Page 14 Step 6: Use an Allen wrench to tighten the left and right column upright screws. Step 7: Use both hands to rotate the column in the direction indicated by the arrow in the figure until it does not turn anymore. Please keep elderly persons and children away from the equipment during the folding process.
-
Page 15: Storage
Step 8: Use an Allen wrench to lock the left and right column fastening screws STORAGE Horizontal storage After folding, it can be stored in a suitable place. Upright storage When choosing upright storage, please continue to complete the following steps. A. - Page 16 WARNING! Try to choose horizontal storage. If you choose to store it upright, please place it against a wall, and ensure that no one goes close to it to prevent unnecessary injuries How to fold the upright stand When you reassemble the treadmill, hold down the long plate with both hands, as shown in the figure, and you will be able to retract the stand.
- Page 17 POWER GROUNDING This product must be grounded. In the event of a fault, grounding provides the path of least resistance to the current to reduce the risk of electric shock. This product is equipped with a power cable grounding conductor and a grounding plug. This plug needs to be inserted into a socket that meets the specifications.
- Page 18 with both hands until you are ready to let go. Please clip the safety key to the appropriate position of your clothes when exercising. If an accident occurs, pull the safety key immediately and the running track will stop immediately. 3.
- Page 19 1. The LED window displays the following functions: A. Time window: display time data, display range: 0:00-99:59. B. Distance window: display distance data, display range: 0.00-99.9. C. Speed window: display speed data, the display range is 0.0-15.0KMH. D. Calorie window: display speed data, the display range is 00.0-999. E.
- Page 20 Press the button in the standby state to start the treadmill and stop the treadmill with the button in the running state. C. Knob: Turn clockwise to increase speed and counterclockwise to decrease speed. D. Exercise Type: Manual mode - Countdown Time - Countdown Distance - Countdown Calorie - Manual Mode Switch.
- Page 21 B. In the standby state, press the start button to run the manual timer mode. 2. There are three setting functions in the countdown mode: time setting, distance setting, calorie setting. A. In the standby state, press the mode key to enter the time countdown mode, the time window displays the time and flashes, the initial time is: 30:00, press the speed plus or minus key to set the countdown.
- Page 22 speed marked in the first part of the automatic programme (see the programme value table for details). 3. Each programme is divided into 20 sections, and the running time of each section is 1/20 of the set time. 4. There will be a chirp when switching between sections. When the set time decreases to zero, the speed slowly decreases until machine stops running, the buzzer emits a short sound: Bi-Bi-Bi, the speed slowly decreases until it stops, the machine returns to standby, and the buzzer emits a short sound Bi.
- Page 23 Walk on treadmill increasing speed each minute up until at a medium paced jog 5 mins The aim is to build the heart rate gradually. Start at a medium walking speed and each minute increase your speed so at the end of the 5mins you are at a mid-paced jog and your muscles are warm ready to stretch.
- Page 24 TREADMILL COOL DOWN Gradually decrease speed on treadmill each minute to a walking pace 5 mins The aim is to decrease the heart rate progressively each minute by decreasing the speed for 5mins until you’re at a complete stop. Hanging calf stretch Using the edge of the treadmill and the treadmill arm for balance, place ball of one foot on the edge and cross the other foot...
-
Page 25: Error Codes
ERROR CODES Error Possible causes Solution A. Not plugged in, or there is no power Connect to AC power, or check AC outlet B. The power switch is not turned on Turn the power switch to the ON position C. The drive is not powered on or is damaged Check overload protector, replace drive No display... -
Page 26: Programmes
Motor belt is too loose Adjust motor belt Feels loose when running (slips) Running belt too loose Tighten the running belt Abnormal noise from roller (grinding) Roller bearing damage Contact after-sales service FIXED TRAINING PROGRAMMES... -
Page 27: Parts
PARTS LIST/DRAWING Description Description Description Treadmill welding Socket Safety key assembly Cross recessed countersunk head Bottom plate Switch screws M8*20 Cross recessed countersunk head M8 nylon washer Switch rack screws M8*30 Fuse Cross recessed pan head screws M3*8 Hex head bolt M8*50 DC motor Power Adapter Hexagon head bolt M8*120... - Page 28 Left rear down cover Guide ST3.5*13 Rear right foot pad Armrest welding ST4.2 Self-tapping Rear left foot pad Speaker ST4.2 Self-tapping Side rail snap Flat damping shaft M5 Screws Cushion Ø30X30XM8 Knob Perspex Plexiglass Cushion Ø30X19XM8 Knob housing Drinking glass Rubber mat Electronic knob assembly Knob spring...
-
Page 31: Maintenance
TREADMILL MAINTENANCE Proper maintenance is very important to ensure the faultless and operational condition of the treadmill. Improper maintenance can cause damage to the treadmill or shorten the life of the product. All parts of the treadmill must be checked and tightened regularly. Worn out parts must be replaced immediately. - Page 32 5. After the belt is centred, increase the speed to 16kph and verify that it is running smoothly. Repeat the above steps if it is necessary. 6. If the above procedure is unsuccessful in resolving the off-centred belt, you may need to increase the belt tension.
- Page 33 CLEANING Regular cleaning of the striding belt ensures a longer product life. After each training: Wipe the console and other surfaces with a clean soft and damp cloth to remove sweat residues. Weekly: To make the cleaning easier it is recommended to use a mat for the treadmill. Shoes can leave dirt on the striding belt that can fall beneath the treadmill.
- Page 34 TERMS AND CONDITIONS This warranty is valid only in accordance with the conditions set forth below. The warranty applies only when the following three conditions are met. It remains in the possession of the original purchaser and proof of purchase is shown. ü...
Need help?
Do you have a question about the P100 and is the answer not in the manual?
Questions and answers