Table of Contents
Advertisement
Quick Links
Advertisement
Table of Contents

Related Manuals for MuscleSquad P200


Summary of Contents for MuscleSquad P200
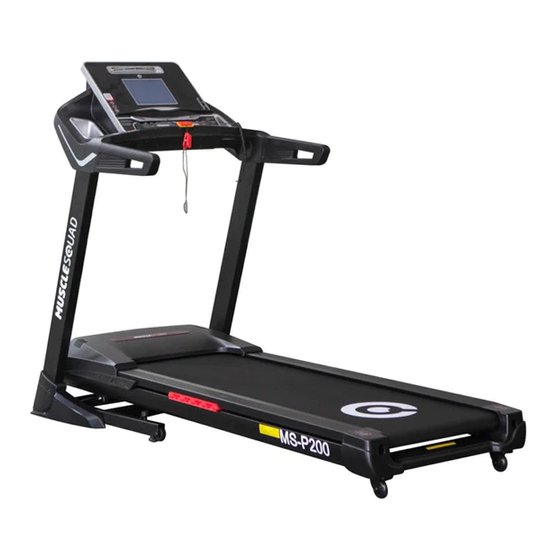
- Page 1 MuscleSquad P200 Treadmill Assembly & User Manual Maximum User Weight 136 kgs Important – Please read these instructions fully before assembly and use. These Instructions contain important information for assembly, safe use, and maintenance.
-
Page 2: Table Of Contents
CONTENTS Warranty Safety Assembly 5-11 Workout Area Warm up & Cool down 13-14 Getting Started Console Operation Important Information Operation & Adjustment 18-19 Pulse Mode 20-21 Bodyfat Analysis Care & Maintenance 23-25 Troubleshooting Exploded Diagram Parts 28-29 Further Safety Information Terms &... -
Page 3: Warranty
The warranty is for 1 year, beginning from the date of purchase. If the device you acquired is defective, please contact our Customer Service at info@musclesquad.com within the guarantee period of 12 months from the purchase date. The warranty applies to the following parts (as far as included in the scope of delivery): Frame, cable, electronic devices, foam, and wheels. -
Page 4: Safety
and nuts are correctly fitted and tightened. Use only attachments recommended and/or supplied by the importer. 8. Do not use a device that is damaged or unserviceable. 9. Always place the device on a smooth, clean and sturdy surface. Never use near water and make sure there are no pointed objects in the direct vicinity of the fitness device. -
Page 5: Assembly
ASSEMBLY Before starting with the assembly of this fitness device carefully read the set up steps. We also recommend that you view the assembly drawing prior to assembly. Remove all packaging material and place the individual parts on a free surface. This will provide you with an overview and will simplify the assembly. - Page 6 GROUNDING INSTRUCTIONS The treadmill must be electrically grounded. In case of malfunction or break down, grounding provides a path of least resistance for the electric current, which reduces the risk of electrical shock. This treadmill is equipped with a power cable with an equipment-grounding conductor and a grounding plug. The plug must be inserted into an appropriate outlet that is properly installed and grounded in accordance with electricity codes and ordinances.
- Page 7 COMPONENTS/PARTS...
- Page 8 FIXINGS Total mass of the product is 182 lbs. Total size of the equipment is (width) 76.7” × (depth) 34.2” × (height) 58.2” Console Handle Console Mast Motor Cover Side Rail Console Mast Transportation Cover Wheel End Cap...
- Page 9 ASSEMBLY INSTRUCTIONS STEP 1 Carton Reinforci ng Tube Before you start assembly please remove the carton reinforcing tube as show in above diagram, then cut off the nylon cable tie. STEP 2 Position the Left & Right Console Mast (15 & 17) on the Platform as shown in the diagram, then connect them to the Stabiliser (12) using 4 x M8 x 15mm Allen Bolts (3), 2 x M8 x 95mm Allen Bolts (4), 4 x M8 x 105mm Allen Bolts (5), 10 x 8mm Spring Washers (6) and 10 x 8mm Washers (7).
- Page 10 STEP 3 Connect the Main Sensor Wire from the Controller to the Main Sensor Wire from the Console. Attach the Console onto the Left & Right Console Masts (15 & 17), and secure with 6 x M8 x 15mm Allen Bolts (3), 6 x 8mm Spring Washers (6) and 6 x 8mm Washers (7).
- Page 11 STEP 4 Fix the Left Upper Console Mast Cover (56) to the Left Console Mast (15) using 4 x ST4.2 x 15mm Phillips Pad Screws (37). Fix the Right Upper Console Mast Cover (57) to the Right Console Mast (17) using 4 x ST4.2 x 15mm Phillips Pad Screws (37).
-
Page 12: Workout Area
WORKOUT AREA The free area must be at least 2 feet greater than the training area. This is a space where you can safely dismount, without obstruction, in case of an emergency. Where two pieces of equipment are positioned adjacent to each other the free area may be shared. The free area behind the treadmill should be 2 feet in length and double the width. -
Page 13: Warm Up & Cool Down
TREADMILL WARM UP Walk on treadmill increasing speed each minute up until at a medium paced jog 5 mins The aim is to build the heart rate gradually. Start at a medium walking speed and each minute increase your speed so at the end of the 5mins you are at a mid-paced jog and your muscles are warm ready to stretch. - Page 14 TREADMILL COOL DOWN Gradually decrease speed on treadmill each minute to a walking pace 5 mins The aim is to decrease the heart rate progressively each minute by decreasing the speed for 5mins until you’re at a complete stop. Hanging calf stretch Using the edge of the treadmill and the treadmill arm for balance, place ball of one foot on the edge and cross the other foot behind the ankle.
-
Page 15: Getting Started
GETTING STARTED OPERATION & ADJUSTMENT Plug your fitness equipment into the main power and turn on the switch (1). You will hear a beep and the computer screen will light up. OVER-CURRENT PROTECTOR: There is an over-current protector (2) located on the right side of the switch (1) (see above picture); in case of short circuit or over-current, the button of the over current protector will pop up and the treadmill will power off;... -
Page 16: Console Operation
CONSOLE OPERATION OPERATION & ADJUSTMENT... -
Page 17: Important Information
IMPORTANT INSTRUCTIONS IMPORTANT mains power cable inlet. The console will turn off Place the safety key into the automatically approximately ten magnetic recess on the middle minutes after the belt stops and front of the computer console. pressing any button on the console will wake it up. -
Page 18: Operation & Adjustment
OPERATION & ADJUSTMENT START YOUR TREADMILL TRAINING Turn on the treadmill and press the “Start” DISTANCE button on the console. CONTROL WORKOUT MODE Press “Speed +” or “Speed -” to adjust the speed. Pressing the button once will change Turn on the treadmill, press the the speed by “MODE”... - Page 19 OPERATION & ADJUSTMENT Programme Workout Model select your desired workout (P01—P10) In this mode, the time (the range is: 5:00 to user has a choice of 99:00 minutes). Programme P01 to Programme P10. Press “Start”, and the treadmill will count down from three before commencing the Press the “Programme”...
-
Page 20: Pulse Mode
PULSE CONTROL WORKOUT MODE Turn on the treadmill, press treadmill will run automatically “Programme” button until the “Pro.” according to the user’s window display “HP1”. “Time” heartbeat rate, every 10 window will display “10:00” which is seconds increasing by 0.3 mph. the treadmill’s pre-set workout time Once the treadmill speed is at for pulse control workout mode. -
Page 22: Bodyfat Analysis
BODY FAT ANALYSIS Turn on the treadmill, button or press “Incline +” or “Incline -” button to select your press “programme” button until the main window displays “FAT”. correct body height. (Range is: 39 to 78 in). Press the “MODE” button, Press the “MODE”... -
Page 23: Care & Maintenance
CARE & MAINTENANCE Adjust the treadmill belt to the centre. The treadmill belt has been adjusted properly before leaving the factory. Sometimes the belt can deviate from the centre during transportation. Check whether the belt is in the centre and operates stably. CAUTION! When adjusting the belt to the centre, make sure that speed of the treadmill does not exceed 1mph and keep your fingers, clothes and hair away from the belt. - Page 24 Adjusting the tensile force of the treadmill belt The treadmill belt has been adjusted properly before leaving the factory. If the machine is idle for a long time it may lead to stretching of the belt. Check to make sure the belt does not slip before using the treadmill.
- Page 25 CLEANING WARNING! ALWAYS UNPLUG THE TREADMILL FROM THE ELECTRICAL OUTLET BEFORE CLEANING OR SERVICING THE UNIT General cleaning or the unit will greatly prolong the life of the treadmill. Keep the treadmill clean by dusting regularly. Be sure to clean the exposed part of the deck on either side of the walking belt and also the side rails.
-
Page 26: Troubleshooting
TROUBLESHOOTING Symptom Cause and Check Solution Safety key not in the position Re-locate the safety key in the correct position No signal to controller from A: Check the main controller wire console B: Replace the PCB board A: Check the wire from motor to controller B: IGBT breakdown, replace the controller Motor communication error C: Check if the power voltage is 50% lower than... -
Page 27: Exploded Diagram
EXPLODED DIAGRAM... -
Page 28: Parts
PARTS LIST Part Description Front Roller Rear Roller M8 x 15mm Allen Bolt M8 x 95mm Allen Bolt M8 x 105mm Allen Bolt 8mm Spring Washer 8mm Washer ST4.8 x15mm Phillips Pad Screw ST4.2 x15mm Phillips Screw Console Mast Cover Sticker Base Frame Stabiliser Incline Frame... - Page 29 Right Tray Console Housing iPad Support Fan Picks Air Flue Right Fan Picks Fixing Block Left Fan Picks Fixing Block USB Fixing Support Left Upper Console Mast Cover Right Upper Console Mast Cover Left Console Mast Cover Right Console Mast Cover Motor Cover Bottom Motor Cover End Cap...
-
Page 30: Further Safety Information
SAFETY INFORMATION This product should only be used as a sports AID and is not for therapeutic usage. Improper use of this product may cause serious accidents. Do not use this product if you wear a pacemaker or other medical devices. Please dispose of the machine as electronic waste in an appropriate manner. -
Page 31: Terms & Conditions
TERMS AND CONDITIONS This warranty is valid only in accordance with the conditions set forth below. The warranty applies only when the following three conditions are met. It remains in the possession of the original purchaser and proof of purchase is shown. ...
Need help?
Do you have a question about the P200 and is the answer not in the manual?
Questions and answers