Blink SEMACONNECT 7 Series Installation Manual
Hide thumbs
Also See for SEMACONNECT 7 Series:
- Product manual (86 pages) ,
- Installation manual (48 pages) ,
- Product manual (77 pages)
Table of Contents
Advertisement
Advertisement
Table of Contents

Related Manuals for Blink SEMACONNECT 7 Series


Summary of Contents for Blink SEMACONNECT 7 Series
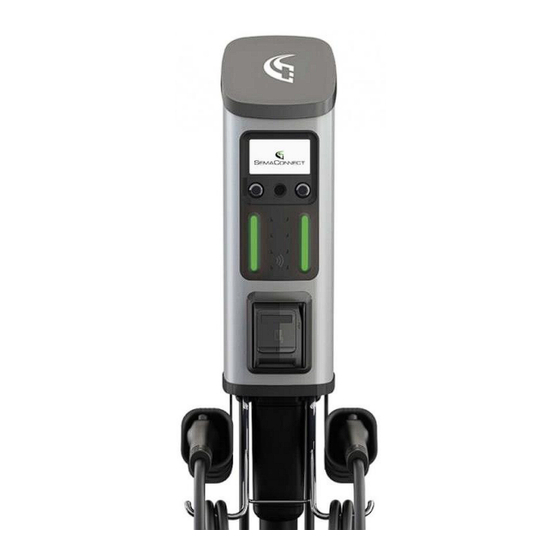
- Page 1 Series 7, 7+, 8, 8+ INSTALLATION MANUAL...
-
Page 2: Table Of Contents
Table of Contents SAFETY AND COMPLIANCE..........................3 GENERAL ..................................4 STATEMENTS ................................. 4 SYSTEM REQUIREMENTS ........................... 5 GENERAL REQUIREMENTS ............................. 5 ELECTRICAL REQUIREMENTS ............................6 STATION CONNECTION DIAGRAMS ..........................8 COMMUNICATION REQUIREMENTS ..........................9 NETWORK PLATFORM REQUIREMENTS ........................9 HARDWARE INVENTORY SPECIFICATION AND INSTALLATION ................10 PEDESTAL MOUNT WITHOUT CABLE MANAGEMENT SYSTEM(CMS) ................. -
Page 3: Safety And Compliance
Safety and Compliance This document provides instructions to install the SemaConnect Charging Station and should not be used for any other products. This product must be installed in accordance with the National Electrical Code (NEC), the Canadian Electrical Code (CEC) or any applicable local code. Review this manual and consult a licensed contractor and/or electrician before installation to ensure compliance with local building practices, climate conditions, safety standards, and state and local codes. -
Page 4: General
General The SemaConnect Station is grounded through a dedicated conductor to the ground connection at the power distribution panel. This equipment has been tested and found to comply with the limits for a Class A digital device, pursuant to Part 15 of the FCC rules. These limits are designed to provide reasonable protection against harmful interference when the equipment is operated in a commercial environment. -
Page 5: System Requirements
System Requirements General Requirements SemaConnect EV charging stations require a solidly grounded electrical system with the presence of a main bonding jumper or system bonding jumper. Ungrounded sources or impedance grounded sources of any type (resistor/reactor) are not suitable for SemaConnect EV charging stations. SemaConnect EV charging stations require 240 volt (phase to phase) or 208 volt (phase to phase) input with an equipment grounding conductor. -
Page 6: Electrical Requirements
Electrical Requirements Each SemaConnect EV charging station is listed and labeled through Nationally Recognized Testing Laboratory compliance testing at the maximum or ‘full rated’ output. Each station is capable of continuous full rated output up to its labeled rating or modified default output configurations in accordance with the following tables: Copyright ©2022 SemaConnect, LLC. - Page 7 Copyright ©2022 SemaConnect, LLC. All rights reserved. dwfwdfwfwfwfwffffgd www.SemaConnect.com...
-
Page 8: Station Connection Diagrams
Station Connection Diagrams DUAL SOURCE INPUT SINGLE SOUCE INPUT Copyright ©2022 SemaConnect, LLC. All rights reserved. dwfwdfwfwfwfwffffgd www.SemaConnect.com... -
Page 9: Communication Requirements
Communication Requirements SemaConnect EV charging stations require cellular connectivity to function properly. To enable cellular connectivity, please reference the following cellular carriers and minimum operational signal requirement at each SemaConnect EV charging station location: Band 13 RSRP: -95 dBm Verizon 4G LTE RSRQ: -13 dB Band 4... -
Page 10: Hardware Inventory Specification And Installation
HARDWARE INVENTORY SPECIFICATION AND INSTALLATION PEDESTAL MOUNT WITHOUT CABLE MANAGEMENT SYSTEM(CMS) Copyright ©2022 SemaConnect, LLC. All rights reserved. dwfwdfwfwfwfwffffgd www.SemaConnect.com... - Page 11 Pedestal Mount Inventory Specification Copyright ©2022 SemaConnect, LLC. All rights reserved. dwfwdfwfwfwfwffffgd www.SemaConnect.com...
- Page 12 INSTALL ANCHOR PLATE VERIFY ALL CONDUCTORS ARE DE-ENERGIZED Copyright ©2022 SemaConnect, LLC. All rights reserved. dwfwdfwfwfwfwffffgd www.SemaConnect.com...
- Page 13 REMOVE ACCESS PANEL COVER AND INSTALL PEDESTAL WITH ACCESS PLATE OPENING FORWARD-FACING VERIFY ALL CONDUCTORS ARE DE-ENERGIZED Copyright ©2022 SemaConnect, LLC. All rights reserved. dwfwdfwfwfwfwffffgd www.SemaConnect.com...
- Page 14 INSTALL CHARGING HEAD UNIT Refer to General Requirements section for station weights VERIFY ALL CONDUCTORS ARE DE-ENERGIZED. COMPLETE ALL ELECTRICAL CONNECTIONS PRIOR TO STEP 4. SEE SYSTEM REQUIREMENTS SECTION FOR CONNECTION DETAILS. RE-INSTALL ACCESS PANEL COVER UPON COMPLETION OF ELECTRICAL CONNECTIONS. Copyright ©2022 SemaConnect, LLC.
- Page 15 INSTALL CABLE RACK Copyright ©2022 SemaConnect, LLC. All rights reserved. dwfwdfwfwfwfwffffgd www.SemaConnect.com...
- Page 16 INSTALL CABLE HOLSTERS Note: A 8" (200 MM) SHANK, 4 MM ALLEN WRENCH IS REQUIRED TO ATTACH THE CABLE HOLSTERS TO THE CHARGING STATION. Copyright ©2022 SemaConnect, LLC. All rights reserved. dwfwdfwfwfwfwffffgd www.SemaConnect.com...
-
Page 17: Pedestal Mount With Cable Management System (Cms)
PEDESTAL MOUNT WITH CABLE MANAGEMENT SYSTEM (CMS) Copyright ©2022 SemaConnect, LLC. All rights reserved. dwfwdfwfwfwfwffffgd www.SemaConnect.com... - Page 18 Pedestal Mount with Cable Management System Inventory Specification Copyright ©2022 SemaConnect, LLC. All rights reserved. dwfwdfwfwfwfwffffgd www.SemaConnect.com...
- Page 19 1. INSTALL ANCHOR PLATE VERIFY ALL CONDUCTORS ARE DE-ENERGIZED Copyright ©2022 SemaConnect, LLC. All rights reserved. dwfwdfwfwfwfwffffgd www.SemaConnect.com...
- Page 20 2. REMOVE ACCESS PANEL COVER AND INSTALL PEDESTAL WITH ACCESS PLATE OPENING FORWARD FACING VERIFY ALL CONDUCTORS ARE DE-ENERGIZED Copyright ©2022 SemaConnect, LLC. All rights reserved. dwfwdfwfwfwfwffffgd www.SemaConnect.com...
- Page 21 3. INSTALL CHARGING HEAD UNIT Refer to General Requirements section for station weights VERIFY ALL CONDUCTORS ARE DE-ENERGIZED. COMPLETE ALL ELECTRICAL CONNECTIONS PRIOR TO STEP 4. SEE SYSTEM REQUIREMENTS SECTION FOR CONNECTION DETAILS. RE-INSTALL ACCESS PANEL COVER UPON COMPLETION OF ELECTRICAL CONNECTIONS. Copyright ©2022 SemaConnect, LLC.
- Page 22 4. INSTALL CABLE RACK (CABLE RACK OPTIONAL WITH CABLE MANAGEMENT SYSTEM) Copyright ©2022 SemaConnect, LLC. All rights reserved. dwfwdfwfwfwfwffffgd www.SemaConnect.com...
- Page 23 5. INSTALL CABLE HOLSTERS Note: A 8" (200 MM) SHANK, 4 MM ALLEN WRENCH IS REQUIRED TO ATTACH THE CABLE HOLSTERS TO THE CHARGING STATION Copyright ©2022 SemaConnect, LLC. All rights reserved. dwfwdfwfwfwfwffffgd www.SemaConnect.com...
- Page 24 6. INSTALL CABLE MANAGEMENT SYSTEM (CMS) Refer to General Requirements section for Cable Management System Weights Copyright ©2022 SemaConnect, LLC. All rights reserved. dwfwdfwfwfwfwffffgd www.SemaConnect.com...
- Page 25 7. INSTALL CMS PEDESTAL CLAMP Copyright ©2022 SemaConnect, LLC. All rights reserved. dwfwdfwfwfwfwffffgd www.SemaConnect.com...
- Page 26 8. INSTALL CABLE MANAGEMENT SYSTEM OUTPUT CABLE CLAMPS 30A/48A Cable Clamp 80A Cable Clamp 18’ Cable – Install clamp 9’ from the output cable J1772 coupler 25’ Cable – Install clamp 9’ from the output cable J1772 coupler Copyright ©2022 SemaConnect, LLC. All rights reserved. dwfwdfwfwfwfwffffgd www.SemaConnect.com...
- Page 27 9. REMOVE CMS COUNTERWEIGHT RETENTION BOLTS Copyright ©2022 SemaConnect, LLC. All rights reserved. dwfwdfwfwfwfwffffgd www.SemaConnect.com...
-
Page 28: Wall Mount Without Cable Management System (Cms)
WALL MOUNT WITHOUT CABLE MANAGEMENT SYSTEM (CMS) Copyright ©2022 SemaConnect, LLC. All rights reserved. dwfwdfwfwfwfwffffgd www.SemaConnect.com... - Page 29 Wall Mount Inventory Specification Copyright ©2022 SemaConnect, LLC. All rights reserved. dwfwdfwfwfwfwffffgd www.SemaConnect.com...
- Page 30 1. REMOVE ACCESS PANEL AND INSTALL WALL MOUNT ASSEMBLY Copyright ©2022 SemaConnect, LLC. All rights reserved. dwfwdfwfwfwfwffffgd www.SemaConnect.com...
- Page 31 2. CONNECT CONDUIT TO WALL MOUNT ASSEMBLY TRADE SIZE: 1” TRADE SIZE: ½” Copyright ©2022 SemaConnect, LLC. All rights reserved. dwfwdfwfwfwfwffffgd www.SemaConnect.com...
- Page 32 3. INSTALL CHARGING HEAD UNIT Refer to General Requirements section for station weights VERIFY ALL CONDUCTORS ARE DE-ENERGIZED. COMPLETE ALL ELECTRICAL CONNECTIONS PRIOR TO STEP 4. SEE SYSTEM REQUIREMENTS SECTION FOR CONNECTION DETAILS. RE-INSTALL ACCESS PANEL COVER UPON COMPLETION OF ELECTRICAL CONNECTIONS. Copyright ©2022 SemaConnect, LLC.
- Page 33 INSTALL CABLE RACK Copyright ©2022 SemaConnect, LLC. All rights reserved. dwfwdfwfwfwfwffffgd www.SemaConnect.com...
- Page 34 INSTALL CABLE HOLSTERS Note: A 8" (200 MM) SHANK, 4 MM ALLEN WRENCH IS REQUIRED TO ATTACH THE CABLE HOLSTERS TO THE CHARGING STATION Copyright ©2022 SemaConnect, LLC. All rights reserved. dwfwdfwfwfwfwffffgd www.SemaConnect.com...
-
Page 35: Wall Mount With Cable Management System (Cms)
WALL MOUNT WITH CABLE MANAGEMENT SYSTEM (CMS) Copyright ©2022 SemaConnect, LLC. All rights reserved. dwfwdfwfwfwfwffffgd www.SemaConnect.com... - Page 36 WALL MOUNT WITH CABLE MANAGEMENT SYSTEM INVENTORY SPECIFICATION Copyright ©2022 SemaConnect, LLC. All rights reserved. dwfwdfwfwfwfwffffgd www.SemaConnect.com...
- Page 37 1. USING THE DRAWING BELOW, MARK ALL AND DRILL ALL ANCHOR CENTERS FOR CMS SUPPORT BRACKETS AND WALL MOUNT BRACKET ASSEMBLY Copyright ©2022 SemaConnect, LLC. All rights reserved. dwfwdfwfwfwfwffffgd www.SemaConnect.com...
- Page 38 2. MOUNT AND SECURE CMS BRACKETS TO WALL Max Anchor Size = Ø 0.236” Copyright ©2022 SemaConnect, LLC. All rights reserved. dwfwdfwfwfwfwffffgd www.SemaConnect.com...
- Page 39 3. MOUNT AND SECURE CMS TO CMS BRACKETS AND TO FLOOR Refer to General Requirements section for Cable Management System Weights Max Anchor Size = Ø 0.236” Copyright ©2022 SemaConnect, LLC. All rights reserved. dwfwdfwfwfwfwffffgd www.SemaConnect.com...
- Page 40 4. REMOVE ACCESS PANEL COVER AND INSTALL WALL MOUNT BRACKET ASSEMBLY AND WALL MOUNT ASSEMBLY Copyright ©2022 SemaConnect, LLC. All rights reserved. dwfwdfwfwfwfwffffgd www.SemaConnect.com...
- Page 41 CONNECT CONDUIT TO WALL MOUNT ASSEMBLY Copyright ©2022 SemaConnect, LLC. All rights reserved. dwfwdfwfwfwfwffffgd www.SemaConnect.com...
- Page 42 INSTALL CHARGING HEAD UNIT Refer to General Requirements section for station weights VERIFY ALL CONDUCTORS ARE DE-ENERGIZED. COMPLETE ALL ELECTRICAL CONNECTIONS PRIOR TO STEP 4. SEE SYSTEM REQUIREMENTS SECTION FOR CONNECTION DETAILS. RE-INSTALL ACCESS PLATE COVER UPON COMPLETION OF ELECTRICAL CONNECTIONS. Copyright ©2022 SemaConnect, LLC.
- Page 43 7. INSTALL CABLE RACK (CABLE RACK OPTIONAL WITH CMS) Copyright ©2022 SemaConnect, LLC. All rights reserved. dwfwdfwfwfwfwffffgd www.SemaConnect.com...
- Page 44 8. INSTALL CABLE HOLSTERS Note: A 8" (200 MM) SHANK, 4 MM ALLEN WRENCH IS REQUIRED TO ATTACH THE CABLE HOLSTERS TO THE CHARGING STATION Copyright ©2022 SemaConnect, LLC. All rights reserved. dwfwdfwfwfwfwffffgd www.SemaConnect.com...
- Page 45 9. INSTALL CABLE MANAGEMENT SYSTEM OUTPUT CABLE CLAMPS 30A/48A Cable Clamp 80A Cable Clamp 18’ Cable – Install clamp 9’ from the output cable J1772 coupler 25’ Cable – Install clamp 9’ from the output cable J1772 coupler Copyright ©2022 SemaConnect, LLC. All rights reserved. dwfwdfwfwfwfwffffgd www.SemaConnect.com...
- Page 46 10. REMOVE CABLE MANAGEMENT SYSTEM (CMS) COUNTERWEIGHT RETENTION BOLTS Copyright ©2022 SemaConnect, LLC. All rights reserved. dwfwdfwfwfwfwffffgd www.SemaConnect.com...
-
Page 47: Start-Up
Start-Up STATION REGISTRATION Once your stations have been installed and prior to initial energization, please contact Customer Service at 1-800-663-5633 or implementation@semaconnect.com to complete station enrollment. If modified output configurations are needed, please provide the following information for each station: •... - Page 48 3. HOUSEKEEPING SemaConnect EV charging stations may be cleaned in accordance with the following guidance: • Use clean, soft cloth along with mild detergent to wash the dirt off • Pour water gently from the top and use a wet/dry cloth to clean all the sides •...
Need help?
Do you have a question about the SEMACONNECT 7 Series and is the answer not in the manual?
Questions and answers