Advertisement
Quick Links
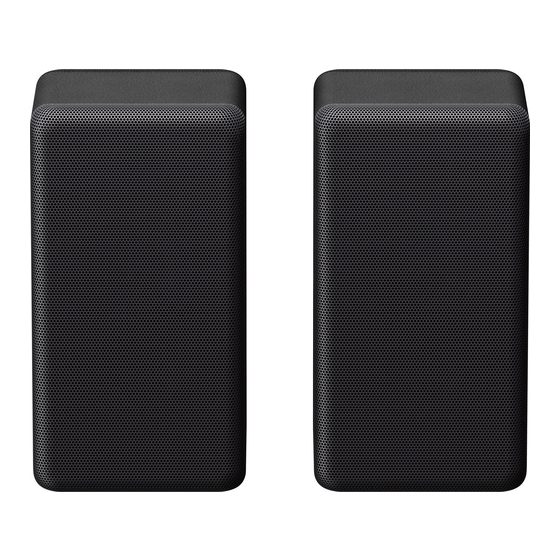
Rear Speaker
Operating Instructions
SA-RS3S
Owner's Record
The model and serial numbers are located on the
bottom of the speakers.
Record the serial numbers in the space provided
below. Refer to them whenever you call upon your
Sony dealer regarding this product.
Model No. SA-RS3S
Serial No.
About compatible
models for the rear
speaker
The SA-RS3S rear speaker works only with the
specified model. For information about compatible
models, visit Sony's website.
In these Operating Instructions, the operations are
described for speakers used with the compatible
model HT-A7000.
Parts and Controls
Front
Power indicator
– Flashes slowly (green): The rear speaker is not
connected to a compatible model.
– Lights up (green): The rear speaker is connected
to a compatible model.
– Flashes twice repeatedly (green): The rear
speaker is attempting to connect to a compatible
model.
– Flashes/lights up (amber): The software is
updating.
– Lights up (red): The rear speaker is in standby
mode.
– Turns off: The rear speaker is turned off.
Note
The brightness of the power indicator syncs with the
DIMMER settings of a compatible model.
Rear
Wall mount hole
(power) button
LINK button
Mounting hole for the general speaker stand
AC inlet
5-011-527-11(2)
©2020 Sony Corporation Printed in Malaysia
Installation
Installing on the Floor
The following illustration is the installation example
to use the speakers with the compatible model
HT-A7000 and an optional subwoofer.
REAR R
REAR L
SA-RS3S
1
Check the right and left rear speakers using the
label on the bottom of them.
"REAR R" is for the right, "REAR L" is for the left.
2
Install the speakers behind your listening
position.
The following installations are recommended to
enjoy the surround sound effectively.
– Align the height position of the speaker with
your ear.
– Turn the speakers to your listening position.
Note
Lay the bottom (the face on which there is a label)
down to install the speaker. Installations other than
above are not supported.
Tip
To obtain a good surround sound, set the speaker
distance from your listening position by using the
setup menu of a compatible model.
For details, refer to the Operating Instructions
supplied with a compatible model.
Mounting on the Wall
The following illustration is the installation example
to use the speakers with the compatible model
HT-A7000 and an optional subwoofer.
SA-RS3S
REAR R
REAR L
Note
• Have the installation done by a Sony dealer or
licensed contractor and pay special attention to
safety during the installation.
• Sony shall not be held responsible for accidents or
damage caused by improper installation,
insufficient wall strength, improper screw
installation or natural disaster, etc.
1
Prepare a screw (not supplied) that is suitable
for the wall mount hole on the rear of the
speakers.
4 mm (3/16 in)
More than 30 mm (1 3/16 in)
5.0 mm
(13/64 in)
10 mm
(13/32 in)
Hole on the rear of the rear speaker
2
Decide the wall mounting position of the
speaker and fasten the screw there.
Approx.
13.5 mm
(approx.
9/16 in)
3
Hang the wall mount hole on the screw.
Check the label on the bottom of the speakers.
"REAR R" is for the right, "REAR L" is for the left.
Note
Prepare screws (not supplied) that are suitable for
the wall material and strength. As a plasterboard wall
is especially fragile, attach the screws securely in the
wall beam. Mount the speakers onto a reinforced
wall making sure that the heights of the right and left
speakers are equal.
Connection
Tip
You can connect the optional subwoofer with a
compatible model in the following way when
installing it too.
1
Turn on a compatible model.
2
Connect the AC power cords (mains leads)
(supplied) to the rear speakers, and then
connect the cords to the AC outlets (mains).
3
Make sure that the power indicators on the
speakers light in green.
When the power indicators light in green, the
connection between the speakers and a
compatible model is established.
If the connection is not established, connect the
speakers to a compatible model manually. For
details, see "If the Connection is not Established
Automatically".
Advertisement

Related Manuals for Sony SA-RS3S


Summary of Contents for Sony SA-RS3S
- Page 1 REAR R Rear REAR L Note • Have the installation done by a Sony dealer or licensed contractor and pay special attention to safety during the installation. • Sony shall not be held responsible for accidents or damage caused by improper installation, insufficient wall strength, improper screw installation or natural disaster, etc.
- Page 2 The connecting process appears on the TV screen. – Follow the steps in “If the Connection is not Please note that Sony cannot answer or respond to To cancel the manual link, select [Cancel]. Established Automatically.”...
- Page 3 If you have any questions about this rear speaker: Precautions Visit: www.sony.com/electronics/support Contact: Sony Customer Information Service Center at 1-800-222-Sony(7669) On safety Write: Sony Customer Information Service Center 12451 Gateway Blvd., Fort Myers, FL 33913 • Should any solid object or liquid fall into the rear speaker,...
Need help?
Do you have a question about the SA-RS3S and is the answer not in the manual?
Questions and answers