Table of Contents
Advertisement
Advertisement
Table of Contents

Related Manuals for Magellan MobileMapper CX


Summary of Contents for Magellan MobileMapper CX
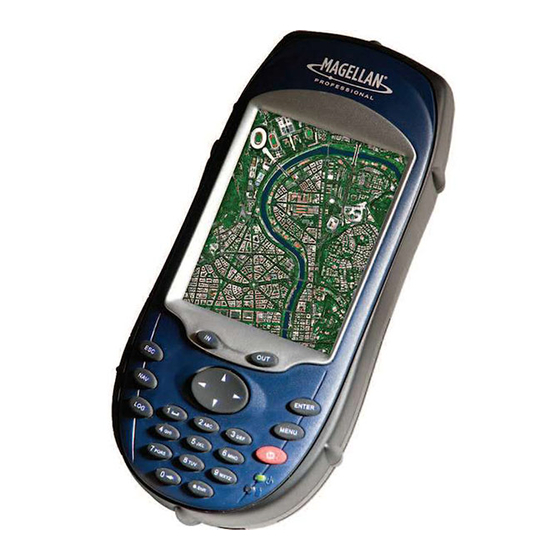
- Page 1 MobileMapper ™ Getting Started Guide...
- Page 2 THIS WARRANTY APPLIES ONLY TO THE ORIGI- NAL PURCHASER OF THIS PRODUCT. In the event of a defect, Magellan Navigation will, at its op- tion, repair or replace the hardware product with no charge to the purchaser for parts or labor. The repaired or replaced prod-...
- Page 3 CA 91773, Phone: +1 909-394-5000, Fax: +1 909-394- 7050 or Magellan Navigation SA - ZAC La Fleuriaye - BP 433 - 44474 Carquefou Cedex - France Phone: +33 (0)2 28 09 38 00, Fax: +33 (0)2 28 09 39 39.
- Page 4 For further information concerning this limited warranty, please call or write: Magellan Navigation SA - ZAC La Fleuriaye - BP 433 - 44474 Carquefou Cedex - France. Phone: +33 (0)2 28 09 38 00, Fax: +33 (0)2 28 09 39 39...
-
Page 5: Table Of Contents
Connection Profile Known... 18 Connection Profile Unknown ... 19 Special Cases... 19 The First Time You Use MobileMapper CX ... 20 Step1: Ask MobileMapper CX to Be Paired with the Cell Phone... 21 Step 2: Allow the Cell Phone to Be Paired with MobileMapper CX ... - Page 6 Returning to Autonomous GPS Mode... 41 Subsequent Uses ... 41 Power & Memory Management ... 42 Power Modes ... 42 Turning Off MobileMapper CX Manually... 43 Checking Battery Status... 43 LED Indicators ... 43 Memory Management... 44 GPS Utilities... 45 DGPS Configuration...
- Page 7 Optimizing Accuracy ...66 General Guidelines ... 66 Recording Data for Post-Processing... 67 Appendices ...69 Updating MobileMapper CX OS Firmware ... 69 Updating MobileMapper CX GPS Firmware ... 70 About Almanac Files... 72 Choosing the Appropriate Real-Time Correction Age Limit ... 72 Assessing MobileMapper Beacon Reception Quality ...
-
Page 9: Introduction
Introduction Thank you for purchasing a MobileMapper CX from Magellan. This Getting Started guide will give you useful information about your Windows CE GPS handheld computer. It will also guide you in your first steps using the system. MobileMapper CX is a handheld device that integrates sub- meter GPS with Microsoft Windows CE in a rugged design suitable for mobile mapping applications. -
Page 10: Software Provided As Standard
(PDAs) or handheld PCs. The Windows CE graphical user in- terface (GUI) is very similar to desktop Windows operating sys- tems. MobileMapper CX is embedded with the Windows CE 5.0 version. Like most Windows CE devices, the MobileMapper CX hand- held has a touch screen. -
Page 11: Receiver Description
• Connects to the I/O module with power supply and communi- cation ports Removable handstrap GPS receiver includes: • Integrated GPS accurate to sub-meter with WAAS/ EGNOS • Ready for RTCM real-time corrections • Internal antenna. Scrolling button Power button... -
Page 12: Side Panel
Side Panel I/O Module USB host port (Type A) for connec- tion to a WiFi key, USB flash drive, card reader etc. DC power input connector External antenna connector Serial port (COM1) DB-9 connector Secure Digital Card slot door: • Open the door to ac- cess the SD card slot Mini USB (Type B) port... -
Page 13: Setting The Mini-Usb Port (I/O Module)
- Tap OK to close the dialog. Resetting MobileMapper CX To reset MobileMapper CX, hold down the ESC, Enter and Pow- er keys simultaneously until the screen goes blank. The Mo- bileMapper CX switches off. You can then power on the device by pressing the power button. -
Page 14: Preparing For First-Time Use
3. Insert the battery into the battery compartment in the 4. Close the battery door and tighten the screws. 5. Attach the clip-on I/O module to the MobileMapper CX ter turn counterclockwise. back of the MobileMapper CX handheld as shown below:... -
Page 15: Turning The Receiver On
7. To detach the clip-on I/O module, press the release button on the module. Turning the Receiver On Once you have charged the battery in your MobileMapper CX, press the red power button until the green LED turns on. Power button... -
Page 16: Calibrating The Screen
Calibrating the Screen The MobileMapper CX touch screen is used both for display and user input. The first time you use your MobileMapper CX you will need to align the display with the touch screen func- tion. Tap each target that appears on the Calibration screen with the tip of the stylus. -
Page 17: Regional Settings
(.CAB) to your device. Use either a card reader to copy the files to an SD card for transfer to the MobileMapper CX or download the files directly to the device using ActiveSync and the unit's USB cable and I/O module. -
Page 18: Establishing A Connection With Your Pc
Establishing a Connection with your PC Using Microsoft ActiveSync, you can connect a desktop com- puter to your MobileMapper CX handheld via the USB data ca- ble. This allows you to install software and transfer files to/ from MobileMapper CX. Magellan recommends you always use the lastest version of ActiveSync. -
Page 19: Working In The Windows Ce Environment
Working in the Windows CE Environment User Interface For Text Input MobileMapper CX comes with an integrated physical keypad and as with most Windows CE devices, you may also use an on-screen keyboard to enter text. To activate the on-screen (or “virtual”) keyboard, tap the keyboard icon... -
Page 20: Using The Stylus
The keyboard default is lower-case alphanumeric letters. - Press the Dot-Shift key to toggle from numeric lock to - Press the Dot-Shift key twice to lock the keypad in Dot-Shift Key - Press the Dot-Shift key three times to activate the upper- - Press the Dot-Shift key four times to bring it back to the Using the Stylus The stylus is used for menu selection or data input on the... -
Page 21: Initializing Gps
- GPS receiver has been reset. - Or the receiver has not been used for more than a few months. Take the MobileMapper CX to a location where there is a clear view of the sky, then: , then select Programs>GPS Utilities>GPS Initialization... -
Page 22: Setting Up Gps Positioning
Setting Up GPS Positioning The GPS Settings tool is used to set the environmental condi- tions in which the unit is to be used. These settings have an impact on both the availability and accuracy of the position computed by the unit. -
Page 23: Viewing Current Gps Status
Elevation Mask. Viewing Current GPS Status The GPS Status utility allows you to quickly see if the GPS re- ceiver is calculating a position from the currently visible GPS constellation. It can also be used to log and playback NMEA data. -
Page 24: Signal Quality/Navigation Window (Sig/Nav)
This window provides the averaged coordinates of the comput- ed position and shows the accuracy figures corresponding to the GPS receiver used in static mode. The Dilution of Preci- sion (DOP) values are also displayed. The data displayed on this tab may be controlled from the Log... -
Page 25: Gps Status Menu Bar
Application As explained in GPS Ports Configuration on page 46, the COM2 port in MobileMapper CX is a virtual COM port named “GPS VSP Output” and has fixed settings: 57600 bauds, 8 data bits, 1 stop bit and no parity bit. -
Page 26: Step-By-Step Procedure For Establishing A Gprs Connection Via Bluetooth
Establishing a GPRS Connection Via Bluetooth Introduction You will use a cell phone associated with MobileMapper CX to operate in NTRIP or Direct IP mode via a GPRS connection. The cell phone should be a Bluetooth-enabled device fitted with a “full IP” SIM card that allows a GPRS connection to be established with the provider. -
Page 27: Connection Profile Unknown
Connection Profile Unknown The GPRS connection profile you want to use is not stored in your cell phone, or your cell phone does not let you list the profiles stored in its memory or SIM card. In this case, you will have to enter the parameters of the con- nection profile in the Dial-Up Connection window. -
Page 28: The First Time You Use Mobilemapper Cx
The First Time You Use MobileMapper CX Please carefully read the procedure outlined in the table be- low. This procedure is described in detail in the continuation of this chapter. Please strictly follow the order in which the in- structions are given. -
Page 29: Step1: Ask Mobilemapper Cx To Be Paired With The Cell Phone
Bluetooth Manager Module on page 50 Detect the Cell Phone Caution! MobileMapper CX and the cell phone should not be too close to each other. Keep a minimum distance of 60 cm (2 feet) between the two devices. 1. Turn on your cell phone. -
Page 30: Step 2: Allow The Cell Phone To Be Paired With Mobilemapper Cx
Step 2: Allow the Cell Phone to Be Paired with MobileMapper CX On the cell phone, after the message triggered by the pairing request from MobileMapper CX, allow a new pair of Bluetooth devices to be created between MobileMapper CX and the cell phone: 1. -
Page 31: Step 3: Re-Boot Mobilemapper Cx's Bluetooth Manager
COMx:” is displayed. NOTE: COM1 is the only physical COM port on MobileMapper CX. COM2 is an internal virtual port and COM3 is automatically assigned as the first Bluetooth vir- tual port at power on. So when you double-tap the Dial-Up Networking icon, COM4 is normally the port used for that connection. -
Page 32: Step 5: Prepare The Gprs Connection
2. Tap OK to close the message window. Note the presence of Create a Shortcut for Future Connections This shortcut will allow you to save time for future connections as you won’t have to list the local services of the cell phone to re-activate the Bluetooth link. -
Page 33: Step 6: Establish The Gprs Connection
4. In the Select a modem field, select the port used on MobileMapper CX (i.e. the port assigned previously) to communicate with the Bluetooth modem of the cell phone (see screen example opposite; the selected modem should be in the form “BT Modem on <CellPhoneName> COMx”). -
Page 34: Troubleshooting
5. Tap OK twice to return to the Dial-up Connection window. 6. Tap on the Connect button. The following messages appear 7. Tap Hide to close the message window. 8. Tap 9. Now it’s time to select your DGPS mode (refer to Selecting Troubleshooting You may encounter problems when attempting to establish the GPRS connection (Step 6 above). -
Page 35: Subsequent Uses
Subsequent Uses Standard Re-Start Procedure Next time you turn on MobileMapper CX and the cell phone, the procedure for re-establishing the GPRS connection will be significantly shorter, as explained below. Because the two de- vices were paired when first using them, you don’t need to make the cell phone discoverable. -
Page 36: Disconnecting Gprs
Disconnecting GPRS You may want to disconnect the GPRS connection. Follow the instructions below to do this from the MobileMapper CX: 1. In the task bar, tap 2. Tap on the icon representing the currently active GPRS 3. Do one of the following: >Settings>Network and Dial-up Con-... -
Page 37: Selecting A Dgps Mode
Selecting a DGPS Mode Introduction MobileMapper CX can be operated in one of the following DGPS modes: 1. SBAS: Differential corrections from SBAS satellites (SBAS) are received by MobileMapper CX itself through one of its GPS reception channels. This is the most straightforward technique to implement DGPS in MobileMapper CX. - Page 38 The table below lists the different steps you have to go through before MobileMapper CX can operate in a given DGPS mode, depending on whether the mode relies on the use of a COM port, Bluetooth or GPRS. DGPS Mode...
-
Page 39: Sbas
DGPS Configuration window where you can read the choice you have just made. - Tap OK again. The window is closed and MobileMapper CX starts operating instantly in SBAS DGPS mode, which means it will dedicate two of its reception channels to SBAS satellites, whenever visible and received, and only the best one will be involved in the DGPS processing. - Page 40 - Tap - Tap - Then go to point 3. below. 2. If you are using COM1 on MobileMapper CX to communi- cate with MobileMapper Beacon (RS232 wire connection): - Attach the I/O module to MobileMapper CX. - Connect the serial cable provided with MobileMapper Bea- - Switch on both MobileMapper Beacon and MobileMapper .
- Page 41 3. Choose MobileMapper Beacon as the DGPS data source: , then Programs>GPS Utilities>DGPS Configuration. - Tap on - Tap on the Select Mode button. - In the Select Differential Mode window, enable the Beacon option and then tap OK. The Settings window opens to let you configure both the beacon and the connection to this beacon.
- Page 42 Settings buttons, you should have first to re-activate them by tapping on the Disconnect button. This would discon- nect the source of DGPS data from MobileMapper CX and so would stop the flow of incoming data packets. lowing two messages are displayed successively: “Please wait...”...
-
Page 43: Direct Ip
Up fields have been filled in accordingly.]. Each Direct IP configuration holds the key information allowing MobileMapper CX to connect to a given correc- tions provider. Having the capability to save several Direct IP configurations in MobileMapper CX will therefore allow... - Page 44 DGPS mode (top of the screen). lowing two messages are displayed successively: “Please wait...” and “Processing incoming data packets...”. page 15) and check that MobileMapper CX is now operat- ing in DGPS mode.
-
Page 45: Ntrip
NTRIP configurations. Each NTRIP configuration holds the key information allowing MobileMapper CX to connect to a given NTRIP caster. Having the capability to save several NTRIP config- urations in MobileMapper CX will therefore allow you to... - Page 46 OK to save this new configuration. Configuration field, tap OK. MobileMapper CX connects to the NTRIP caster. The NTRIP Settings window is dis- played again on which you can choose a network and sta- tion (corrections source) from the caster.
- Page 47 “Processing incoming data packets...”. - Tap OK to close the message window. - Run GPS Status (see Viewing Current GPS Status on page 15) and check that MobileMapper CX is now operat- ing in DGPS mode. - Start your application.
-
Page 48: Other Rtcm Source
- On this screen, set the Real-Time Correction Age Limit - Tap OK and then Connect. data. If you want to use COM1 on MobileMapper CX to commu- nicate with the external device, connect the adequate serial cable between the two units. -
Page 49: Returning To Autonomous Gps Mode
- Tap OK to close the window. This takes you back to the DGPS Configuration window where you can read the choice you have just made. - Tap OK again. The window is closed and MobileMapper CX starts operating instantly in Autonomous GPS mode. Subsequent Uses... -
Page 50: Power & Memory Management
Power & Memory Management Power Modes MobileMapper CX comes with a removable/rechargeable bat- tery, which provides enough energy for a full working day –pro- vided you start your day with a fully charged battery. In order to ensure a longer battery life, use the external power whenev- er possible. -
Page 51: Turning Off Mobilemapper Cx Manually
Suspend field. Turning Off MobileMapper CX Manually , then Shut Down. In the Shut Down window that opens, just tap OK. After a few seconds, the MobileMapper CX will shut down. Checking Battery Status To check the battery level, tap el>Power. -
Page 52: Memory Management
Memory Management The MobileMapper CX has three types of memory: - The Nand Flash memory (“MyDevice”), a non volatile - The removable SD Card memory, a non-volatile memory. - The RAM (volatile memory), mainly used for running pro- Programs or data that are saved in the RAM will be erased when the system is switched off! We recommend that you install programs on “MyDevice”... -
Page 53: Gps Utilities
GPS Utilities The set of GPS utilities provided in the Start menu allows you to configure and monitor MobileMapper CX’s internal GPS re- ceiver. This chapter describes the full set of GPS Utilities, which includes the following items: - DGPS Configuration... -
Page 54: Gps Ports Configuration
USB serial), or to the application running on Mo- bileMapper CX, through the GPS VSP output port (VSP=Virtu- al Serial Port). The VSP port is also known as “COM2” and is always active. See also MobileMapper CX Port Allocation on page 75. Using this utility, you can therefore: •... -
Page 55: Gps Settings
As explained in the GPS Reset window, you may reduce the time to first fix by running the GPS Initialization utility (see Initializing GPS on page 13). Until a new almanac file is received from the GPS constellation, MobileMapper CX uses a non-erasable almanac file stored in its memory to start the satellite acquisition process. - Page 56 Tap this icon to open the Setup window. This window allows you to set the cut-off angle, the maximum PDOP value and whether or not to include elevation for the GPS position (2D or 3D). Tap this icon to access the sky plot graph settings. The following...
-
Page 57: Switching Between Two Utilities
Use the icon located at the far right in the task bar to switch from a running application to another. For example if DGPS Configuration and GPS Status are both running in the background while using Mission Planning, the menu opposite will pop up when you tap this button. -
Page 58: Bluetooth Manager Module
Here are two typical examples in which MobileMapper CX is successively the inquiring device and the host device: • When you operate MobileMapper CX in NTRIP or Direct IP • When you output GPS data via the auxiliary port, of the local services of the other device. -
Page 59: Bluetooth Range
Exit from the pop- - In the task bar, tap up menu. This turns off Bluetooth. Detecting Bluetooth-Enabled Devices Use the following two buttons to let MobileMapper CX’s local Bluetooth controller detect the Bluetooth-Enabled devices present nearby: icon in the task bar. -
Page 60: Pin Code, Detectability & Authentication
- Tap - Tap PIN Code, Detectability & Authentication - Tap - Tap on the Security tab. The bottom of the window shows - To change the PIN code, enter the desired code in the - To make the device discoverable (or detectable), enable the first time you run a search. -
Page 61: Local Services
• Object Push Service. This service is required to run the File Transfer Service but is not usable as such in MobileM- apper CX. To list the local services offered by MobileMapper CX: • Tap located in the Bluetooth Manager toolbar. The Bluetooth window shows the three icons representing its three local services. -
Page 62: Using The Serial Port Service
Using the Serial Port Service Assuming you want to send the NMEA messages coming out from your MobileMapper CX to a computer screen, follow the procedure below, based on the use of MobileMapper CX’s Se- rial Port Service: - On MobileMapper CX, make sure: •... -
Page 63: Using The File Transfer Service
• Run Bluetooth. • Detect MobileMapper CX. • If required, pair the two devices (you’ll need to enter the PIN code defined in the MobileMapper CX Blue- tooth properties; see page 52). • List the local services offered by MobileMapper CX •... - Page 64 MobileMapper CX is detected as a WindowsCE PDA. • If required, pair the two devices (you’ll need to enter the PIN code defined in the host MobileMapper CX Bluetooth properties; see page 52). • List the local services offered by the remote (host) MobileMapper CX.
-
Page 65: Creating Shortcuts For Remote Services
Once a service in a detected remote device has been found, you can create a shortcut for this service. This means you will no longer have to ask MobileMapper CX to find this service to be able to use it. -
Page 66: Web Tools
The Magellan MobileMapper CX unit comes with standard pro- grams allowing Internet access and email exchange while be- ing still in the field. MobileMapper CX lets you go to the Internet using one of the following two connections: • Via a Bluetooth-enabled, GPRS-enabled cell phone. -
Page 67: Wifi Connection
WiFi Connection IMPORTANT! Only model 5421A from U.S.Robotics can be used with MobileMapper CX. The driver of this adapter being pre-installed, no installation phase is needed (the device is fully plug-and-play). You will however find an Installation Guide in the box but remember you don’t need to go through any of the procedures described in this Guide. -
Page 68: Using The Inbox Program
Using the Inbox Program Setting Up an Email Service Below are a few instructions to help you set up an email ser- vice in Inbox. Before going any further, make sure you have the following information available for the email account you want to connect to: 1. - Page 69 - Tap Add. This opens the Service Name dialog. - Select the service type used by the email account you - Name the service or keep the default name (the default - Tap OK. - Enter the parameters listed below (see also POP3/IMAP4 POP3 Server Type Settings want to connect to.
- Page 70 In this case, enter any valid email address. Note that this address will not be affected by the email traffic from/to your MobileMapper CX. (Example: Pete.Smithetz@fcs.com) Screens 2/3 and 3/3: Miscellaneous settings about how Inbox handles and filters emails (see screen examples above).
-
Page 71: Using Inbox
- Tap the Finish button to create the email service. This takes you back to the Options screen from which you can now view and edit the Inbox options (Compose, Read, Delete, Storage). See screen examples below. Using Inbox Once an Internet connection has been established via GPRS or WiFi and an email service has been created In Inbox, do the following to use the email box: - In the Inbox menu bar, select Service and make sure the... -
Page 72: Nmea Data Output
- In the GPS Auxiliary Output pane, check on the Enable - Tap Configure Port to configure the selected port. Enter its - Tap OK. MobileMapper CX will now deliver the NMEA mes- , then Programs>GPS Utilities>GPS Ports Configura- tion. -
Page 73: Outputting The Nmea Message On Usb
- Tap OK. MobileMapper CX will now deliver the NMEA mes- sage you have defined on its USB port. Outputting NMEA Data on Virtual Port COM2... -
Page 74: Optimizing Accuracy
Optimizing Accuracy General Guidelines There are five basic rules for recording MobileMapper CX rover data so as to achieve the optimal accuracy: 1. Allow the receiver to have full “view” of the sky the entire 2. When you record a point feature, remain stationary for 10 3. -
Page 75: Recording Data For Post-Processing
10-minute period of con- tinuous lock will be, but it will be more accurate than a real- time corrected position. IMPORTANT! Only the SBAS mode can be used while record- ing raw data to let MobileMapper CX deliver real-time DGPS positioning. - Page 76 SBAS-corrected position may be more accurate. When recording a job for post-processing, the receiver records GPS measurements the entire time the job is open – not just when you’re recording data into a feature. Therefore, you do not need to record each feature for more than 20 minutes.
-
Page 77: Appendices
(OS) firmware can be downloaded from ftp.magellangps.com in the /Mobile Mapping/MM CX/Firmware/OS/ 1. Turn on MobileMapper CX and either attach it to external power or make sure that there is at least a 25% charge in the battery (tap Start>Settings>Control Panel>Power). -
Page 78: Updating Mobilemapper Cx Gps Firmware
1. Go to 2. Open the GPS firmware zip file and extract the two com- 3. Copy the extracted files to MobileMapper CX’s SD card by successfully,” tap OK on the OS Loader window. in the upper right of the Windows screen to exit back to the desktop. - Page 79 4. Copy all the files extracted from the GPS firmware zip file from your PC to the MobileMapper CX’s SD card using ActiveSync’s Explore utility. The Explore button is located in Microsoft Active Sync window’s taskbar (third button from the left).
-
Page 80: About Almanac Files
About Almanac Files When first using your MobileMapper CX, and because there is no recent almanac file available yet in the unit, the internal GPS receiver (or Mission Planning if used at that time) will use a default almanac file stored in its protected memory. -
Page 81: Assessing Mobilemapper Beacon Reception Quality
SNR. Consider working with a station that would give a better SNR. MobileMapper CX gives you the ability to analyze the key re- ception parameters of the MobileMapper Beacon. You can do this anytime, when setting the DGPS beacon mode, or later while using the beacon provided you first ask MobileMapper CX to stop processing the incoming correction data packets. -
Page 82: Bluetooth Manager Toolbar Functions
Bluetooth devices. Provides access to all Bluetooth local services available in the MobileMapper CX unit. Allows you to view or edit the properties of MobileMapper CX’s Blue- tooth device: General, Security and Options. Returns the software version of Bluetooth Manager software. -
Page 83: Mobilemapper Cx Port Allocation
MobileMapper CX Port Allocation Port Assigned to Number COM1 RS232 COM2 Internal use (VSP) COM3 USB ActiveSync COM4 Bluetooth Serial Service COM5 Free COM6 USB Serial COM7 Free COM8 Free COM9 Free... -
Page 84: Index
Inquiring device 50 LED Indicators 43 Local services (Bluetooth) 23 Lock status 34 Log NMEA Data 17 Login 29 Magellan System Info 70 Manual tuning 33 Maximum DOP 14 Message types #1 and #3 29 Mini USB 4 Minimum distance (between... - Page 85 Tap 12 Tap and hold 12 Text Input 11 Thresholds 17 Tree Canopy 14 Tune by site 33 Update GPS firmware 70 Update OS firmware 69 Upload files 57 Urban Canyon 14 USB 10 USB flash drive 4 USB host port 4...
- Page 86 MobileMapper ™ Magellan Mobile Mapping Solutions Contact Information: In USA Toll Free (Sales in USA/Canada) In South America In Singapore In China In France In Germany In Russia In the Netherlands www.pro.magellangps.com...
Need help?
Do you have a question about the MobileMapper CX and is the answer not in the manual?
Questions and answers