
Related Manuals for Sungrow ST2752UX

Summary of Contents for Sungrow ST2752UX
- Page 1 Operation & Maintenance Instruction Liquid-cooling Energy Storage Systems Liquid-cooling Energy Storage SystemsOperation & Maintenance InstructionLiquid- cooling ESS O&M Instruction-OEN- Ver11-202208 Liquid-cooling ESS O&M Instruction-OEN-Ver11-202208...
-
Page 3: All Rights Reserved
Software Licenses • It is prohibited to use data contained in firmware or software developed by SUNGROW, in part or in full, for commercial purposes by any means. • It is prohibited to perform reverse engineering, cracking, or any other operations that... -
Page 4: About This Manual
About This Manual This manual describes the commissioning, troubleshooting, and maintenance of the ESS. Target Group This manual is for operators of the power storage plant and qualified technical personnel. The ESS must and can only be installed by professional technicians who meet the following requirements: •... - Page 5 Indicates a slightly hazardous situation which, if not avoided, may result in minor or moderate injury. Indicates a potential hazard which, if not avoided, will result in device malfunction or property damage. “NOTE” indicates additional information, emphasized contents or tips that may be helpful, e.g., to help you solve problems or save time.
- Page 6 Explanation Marks In case of contact with eyes, rinse the eyes immediately with running water or normal saline; and seek medical help in time. It is required to wear goggles. Abbreviations Complete designation Abbreviations Battery Energy Storage System BESS Energy Storage System Battery Connection Panel Battery Supply Panel Power Conversion System...
- Page 7 Unless otherwise specified, devices in this manual are referred to as the abbreviations above.
-
Page 9: Table Of Contents
Contents All Rights Reserved .....................I About This Manual......................II 1 Introduction .......................1 2 Commissioning ....................2 2.1 Inspection Before Powering up ................2 2.2 Powering on Steps ..................2 2.3 Pre-run Preparation ..................4 2.4 Commissioning ....................4 2.4.1 Communication Commissioning .............4 2.4.2 Charge-Discharge Commissioning ............5 2.4.3 Charge-Discharge Cycle Commissioning ..........5 3 Routine Maintenance ..................6... - Page 10 3.7.1 Overview ....................22 3.7.2 Visual Inspection.................23 3.7.3 Linkage Testing...................24 4 Common Maintenance Operations ..............26 4.1 Coolant Filling and Drainage Operations ............26 4.1.1 Coolant Replacement Intervals ............26 4.1.2 Safety Precautions ................27 4.1.3 System Components Introduction............28 4.1.4 Coolant Filling and Drainage Kit ............29 4.1.5 System Drainage ................30 4.1.6 System Filling ..................32 4.2 Battery Module Replacement ................35...
-
Page 11: Introduction
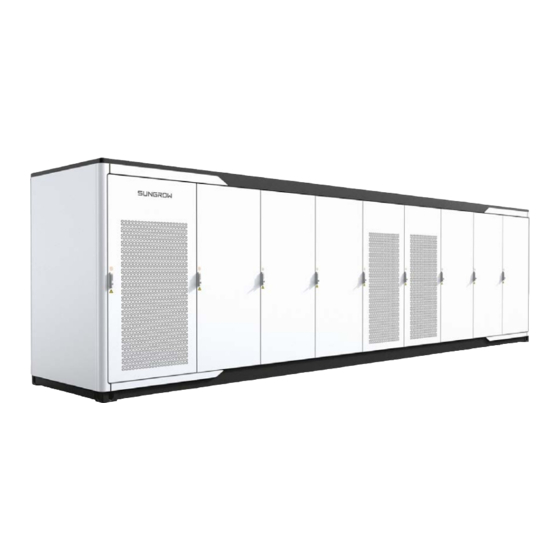
Introduction The typical functional block diagram of ESS is shown below. The core equipment mainly consists of PCS, medium voltage transformers, DC/DC converters, BCP, BSP, batteries, battery management systems, energy management systems, local controllers, etc. The auxiliary systems mainly consist of LCS, FSS, lighting systems, etc. figure 1-1 Functional block diagram of ESS *The above pictures are for reference only, please refer to the actual product received! -
Page 12: Commissioning
Commissioning Inspection Before Powering up Before powering up the equipment, check the following items carefully. • Check that the positive and negative wiring of the battery RACK and the DC/DC power cable are correctly wired. • Check that the battery RACK, DC/DC and battery terminal cabinet power circuit wiring should not be loose. - Page 13 Operation & Maintenance Instruction 2 Commissioning Close the DC/DC load switches SWITCH1 and SWITCH2 in the BESS, close the miniature circuit breakers of the BESS in turn according to the electrical drawings, and check whether the voltage is normal. For specific steps, please refer to the system manual of the specific project.
-
Page 14: Pre-Run Preparation
2 Commissioning Operation & Maintenance Instruction • The emergency stop button is released and the Start/Stop switch is in Start position. • Grid main switch is in OFF position. • Measure the DC and AC voltages with multimeter to check if they meet the PCS startup requirements and there is no over-voltage hazard. -
Page 15: Charge-Discharge Commissioning
Operation & Maintenance Instruction 2 Commissioning 2.4.2 Charge-Discharge Commissioning step 1 Control the PCS startup through the background monitoring interface, close the ring network cabinet, issue the PCS startup command, the PCS should be able to start normally, and issue the PCS shutdown command, the PCS should be able to stop normally. step 2 Through the background monitoring interface, take 100kW as the step, increase the PCS power to the actual maximum dischargeable power, run for 10min, the intelligent unit board should be able to distribute the power to the PCS normally. -
Page 16: Routine Maintenance
Precautions Before Maintenance • Do not open the door to maintain the batteries in rainy, humid or windy days. SUNGROW shall not be held liable for any damage caused by violation of the warning. • Avoid opening the container door when the humidity is high in rain, snow or fog, and make sure that the seals around the container door do not curl when the door is closed. -
Page 17: Maintenance Item And Period
Operation & Maintenance Instruction 3 Routine Maintenance Maintenance Item and Period 3.2.1 Maintenance (Every two years) Item Check method Check the following items, and correct immediately those failing to meet the relevant requirements: • Check whether there is any damage or deformation of the container and internal devices. -
Page 18: Maintenance (Every Half A Year To Once A Year)
3 Routine Maintenance Operation & Maintenance Instruction Item Check method Check the temperature of the radiator and the amount of dust Air inlet and outlet accumulated. Clean heat-dissipation modules with a vacuum cleaner if necessary. Completely power off the devices inside the BESS before checking. For any non-conformances found during inspection, correct them immediately. -
Page 19: Maintenance Of Liquid Cooling System
Operation & Maintenance Instruction 3 Routine Maintenance Item Check method • Check the cleanness of the circuit board and other elements and components. • Check the temperature of the radiator and the amount of dust accumulated. Clean heat-dissipation modules with a vacuum Internal cleaner if necessary. - Page 20 3 Routine Maintenance Operation & Maintenance Instruction Item Content Check method Maintenan- ce tools Check whether the fan blades 1. The fan blade rotates Screwdriver cannot rotate or are damaged. If smoothly without with long so, replace the fan. abnormal noise; handle 2.
-
Page 21: Container Maintenance
Operation & Maintenance Instruction 3 Routine Maintenance Container Maintenance 3.4.1 Cleaning Container Appearance Clean the top and then the sides. Wash it directly, or wash and flush with water simultaneously. Check the container appearance: Case 1:Dirt on surface caused by water spots and dusts can be cleaned. Case 2:Surface dirt and damaged finish, which cannot be cleaned. - Page 22 3 Routine Maintenance Operation & Maintenance Instruction Graphics Description 1.Polish the paint surface with blistering or scratches with an abrasive paper for a smooth surface. 2.Wet the cleaning cloth with water or 97% alcohol, and scrub the damaged parts to remove surface stains.
- Page 23 Operation & Maintenance Instruction 3 Routine Maintenance Graphics Description 1. Polish the damaged parts with an abrasive paper to remove rust and other burrs for a smooth surface 2. Wet the cleaning cloth with water or 97% alcohol, and scrub the damaged parts to remove surface stains and dust.
-
Page 24: Checking Door Locks And Hinges
3 Routine Maintenance Operation & Maintenance Instruction 3.4.2 Checking Door Locks and Hinges Check whether the door locks and hinges of the container can be used normally after cleaning. Lubricate the door lock holes and hinges properly when necessary. 3.4.3 Checking Sealing Strips If the sealing strip is in good condition, it can effectively prevent water seepage inside the container. - Page 25 Operation & Maintenance Instruction 3 Routine Maintenance Maintenance performed once every two years Inspection item Inspection method Check the following items. In case of nonconformity, take corrective actions immediately: • Check the battery cluster and internal devices for damage or deformation. •...
- Page 26 3 Routine Maintenance Operation & Maintenance Instruction Maintenance performed once a year Inspection item Inspection method Check the following items. In case of nonconformity, take corrective actions immediately: • Check whether there are flammable objects at the top of the battery cluster. •...
-
Page 27: Maintenance Precautions
In case of any doubt on operation and maintenance of this product, contact the Customer Service Center of SUNGROW instead of operation without permission. 3.5.3 Maintenance Operating temperature: The working temperature should be kept between 0℃ ~45℃. - Page 28 3 Routine Maintenance Operation & Maintenance Instruction The RACK should not be charged or discharged with high magnifying power. The continuous charging and discharging current of a single rack should not exceed the rated current. When the energy storage system is not used in a long time, it should be charged once every six months, until its SOC is 50% to 80%.
-
Page 29: Pcs Maintenance
Operation & Maintenance Instruction 3 Routine Maintenance PCS Maintenance 3.6.1 Safety Rules Only qualified personnel can perform the work described in this chapter. Do not leave any screws, washers or other metallic parts inside the PCS to avoid damages to the PCS. Disconnection of the switches in no way implies that there is no voltage of the cable connection terminals inside the AC and DC cabinet. - Page 30 3 Routine Maintenance Operation & Maintenance Instruction Item Method Interval • Read Web interface data; • Save running data, parameters and logs to a Once a disk or a file; Save software data month • Check each parameter setting; • Update software •...
- Page 31 Operation & Maintenance Instruction 3 Routine Maintenance Item Method Interval • Check whether the screws of the control terminals are loose. Refasten them with screwdriver if necessary; • Check whether the terminals of the main circuit Once per Terminal and cable are in poor contact and whether the screws are hot;...
-
Page 32: Filter Checking And Cleaning
3 Routine Maintenance Operation & Maintenance Instruction Almost all maintenance work requires no internal protective cover during maintenance. Make sure to reassembly the cover and fasten all the screws after the maintenance work. Make sure all bolts are securely fixed. The frequency of maintenance operations could be increased according to the environmental conditions of the place where the PCS is located, plant capacity and on-site situations. -
Page 33: Visual Inspection
The maintenance of the fire protection system should be operated by SUNGROW after-sales technical support or local personnel/institutions with fire protection system commissioning qualifications. If the operation is performed by an... -
Page 34: Linkage Testing
3 Routine Maintenance Operation & Maintenance Instruction 3.7.3 Linkage Testing Tools: a fire test lance, automatic fire alarm controller (programmed), a mobile phone with SensePoint software installed, a canister of 10% LEL (or 50% LEL) methane gas. step 1 Combustible gas & BSC communication & control logic. The BSC reads the combustible gas concentration values (distinguishing between left and right) via RS485 communication and uploads the LC display to the customer. - Page 35 Operation & Maintenance Instruction 3 Routine Maintenance For factory testing, the latest calibration time and test time of the detector used should not exceed 180 days and should be recalibrated and qualified before it is used for testing. If the detector is faulty or does not read correctly, the detector and calibration time should be checked and the latest calibration time and test time of the detector used should not exceed 360 days.
-
Page 36: Common Maintenance Operations
Coolant 1. There are obvious impurities in clamp, slotted screwdriver. antifreeze. 2. Note: Please contact Antifreeze turns from Sungrow Customer Service pink to dark red. 3. to replace hardware Coolant PH value facilities. less than 7.3. Coolant PH Value Test step 1 Power down the system: Open the door of the power distribution cabinet in the BSP cabinet, and turn off the system circuit breaker (flick the lever down). -
Page 37: Safety Precautions
Operation & Maintenance Instruction 4 Common Maintenance Operations step 5 Use a PH test strip or PH measuring instrument to test the coolant sample. If the coolant PH value is less than 7.3, the coolant in the whole system shall be drained and refilled. - - End 4.1.2 Safety Precautions General Safety... -
Page 38: System Components Introduction
4 Common Maintenance Operations Operation & Maintenance Instruction Coolant Recycling The coolant and packaging shall not be discarded at will. The disposal of scrap must comply with relevant requirements. 4.1.3 System Components Introduction Chiller Cabinet The chiller cabinet is composed of a chiller and the system coolant filling and drain port. Removing the sealing plate under the chiller to operate ball valves V1 and V2 to fill and drain the coolant in the whole system. -
Page 39: Coolant Filling And Drainage Kit
Operation & Maintenance Instruction 4 Common Maintenance Operations DCDC Cabinet The DCDC cabinet is composed of 8 DCDCs, a power distribution cabinet at the lower left, and a wiring cabinet at the lower right. The system circuit breaker, the circuit breaker of the chiller, and the power supply interface of the coolant filling and drainage kit are all located in the power distribution cabinet. -
Page 40: System Drainage
4 Common Maintenance Operations Operation & Maintenance Instruction One end of the coolant filling pipe is a quick joining piping joint with a ball valve V5 matched with the system coolant filling port. The special coolant drain pipe can also be stored in the compartment. - Page 41 Operation & Maintenance Instruction 4 Common Maintenance Operations step 4 Squeeze both ends of the plug at the drain port D1, and remove the plug at the drain port D1. step 5 Insert the other end of the drain pipe into the drain port D1 until hearing a crisp click sound. The coolant has flowed out at this time.
-
Page 42: System Filling
4 Common Maintenance Operations Operation & Maintenance Instruction step 6 Open the ball valve V1 at the system filling port. step 7 Open the ball valve V5 on the coolant filling pipe in the kit. step 8 Open the drain valve on the kit, and the coolant has flowed out at this time. step 9 If no liquid flows out of the suction pipe within 30 s, the system coolant drainage is finished (It requires about 9 barrels to store the coolant in the whole system). - Page 43 Operation & Maintenance Instruction 4 Common Maintenance Operations step 8 Close the drain valve on the kit. step 9 Open the branch ball valves (ball valves V3 and V4 closed when draining coolant in a single column). step 10 Connect the plug of the kit to the power distribution cabinet in the DCDC cabinet, and the power indicator of the kit will light up.
- Page 44 4 Common Maintenance Operations Operation & Maintenance Instruction and replace the faulty components. It is strictly forbidden to plug and unplug the joints while the liquid pressure is still present. step 22 Switch the system to a low-speed circulation mode on the chiller display screen. step 23 The chiller will be shut down after 60min of operation.
-
Page 45: Battery Module Replacement
Operation & Maintenance Instruction 4 Common Maintenance Operations Battery Module Replacement 4.2.1 Preparation System power-off A system level disconnection must be carried out prior to the PACK replacement operation: press the battery container emergency stop button, open the BSP cabinet door, switch off the system circuit breaker and stop all auxiliary power to the battery container. -
Page 46: Connecting The Drainage Pipe
4 Common Maintenance Operations Operation & Maintenance Instruction 4.2.3 Connecting The Drainage Pipe First locate the bottom pipe drain valve and remove the fixings by squeezing the valve pins by hand. The drain tube is inserted into the drain valve and the other end of the tube is inserted into a pre-prepared liquid collection bucket for temporary storage and re-use. -
Page 47: Replace The Faulty Pack
Operation & Maintenance Instruction 4 Common Maintenance Operations The hoisting assembly ("hoisting tool") is as follows: 4.2.5 Replace the Faulty Pack Preparation: • Check whether tools are complete, the crane is in place, the cushion wood/cushion block is prepared as required on-site, and whether the personal protective equipment is well worn. - Page 48 4 Common Maintenance Operations Operation & Maintenance Instruction step 1 Open the door and secure it to the fixing point as shown in the figure below. step 2 Hoist to move the platform and land it in front of the door. The distance between the platform and the container should be 5~10 cm, as shown in the following figure.
- Page 49 Operation & Maintenance Instruction 4 Common Maintenance Operations The deviation between the platform guide rail and the center of the container door should be within 10 cm, as shown in the following figure. step 3 Unfold platform supports. The recommended angle of unfolding ranges from 60°~ 90°, and 90°...
- Page 50 4 Common Maintenance Operations Operation & Maintenance Instruction When adjusting the level, it is necessary to pay attention to the level of the platform surface in real time, and here are the adjustment suggestions for various non-level conditions. i. If the platform surface is low on the left and high on the right, raise left support 1 or lower right support 1.
- Page 51 Operation & Maintenance Instruction 4 Common Maintenance Operations iii. If the platform surface is high at the front and low at the back, lower left support 1 and right support 1, and raise left support 2 and right support 2. iv.
- Page 52 4 Common Maintenance Operations Operation & Maintenance Instruction step 6 Pull out the PACK. Pull out the PACK by levers. When the battery Pack is about to be dragged out of the container, check from the side whether the distance between the bottom of the Pack and the platform surface is appropriate.
- Page 53 Operation & Maintenance Instruction 4 Common Maintenance Operations During the pull-out process, as the Pack moves, the center of gravity of the platform changes, which will bring about changes in the level of the platform surface. Here are the adjustment suggestions for various non-level conditions. •...
- Page 54 4 Common Maintenance Operations Operation & Maintenance Instruction If the rollers are in the status below, raise left support 2 and right support 2. • Phase 3: End of platform bearing: It is recommended that the Pack is placed stably and evenly on the platform as shown below.
- Page 55 Operation & Maintenance Instruction 4 Common Maintenance Operations Platform surface adjustment: When the new Pack is pushed in, the platform levelness changes in an opposite way as the old Pack is pulled out. At the initial stage, the platform surface should be 1 cm (recommended) higher than the corresponding rail, as shown below (raise left support 1 and right support 1).
-
Page 56: Operation After Pack Replacement
4 Common Maintenance Operations Operation & Maintenance Instruction • Push-in status inspection: Refer to the roller inspection steps for pulling out the Pack. - - End 4.2.6 Operation after Pack Replacement • Transfer the tools to the truck, drive the crane away, and recycle the cushion wood/ cushion block according to the situation. -
Page 57: Fuse Replacement
Operation & Maintenance Instruction 4 Common Maintenance Operations figure 4-6 BMU board mounting position step 3 Replace the BMU board: re-insert the communication cable terminals to avoid the connection wires falling off the terminals, tighten the BMU board fixing bolts and re-install the front cover plate, taking care to check that the cover plate is sealed tightly. - Page 58 4 Common Maintenance Operations Operation & Maintenance Instruction step 3 After replacing the faulty fuse, reinstall the fuse in the reverse order of the above and plug in the connection to the battery pack tightly. - - End...
-
Page 59: Troubleshooting
If any exception occurs to the Turnkey Station, it is suggested to preliminarily troubleshoot the product according to the troubleshooting methods described in this manual. If the problem still persists or there is still any questions, please contact SUNGROW. It would be helpful if the following information is provided during a call. - Page 60 920us. 3. If the fault is not caused by the foregoing reasons and still exists, please contact SUNGROW. Normally, the machine will reconnect to the grid when the DC voltage returns to normal. If the fault repeatedly occurs (If the busbar 1.
- Page 61 LVRT required 4. If the fault is not caused by the automaticall- duration. In off-grid foregoing reasons and still exists, y cleared mode: Enable the please contact SUNGROW. 30s after AC under-voltage protective function only after shutdown. the output voltage is stable.
- Page 62 3. If the fault is not caused by the LVRT required shutdown. foregoing reasons and still exists, duration. In off-grid please contact SUNGROW. mode: Enable the AC over-voltage function only after the output voltage is stable. The protection is as the same as that of grid connection.
- Page 63 3. If the fault is not caused by the mode: The function only after foregoing reasons and still exists, fault will be the output voltage please contact SUNGROW. automaticall- is stable. The y cleared protection is as the 30s after...
- Page 64 Wait for the inverter to return to an over-current in automaticall- normal. If the fault persists, please Module the hardware (- y cleared for contact SUNGROW to manually Protection including AC/DC 5 times at power down the machine and clear over-current), or the most. After the fault.
- Page 65 Corrective measures condition condition 5. If the fault is not caused by the foregoing reasons and still exists, please contact SUNGROW. Generally, the machine will reconnect to the grid when the internal temperature returns to normal. If the fault repeatedly occurs: 1.
- Page 66 5s. protection parameter settings. value. 4. If the fault is not caused by the foregoing reasons and still exists, please contact SUNGROW. 1. Three-phase AC output is 1.25 times larger than the rated current. 2. Or the load is 1.3...
- Page 67 2. If the fault is not caused by the without other 3. The foregoing reasons and still exists, faults. communication is please contact SUNGROW. abnormal, and the Tigbt is greater than 93 for 6s in operation mode. 4. The communication is...
- Page 68 4. Check whether the fan is running properly. Replace the fan if necessary. 5. If the fault is not caused by the foregoing reasons and still exists, please contact SUNGROW. Generally, the fault will be cleared The trigger In off mode, the Hardware...
-
Page 69: Bess Faults And Corrective Measures
Corrective measures condition condition current is higher disappears repeatedly occurs, please contact than 350A for 5s, or continuously SUNGROW. in operation mode, for 2min the DC voltage is without other lower than 100V for faults. 500ms. For further troubleshooting operations please refer to the PCS user manual for the specific project. - Page 70 5 Troubleshooting Operation & Maintenance Instruction Fault name Common causes Corrective measures • Check that the BSC parameters are set correctly. Cell under- Single cell voltage voltage consistently below set • Check for abnormal cell voltage. failure fault threshold. • Check the voltage sampling line for abnormalities.
- Page 71 Operation & Maintenance Instruction 5 Troubleshooting Fault name Common causes Corrective measures • Current collection abnormalities. Current • Disconnected, • Check that the current sampling collection loose wire is not disconnected. fault misconnected sampling wire. • CMU failure. • Broken voltage collection •...
- Page 72 5 Troubleshooting Operation & Maintenance Instruction Fault name Common causes Corrective measures • Measure the fuse for an open • Short circuit, circuit and replace it in case of prolonged overload. abnormality. • Loose feedback Fuse failure • Check that the wiring is not wire.
- Page 73 Operation & Maintenance Instruction 5 Troubleshooting Alarm name Common causes Corrective measures • The charge is stopped for 5 minutes (or the system starts to discharge) alarm Total voltage RACK voltage checked to see if it resumes over-voltage consistently exceeds automatically.
- Page 74 5 Troubleshooting Operation & Maintenance Instruction Alarm name Common causes Corrective measures RACK captures the • After a drop in PCS operating difference between the power, check that the alarm is automatically restored. highest cell Cell temperature and the • Check that the liquid-cooled unit is temperature turned on properly.
-
Page 75: Bsc Fault / Alarm List
The corrective measures mentioned above are for reference only. In case of any fault, please contact the Customer Service Center of SUNGROW for professional solutions. 5.3.2 BSC Fault / Alarm List BSC: mainly collects signals from nodes such as temperature, fire, and UPS of the ESS. - Page 76 5 Troubleshooting Operation & Maintenance Instruction table 5-3 BSC Fault List Fault name Common causes Corrective measures Node input signals Node 1~ • Check for loose node feedback differ from the default Node 16 signal wires and abnormal node configuration signals feedback messages.
- Page 77 Operation & Maintenance Instruction 5 Troubleshooting Alarm Common causes Corrective measures name • Check that the BSC and CMU communication lines The BSC BSC-CMU connected. communicates with communica- • Check the CMU matching resistor the CMU exceptionally. tion alarms abnormalities, resistance value is approximately 62Ω.
-
Page 78: Lc Fault / Alarm List
The corrective measures mentioned above are for reference only. In case of any fault, please contact the Customer Service Center of SUNGROW for professional solutions. 5.3.3 LC Fault / Alarm List LC: To facilitate information management of the energy storage system, an optional local controller is used to collect information on the operation of the PCS, BCP and other equipment in the system and upload this information to the EMS. - Page 79 Operation & Maintenance Instruction 5 Troubleshooting table 5-5 LC Fault List Fault name Common causes Corrective measures • Check if the LC and PCS networks are on the same LAN under the All PCS and LC system. communication LC-PCS • Check the communication lines exceptions under the Comm Fault.
-
Page 80: Fss Fault List
SPD for abnormalities. The corrective measures mentioned above are for reference only. In case of any fault, please contact the Customer Service Center of SUNGROW for professional solutions. 5.3.4 FSS Fault List table 5-7 FSS Fault List... - Page 81 Module Module open circuit. • Check that the 47k resistor is OK. open circuit The corrective measures mentioned above are for reference only. In case of any fault, please contact the Customer Service Center of SUNGROW for professional solutions.
-
Page 82: Temperature Control System Fault/Alarm List
5 Troubleshooting Operation & Maintenance Instruction 5.3.5 Temperature Control System Fault/Alarm List table 5-8 Temperature Control System Fault List Fault name Common causes Corrective measures • Circuit breaker tripped, check if the circuit breaker inside the chiller is closed. • If the power input is abnormal (e. - Page 83 Operation & Maintenance Instruction 5 Troubleshooting Fault name Common causes Corrective measures • Liquid temperature set too high, no cooling required, check inlet and return liquid temperatures and set appropriate control temperature. • Stop time delay, the compressor has a minimum stop time in normal conditions and if the temperature rises to the start point during this time, the compressor...
- Page 84 5 Troubleshooting Operation & Maintenance Instruction Fault name Common causes Corrective measures • Faulty refill pump, replace the automatic refill pump. • Refill pump is stuck, check for foreign objects in the refill tank and remove if there are any. If the refill pump is damaged replace it.
- Page 85 Operation & Maintenance Instruction 5 Troubleshooting Alarm name Common causes Corrective measures • The condenser is • Flush the condenser and finish severely dirty and Condensing cleaning when water clogged. overtemperat- draining from the drain hole • Clogging becomes clear. ure lockout return air outlet of •...
- Page 86 5 Troubleshooting Operation & Maintenance Instruction Alarm name Common causes Corrective measures • Loose wiring Electric broken cables in the heating failure • Tighten electric control electrical control of wiring or replace the cable. Electric the electric heating. heating fault •...
- Page 87 Operation & Maintenance Instruction 5 Troubleshooting Alarm name Common causes Corrective measures 1# low pressure • Loose wiring pressure broken cable in the • Tighten electric control sensor failure electrical control of wiring or replace the cable. the pressure sensor. 2# low •...
- Page 88 The corrective measures mentioned above are for reference only. In case of any fault, please contact the Customer Service Center of SUNGROW for professional solutions.
-
Page 89: Dc/Dc Fault List
Operation & Maintenance Instruction 5 Troubleshooting 5.3.6 DC/DC Fault List table 5-10 DC/DC Fault List Fault name Common causes Corrective measures • Check that the control board When the speed of one of Fan alarm fan interface terminals are well the fans falls below 400 fault connected;... - Page 90 5 Troubleshooting Operation & Maintenance Instruction Fault name Common causes Corrective measures The module temperature • Check that the control board to Module exceeds the protection power board terminals are well over- value (Infineon: 87 connected. If there is no temperature degrees, Vinco: 97 abnormality, it may be that the...
- Page 91 Operation & Maintenance Instruction 5 Troubleshooting Fault name Common causes Corrective measures The machine will normally run again after waiting a few minutes for it to return to normal, if the fault recurs. Check if the battery-side half-bus is short-circuited and if BAT+, BAT- and N on the volume control board are short-circuited.
- Page 92 5 Troubleshooting Operation & Maintenance Instruction Fault name Common causes Corrective measures The machine will normally run again after the bus voltage has returned to normal, if the fault recurs. • Check that the load switch is Busbar closed. The busbar voltage value average is below the preset •...
- Page 93 Operation & Maintenance Instruction 5 Troubleshooting Fault name Common causes Corrective measures The machine will normally run again after waiting a few minutes for it to return to normal, if the fault recurs. • Consider whether the PV-side half-bus short-circuited, Caused by a positive or whether the PV-side module is Busbar...
- Page 94 5 Troubleshooting Operation & Maintenance Instruction Fault name Common causes Corrective measures If the fault recurs. If a fault occurs at the same time as a bus-side overcurrent or a battery-side overcurrent, consider whether the machine is operating in constant voltage mode and the system power allocation is greater than the maximum power of the machine, and suggest a...
- Page 95 Operation & Maintenance Instruction 5 Troubleshooting Fault name Common causes Corrective measures (DC/DC inductor current 6 overcurrent) at the same time, may be inductor inductor inductance is too small resulting in a large ripple to exceed the inductor current threshold, at this time consider replacing the inductor L2 and L5.
- Page 96 5 Troubleshooting Operation & Maintenance Instruction Fault name Common causes Corrective measures DC/DC inductor Inductive current 5 Same as 15 current 5 overcurrent. overcurrent DC/DC inductor Inductive current 6 Same as 14 current 6 overcurrent. overcurrent DC/DC The current of the DC/DC Power off and restart, if the fault inductor inductor current 1 is...
- Page 97 Operation & Maintenance Instruction 5 Troubleshooting Fault name Common causes Corrective measures • Check if the contactor is Based on the detection operating: replace logic, the relay is judged to contactor. be either broken or short- • Is the wiring correct. Busbar circuited (the voltage •...
- Page 98 5 Troubleshooting Operation & Maintenance Instruction Fault name Common causes Corrective measures Reboot the appliance if the fault persists. In the non-running state, Reverse • After power failure, check that the bus voltage sampling polarity on the wiring on the busbar (PV) is judged to be less than side is correct.
- Page 99 Operation & Maintenance Instruction 5 Troubleshooting Fault name Common causes Corrective measures The machine will normally run again after the internal temperature or module temperature has returned to normal, if the fault recurs. • Check that ambient temperature of the machine is not too high.
- Page 100 Please contact Sungrow Customer Service to confirm that the fault is not due to the above reasons and that the fault still exists. Restart the appliance and if the fault recurs.
- Page 101 Operation & Maintenance Instruction 5 Troubleshooting Fault name Common causes Corrective measures The machine will normally run again after the internal temperature or module temperature has returned to normal, if the fault recurs. • Check ambient temperature of the machine is too high.
- Page 102 Fault name Common causes Corrective measures foreign objects and replace the fan if it is damaged. The corrective measures mentioned above are for reference only. In case of any fault, please contact the Customer Service Center of SUNGROW for professional solutions.
-
Page 103: Appendix
• The customer shall give SUNGROW a reasonable period to repair the faulty device. Exclusion of Liability In the following circumstances, SUNGROW has the right to refuse to honor the quality guarantee: • The free warranty period for the whole machine/components has expired. - Page 104 6 Appendix Operation & Maintenance Instruction • Model of the device • Serial number of the device • Fault code/name • Brief description of the problem For detailed contact information, please visit: https://en.sungrowpower.com/contactUS.
- Page 105 Sungrow Power Supply Co., Ltd. www.sungrowpower.com...
Need help?
Do you have a question about the ST2752UX and is the answer not in the manual?
Questions and answers