Subscribe to Our Youtube Channel
Summary of Contents for Master Water Conditioning Clarifier MCA Series
- Page 1 MASTER Water Conditioning Corp. Installation and Operation Manual MCA Clarifier Series Residential Filters 2022...
-
Page 2: Table Of Contents
Table of Contents Model Number ..................1 Shipping Carton Description ..............1 Filter Media ................... 1 Filter Positioning ................... 2 Filter Tank Loading ................2 Clarifier Control Valve ............... 2-4 Service and Drain Piping ..............4-5 Electrical Supply ................... 6 Filling Filter with Water ................ -
Page 3: Model Number
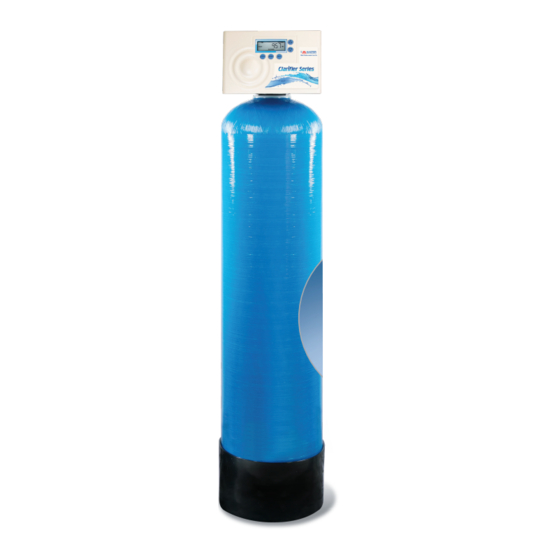
Installation and Operating Instructions for MCA Clarifier Series Filters Model #: ______ MCA-AC-10/13 Carbon Filter _______ MCA-ACC-10/13 Centaur Carbon Filter _______ MCA-AN-10/13 Acid Neutralizer _______ MCA-FE-10/13B Birm Filter _______ MCA-MM-10/13 Multi-Media Filter _______ MCA-S-10/13 Turbidex Filter Shipping Carton Description: Contents Description Mineral tank Distributor pipe installed... -
Page 4: Filter Tank Loading
Filter Tank Loading: 1. Remove yellow caplug from top of tank. DO NOT CUT white riser tube. Tube was prefitted at the factory. 2. The distributor is permanently attached to the vortech----centering is not necessary. The top of the distributor will be 5/8” above the top of the tank (this was prefitted at the factory). - Page 5 Control Valve Front View Top View Turn the control valve upside down and ensure that the control valve distributor o’ring is in place. Use silicone lubricant on the o'ring. **DO NOT USE PETROLEUM!** **USE ONLY SILICONE ** Place the control valve onto the distributor pipe and into the tank opening.
-
Page 6: Service And Drain Piping
until the nut can be tightened. Hand tighten the nut because excessive tightening will damage the assembly. REPEAT THE PROCEDURE FOR THE OUTLET CONNECTION. Service and Drain Piping: 1. Pipe water filter into the service lines. The inlet and outlet connections of the control valve are 1”... - Page 7 MASTER Water Conditioning Corp. TYPICAL PIPING LAYOUT FOR MCA SERIES FILTER Treated Air Gap Drain Master Water Conditioner Well Tank NOTE: All Master Water Conditioners must be installed after the well tank or water meter if its public water supply.
-
Page 8: Electrical Supply
Electrical Requirements: Always follow all local electrical codes when installing our water treatment equipment. 1. Provide an 115v/60Hz properly grounded dedicated electrical Outlet. (It’s very important that the polarity be correct) Avoid using outlets that are switch controlled. 2. Maximum amperage required is 5 amps. 3. -
Page 9: Control Valve Timer Settings
Control Valve Timer Settings: Note: The control valve is set at the factory. You only need to set the time of day and regeneration time if required, which is preset at 1 am. Time of Day Setting 1) Press and hold the CLOCK button. The screen will display “Set Time”... -
Page 12: Troubleshooting
Troubleshooting Problem: Unit Fails to Regenerate Cause Solution Faulty electrical supply Verify that electrical power is getting to the outlet Low inlet water pressure Verify a minimum 30 psi inlet water pressure Drain line is restricted Insure that the drain line is free of blockage Defective timer motor Replace the timer motor... - Page 13 Problem: Continuous Flow to Drain Cause Solution Defective or damaged piston Replace the piston stack stack assembly assembly Piston rod assembly is damaged Replace piston rod assembly Drive motor failure Replace the drive motor Problem: Loss of Water Pressure Cause Solution Dirt build-up in filter tank Clean or replace the Filter media...
- Page 14 Problem: Control Valve regenerates at wrong time of day Possible Cause Solution Power Outages Reset control valve to correct time of Time of day not set correctly Reset to correct time of day Time of regeneration incorrect Reset regeneration time Problem: Control valve stalled in regeneration Possible Cause Solution...
-
Page 15: Error Codes
Error Codes Display Description Cause Unable to recognize start of Defective motor, damaged regeneration wiring, or poor wire connection. Unexpected electrical or Defective motor, damaged mechanical stall wiring, poor wire connection, or mechanical component failure. Motor running too long or Damaged wiring, poor wire timeout during piston relocating connection, or mechanical... -
Page 19: Warranty
All claims must be submitted in writing to Master Water Conditioning Corporation at 224 Shoemaker Road, Pottstown, Pennsylvania 19464 within thirty (30) days from the discovery of the defect. - Page 20 MCA TIME CLOCK FILTER NORMAL DISPLAY TIME OF DAY DAYS TO NEXT REGEN CONFIGURATION CLOCK (3 SECONDS) CLOCK (3 SECONDS) PROGRAM CHART Note: In the event that the filter is producing dirty water you may select P9 to help Clean the filter. Program Backwash Brine Draw...
- Page 21 CLOCK MINUTES MIN. FILL OF REFILL CLOCK SET DAYS TO REGEN 1-99 DAYS 7-DAY CLOCK ONLY ACTIVE WITH A DP SWITCH CLOCK Clock Type MANUAL REGENERATION REGENERATE NOW: •PRESS BOTH ARROWS FOR 4 SECONDS, MOTOR WILL START REGENERATE TONIGHT: •PRESS BOTH ARROWS FOR 1 SECOND (SIMULTANEOUSLY) ADVANCE THROUGH EACH REGENERATION CYCLE ONCE REGEN HAS BEGUN...
- Page 22 SEVEN DAY OPTION CLOCK (3 SECONDS) Regen SET HOUR OF DAY Hour FOR REGENERATION CLOCK Regen SET MINUTES OF DAY Hour FOR REGENERATION CLOCK SET CURRENT DAY OF WEEK (d1 IS SUNDAY) CLOCK CHOOSE REGEN Regen DAY OF WEEK (SUNDAY) Regen Do not Regen CLOCK...
- Page 23 1-99 DAY OPTION (3 SECONDS) CLOCK AND SET HOUR OF DAY Regen FOR REGENERATION Hour CLOCK Regen SET MINUTES OF DAY Minutes FOR REGENERATION CLOCK SET DAYS BETWEEN Days to Regen REGENERATIONS...
- Page 24 Error Codes...


Need help?
Do you have a question about the Clarifier MCA Series and is the answer not in the manual?
Questions and answers