
Related Manuals for Bosch WGG244MPFG


Summary of Contents for Bosch WGG244MPFG
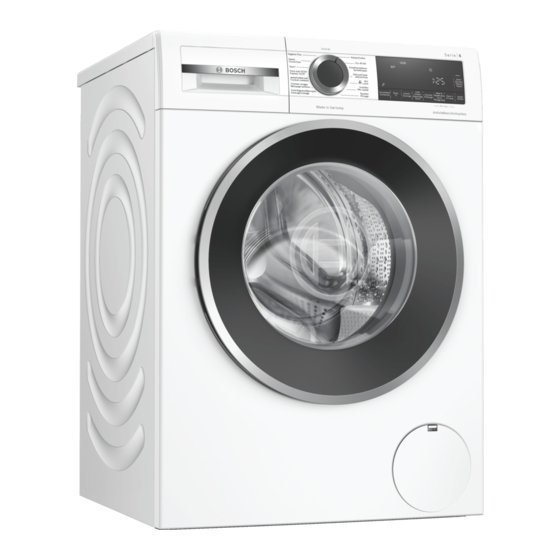
- Page 1 Translated from Dutch to English - www.onlinedoctranslator.com Washing machine WGG244MPFG [NL] User manual and installation instructions...
-
Page 2: Table Of Contents
Refer to the Digital User's Guide for more information. Table of contents 1 Safety..........4 7 Display ........21 1.1 General instructions ....4 8 Buttons ........24 1.2 Destination of the device rate ........4 9 Programs ........ 26 1.3 Restriction of users .. - Page 3 15 Basic Settings ....34 16 Cleaning and maintenance ..34 16.1 Cleaning the drum ....34 16.2 Cleaning the detergent drawer ........ 35 16.3 Cleaning the drain pump....35 16.4 Cleaning the inlet opening in the rubber sleeve....38 17 Troubleshooting ....
-
Page 4: Safety
NL Safety 1 Safety Observe the following safety instructions. 1.1 General instructions s Read this manual carefully. s Keep the operating instructions and product information for later use or for subsequent owners. s Do not connect the device in case of transport damage. 1.2 Destination of the device Only use the device: s to wash machine washable textiles and wool for hand wash... -
Page 5: Safe Installation
Safety NL 1.4 Secure installation Observe the safety regulations when installing the device. WARNING ‒ Risk of electric shock! Improper installations are dangerous. ▶ Only connect and use the device in accordance with the information on the type plate. ▶ Only connect the device to a mains supply with alternating current via a properly installed earthing socket. - Page 6 NL Safety ▶ If the power cord is too short, contact customer service. ▶ Only use adapters approved by the manufacturer. WARNING ‒ Risk of injury! The heavy weight of the device can cause injuries when lifted. ▶ Do not lift the device alone. If this appliance is installed incorrectly in a washer-dryer column, the installed appliance may fall down.
-
Page 7: Safer Use
Safety NL If the appliance is moved by protruding parts, such as the loading door, the parts can break off. ▶ Do not move the appliance by protruding parts. CAUTION ‒ Risk of cutting! Sharp edges on the device can cause cuts if touched. ▶... - Page 8 NL Safety ▶ In the case of discarded appliances, remove the plug of the mains cable from the socket, then cut the mains cable and damage the lock of the appliance door so that the appliance door no longer closes. WARNING ‒...
-
Page 9: Safe Cleaning And Maintenance
Safety NL CAUTION ‒ Risk of burns! The soap gets hot when washing at high temperatures. ▶ Do not touch the hot soapy water. CAUTION ‒ Risk of chemical burns! When opening the detergent drawer, detergent and care products may splash out of the appliance. Contact with eyes or skin may cause irritation. - Page 10 NL Safety WARNING ‒ Risk of poisoning! Toxic fumes can be generated when using solvent-based cleaning agents. ▶ Do not use solvent-based cleaning agents.
-
Page 11: Avoiding Material Damage
Avoid material damage NL Make sure that the thread length ▶ 2 Material damage on the connection to the water avoid tap is at least 10 mm. Follow this instruction to avoid Water pressure that is too low or too high can material damage and damage to the interfere with the appliance function. -
Page 12: Environmental Protection And Savings
NL Environmental protection and saving Remove all detergent residues, ▶ Reduce washing temperature for spray mist or residues immediately lightly and normally soiled laundry. upon contact with the appliance. a At low temperatures, it consumes low energy device. For light to normal soiling, lower temperatures 3 Environmental protection and than those stated on the care label... -
Page 13: Set Up And Connection
Set up and connect NL Remark: The device has been checked 4 Set up and connect at the factory for correct operation. Water stains may remain in the device. The stains disappear after the 4.1 Unpacking device first wash. PAY ATTENTION! The delivery consists of: Objects that remain in the drum and that are not intended for use with the... -
Page 14: Removing Transport Locks
NL Set up and connect 4.4 Removing transport locks installation site To demand The device with Plinth locking lips → Page 30 The device is secured for transport with transport locks at the rear of the confirm. device. Remark: Keep the screws of the transport locks and the sleeves for later transport Place the device... -
Page 15: Connecting The Device
Set up and connect NL Push the 4 cover caps down. Pull the mains connection cable out of the holder. Remove the 4 sleeves. 4.5 Connecting the device Connect water supply hose Connect the water supply hose to the appliance. Install the 4 cover caps. -
Page 16: Adjusting The Device
NL Set up and connect Open the tap carefully and check 4.6 Adjusting the device that the connections are tight. To reduce noises and vibrations and to prevent the device from walking, place the device horizontally. Water drainage connection types The information will help you connect this Loosen the lock nuts with a SW17 appliance to the water outlet. -
Page 17: Connecting The Appliance Electrically
Set up and connect NL Tighten the lock nuts against the housing with an open-end wrench SW17 hand-tight. Hold the appliance foot while doing so and do not adjust the height. 4.7 Connecting the appliance electrically Insert the mains plug of the appliance's connecting cable into a socket in the vicinity of the appliance. -
Page 18: Getting To Know Your Device
NL Getting to know your device 5 Getting to know your device 5.1 Device Here you will find an overview of the components of your device. Depending on the device type, details in the image may differ, e.g. color and shape. -
Page 19: Detergent Drawer
Getting to know your device NL 5.2 Detergent drawer Detergent dispenser II: s Detergent for the main used to be, s softener s Bleach s Stain salt Compartment : s fabric softener s Liquid starch s Impregnating agent Detergent dispenser I: s Detergent for the pre- used to be 1 2 3... -
Page 20: Before Using For The First Time
NL Before first use Start the first wash cycle or turn 6 Before first use the program selector to from to turn off the device. → "The Ministry in essence", Prepare the device for use. Page 31 6.1 Starting a wash cycle without laundry Your device has been thoroughly checked before leaving the factory. -
Page 21: Display
Display NL 7 Display The display shows the current setting values, options or information texts. Example display indication name More information Indication 0:40 Approximate expected program duration Program duration / remaining time of or time remaining in the program. the program →... - Page 22 NL Display name More information Indication Start / Pause Start, cancel or pause s lights up: the program is running and can be aborted or paused. s flashes: the program can be started or resumed. prewash Program status Wash Program status To rinse Program status Centrifuge...
- Page 23 Display NL name More information Indication E:35 / -10 Error code, error indication, signal. Wrong Example...
- Page 24 NL Tests 8 Keys The selection of the program settings depends on the program set. You can see the selection options for each program in the overview for . Choise More information Start/Refill s start Start, cancel or pause program. s Cancel s pause s activate...
- Page 25 Tests NL Choise More information Water & Rinsing s activate Wash with more water and activate or plus deactivate an extra rinse cycle. s deactivate Recommended for particularly sensitive skin or in areas with very soft water. s activate Activate or deactivate washing with To iron lightly less crease.
-
Page 26: Programs
NL Programs 9 Programs Remark: The care labels on the laundry give you additional information on program selection. Care instructions on care labels Max. Program Description bela- thing (kg) Cotton Wash hard-wearing fabrics made of cotton, linen and blended fabrics. Also suitable as a shortened program for normally soiled laundry if you activate Speed Perfect. - Page 27 Programs NL Max. Program Description bela- thing (kg) Program setting: s max. 60 °C s max. 1400 rpm Delicate/Silk Wash delicate, washable textiles made of silk, viscose and synthetics. Use a detergent for delicates or silk. Remark: Wash particularly sensitive textiles or textiles with hooks, eyes or brackets in a laundry net.
- Page 28 NL Programs Max. Program Description bela- thing (kg) Wash sports and leisure textiles made of Sport synthetic, microfibre and fleece. Use a detergent for sports textiles. Do not use fabric softener. Tip: Wash heavily soiled laundry with the Easy- Care programme. Program setting: s max.
- Page 29 Programs NL Max. Program Description bela- thing (kg) Use a powder detergent or a detergent containing bleach. Halve the amount of detergent to avoid foaming. Do not use fabric softener. Do not use wool, delicates or liquid detergents. Remark: If you have not used a program with a 60 °C or higher temperature for a long time, the drum cleaning indicator flashes as a reminder.
-
Page 30: Accessories
– Tie fabric belts, apron straps, etc. together, or use a laundry Remark: Detailed instructions for use can be found at www.bosch- home.com or by scanning the QR – Tie together long drawstrings and cords with fixed ends in code on the title page of these operating instructions. -
Page 31: Detergent And Care Ginger
Remarks Page 13 s Comprehensive directions for the Set the program selector to a ▶ Use can be found at www.bosch- programme. home.com or by scanning the QR code on the title page of these Remark: The drum lighting instructions for use. -
Page 32: Detergent
NL The Ministry in essence Place the laundry in the drum. 13.6 Using the dosing aid for liquid detergent Close the door. know Make sure that no small items of laundry are caught in the door. You can use a dosing aid in the detergent drawer to dose liquid detergent. -
Page 33: Starting The Program
The Ministry in essence NL s Keep the directions for washing Remark: When appears agent and laundry care agent it is not possible to add laundry. → Page 31 at. When goes out, then the refill Pull out the detergent drawer. Fill with detergent. -
Page 34: Child Lock
Remark: You can find more information in the digital operating instructions by scanning the QR code in the table of contents or on www.bosch-home.com. 6 Cleaning and maintenance loves Leave the appliance door and clean and maintain your appliance... -
Page 35: Cleaning The Detergent Drawer
Cleaning and maintenance NL 16.2 Cleaning the detergent Place the insert and click into place. drawer Pull out the detergent drawer. Press the insert down and remove the detergent drawer. Clean the opening for the detergent drawer. Pull out the insert from bottom to top. - Page 36 NL Cleaning and maintenance Open and remove the service CAUTION - Risk of burns! The door. soap gets hot when washing at high temperatures. ▶ Do not touch the hot soapy water. Pull off the sealing cap to allow the wash water to flow into the collection container.
- Page 37 Cleaning and maintenance NL Make sure that both wing wheels Cleaning the drain pump can be turned. Required: The drain pump is empty. → Page 35 As there may still be residual water in the pump, carefully unscrew the lid. Large impurities can cause the filter element to get stuck in the pump housing.
-
Page 38: Cleaning The Inlet Opening In The Rubber Sleeve
NL Cleaning and maintenance Install and close the service door. 16.4 Cleaning the inlet opening in the rubber sleeve Regularly check the inlet opening in the rubber sleeve for blockages and clean the inlet opening. Open the appliance door. Clear the blockages from the inlet opening. -
Page 39: Troubleshooting
Troubleshooting NL 1 7 Troubleshooting You can remedy minor faults on the device yourself. Before contacting customer service, please refer to the troubleshooting information. This way you avoid unnecessary costs. WARNING Risk of electric shock! Improper repairs are dangerous. Only trained specialist personnel may carry out repairs on the device. ▶... - Page 40 NL Troubleshooting Cause and Troubleshooting Malfunction "E:36 / -10" Remove any unauthorized extensions from the ▶ water drain hose. Connect device Pump cover is not fully screwed in. Make sure that the pump cover is screwed into the ▶ device as far as it will go. The pump cover handle must be vertical.
- Page 41 Troubleshooting NL Cause and Troubleshooting Malfunction All other error codes. Malfunction Please contact customer service. ▶ → "Customer Service", page 49 "E:30/-20" Solenoid valve defective. Please contact customer service. ▶ → "Customer Service", page 49 Detergent dosage is too high. Reduce the amount of detergent for the next wash ▶...
- Page 42 NL Troubleshooting Cause and Troubleshooting Malfunction Door cannot be is activated. opened. Resume the program by Centrifuge or Drain to ▶ choose and press Start/Refill to push. → "Resume program at rinse hold", page 33 Temperature is too high. Wait for the temperature to drop. ▶...
- Page 43 Troubleshooting NL Cause and Troubleshooting Malfunction No water flows into Start/Refill was not pressed. the device. The Press Start/Refill. ▶ detergent was not The strainers in the water supply are clogged. washed in. ▶ Clean the strainers in the water supply. Water tap is closed.
- Page 44 NL Troubleshooting Cause and Troubleshooting Malfunction The appliance is not leveled properly. Vibration and movement of the appliance Adjusting the device ▶ during the spin Device feet are not fixed. run. Secure the device feet. Adjusting the device ▶ Transport protections have not been removed. Remove transport locks ▶...
- Page 45 Troubleshooting NL Cause and Troubleshooting Malfunction Program centrifugal Redistribute the laundry in the drum. ▶ run does not start. Remark: If possible, place large and small items of laundry together in the drum. Different sized laundry is more evenly distributed during the spin cycle. Start the program Centrifuge.
- Page 46 NL Troubleshooting Cause and Troubleshooting Malfunction Spin result is Select a suitable program for the type of fabric. ▶ not to satisfaction- Drain pipe or water drain hose is clogged. ness. The laundry is Clean the drain pipe and the water drain hose. ▶...
- Page 47 Troubleshooting NL Cause and Troubleshooting Malfunction Inside the device is Humidity and detergent residue can damage the bacteria stimulate odor formation. Pine tree. → "Cleaning the drum", Page 34 ▶ ▶ When you are not using the appliance, leave the door and detergent drawer open to allow the residual water to dry out.
-
Page 48: Emergency Release
→ "Set up and connect" Remark: Detailed instructions for use Page 13 and → "For the first use", can be found at www.bosch- home.com or by scanning the QR Page 20 . code on the title page of these operating instructions. -
Page 49: Disposal Of Your Old Appliance
customer service NL 18.4 Disposal of your old chemical equipment (waste electrical and electronic appliance equipment - WEEE). Environmentally friendly disposal The directive sets the allows valuable raw materials to be framework for the take- reused. back valid in the EU and disposal of old appliances. -
Page 50: Product Number (E No.) And Production Number (Fd)
NL customer service 19.1 Product number (E no.) and production number (FD) The product number (E-Nr.) and the production number (FD) can be found on the type plate of the device. The type plate is located depending on the model: s on the inside of the door. -
Page 51: Consumption Values
Consumption values NL 0 Consumption values The following information is provided in accordance with the EU Ecodesign Regulation. The specified values for other programs asEco 40-60 are only guide values and have been determined in accordance with the applicable standard EN60456. - Page 52 NL Technical data 10 A Minimum input installation fuse Rated power 2300W gene Recorded Ver- s Off state: 0.10W be allowed to s non-disabled caved in position: 0.50 W s At least: water pressure 100 kPa (1 bar) s Maximum: 1000 kPa (10 bar) Length of the...
- Page 56 Contact data of all countries are listed in the attached service directory. Robert Bosch Hausgeräte GmbH Carl-Wery-Straße 34 81739 Munich GERMANY www.bosch-home.com * 9001646921* 9001646921 (010722)
Need help?
Do you have a question about the WGG244MPFG and is the answer not in the manual?
Questions and answers