
Subscribe to Our Youtube Channel
Related Manuals for Nevir NVR-CB4P

Summary of Contents for Nevir NVR-CB4P
- Page 1 NVR-CB4P FULL SIZE COOKER WITH GAS CYLINDER COMPARTMENT COCINA GAS CON PORTABOMBONA USER MANUAL MANUAL DEL USUARIO H10-20-180-603...
- Page 2 Dear Customer, Thank you for relying on this product. We aim to allow you to optimally and efficiently use this environment- friendly product produced in our modern facilities under precise conditions with respect to sense of quality in total. We recommend that you read the user manual carefully and keep it permanently before using the appliance so that it retains its original features for a long time.
-
Page 3: Table Of Contents
Contents Important warnings ..............4 Electrical safety ..............8 Gas safety ................10 Power connection ..............13 Gas connection ..............14 Appliance introduction ............. 19 Technical specifications ............20 Setting up the appliance ............22 Control Panel ............... 24 Appliance use ..............25 Maintenance and cleaning........... -
Page 4: Important Warnings
IMPORTANT WARNINGS 1. Installation and repair should always be performed by “AUTHORISED SERVICE”. Manufacturer shall not be held responsible for operations performed by unauthor- ised persons. 2. Please read this operating instructions carefully. Only by this way you can use the appliance safely and in a correct manner. - Page 5 12. Children under 8 years of age should be kept away, if they cannot be monitored continuously. 13. Touching the heating elements should be avoided. 14. CAUTION: Cooking process should be supervised. Cooking process shall always be supervised. 15. The appliance is not suitable for use with an exter- nal timer or a separate remote control system.
- Page 6 23. Do not use the appliance in states like medicat- ed and/or under influence of alcohol which may affect your ability of judgement. 24. Check that the appliance is off after each use. 25. Be careful when using alcohol in your foods. Alco- hol will evaporate at high temperatures and may catch fire to cause a fire if it comes in contact with hot sur- faces.
- Page 7 33. Turn off the appliance before removing the safe- guards. After cleaning, install the safeguards according to instructions. 34. Cable fixing point shall be protected. 35. WARNING: If the glass of the appliance is broken, turn off any heating element immediately and disconnect the appliance from power source, do not touch the surface of the appliance and do not use the appliance.
-
Page 8: Electrical Safety
Electrical Safety WARNING: This appliance might not require Electrical connection¡ Check if your current model operates by gas Plug the appliance in a grounded socket protected by a fuse conforming to the values specified in the technical specifications chart. Have an authorized electrician set grounding equipment. Our company will not be responsible for the dam- ages that may occur due to using the appliance without grounding according to local regulations. - Page 9 11. Make sure that there is no liquid or humidity in the outlet where the appliance plug is inserted. 12. The appliance should be installed in such a way that the electrical installation can be completely dis- connected. Disconnection from power supply shall be provided with a switch or an integrated fuse installed on fixed power supply according to building code.
-
Page 10: Gas Safety
Gas Safety 1. This appliance is not connected to burning prod- ucts evacuation apparatus. This appliance should be connected and installed according to the installation regulations in force. Conditions regarding ventilation should be considered. 2. When a gas cooking appliance is used; humidity, heat and burning products are generated in the room. - Page 11 7. All kinds of operations to be performed on gas in- stallation should be performed by authorised and com- petent people. 8. For proper operation, hood, gas pipe and clamp should be replaced periodically according to manufac- turer recommendations and when required. 9.
- Page 12 What To Do When Gas Odor Is Detected 1. Do not use naked flame, and do not smoke. 2. Do not operate any electrical switch. (For example: lamp switch or doorbell) 3. Do not use telephone or mobile phone. 4. Open the doors and windows. 5.
-
Page 13: Power Connection
Power Connection WARNING: This appliance might not require Electrical connection¡ Check if your current model just operates by gas This appliance should be installed and connected correctly according to the manufacturer's instructions and by the authorised service. The electrical connections of the appliance should only be made with (grounded) sockets with a grounding system that is laid in accordance with the rules. -
Page 14: Gas Connection
Gas Connection WARNING: Before starting any work related with gas installation, turn off gas supply. Risk of explosion. Check if the appliance settings are compatible with the local distribu- tion conditions (gas type and gas pressure) before placing the appliance. For LPG connection, attach the metal clamp to the hose coming from the LPG cylinder. - Page 15 Conversion from Natural Gas to LPG or from LPG to Natu- ral Gas 1. Switch off the gas and electricity of the appliance. If the appliance is hot, wait for it to cool down. 2. Use a screwdriver with the tip as shown in figure 1 for injector replacement.
- Page 16 Gas Hose Crossing Path Connect your appliance to the gas mains cock in the shortest way and without any leakage. The correct connection shape is shown in the figure below. Ensure that the buttons on the control panel are closed and the gas cylinder is open for sealing and gasket safety control.
- Page 17 LPG bottle sizes WARNING: The LPG bottle to be used in this product should comply with the table given below. Country LPG Bottle Sizes Spain 30 cm Portugal 33.5 cm Italy 31.5 cm France 33 cm Romania 30 cm...
- Page 18 Room Ventilation Air required for combustion is taken from the room air and gases produced are returned directly to the room. A good room ventilation is essential for the safe operation of your appliance. If there are no windows or doors to be used for room ventilation, additional ventilation should be installed.
-
Page 19: Appliance Introduction
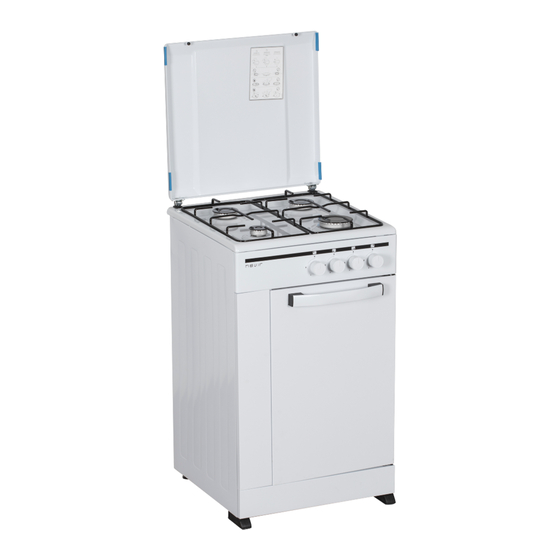
APPLIANCE INTRODUCTION 1. Upper hobs 2. Control panel 3. Cabinet door 4. Large burner 5. Middle burner 6. Small burner * 7. Wok burner * 8. Coffee adapter (coffee pot) * 9. Wok burner adapter * 10. Grate... -
Page 20: Technical Specifications
Technical Specification Tables G30,28-30 mbar By gas type G30.50 mbar G30.37 mbar G31,37 mbar upper hob specifications Injector 0.96 0.76 0.96 Wok burner Gas flow (3.5) Power 3.50 3.50 3.50 Injector 0.68 0.60 0.65 Wok burner Gas flow (1.9) Power 1.90 1.90 1.90... - Page 21 WARNING: Technical specification tables should be taken into consideration in the change to be made by the authorised service. Manufacturer may not be held responsible for any problems rising because of any faulty modification. WARNING: In order to increase the appliance quality, the technical specifications may be changed without prior notice.
-
Page 22: Setting Up The Appliance
SETTING UP THE APPLIANCE Check if the electrical installation is proper to bring the appliance in op- erating condition. If electricity installation is not suitable, call an electri- cian and plumber to arrange the utilities as necessary. The manufacturer shall not be held responsible for the damages that may arise due to the operations performed by unauthorised persons and the warranty of the appliance shall be invalid. - Page 23 Right Place for Installation and Important Warnings The appliance should be used within the kitchen furniture in such a way that there is a distance of at least 400 mm between the upper hob surfac- es and other surfaces and a distance of 6.5 mm from the side surfaces. If a hood or aspirator will be installed above the appliance, follow the instructions of the manufacturer for height of installation.
-
Page 24: Control Panel
CONTROL PANEL For 4-upper hob models; 1. Left rear upper hob 2. Left front upper hob 3. Right front upper hob 4. Right rear upper hob For 3-upper hob models; 1. Left middle upper hob 2. Right front upper hob 3. -
Page 25: Appliance Use
APPLIANCE USE Use of the Upper Hob Section 1. Ensure that the upper hob covers are in the correct position before using your appliance. The correct placement of the upper hob covers is shown in the figure below. 2. Follow the signs on the control panel indicating the location of the relevant upper hob to operate the desired upper hob from the correct button. - Page 26 5. Wait 5-10 seconds by performing the ignition process in accordance with the instructions, seeing the flame on the burner, and then pushing the button forward without withdrawing your hand in models with a gas cutter safety assembly. The safety mechanism will be activated within this period and will ensure that the appliance is in working condition.
- Page 27 19. Use long-handled pots that fit exactly on the surface of the appliance. This way you will be able to use energy more efficiently. 20. Make sure that the top cover of the appliance is in the fully open position when cooking. Do not close the top cover when the upper hobs are hot.
-
Page 28: Maintenance And Cleaning
MAINTENANCE AND CLEANING The operating life of the appliance is extended and the problems en- countered are reduced if it is cleaned at regular intervals. WARNING: Unplug the appliance. There is a danger of electric shock. WARNING: Wait for the appliance to cool down before cleaning the appliance. -
Page 29: Troubleshooting
TROUBLESHOOTING You may solve the problems you may encounter with your appliance by checking the following points before calling the technical service. Problem Possible Cause Remedy No sparks. Check power supply. No Ignition The upper hob cover is badly fitted. Install the upper hob cover correctly. -
Page 30: Handling Rules
HANDLING RULES 1. Carry out the movement and transportation in the original packaging. 2. Pay maximum attention to the appliance while loading/unloading and handling. 3. Make sure that the packaging is securely closed during handling and transportation. 4. Protect from external factors (such as humidity, water, etc.) that may damage the packaging. -
Page 31: Disposal Of Waste Product
COMPLIANCE WITH AEEE REGULATIONS AND DISPOSAL OF WASTE PRODUCT This appliance does not contain harmful and prohibited substances specified in the Regulation on Control of Waste Electrical and Electronic Equipment published by the Ministry of Environment and Urbanisation of the Republic of Turkey. It complies with AEEE Regulation. PACKAGE INFORMATION This appliance was manufactured from recyclable and reusable high quality parts and materials. - Page 32 Estimado cliente, Gracias por confiar en este producto. Nuestro objetivo es permitirle utilizar de manera óptima y eficiente este producto ecológico, fabricado en nuestras modernas instalaciones en condiciones precisas con respecto a la sensación de calidad en total. Le recomendamos leer atentamente el manual de instrucciones y con- servarlo permanentemente antes de utilizar el aparato para que mantenga sus características originales durante mucho tiempo.
- Page 33 Contenido Advertencia importantes ............. 34 Seguridad eléctrica ..............38 Seguridad de gas ............... 40 Conexión eléctrica ..............43 Conexión de gas ................ 44 Introducción al aparato ............... 49 Características técnicas ............. 50 Configuración del aparato ............52 Panel de mandos ............... 54 Uso de aparato ................
-
Page 34: Advertencia Importantes
ADVERTENCIAS IMPORTANTES 1. La instalación y la reparación siempre deben ser realizadas por el “SERVICIO AUTORIZADO”. El fabricante no se hace responsable de las operaciones realizadas por personas no autorizadas. 2. Lea atentamente estas instrucciones de funciona- miento. Solo de esta manera puede usar el dispositivo de forma segura y correcta. - Page 35 11. NO TRATE NUNCA de apagar el fuego con agua. Solo apague el circuito del aparato y luego cubra la lla- ma con una cubierta o una manta ignífuga. 12. En caso de no poder vigilar adecuadamente a los menores de 8 años, deberá mantenerles lejos del apa- rato.
- Page 36 20. Coloque cortinas, tul, papel o cualquier material inflamable (inflamable) lejos del aparato antes de co- menzar a usarlo. No coloque materiales inflamables encima o dentro del aparato. 21. Mantenga abiertos los canales de ventilación. 22. No caliente latas cerradas ni frascos de vidrio. La presión puede llevar a los tarros a explotar.
- Page 37 30. Durante las obras de construcción en la casa, el aparato debe estar desconectado. Tras finalizar las obras, la reconexión del aparato debe ser realizada por un servicio técnico autorizado. 31. No coloque envases metálicos como cuchillos, te- nedores o cucharas en la superficie del aparato, ya que se calientan.
-
Page 38: Seguridad Eléctrica
39. Los usuarios podrían entrar en contacto con su- perficies calientes y podrían sufrir quemaduras si se olvida apagar el aparato durante la cocción. 40. En caso de poner elementos pesados sobre el apa- rato, éstos pueden caer. Puede causar lesiones perso- nales. - Page 39 7. Asegúrese de que el enchufe del aparato esté inser- tado firmemente en el tomacorriente de la pared para evitar chispas. 8. Si el cable de suministro de energía (el cable con enchufe) está dañado, este cable debe ser reemplaza- do por el fabricante o su agente de servicio o un per- sonal igualmente calificado para evitar una situación peligrosa.
-
Page 40: Seguridad De Gas
16. Los disyuntores del aparato deben estar en el lu- gar de trabajo accesible para el usuario final mientras el aparato está en su sitio. 17. Las conexiones fijas se deben conectar a una fuen- te de alimentación que permita la desconexión omni- polar. - Page 41 3. Después de usar el artefacto durante un período prolongado, es posible que se requiera ventilación adi- cional. Por ejemplo, abra una ventana o ajuste una ve- locidad más alta para la ventilación mecánica, si la hay. 4. Este electrodoméstico debe usarse solo en lugares bien ventilados de acuerdo con la normativa vigente.
- Page 42 9. El gas debería arder bien en los aparatos de gas. El gas de combustión bien puede entenderse a partir de la llama azul y la combustión continua. Si el gas no se quema lo suficiente, se puede generar monóxido de carbono (CO).
-
Page 43: Conexión Eléctrica
Uso previsto Este aparato está diseñado para uso domestico. El uso comercial del aparato no está permitido. Este aparato solo se puede usar para cocinar. No debe usarse para otros fines, como calentar una habi- tación. El fabricante no asume ninguna responsabilidad por los daños debidos al mal uso o mal manejo. -
Page 44: Conexión De Gas
Conexión de gas ADVERTENCIA: Antes de comenzar cualquier trabajo relacionado con la instalación de gas, cierre el suministro de gas. Riesgo de explosión Antes de colocar el aparato, asegúrese de que los ajustes sean compatibles con las condiciones locales de distribución (tipo de gas y presión de gas). Para la conexión de GLP, coloque la abraza- dera de metal en la manguera que sale del cilindro de GLP. - Page 45 Transformación de Gas Natural a GLP y de GLP a Gas Natural 1. Cierre el gas y desconecte la electricidad del aparato. Si el aparato está caliente, espere para que se enfríe. 2. Para la sustitución del inyector utilice un destornillador con la punta que se muestra en la figura 1.
- Page 46 Recorrido de la Manguera de Gas Conecte su aparato a la toma de gas de la forma más corta y sin fugas. La forma correcta de conexión se indica en la figura siguiente. Compruebe que los botones del panel de control están cerrados y que el cilindro de gas está...
- Page 47 Tamaños de botellas de GLP ADVERTENCIA: La botella de GLP que se utilizará en este producto debe cumplir con la tabla que se propor- ciona a continuación. Tamaños de País botellas de GLP España 30 cm Portugal 33.5 cm Italia 31.5 cm Francia 33 cm...
- Page 48 Ventilación de la Habitación Para la combustión, el aire necesario se obtiene del aire de la habitación y los gases producidos se devuelven directamente a la habitación. Es esencial que haya una buena ventilación en la habitación para el funcionamiento seguro de su aparato. En caso de que no haya ventanas o puertas para la ventilación de la habitación, se debe instalar una ventilación adicional.
-
Page 49: Introducción Al Aparato
INTRODUCCIÓN AL APARATO 1. Placas superiores 2. Panel de control 3. Puerta de gabinete 4. Quemador grande 5. Quemador intermedio 6. Quemador pequeño* 7. Quemador para WOK* 8. Adaptador de café (olla de café) * 9. Adaptador de quemador de Wok * 10. -
Page 50: Características Técnicas
Tablas de Especificaciones Técnicas G30,28-30 mbar Por tipo de gas G30.50 mbar G30.37 mbar G31,37 mbar placa superior especificaciones Inyector 0,96 0,76 0,96 Quemador para wok Flujo de gas (3,5) Potencia 3,50 3,50 3,50 Inyector 0,68 0,60 0,65 Quemador para wok Flujo de gas (1,9) Potencia... - Page 51 ADVERTENCIA: Se deben considerar las tablas de es- pecificaciones técnicas para el cambio a realizar por el servicio autorizado. El fabricante no se hace responsa- ble de cualquier problema que surja debido a cualquier modificación defectuosa. ADVERTENCIA: Para aumentar la calidad del aparato, las especificaciones técnicas pueden modificarse sin previo aviso.
-
Page 52: Configuración Del Aparato
CONFIGURACIÓN DEL APARATO Verifique si la instalación eléctrica es adecuada para poner el aparato en funcionamiento. Si la instalación de electricidad no es adecuada, llame a un electricista y un plomero para organizar los servicios públicos según sea necesario. El fabricante no se responsabilizará de los daños derivados de las operaciones realizadas por personas no autorizadas y la garantía del aparato quedará... - Page 53 Lugar correcto para la instalación y advertencias impor- tantes Es necesario utilizar el aparato dentro de los muebles de la cocina de manera que haya una distancia de al menos 400 mm entre las superficies superiores de la placa de cocción y otras superficies y una distancia de 6.5 mm de las superficies laterales.
-
Page 54: Panel De Mandos
ADVERTENCIA: No instale el aparato al lado de refrige- radores o refrigeradores. El calor irradiado por el aparato aumenta el consumo de energía de los aparatos de re- frigeración. PANEL DE MANDOS Para modelos de 4 placas superiores; 1. Placa superior trasera izquierda 2. -
Page 55: Uso De Aparato
USO DE APARATO Uso de la Sección de Placa Superior 1. Antes de utilizar el aparato, asegúrese de que las tapas superiores de la placa de cocción están en la posición correcta. En la siguiente figura se muestra la colocación correcta de las tapas de la placa superior. 2. - Page 56 5. Espere entre 5 y 10 segundos efectuando el proceso de ignición con- forme a las instrucciones, viendo la llama en el quemador y, a continua- ción, pulsando el botón hacia delante sin retirar la mano en los modelos con mecanismo de seguridad de corte de gas. El mecanismo de seguridad se activará...
- Page 57 17. Mantenga abierta la tapa del recipiente que utilice para calentar el aceite. 18. Nunca llene la sartén con más de un tercio del aceite. No abandone la cocina mientras calienta los aceites. El aceite excesivamente caliente supone un riesgo de incendio. 19.
-
Page 58: Mantenimiento Y Limpieza
Uso del Quemado de Wok * El quemador de wok se caracteriza por su rápi- da cocción. Puesto que cuenta con un sistema de llama de doble anillo ofrece una distribución homogénea del calor a la base de la olla a alta temperatura. - Page 59 No lave ninguna pieza de aparato en el lavavajillas. Utilice estearato de potasio (jabón arábigo) para la suciedad y las manchas. Es necesario limpiar a fondo el aparato después de cada uso. Así se pueden limpiar fácilmente los restos de comida y se evita que estos re- siduos se quemen cuando se vuelva a utilizar el aparato posteriormente.
-
Page 60: Solución De Problemas
SOLUCIÓN DE PROBLEMAS Puede resolver los problemas que puede encontrar con su producto al verificar los siguientes puntos antes de llamar al servicio técnico. Problema Causa Posible Solución Sin chispa Revise el suministro eléctrico. La tapa de la placa superior está mal Instale la tapa de la placa superior co- Sin encendido montada. -
Page 61: Reglas De Manejo
REGLAS DE MANIPULACIÓN 1. Realice el movimiento y el transporte en el embalaje original. 2. Preste la máxima atención al aparato mientras es cargado / descargado y manipulado. 3. Asegúrese de que el embalaje esté bien cerrado durante la manipu- lación y el transporte. -
Page 62: Eliminación De Producto Desecho
CONFORMIDAD CON LA NORMATIVA AEEE, Y DESECHO DE PRODUCTO Este aparato no contiene los materiales peligrosos y prohibidos indicados en el Reglamento de control de Residuos de Aparatos Eléctricos y Electrónicos publicado por el Ministerio de Medio Ambiente y Urbanismo de la República de Turquía.
Need help?
Do you have a question about the NVR-CB4P and is the answer not in the manual?
Questions and answers