
Related Manuals for DASS Tech DASS 3.0i LV


Summary of Contents for DASS Tech DASS 3.0i LV
- Page 1 Manual for Use and Installation DASSTECH Solar Photovoltaic DSP-123i-ODS Version 1.1...
-
Page 2: Table Of Contents
3.2. Checking Before Installation................- 10 - 3.3. Tools........................- 13 - 3.4. Determining the Installation Position............... - 14 - 3.5. Moving the DASS 3.0i LV (DSP-123i-ODS)........... - 16 - 3.6. Installing DASS 3.0i LV (DSP-123i-ODS)............- 17 - 4. Electrical Connections....................- 19 - 4.1. - Page 3 DASS Tech Co., Ltd or individual should not plagiarize, partially copy or fully copy it (including software, ect .),and no reproduction or distribution of it in any form or by any means.All right reserved. Copyright © DASS Tech Co., Ltd...
-
Page 4: Preface
You must understand these emphasized information to avoid the personal injury and property loss.Please read the following symbols used in this manual carefully. Copyright © DASS Tech Co., Ltd... - Page 5 Caution Attention indicates potential risks which, if not avoided, may lead to equipment fault or property damage. Attention Note provides tips that are valuable for the optimal operation of the product. Note Copyright © DASS Tech Co., Ltd...
-
Page 6: Basic Safety Information
DASS 3.0i LV (DSP-123i-ODS) User manual 1. Basic safety information If you have any question or problem when you read the following information, please contact DASS Tech Co., Ltd. Note Outlines of this chapter Safety instruction It mainly introduce the safety instruction when install and operate the equipment. - Page 7 / or has demonstrated skills and knowledge in construction and in operation of this unit, can install this inverter. DASS Tech Co., Ltd does not take any responsibility for the property destruction and personal injury because of any incorrect use.
- Page 8 Attention It’s forbidden to remove the tamper evident label, or open the inverter. Otherwise DASS Tech Co., Ltd will not provide warranty or maintenance! Note Operation...
-
Page 9: Symbols And Signs
Can’t open the internal components of inverter without authorized. DASS Tech Co., Ltd does not take any responsibility for Attention the losses from that. EMC / noise level of inverter... - Page 10 Caution hot surface. Comply with the Conformite Europeenne (CE) certification. Grounding point. Please read this manual before install DASS 3.0i LV (DSP-123i-ODS). This indicates the degree of protection of the equipment according to IEC standard 70-1 (EN 60529 June 1997).
-
Page 11: Product Characteristics
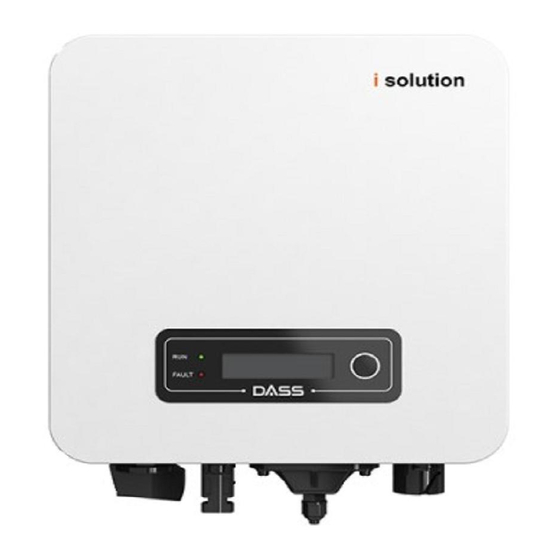
User manual 2. Product characteristics Outlines of this chapter Product dimensions It introduces the field of use, and the overall dimensions of DASS 3.0i LV (DSP-123i-ODS) inverters. Function description It introduces how DASS 3.0i LV (DSP-123i-ODS) inverters work and the function modules inside. - Page 12 The choice of optional parts of inverter should be made by a qualified technician who knows the installation conditions clearly. DASS 3.0i LV (DSP-123i-ODS):L×W×H=321mm×260.5mm×131.5mm Figure 2-2 Front view and left view dimensions of DASS 3.0i LV (DSP-123i-ODS) Figure 2-3 Bracket dimensions of DASS 3.0i LV (DSP-123i-ODS) Labels on the equipment...
-
Page 13: Function Description
When the grid frequency is higher than the limited value, inverter will reduce output power which is necessary for the grid stability. E. Data transmission The inverter or a group of inverters may be monitored remotely through an - 8 - Copyright © DASS Tech Co., Ltd... -
Page 14: Efficiency Curve
RS-485 serial interface, or remotely via the WIFI/GPRS. F. Software update Support usb flash drive local upgrade software and WIFI/GPRS remote upgrade software. Electrical block diagram Figure2-4 Electrical block diagram 2.3. Efficiency curve - 9 - Copyright © DASS Tech Co., Ltd... -
Page 15: Installation
DASS 3.0i LV (DSP-123i-ODS) User manual 3. Installation Outlines of this chapter This topic describes how to install the DASS 3.0i LV (DSP-123i-ODS) . Installation notes Do NOT install the DASS 3.0i LV (DSP-123i-ODS) on flammable material. Do NOT install the DASS 3.0i LV (DSP-123i-ODS) in an area used to store Flammable or explosive material. - Page 16 Table3-1 shows the components and mechanical parts that should be delivered. Picture Description Quantity DASS 3.0i LV 1pcs (DSP-123i-ODS) Rear panel 1pcs PV+ input terminal 1pcs PV- input terminal 1pcs Metal terminals secured to PV+ input power 1pcs cables - 11 - Copyright © DASS Tech Co., Ltd...
- Page 17 PV- input power 1pcs cables M5Hexagon screws 2pcs Expansion bolts 3pcs Self-tapping screw 5pcs Manual 1pcs The warranty card 1pcs Registration Form 1pcs AC output terminal 1pcs 485 terminal (2pin) 1pcs - 12 - Copyright © DASS Tech Co., Ltd...
-
Page 18: Tools
Turn the screw to connect rear Wrench panel with inverter. Crimping tool Used to crimp power cables Multi-meter Used to check grounding Marker Used to mark signs Measuring tape Used to measure distances - 13 - Copyright © DASS Tech Co., Ltd... -
Page 19: Determining The Installation Position
Safety goggles Operators wear Anti-dust respirator Operators wear 3.4. Determining the Installation Position Determine an appropriate position for installing the DASS 3.0i LV (DSP-123i-ODS) inverter. Comply with the following requirements when determining the installation position: Figure3-2 Installation Requirements - 14 -... - Page 20 DASS 3.0i LV (DSP-123i-ODS) User manual clearance for single DASS 3.0i LV (DSP-123i-ODS) Inverter Installation of multiple DASS 3.0i LV (DSP-123i-ODS) inverter - 15 - Copyright © DASS Tech Co., Ltd...
-
Page 21: Moving The Dass 3.0I Lv (Dsp-123I-Ods)
Figure 3-3 and Figure 3-4. Figure 3-3 Moving the inverter (1) Figure 3-4 Moving the inverter (2) Step 2 Lift the DASS 3.0i LV (DSP-123i-ODS) from the packing case and - 16 - Copyright © DASS Tech Co., Ltd... -
Page 22: Installing Dass 3.0I Lv (Dsp-123I-Ods)
Attention inverter to protect its shell. 3.6. Installing DASS 3.0i LV (DSP-123i-ODS) Step 1 Determine the positions for drilling holes, ensure the hole positions are level, then mark the hole positions using a marker pen, use the hammer drill to drill holes on the wall. - Page 23 DASS 3.0i LV (DSP-123i-ODS) User manual - 18 - Copyright © DASS Tech Co., Ltd...
-
Page 24: Electrical Connections
≤ 550V. The power of PV grid-tied system which contain by several the DASS 3.0i LV (DSP-123i-ODS) inverters must be < 3.68kw in Germany. Note The connected PV modules must have an IEC 61730 Class A ratin... -
Page 25: Electrical Connection
Procedure: Step 1 Remove the insulation layer with an appropriate length using a wire stripper, as shown in Figure 4-2. Figure4-2 Preparing a ground cable (1) - 20 - Copyright © DASS Tech Co., Ltd... - Page 26 The core wires shall contact the terminal closely. Step 3 Install the crimped OT terminal, flat washer using M5 screw, and tighten the screw to a torque of 3 N.m using an Allen wrench. Figure4-4 Ground terminal composition - 21 - Copyright © DASS Tech Co., Ltd...
-
Page 27: Connecting Dc Input Power Cables
Step 2 Remove the insulation layer with an appropriate length from the positive and negative power cables by using a wire stripper as show in Figure 4-5. Figure 4-5 Connecting DC input power cables - 22 - Copyright © DASS Tech Co., Ltd... - Page 28 "click" sound. The power cables snap into place. Step 6 Reinstall cable glands on positive and negative connectors and rotate them against the insulation covers. Step 7 Insert the positive and negative connectors into corresponding DC - 23 - Copyright © DASS Tech Co., Ltd...
-
Page 29: Connecting Ac Output Power Cables
Caution Figure 4-8 Removing a DC input connector 4.4. Connecting AC Output Power Cables Connect the DASS 3.0i LV (DSP-123i-ODS) to the AC power distribution frame (PDF) or power grid using AC output power cables. - 24 - Copyright © DASS Tech Co., Ltd... - Page 30 The relationship between power loss in AC cable and wire length, wire cross sectional area is shown in the following figure: Figure 4-10 wire length, wire cross sectional area and wire power loss - 25 - Copyright © DASS Tech Co., Ltd...
- Page 31 AC output cable needs Type connector Ⅱ to be wired by the customer. The appearance of is shown in figure AC connector 4-11. AC connector type: TypeⅠ connector TypeⅡ connector - 26 - Copyright © DASS Tech Co., Ltd...
- Page 32 Connect the brown wire to the hole labeled "L", fasten the wire using an Allen wrench; Connect the blue wire to the hole labeled "N", fasten the wire using an Allen wrench; Figure 4-14 L--Brown, N--Blue, PE--Yellow-green - 27 - Copyright © DASS Tech Co., Ltd...
- Page 33 AC connector clockwise until the Figure 4-15 fastener reaches its designated position, as shown below. Figure 4-16 Removing the AC connector Pull out the AC connector by rotating the knob counterclockwise. Figure 4-17 - 28 - Copyright © DASS Tech Co., Ltd...
- Page 34 Connect the brown wire to the hole labeled "L", fasten the wire using an Cross screwdriver; Connect the blue wire to the hole labeled "N", fasten the wire using an Cross screwdriver. Figure 4-20 - 29 - Copyright © DASS Tech Co., Ltd...
- Page 35 Turn the ac connector knob to figure below, to ensure that the cable is lock until you hear a "click" and the clasp firmly connected. is in place. Figure 4-21 Figure 4-22 - 30 - Copyright © DASS Tech Co., Ltd...
-
Page 36: Rs485,Ct,Inverter Logic Interface Connection
Make sure the grid is disconnected before removing the AC connector Caution 4.5. RS485,CT,inverter logic interface connection The communication interface location of the DASS 3.0i LV (DSP-123i-ODS) shown in the figure below. Figure 4-24 - 31 - Copyright © DASS Tech Co., Ltd... - Page 37 2.5~6mm 2.5~6mm Step1 Remove the communication waterproof cover using a screwdriver; Figure 4-25 Step2 Unlock the waterproof cable gland, remove the stopper in the waterproof connector; Figure 4-26 A1: Waterproof stopper - 32 - Copyright © DASS Tech Co., Ltd...
- Page 38 The function of logical interface needs to be set on the display screen, please refer to the operation steps in section 6.3 . Logic interface pin are defined according to different standard requirements. - 33 - Copyright © DASS Tech Co., Ltd...
- Page 39 The inverter can be connected to a RRCR (Radio Ripple Control Receiver) in order to dynamically limit the output power of all the inverters in the installation. Figure 4-28 Inverter – RRCR Connection - 34 - Copyright © DASS Tech Co., Ltd...
- Page 40 Table 4-8 Function description of the terminal Pin NO. Pin name Description Connected to (RRCR) Relay contact 1 input K1 - Relay 1 output Not Connected Not Connected Not Connected Not Connected - 35 - Copyright © DASS Tech Co., Ltd...
- Page 41 Step4 Insert the terminal as per the printed label, and then tighten the screws to fix the waterproof cover, rotate the cable gland clockwise to fasten it securely. Figure 4-30 Figure 4-31 - 36 - Copyright © DASS Tech Co., Ltd...
-
Page 42: Wifi/Gprs Module Installation Procedure
Step1: Remove wifi/GPRS waterproof cover using screw driver. Step2: Install WIFI/GPRS module. Stpe3: Fasten WIFI/GPRS module using screws. 4.7. Communication method DASS 3.0i LV (DSP-123i-ODS) gird-connected inverters offer RS485 (standard) and Wi-Fi (optional) communication modes: A. Communication between one inverter and one PC: 1. RS485 Refer to the figure shown below, connect the TX+ and TX- of the inverter to the TX+ and TX- of the RS485→... - Page 43 USB port of the adapter to the computer. A maximum of 31 inverters can be connected in one daisy chain.(NOTE2) Figure 4-34 2. WI-FI Refer to the figure shown below: (wireless function required for the - 38 - Copyright © DASS Tech Co., Ltd...
- Page 44 The length of the RS485 communication cable should be less than 1000 m. Note2: When multiple inverters are connected via RS485 wires, set mod-bus address to differentiate the inverters. Note3: S/N number of the Wi-Fi module is located on the side. - 39 - Copyright © DASS Tech Co., Ltd...
-
Page 45: Commissioning Of Inverter
DASS Tech Co., Ltd. is not responsible for any consequences arising out of incorrect country code selection. If the inverter indicates any fault, please refer to Section 7.1 of this manual —... -
Page 46: Operation Interface
User manual 6. Operation interface Outlines of this chapter This section introduces the display, operation, buttons and LED indicator lights of DASS 3.0i LV (DSP-123i-ODS) Inverter. 6.1. Operation and Display Panel Buttons and Indicator lights Button: Long press the button to enter the next menu or confirm the selection... -
Page 47: Standard Interface
DASS 3.0i LV (DSP-123i-ODS) User manual 6.2. Standard Interface - 42 - Copyright © DASS Tech Co., Ltd... - Page 48 When power-on, LCD interface displays INITIALIZING, refer below picture. When control board successfully connected with communication board, the LCD display the current state of the inverter,display as shown in the figure below. - 43 - Copyright © DASS Tech Co., Ltd...
-
Page 49: Main Interface
When the control board and communication board connection fails, the LCD display interface as shown in the figure below. 6.3. Main Interface Long press the button under standard interface to enter into main interface, - 44 - Copyright © DASS Tech Co., Ltd... - Page 50 0001), when entering the password, short press to change the number, long press to confirm the current number, and long press after entering the correct password.If "password error, try again" appears, you will need to re-enter the correct password. 1. Set Time - 45 - Copyright © DASS Tech Co., Ltd...
- Page 51 LV-Range-50HZ France NewZealand EU EN50549 Poland Brazil South Africa Germany BDEW Slovakia VSD 45-49 Reserved Germany VDE Slovakia SSE 0126 Italy CEI0-16 Slovakia ZSD 5. On-Off Control Inverter on-off local control. - 46 - Copyright © DASS Tech Co., Ltd...
- Page 52 9. Set Input mode The input modes of the inverter are divided into parallel mode and independent mode (when multi-channel MPPT is input). Since DASS 3.0i LV (DSP-123i-ODS) has only one group of MPPT input, the input modes are not distinguished.
- Page 53 Please refer to below picture. Long press the button and short press the button to turn the page in standard interface, then enter into “2.Event List” interface. 2. Event List 1. Current event 2. History event - 48 - Copyright © DASS Tech Co., Ltd...
-
Page 54: Update Software Online
USB flash drive. 6.4. Update Software online DASS 3.0i LV (DSP-123i-ODS) inverters offer software upgrade via usb flash drive to maximize inverter performance and avoid inverter operation error caused by software bugs. - Page 55 Step 2 Insert the usb flash drive into the compute. Step 3 DASS Tech Co., Ltd will send the Software code to the user who needs to update. After user receive the file,please decompressing file and cover the original file in usb flash drive.
-
Page 56: Trouble Shooting
Select “ 2. Event List ” then long press the button to enter event list. Event List information Table 7-1 Event list - 51 - Copyright © DASS Tech Co., Ltd... - Page 57 GFCI Fault normal operating status after the fault is rectified.If the fault occurs frequently and lasts a long time,check whether the insulation resistance between the PV array and earth(ground) is too - 52 - Copyright © DASS Tech Co., Ltd...
- Page 58 “DC switch”, wait for 5 minutes, then turn ON the “DC switch”. Check whether the fault is rectified. If no, please contact technical support, If it’s incorrect, change it according to Section - 53 - Copyright © DASS Tech Co., Ltd...
- Page 59 The Boost temp is ID58 Check whether the ambient temperature of Boost too high the installation position exceeds the upper limit. ID59 OverTempFault_ The environment If yes, improve ventilation to decrease the - 54 - Copyright © DASS Tech Co., Ltd...
- Page 60 If yes, improve ventilation to decrease the temperature. Over Freq The inverter has Inverter automatically reduce the output ID82 Derating derated because of power when the frequency of electrical grid is - 55 - Copyright © DASS Tech Co., Ltd...
-
Page 61: Maintenance
Please clean the inverter with an air blower, a dry & soft cloth or a soft bristle brush. Do NOT clean the inverter with water, corrosive chemicals, detergent, etc. Heat sink cleaning For the long-term proper operation of inverters, ensure there is enough space - 56 - Copyright © DASS Tech Co., Ltd... - Page 62 Please clean the heat sink with an air blower, a dry & soft cloth or a soft bristle brush. Do NOT clean the heat sink with water, corrosive chemicals, detergent, etc. - 57 - Copyright © DASS Tech Co., Ltd...
-
Page 63: Technical Data
DASS 3.0i LV (DSP-123i-ODS) User manual 8. Technical data Outlines of this chapter This topic lists the technical specifications for all DASS 3.0i LV (DSP-123i-ODS) inverters. 8.1. Input parameters (DC) DASS 3.0i LV (DSP-123i-ODS) Technical Data Max.DC power 4500W Max.Input voltage... -
Page 64: Output Parameters (Ac)
Grid voltage range 180-276Vac( According to local grid standard ) Nominal grid frequency 50Hz/60Hz Grid frequency range 45~55Hz/54~66Hz( According to local grid standard ) THDi <3% Power factor 1default( +/-0.8 adjustable) - 59 - Copyright © DASS Tech Co., Ltd... -
Page 65: Efficiency,Protection And Communication
Degree 3 pollution degree Overvoltage category PV:OVC II, AC mains:OVC III Max inverter Back-feed current to the array Output short circuit current 200A/1us to the array Output inrush current and 0.8A/2us duration - 60 - Copyright © DASS Tech Co., Ltd... -
Page 66: General Date
Permissible humidity range 0~100% Noise figure <25dB DC Switch Optional Cooling Natural convection Max.Operating altitude 2000m Outline Dimension 321*260.5*131.5mm Bracket Wall-mounted Weight 6.3kg Display LCD+LED Communication mode RS485.WiFi/GPRS(optional),USB Degree of protection IP65 - 61 - Copyright © DASS Tech Co., Ltd... -
Page 67: Quality Assurance
Customers shall bear different extended premium. During the extended warranty period, pv components GPRS, WIFI and - 62 - Copyright © DASS Tech Co., Ltd... - Page 68 11) Poor ventilation of the device; 12) The product maintenance process does not follow relevant standards; 13) Failure or damage caused by natural disasters or other force majeure (such as earthquake, lightning strike, fire, etc.) - 63 - Copyright © DASS Tech Co., Ltd...
- Page 69 You are also entitled to have the goods repaired or replaced if the goods fail to be of acceptable quality and the failure does not amount to a major failure. - 64 - Copyright © DASS Tech Co., Ltd...
- Page 70 DASS Tech Co., Ltd. Customer Ser vice Center 1588-7468 Main Phone of Headquar ter 043-218-5670 (FAX) 043-218-5671 E-mail webmaster@dasstech.com The specifications of the product are subject to change without notice due to quality improvement, etc. Headquarter: 109, Yangcheongsongdae-gil, Ochang-eup, Cheongwon-gu, Cheongju-si, Chungcheongbuk-do, 28118, Republic of Korea (in Science Park of Ochgang) http://www.dasstech.com...
Need help?
Do you have a question about the DASS 3.0i LV and is the answer not in the manual?
Questions and answers