Table of Contents
Advertisement
Available languages
Available languages
Quick Links
Advertisement
Chapters
Table of Contents

Subscribe to Our Youtube Channel
Related Manuals for Canvas WELLINGTON 063-6340-4


Summary of Contents for Canvas WELLINGTON 063-6340-4
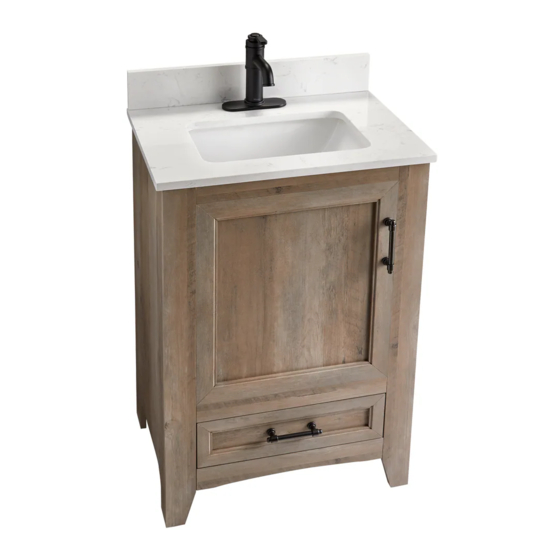
- Page 1 WELLINGTON 24” (61 CM) WEATHERED-OAK BATHROOM VANITY PRODUCT NO. 063-6340-4 ASSEMBLY INSTRUCTIONS HAVING TROUBLE? TOLL-FREE: 1-888-670-6684 IMPORTANT: Please read this manual carefully before beginning assembly of this product. Keep this manual for future reference.
- Page 2 From on-trend furniture pieces to holiday décor and all your outdoor living essentials, CANVAS® makes it easy to refresh your space to reflect your unique style and the way you live every day. We would love to hear from you and welcome your thoughtful feedback.
-
Page 3: Table Of Contents
TABLE OF CONTENTS Parts List Before You Begin Assembly Step-by-step Guide Technical Data Troubleshooting Caring for Your Item Warranty WARNING! TO REDUCE THE RISK OF SERIOUS INJURY, READ THE FOLLOWING SAFETY INSTRUCTIONS BEFORE ASSEMBLING AND USING THE PRODUCT. • Please read and understand this entire manual before attempting to assemble, operate, or install the product. -
Page 4: Parts List
PARTS LIST ITEM DESCRIPTION THUMBNAIL QUANTITY Backsplash Vanity Top Side Panel Left Side Panel Right Upper Back Stretcher Middle Back Stretcher Lower Back Stretcher Middle Panel Back Panel Upper Front Stretcher Bottom Front Stretcher Door Drawer Front WELLINGTON 24” (61 CM) WEATHERED-OAK BATHROOM VANITY... - Page 5 PARTS LIST ITEM DESCRIPTION THUMBNAIL QUANTITY Drawer Back Drawer Left Drawer Right Drawer Stretcher Drawer Bottom WELLINGTON 24” (61 CM) WEATHERED-OAK BATHROOM VANITY...
- Page 6 EXPLODED PARTS WELLINGTON 24” (61 CM) WEATHERED-OAK BATHROOM VANITY...
- Page 7 HARDWARE LIST ITEM DESCRIPTION THUMBNAIL QUANTITY Large Cam Lock Large Cam Bolt M8x30 mm Wood Dowel Handle with Bolt M4x25 mm Screw M4x12 mm Screw M3.5x15 mm Screw M3.5x10 mm Screw Slow Close Hinge Drawer Slides Leveller WELLINGTON 24” (61 CM) WEATHERED-OAK BATHROOM VANITY...
- Page 8 HARDWARE LIST ITEM DESCRIPTION THUMBNAIL QUANTITY Small Cam Lock Small Cam Bolt Glue WELLINGTON 24” (61 CM) WEATHERED-OAK BATHROOM VANITY...
-
Page 9: Before You Begin Assembly
Place packing materials back in the box. Do not dispose of packaging materials until assembly is complete. READ EACH STEP CAREFULLY Make sure you understand each step. If you have any questions, ® contact CANVAS customer service at 1-888-670-6684 (toll free). WELLINGTON 24” (61 CM) WEATHERED-OAK BATHROOM VANITY... - Page 10 BEFORE YOU BEGIN ASSEMBLY NOTE: IT IS VERY IMPORTANT TO USE GLUE WITH DOWELS. EXCESS GLUE CAN BE WIPED OFF WITH DAMP CLOTH. Insert dowel at least half way by tapping lightly with a rubber mallet IF NECESSARY. CAM LOCK SYSTEM OPERATION HOW THE KNOCK DOWN (KD) ASSEMBLY SYSTEM WORKS 1.
-
Page 11: Step-By-Step Guide
STEP-BY-STEP GUIDE STEP 1 Remove preassembled bolt from handle . Insert drawer handle into drawer front , securing with previously removed bolts. Install small cam bolts into drawer front . Set aside. Attach drawer left and drawer right to drawer back using M4x25mm screws . - Page 12 STEP-BY-STEP GUIDE STEP 2 Attach drawer front and drawer stretcher to drawer left , drawer right drawer back using M4x25mm screws and small cam locks Attach drawer slides to drawer left and drawer right using M3.5x10mm screws WELLINGTON 24” (61 CM) WEATHERED-OAK BATHROOM VANITY...
- Page 13 STEP-BY-STEP GUIDE STEP 3 Attach drawer slides to side panel left and side panel right using M3.5x10mm screws . Attach Leveller to the base of the vanity assembly. large cam bolts Install into side panel left and side panel right , Set aside.
- Page 14 STEP-BY-STEP GUIDE STEP 4 Attach middle back stretcher to middle panel using large cam locks , large cam locks and M8x30 mm wood dowel Note : Make sure large cam bolts are completely seated. WELLINGTON 24” (61 CM) WEATHERED-OAK BATHROOM VANITY...
- Page 15 STEP-BY-STEP GUIDE STEP 5 lower back stretcher Attach upper back stretcher , upper front stretcher bottom front stretcher and bottom panel assembly to side panel left and side panel right using large cam locks , M8x30mm wood dowels WELLINGTON 24” (61 CM) WEATHERED-OAK BATHROOM VANITY...
- Page 16 STEP-BY-STEP GUIDE STEP 6 Attach back panel to the back of the vanity assembly using M3.5x15mm screws WELLINGTON 24” (61 CM) WEATHERED-OAK BATHROOM VANITY...
- Page 17 STEP-BY-STEP GUIDE STEP 7 Insert the drawer into the assembly by pressing down the release levers on the slide runners and sliding the drawer into the tracks of slides. WELLINGTON 24” (61 CM) WEATHERED-OAK BATHROOM VANITY...
- Page 18 STEP-BY-STEP GUIDE STEP 8 door Attach slow close hinge using M4x12 mm screws door Remove preassembled bolts from handle . Attach drawer handle securing with previously removed bolts. Attach the hinge bases on door 12 to vanity assembly, using the pilot holes as a guide, with M4x12mm screws Open and close the doors to make sure they are aligned and shut correctly.
- Page 19 STEP-BY-STEP GUIDE STEP 9 Suggested way to attach vanity to wall. (Hardware NOT Provided.) WALL WELLINGTON 24” (61 CM) WEATHERED-OAK BATHROOM VANITY...
- Page 20 STEP-BY-STEP GUIDE STEP 10 Apply silicone around the edges of vanity assembly to secure vanity top Silicone (NOT Provided.) WELLINGTON 24” (61 CM) WEATHERED-OAK BATHROOM VANITY...
- Page 21 STEP-BY-STEP GUIDE STEP 11 Apply silicone around the edges of backsplash and attach it to tje vanity assembly. Silicone (NOT Provided.) WELLINGTON 24” (61 CM) WEATHERED-OAK BATHROOM VANITY...
-
Page 22: Technical Data
TECHNICAL DATA 24” 61 cm 18” 45.7 cm 38 7/16” 97.6 cm 34 1/2” 87.6 cm SPECIFICATIONS ASSEMBLED DIMENSIONS (W x D x H) 24 x 18 x 34 1/2 in 61 x 45.7 x 87.6 cm ASSEMBLED WEIGHT 84.88 lb 38.5 kg MAXIMUM WEIGHT CAPACITY 100 lb... -
Page 23: Troubleshooting
ASSEMBLY TROUBLESHOOTING HAVING TROUBLE? LET US HELP YOU! TOLL-FREE: 1-888-670-6684 BEFORE RETURNING CALL US; If you have questions regarding your product or require YOUR PRODUCT WE CAN HELP warranty assistance, please call our customer service helpline. PRODUCT TROUBLESHOOTING PROBLEM POSSIBLE CAUSES SOLUTION Vanity doors rub against The floor is not level. -
Page 24: Warranty
WARRANTY INFORMATION This CANVAS® product carries a one (1) year warranty against defects in workmanship and materials. Trileaf Distribution agrees to replace the defective product free of charge within the stated warranty period, when returned by the original purchaser with proof of purchase. This product is not guaranteed against wear or breakage due to misuse and/or abuse. - Page 26 WELLINGTON MEUBLE SALLE DE BAIN DE 24” (61 CM) EN CHÊNE PATINÉ N° D’ARTICLE: 063-6340-4 INSTRUCTIONS D’ASSEMBLAGE VOUS RENCONTREZ DES PROBLÈMES? NUMÉRO SANS FRAIS : 1 888 670-6684 IMPORTANT : Veuillez lire attentivement ce guide avant de procéder à l’assemblage de ce produit. Conservez ce guide aux fins de consultation ultérieure.
- Page 27 INSPIRÉ PAR LE CANADA Nous croyons au pouvoir de la décoration pour donner son âme à votre maison. C’est pour cela que les collections CANVAS s’inspirent des Canadiens et de leur style de vie. Qu’il s’agisse de meubles tendance, de décorations pour les fêtes ou pour le plein...
- Page 28 TABLE DES MATIÈRES Liste des pièces Avant de commencer l’assemblage Guide étape par étape Données techniques Dépannage Prendre soin de votre article Garantie AVERTISSEMENT! VEUILLEZ LIRE LES CONSIGNES DE SÉCURITÉ SUIVANTES AVANT D’ASSEMBLER ET D’UTILISER L’ARTICLE AFIN DE RÉDUIRE LE RISQUE DE BLESSURES GRAVES. •...
-
Page 29: Liste Des Pièces
LISTE DES PIÈCES ARTICLE DESCRIPTION ILLUSTRATION QUANTITÉ Dosseret Lavabo Panneau latéral gauche Panneau latéral droit Traverse arrière supérieure Traverse arrière intermédiaire Traverse arrière inférieure Panneau intermédiaire Panneau arrière Traverse avant supérieure Traverse avant inférieure Porte Panneau avant de tiroir WELLINGTON MEUBLE SALLE DE BAIN DE 24” (61 CM) EN CHÊNE PATINÉ... - Page 30 LISTE DES PIÈCES ARTICLE DESCRIPTION ILLUSTRATION QUANTITÉ Panneau arrière de tiroir Tiroir gauche Tiroir droit Traverse de tiroir Fond du tiroir WELLINGTON MEUBLE SALLE DE BAIN DE 24” (61 CM) EN CHÊNE PATINÉ...
- Page 31 VUE ÉCLATÉE WELLINGTON MEUBLE SALLE DE BAIN DE 24” (61 CM) EN CHÊNE PATINÉ...
- Page 32 LISTE DE LA QUINCAILLERIE ARTICLE DESCRIPTION ILLUSTRATION QUANTITÉ Grande came Grand goujon à came Goujon de bois M8x30 mm Poignée avec boulons Vis M4x25 mm Vis M4x12 mm Vis M3.5x15 mm Vis M3.5x10 mm Charnière à fermeture lente Glissières à tiroir Pied de nivellement WELLINGTON MEUBLE SALLE DE BAIN DE 24”...
- Page 33 HARDWARE LIST ITEM DESCRIPTION THUMBNAIL QUANTITY Petite came Petit goujon à came Colle WELLINGTON MEUBLE SALLE DE BAIN DE 24” (61 CM) EN CHÊNE PATINÉ...
-
Page 34: Avant De Commencer L'assemblage
LISEZ ATTENTIVEMENT CHAQUE ÉTAPE Assurez-vous de bien comprendre chaque étape. Si vous avez des questions, contactez le service à la clientèle CANVAS® au 1 888 670-6684 (sans frais). WELLINGTON MEUBLE SALLE DE BAIN DE 24” (61 CM) EN CHÊNE PATINÉ... - Page 35 AVANT DE COMMENCER L’ASSEMBLAGE REMARQUE : IL EST TRÈS IMPORTANT D’UTILISER DE LA COLLE AVEC LES GOUJONS. L’EXCÈS DE COLLE PEUT ÊTRE ESSUYÉ AVEC UN LINGE HUMIDE. Insérez le goujon à moitié en le frappant légèrement avec un maillet de caoutchouc SI NÉCESSAIRE.
-
Page 36: Guide Étape Par Étape
GUIDE ÉTAPE PAR ÉTAPE ÉTAPE 1 Retirez les boulons préassemblés de la poignée D. Fixez la poignée du tiroir D à la façade du tiroir 13, en la fixant avec les boulons retirés précédemment. Installer les petits boulons à came M dans la façade du tiroir 13. Mettez de côté. Fixez le tiroir gauche 15 et le tiroir droit 16 au fond du tiroir 14 à... - Page 37 GUIDE ÉTAPE PAR ÉTAPE ÉTAPE 2 Fixez la façade du tiroir 13 et le cadre du tiroir 17 au tiroir gauche 15, au tiroir droit 16 et au tiroir arrière 14 à l’aide des vis M4x25mm E et des petits verrous à came L. Fixer les glissières du tiroir J au tiroir gauche 15 et au tiroir droit 16 à...
- Page 38 GUIDE ÉTAPE PAR ÉTAPE ÉTAPE 3 Fixez les glissières de tiroir J au panneau latéral gauche 3 et au panneau latéral droit 4 à l’aide des vis M3,5x10mm H. Fixez le niveleur K à la base du meuble-lavabo. Installez les grands boulons à came B dans le panneau latéral gauche 3 et le panneau latéral droit 4, puis mettez-les de côté.
- Page 39 GUIDE ÉTAPE PAR ÉTAPE ÉTAPE 4 Fixez le cadre arrière central 6 au panneau central 8 à l’aide des grands verrous à came A, des grands verrous à came B et de la cheville en bois M8x30 mm C. Remarque: Assurez-vous que les grands boulons à came B sont complètement en place.
- Page 40 GUIDE ÉTAPE PAR ÉTAPE ÉTAPE 5 Fixez le cadre supérieur arrière 5, le cadre supérieur avant 10, le cadre inférieur arrière 7, le cadre inférieur avant 11 et le panneau inférieur au panneau latéral gauche 3 et au panneau latéral droit 4 à l’aide des grands verrous à came A et des chevilles en bois M8x30 mm C.
- Page 41 GUIDE ÉTAPE PAR ÉTAPE ÉTAPE 6 Fixez le panneau arrière 9 à l’arrière du meuble-lavabo au moyen des vis M3.5x15 mm G. WELLINGTON MEUBLE SALLE DE BAIN DE 24” (61 CM) EN CHÊNE PATINÉ...
- Page 42 GUIDE ÉTAPE PAR ÉTAPE ÉTAPE 7 Insérez le tiroir dans l’assemblage en appuyant sur les leviers de dégagement des glissières et en faisant glisser le tiroir dans les rails des glissières. WELLINGTON MEUBLE SALLE DE BAIN DE 24” (61 CM) EN CHÊNE PATINÉ...
- Page 43 GUIDE ÉTAPE PAR ÉTAPE ÉTAPE 8 Fixez les charnières à fermeture lente I à la porte 12 au moyen des vis M4x12 mm F. Retirez les boulons préassemblés de la poignée D. Fixez la poignée du tiroir D à la porte 12 au moyen des boulons précédemment retirés.
- Page 44 GUIDE ÉTAPE PAR ÉTAPE ÉTAPE 9 Méthode suggérée pour fixer le meuble-lavabo au mur. (Quincaillerie NON incluse.) WELLINGTON MEUBLE SALLE DE BAIN DE 24” (61 CM) EN CHÊNE PATINÉ...
- Page 45 GUIDE ÉTAPE PAR ÉTAPE ÉTAPE 10 Appliquez du silicone autour du bord supérieur du meuble-lavabo pour fixer le lavabo 2. Silicone (NON fourni) WELLINGTON MEUBLE SALLE DE BAIN DE 24” (61 CM) EN CHÊNE PATINÉ...
- Page 46 GUIDE ÉTAPE PAR ÉTAPE ÉTAPE 11 Appliquez du silicone sur les bords du dosseret 1 et fixez-le à l’assemblage du meuble-lavabo. Silicone (NON fourni) WELLINGTON MEUBLE SALLE DE BAIN DE 24” (61 CM) EN CHÊNE PATINÉ...
-
Page 47: Données Techniques
DONNÉES TECHNIQUES 24 po 61 cm 18 po 45,7 cm 38 7/16 po 97,6 cm 34 1/2 po 87,6 cm FICHE TECHNIQUE DIMENSION DE L’ARTICLE (larg. x P. x H.) 24 x 18 x 34 1/2 po 61 x 45,7 x 87,6 cm POIDS DE L’ARTICLE 84,88 lb 38,5 kg... -
Page 48: Prendre Soin De Votre Article
RÉSOUDRE LES PROBLÈMES DE L’ASSEMBLAGE VOUS RENCONTREZ DES PROBLÈMES? LAISSEZ-NOUS VOUS AIDER! NUMÉRO SANS FRAIS : 1 888 670-6684 AVANT DE APPELEZ-NOUS; Si vous avez des questions concernant votre produit ou avez RETOURNER NOUS POUVONS besoin d’une assistance au titre de la garantie, veuillez appeler VOTRE ARTICLE notre service d’assistance à... -
Page 49: Garantie
GARANTIE GARANTIE LIMITÉE DE 1 AN* Cet article CANVAS comprend une garantie de un (1) an contre les défauts de fabrication et de matériau(x). Distribution Trifeuil consent à remplacer l’article défectueux lorsqu’il est retourné par l’acheteur original, accompagné de la preuve d’achat, au cours de la période de garantie convenue.
Need help?
Do you have a question about the WELLINGTON 063-6340-4 and is the answer not in the manual?
Questions and answers