
Related Manuals for Markator FlyMarker mini 85/45 plus

Summary of Contents for Markator FlyMarker mini 85/45 plus
- Page 1 Operating Manual ® FlyMarker mini 85/45 plus and 120/45 plus Original Operating Manual Version 7...
- Page 2 ® FlyMarker mini 85/45 plus and 120/45 plus Operating Manual ® © MARKATOR MANFRED BORRIES GMBH All rights, including translations, remain with ® MARKATOR MANFRED BORRIES GMBH. No part of this documentation may be reproduced, edited or disclosed without written permission from ®...
-
Page 3: Table Of Contents
® FlyMarker mini 85/45 plus and 120/45 plus Operating Manual Contents ® Your contact at MARKATOR ............ 2 Design and function ............7 ® Description of the FlyMarker mini handheld CNC marking system ......7 ® How the FlyMarker mini handheld CNC marking system works ........8 ®... - Page 4 ® FlyMarker mini 85/45 plus and 120/45 plus Operating Manual 4.2.5 Turn the display and marking area ..............41 4.2.6 Display lighting ....................41 4.2.7 Configuring power management ................. 41 4.2.8 Battery charging status ..................43 4.2.9 Changing/charging the battery ................44 4.2.10 LED charge indicator on the charger ..............
- Page 5 ® FlyMarker mini 85/45 plus and 120/45 plus Operating Manual 5.4.13 Password (program option B: KOMFORT) ............114 5.4.14 Mirror (program option B: KOMFORT) ...............116 5.4.15 Save file (program option B: KOMFORT) ............119 Show/edit the marking preview .................121 Marking ........................124 Selecting the operating language ................127 Teach-in........................128 5.8.1 Status reports ....................131...
- Page 6 ® FlyMarker mini 85/45 plus and 120/45 plus Operating Manual 8.12.2 USB B (device) ....................149 8.12.3 Ethernet ........................150 Handling lithium-ion batteries ........151 Disposal ........................151 Storage ........................152 Transport ........................152 Firefighting measures ....................153 First aid ........................154 10. Appendix ................155 10.1 Barcode scanner Keyboard German .................155 10.2 Barcode scanner Keyboard English ................156 10.3 Barcode scanner Keyboard English U.S.
-
Page 7: Design And Function
The premium flatbed guides in the X and Y directions are double routed and make FlyMarker mini mechanism very stable and durable. Working with other high-quality components from ® MARKATOR , this makes for very precise marking that meets the highest standards. Self-explanatory software The device’s easy-to-use software is clearly structured and self-explanatory. -
Page 8: How The Flymarker Mini Handheld Cnc Marking System Works
® FlyMarker mini 85/45 plus and 120/45 plus Operating Manual ® 1.2 How the FlyMarker mini handheld CNC marking system works ® Without any previous knowledge, any user can start marking with the FlyMarker mini in a minute or less. The quick start guide included is all that’s needed to start marking right away. An operator who only wants to mark doesn’t need a password. -
Page 9: Scope Of Supply Flymarker
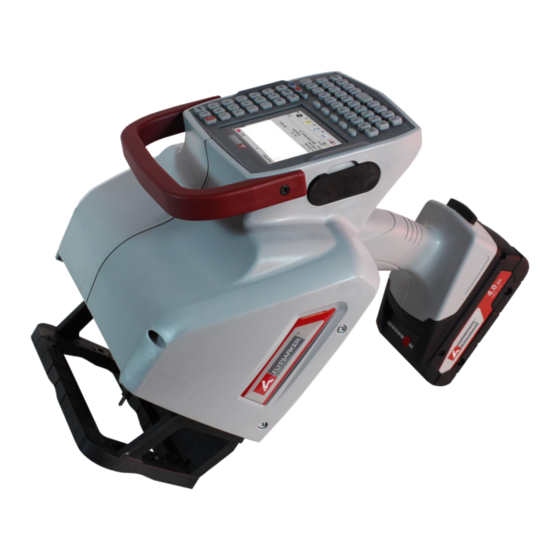
® FlyMarker mini 85/45 plus and 120/45 plus Operating Manual ® 1.3 Scope of supply FlyMarker mini 85/45 plus and 120/45 plus handheld CNC marking system ® 1. FlyMarker mini 85/45 plus & 120/45 7. Box wrench plus 8. Storage tube contains: 2. -
Page 10: Scope Of Supply Flymarker
® FlyMarker mini 85/45 plus and 120/45 plus Operating Manual ® 1.4 Scope of supply FlyMarker mini 85/45 plus and 120/45 plus with column frame ® FlyMarker mini 85/45 plus & 120/45 Limit stop of release handle with lock nut plus Solenoid with marking pin Handle with release button... -
Page 11: Safety
® FlyMarker mini 85/45 plus and 120/45 plus Operating Manual 2. Safety Symbols and terms These symbols indicate warnings, prohibitions and advice that point to hazards and must always be heeded: This warning means that death, severe bodily injury or serious property damage will occur if the precautions are not taken. -
Page 12: Personnel Requirements
® FlyMarker mini 85/45 plus and 120/45 plus Operating Manual Personnel requirements All activities must be performed only by appropriately qualified personnel. Basic knowledge of keyboarding and basic computer functions is a prerequisite. Only expert personnel are to carry out control and maintenance. Definition of expert personnel Expert personnel are those who have technical knowledge and experience due to specialized training. - Page 13 ® used with the FlyMarker mini. ® Repairs are to be performed only by MARKATOR personnel. The warranty on the marking system’s parts is void if repairs are made during the warranty period without the manufacturer’s approval.
-
Page 14: First Use
® FlyMarker mini 85/45 plus and 120/45 plus Operating Manual 3. First use Risk of injury due to falling parts! - Use caution - Unpack with care - When choosing a place to set up and assemble the ® FlyMarker mini, consider its weight. -
Page 15: Preparing Flymarker
® FlyMarker mini 85/45 plus and 120/45 plus Operating Manual ® Preparing FlyMarker mini for mobile operation Charge battery completely. (→Chapter „Battery charging status, page 43) (→Chapter „Changing/charging the battery“, page 44) Insert the charged battery into the handle. (→ Illustration) You can hear and feel the battery snap in when it locks. -
Page 16: Preparing Flymarker Mini With Column Frame For Stationary Operation
® FlyMarker mini 85/45 plus and 120/45 plus Operating Manual ® Preparing FlyMarker mini with column frame for stationary operation Loosen the locking mechanism and open the clamping lever completely. Set the FlyMarker mini into the black locking pins and close the clamping lever completely. - Page 17 ® FlyMarker mini 85/45 plus and 120/45 plus Operating Manual Adjust the height of the mechanical support. 1. Loosen the clamping lever 3. Fix the clamping lever Note: 2. Adjust the mechanical The distance should be support approx. 20 mm without pulling down the release handle Hold the mechanical support while loosen the clamping lever.
-
Page 18: Adjustment Of The Marking Pin Distance Of The Extended Marking Pin (Optional)
® FlyMarker mini 85/45 plus and 120/45 plus Operating Manual Adjustment of the marking pin distance of the extended marking pin (optional) Adjust the marking pin distance towards the work piece (while pulling down the release handle) 1. Loosen the knurled nut 3. -
Page 19: Turning On Flymarker ® Mini
® FlyMarker mini 85/45 plus and 120/45 plus Operating Manual ® Turning on FlyMarker mini The FlyMarker mini is now ready to use. (→Chapter „Preparing FlyMarker ® mini for mobile operation“, page 15) Turn FlyMarker mini on with the ON/OFF button. ®... - Page 20 ® FlyMarker mini 85/45 plus and 120/45 plus Operating Manual Press the spacebar. mini can’t be operated if the battery is drained. FlyMarker (→Chapter „Battery charging status, page 43) (→Chapter “Changing/charging the battery”, page 44) After a short time, the main menu window appears. ®...
-
Page 21: Entering Passwords
® FlyMarker mini 85/45 plus and 120/45 plus Operating Manual 3.5.1 Entering passwords Press the key button. The following dialog box appears. Enter the password. The default user password is: 1111. The administrative password is: 2222. (→ Chapter “Menu structure”, page 56) Press the Return key. - Page 22 ® FlyMarker mini 85/45 plus and 120/45 plus Operating Manual Level 1 (F1 to F5) A = Menu information B = File name C = Time D = Charge of battery E = Status line F = General instructions or marking text G = Parameter H = Writing mode I = OK or reporting keys (stop, etc.)
-
Page 23: Key Panel
® FlyMarker mini 85/45 plus and 120/45 plus Operating Manual Level 1 (F2 to F5) Level 2 (F7 to F10) 3.5.2 Key panel 1 = Display 8 = Shift key 2 = ON/OFF key 9 = Escape key 3 = Info key 10 = Function key 4 = Delete key 11 = Password query... -
Page 24: User Interface Touch Display
® FlyMarker mini 85/45 plus and 120/45 plus Operating Manual 3.5.3 User interface touch display 1 = Display 9 = function keys 2 = On/Off button 10 = Insert key 3 = password request 11 = Short-Key Keys 4 = Enter button 12 = point 5 = Undo button 13 = space bar... -
Page 25: Selecting Operating Language
® FlyMarker mini 85/45 plus and 120/45 plus Operating Manual 3.5.4 Selecting operating language This function is only possible after entering the administrative password. (→ Chapter “Entering passwords”, page 21). The main menu appears. Press the change level key. The second level of the main menu appears. Press F9. -
Page 26: General Instructions
® FlyMarker mini 85/45 plus and 120/45 plus Operating Manual Following languages are available: - German - Portuguese - Czech - Chinese - English - Finnish - Hungarian - Japanese - French - Danish - Arabic - Swedish - Italian - Norwegian - Slovak …other languages are... -
Page 27: Description Of Function Keys
® FlyMarker mini 85/45 plus and 120/45 plus Operating Manual 3.5.6 Description of function keys F1 = Shift key (standard characters ↔ special characters) F2 = File manager F3 = Parameter menu F4 = Insert substitute F5 = Preview F7 = Settings F8 = Information F9 = Language F10 = Teach-in... - Page 28 ® FlyMarker mini 85/45 plus and 120/45 plus Operating Manual - If an external USB keyboard is used, the F12 key on the USB keyboard must be pressed to switch levels. - The menu above the current one can be reached by pressing the escape key (ESC).
-
Page 29: Operation
- The manufacturer recommends that only new, original MARKATOR marking pins be used when the old ones wear out. 3.6.1 Selecting and installing the marking pin The marking pin must be selected based on the material to be marked. - Page 30 ® FlyMarker mini 85/45 plus and 120/45 plus Operating Manual Turn FlyMarker mini off with the ON/OFF button. Insert the 2,5 mm allen wrench (included) through the hole in the marking pin stem to secure the marking pin stem from twisting. Unscrew the chuck nut using the 6 mm angled box wrench.
- Page 31 ® FlyMarker mini 85/45 plus and 120/45 plus Operating Manual Pull the marking pin out of the chuck. Insert the marking pin to be used into the chuck until it stops. Retighten the chuck nut, and remove the box wrench and hex wrench. Moment of force = 6Nm The marking pin is installed.
-
Page 32: Select And Change The Magnet
® FlyMarker mini 85/45 plus and 120/45 plus Operating Manual 3.6.2 Select and change the magnet Depending on the material and the required marking depth, the magnet can be selected. There are two versions available: A standard magnet version and an extra strong magnet version. As the magnet is a wear part, it could be that it needs to be changed. - Page 33 ® FlyMarker mini 85/45 plus and 120/45 plus Operating Manual Remove the magnet from the fixture. Store the good working magnet in a dry and safe place. If the magnet is damaged please dispose immediately. Insert the magnet carefully into the fixture. Insert the magnet carefully and take care of the contacts.
- Page 34 ® FlyMarker mini 85/45 plus and 120/45 plus Operating Manual Gently screw the collet in and tighten the marking pin. Chapter „Selecting and installing the marking pin“, page 29. ® Turn the FlyMarker mini on using the On/Off-button. The new magnet will be identified only when the device is turned on.
-
Page 35: Adjust The Marking Pin Distance (Optional Positioning Plate)
® FlyMarker mini 85/45 plus and 120/45 plus Operating Manual 3.6.3 Adjust the marking pin distance (optional positioning plate) ® 1. Turn the FlyMarker mini off using the On/Off-button. 2. Unscrew the 4 screws on the positioning plate (An allen wrench SW 3mm is necessary) If the screws will be changed, use a maximum size of M4x18! 3. - Page 36 The scale value 0mm corresponds with the marking pin distance of 3,5 mm. Please contact MARKATOR if you would like to produce your own positioning plate. 4. Tighten the 4 screws on the positioning plate (An allen wrench SW 3mm is necessary) Check the marking pin distance to the material.
-
Page 37: Integrated Barcode Scanner (Optional)
® FlyMarker mini 85/45 plus and 120/45 plus Operating Manual 3.6.4 Integrated barcode scanner (optional) To avoid mistakes and to save time, processes will be automated more and more. This includes also the input of texts which needs to be marked via a barcode scanner. With this optional available, integrated barcode scanner it is possible to scan printed 2D-Codes, e.g. - Page 38 ® FlyMarker mini 85/45 plus and 120/45 plus Operating Manual The Insert substitutes window appears. 2. Use the -arrow keys to select the internal barcode scanner substitute. The internal barcode scanner window appears. 3. Change the setting on active „ON“ and press ESC to leave the menu. The command „internal barcode scanner“...
-
Page 39: Installation
® FlyMarker mini 85/45 plus and 120/45 plus Operating Manual 4. Installation Function levels Access to control functions depends on the functional level selected: Operator level The following functions can be performed without a password: - Entering passwords - Single marking (without entering the marking text) - Showing the marking preview User level By entering a user password, the user can perform all operator functions, as well as the... -
Page 40: Instructions On The Keyboard And Display
® FlyMarker mini 85/45 plus and 120/45 plus Operating Manual 4.2 Instructions on the keyboard and display 4.2.1 Locking/unlocking the keyboard Press the key button. The password dialog box appears. F2 activates the keylock. Do the same to unlock the keyboard. 4.2.2 Turn on/off the illumination of the marking area Press for 1 second... -
Page 41: Switch Between Mm And Inch
® FlyMarker mini 85/45 plus and 120/45 plus Operating Manual 4.2.3 Switch between mm and inch Press for 5 seconds = Switch between mm and inch 4.2.4 Laserpointer Press for 1 second = Laserpointer will be activated for 20 seconds 4.2.5 Turn the display and marking area Press for 5 seconds... - Page 42 ® FlyMarker mini 85/45 plus and 120/45 plus Operating Manual If the value is set to 0 (zero seconds), FlyMarker mini does not turn on. Setting the standby time FlyMarker mini switches into standby mode if there has been no marking or no key has been pressed within a specified time.
-
Page 43: Battery Charging Status
® FlyMarker mini 85/45 plus and 120/45 plus Operating Manual 4.2.8 Battery charging status 4.2.4.1 Checking the battery charging status in the software ® If the FlyMarker mini remains switched off for more than 2 days(e.g. on weekends), the battery must be removed from the machine. -
Page 44: Changing/Charging The Battery
® FlyMarker mini 85/45 plus and 120/45 plus Operating Manual 4.2.4.2 Checking the battery charging status directly at the battery Press the button (battery symbol) on the battery to show the charging status. After about 5 seconds, the charging status display goes off by itself. If an LED blinks after the battery symbol is pushed, the battery must be charged. - Page 45 ® FlyMarker mini 85/45 plus and 120/45 plus Operating Manual Do not open the battery. There is a risk of short circuit. Never short-circuit the battery. There is a risk of explosion! Protect the battery from heat or temperatures above 50°C, such as from strong sunlight or fire.
- Page 46 ® FlyMarker mini 85/45 plus and 120/45 plus Operating Manual ® Only original batteries from MARKATOR should be used! Using other batteries may cause injury or fire. Batteries must only be charged using the original ® MARKATOR charging unit. If a charger is made for a specific type of battery, there is a fire hazard if it is used for other batteries.
- Page 47 The risk of electric shock increases if water enters the charger. Do not charge batteries of other brands or types. ® The charger is only for charging MARKATOR batteries. Otherwise there is risk of fire or explosion. Keep the charger clean.
- Page 48 ® FlyMarker mini 85/45 plus and 120/45 plus Operating Manual Before each use, check the charger, cable and plug. Do not use the charger if you find damage. Do not open the charger yourself — have it repaired only by qualified expert personnel and only with original replacement parts.
- Page 49 ® FlyMarker mini 85/45 plus and 120/45 plus Operating Manual Do not insert objects into the ventilation slots on the battery charger. There is a danger of electric shocks and short circuits. There is danger of fire! When storing, transporting or disposing of the battery, put the safety cap on its contacts.
- Page 50 ® FlyMarker mini 85/45 plus and 120/45 plus Operating Manual ® Turn FlyMarker mini off with the ON/OFF button. Press the battery lock on both sides and pull the battery from the handle. Before plugging in, check to see that the rated mains voltage and mains frequency, as specified on the rating label, match your power supply.
- Page 51 ® FlyMarker mini 85/45 plus and 120/45 plus Operating Manual Insert the charger’s plug into a regulation-compliant socket. The warning display and the operating indicator light up one after the other for approx. 1 second and the installed fan runs for approx. 5 seconds. - Make sure that the supply voltage conforms to the charger’s technical data.
- Page 52 ® FlyMarker mini 85/45 plus and 120/45 plus Operating Manual The battery is fully charged. The charger has switched to trickle charging. Once the charging process has finished, the battery charger automatically switches to conservation mode Remove battery from charger. ®...
-
Page 53: Led Charge Indicator On The Charger
® FlyMarker mini 85/45 plus and 120/45 plus Operating Manual 4.2.10 LED charge indicator on the charger The operating indicator flashes. The operating display lights up continuously. Battery pack is not charged. Temperature too high/too low. When the temperature of the battery pack is between 0 °C and 50 °C, the charging process begins automatically. -
Page 54: Selecting The Writing Mode
® FlyMarker mini 85/45 plus and 120/45 plus Operating Manual 4.2.12 Selecting the writing mode Use the Insert key to select the writing mode. The selected writing mode is shown in the main menu. The possibilities are: Insert mode The new character is inserted to the left of the cursor Overwrite mode The character below the cursor is overwritten by the new character. -
Page 55: Entering Characters
® FlyMarker mini 85/45 plus and 120/45 plus Operating Manual 4.2.13 Entering characters The characters to be marked are entered through the keyboard. Use the arrow keys to move the cursor to any place in the character sequence. Use one of the arrow keys or the Enter key to switch between lines. -
Page 56: Menu Structure
® FlyMarker mini 85/45 plus and 120/45 plus Operating Manual 4.2.14 Menu structure... -
Page 57: Operation
® FlyMarker mini 85/45 plus and 120/45 plus Operating Manual 5. Operation Creating, loading and saving a marking file The main menu appears. Press F2. The Files window appears. The Files window contains information on the current marking file and on the memory. Level 1 Level 2... -
Page 58: Creating A Marking File
® FlyMarker mini 85/45 plus and 120/45 plus Operating Manual 5.1.1 Creating a marking file This function is only possible after entering the user or administrative password. Chapter “Entering passwords”, page 21) The main menu appears. Press F2. The Files window appears. Level 1 Press F2. - Page 59 ® FlyMarker mini 85/45 plus and 120/45 plus Operating Manual If the current marking file has not yet been saved: The following window is shown. Press Enter. The instruction text is deleted and all parameters are set to their standard values. The main menu appears.
-
Page 60: Loading A Marking File
® FlyMarker mini 85/45 plus and 120/45 plus Operating Manual 5.1.2 Loading a marking file This function is only possible after entering the user or administrative password. (→ Chapter “Entering passwords”, page 21). The main menu appears. 1. Press F2. The Files window appears. - Page 61 ® FlyMarker mini 85/45 plus and 120/45 plus Operating Manual The main menu appears. The marking file has been loaded. The selected file name is shown in the header.
-
Page 62: Saving A Marking File
® FlyMarker mini 85/45 plus and 120/45 plus Operating Manual 5.1.3 Saving a marking file This function is only possible after entering the user or administrative password. (→ Chapter “Entering passwords”, page 21). The main menu appears. 1. Press F2. The Files window appears. -
Page 63: Saving A Marking File As
® FlyMarker mini 85/45 plus and 120/45 plus Operating Manual 5.1.4 Saving a marking file as This function is only possible after entering the user or administrative password. Chapter “Entering passwords”, page 21) The main menu appears. 1. Press F2. The Files window appears. - Page 64 ® FlyMarker mini 85/45 plus and 120/45 plus Operating Manual The Save file as window appears. 3. Enter the file name. 4. Press Enter. The main menu appears. The marking file has been saved with the new name.
-
Page 65: Deleting A Marking File
® FlyMarker mini 85/45 plus and 120/45 plus Operating Manual 5.1.5 Deleting a marking file This function is only possible after entering the user or administrative password. (→ Chapter “Entering passwords”, page 21). The main menu apears. 1. Press F2. The Files window appears. - Page 66 ® FlyMarker mini 85/45 plus and 120/45 plus Operating Manual Level 2 3. Use the arrow keys to select the file. 4. Press F7. 5. Press Enter. 6. Press Enter to confirm the security question. The marking file has been deleted.
-
Page 67: File Filter (Marking Files, Logos And Fonts)
® FlyMarker mini 85/45 plus and 120/45 plus Operating Manual 5.1.6 File filter (marking files, logos and fonts) This function is only possible after entering the user or administrative password. (→ Chapter “Entering passwords”, page 21). The main menu appears. 1. - Page 68 ® FlyMarker mini 85/45 plus and 120/45 plus Operating Manual The second level of the Files window appears. Level 2 3. Press F8. Depending on the mode selected either: Only marking files are shown. Only logos, fonts and CSV files are shown.
-
Page 69: Choosing A Data Medium
® FlyMarker mini 85/45 plus and 120/45 plus Operating Manual ® mini ↔ USB-Stick) 5.1.7 Choosing a data medium (FlyMarker This function is only possible after entering the user or administrative password. (→ Chapter “Entering passwords”, page 21). The main menu appears. 1. - Page 70 ® FlyMarker mini 85/45 plus and 120/45 plus Operating Manual Level 2 3. Press F9. Depending on the mode selected either: All files saved on the FlyMarker® mini are shown (.dat / .cgp / .cft / .csv). All files saved on the USB stick are shown (.dat / .cgp / .cft / .csv).
-
Page 71: Copying Files To Flymarker ® Mini Or A Usb Stick
® FlyMarker mini 85/45 plus and 120/45 plus Operating Manual ® 5.1.8 Copying files to FlyMarker mini or a USB stick This function is only possible after entering the user or administrative password. (→ Chapter “Entering passwords”, page 21). The main menu appears. 1. - Page 72 ® FlyMarker mini 85/45 plus and 120/45 plus Operating Manual Level 2 3. Use the arrow keys to select the file to be copied. 4. Press F10. either: ® The highlighted file is copied to FlyMarker mini. The highlighted file is copied to USB stick.
-
Page 73: Editing A Marking File
® FlyMarker mini 85/45 plus and 120/45 plus Operating Manual Editing a marking file This function is only possible after entering the user or administrative password. (→ Chapter “Entering passwords”, page 21). The main menu appears. 1. Press F3. The Parameter menu window appears. 2. -
Page 74: Instructions On The Parameter Menu
® FlyMarker mini 85/45 plus and 120/45 plus Operating Manual 5.2.1 Instructions on the parameter menu The lower part of the Parameters menu contains limit values and selection options, as well as a short explanation of the current parameter. 5.2.2 Parameter types Depending on the selected marking mode the parameter menu will be adapted. - Page 75 ® FlyMarker mini 85/45 plus and 120/45 plus Operating Manual Mode Linear text X-position Indicates the X coordinates Y-position Indicates the Y coordinates Character height Indicates the character height Compression factor Indicates the text compression (100%) (75%) Force Indicates the marking thickness from 1 to 30 Angle Indicates the text direction (45°...
- Page 76 ® FlyMarker mini 85/45 plus and 120/45 plus Operating Manual Font Indicates the font selected (Font 5x7) (Font 9x13) Spacing Shows the spacing between two characters. Spacing 100 (Standard) Spacing 150...
- Page 77 ® FlyMarker mini 85/45 plus and 120/45 plus Operating Manual Reverse marking Can be used for multi-line marking to decrease the marking cycle time. Example: The first line is marked from left to right, and the second line is marked from right to left. 5.2.2.2 Radial (for marking round parts) Avoid markings in the air.
- Page 78 ® FlyMarker mini 85/45 plus and 120/45 plus Operating Manual Mode Radial Y-position Indicates the Y coordinates. Character height Indicates the character height. Compression factor Indicates the text compression Chapter “Linear”, page 74) Force Indicates the marking force from 1 to 30. Font Indicates the font selected Chapter “Linear”, page 74)
- Page 79 ® FlyMarker mini 85/45 plus and 120/45 plus Operating Manual 5.2.2.3 Axial (for marking round parts) Avoid markings in the air. When marking round parts, the text arc must be smaller than the stroke of the marking pin (5 mm). markable text area Marking is done in the middle of prism A of the support plate and lengthwise to the axis of the...
- Page 80 ® FlyMarker mini 85/45 plus and 120/45 plus Operating Manual Spacing Indicates the distance to the next line. Only for multi-line marking. Character height Indicates the character height. Compression factor Indicates the text compression Chapter “Linear”, page 74) Force Indicates the marking force from 1 to 30. Font Chapter “Linear”, page 74) Indicates the font selected (...
- Page 81 ® FlyMarker mini 85/45 plus and 120/45 plus Operating Manual 5.2.2.4 Text-circle Text and variables are marked in a circle. Mode Text circle Center of circle X coordinates of the circle’s center Y coordinates of the circle’s center Radius X center Indicates the X coordinates of the center of the circle, around whose radius the text is to be marked.
- Page 82 ® FlyMarker mini 85/45 plus and 120/45 plus Operating Manual Angle Indicates the starting point for marking on the arc of a circle. 0° angle 90° angle 180° angle 270° angle Character height Indicates the character height. Compression factor Indicates the text compression Chapter “Linear”, page 74) Force Indicates the marking force from 1 to 30.
- Page 83 ® FlyMarker mini 85/45 plus and 120/45 plus Operating Manual (+) = Clockwise (-) = Counter-clockwise 5.2.2.5 2D-coding text (program option F: DMC) For perfect identification of the data matrix code (DMC), the position of FlyMarker mini must not be changed during marking.
- Page 84 ® FlyMarker mini 85/45 plus and 120/45 plus Operating Manual Width Indicates the DMC’s width in millimeters. Height Indicates the DMC’s height in millimeters. Grid For determining the DMC’s grid. The grid number is used to determine the DMC’s number of grid points.
- Page 85 ® FlyMarker mini 85/45 plus and 120/45 plus Operating Manual Adjustable code sizes: Max. Symbol size Digits Characters Bytes correctable errors 12x12 14x14 16x16 18x18 20x20 22x22 24x24 26x26 8x18 8x32 12x26 12x36 Force Size and force must be specified so that the DMC is optimally legible. This depends on the material to be marked, among other things.
-
Page 86: Displaying System Information
The Information window contains current data on the system that are important for ordering replacement parts and for customer service. ® Additionally, a MARKATOR activation code can be entered into the Information window to activate options acquired later. Program options available:... -
Page 87: Selecting And Managing Substitutes
® FlyMarker mini 85/45 plus and 120/45 plus Operating Manual Selecting and managing substitutes Commands Option A Text-linear Text-circle Axial Radial Time Date Incrementation 1 Incrementation 2 Option B Shift identification Prepositioning Multi marking Time to edit Date to edit Device type Read keyboard 1 (max. -
Page 88: Configuring/Inserting Time
® FlyMarker mini 85/45 plus and 120/45 plus Operating Manual 5.4.1 Configuring/inserting time This function is only possible after entering the user or administrative password. (→ Chapter “Entering passwords”, page 21). The main menu appears. 1. Press F4. The Insert substitutes window appears. - Page 89 ® FlyMarker mini 85/45 plus and 120/45 plus Operating Manual 2. Use the arrow keys to select the Time substitute. either Configure auto-time. Press F3. The Auto-time window appears. Use the arrow keys to configure the time format. The possibilities are: Current hour as: 5 (for 5) Current hour as: 05 (for 5) Current minute as: 7 (for 7)
- Page 90 ® FlyMarker mini 85/45 plus and 120/45 plus Operating Manual Press the arrow key to jump to the next line. Use the arrow keys to configure separation. The possibilities are: . , / - : * _ ’ ” space Press the ESC key to go back to the main menu.
-
Page 91: Configuring/Inserting Auto-Date
® FlyMarker mini 85/45 plus and 120/45 plus Operating Manual 5.4.2 Configuring/inserting auto-date This function is only possible after entering the user or administrative password. (→ Chapter “Entering passwords”, page 21). The main menu appears. 1. Press F4. The Insert substitute window appears. 2. - Page 92 ® FlyMarker mini 85/45 plus and 120/45 plus Operating Manual The Auto-date window appears. Use the arrow keys to configure the date format. The possibilities are: Current year as: 3 (for 2013) Current year as: 13 (for 2013) YYYY Current year as: 2013 Current month as: 2 (for February) Current month as: 02 (for February) Current month as: February (for February)
- Page 93 ® FlyMarker mini 85/45 plus and 120/45 plus Operating Manual Press the arrow key . Use the arrow keys to select separation. The possibilities are: . , / - : * _ ’ ” space Press the ESC key to go back to the main menu. Insert auto-date.
-
Page 94: Configuring/Inserting Auto-Numbering
® FlyMarker mini 85/45 plus and 120/45 plus Operating Manual 5.4.3 Configuring/inserting auto-numbering This function is only possible after entering the user or administrative password. (→ Chapter “Entering passwords”, page 21). The main menu appears. 1. Press F4. The Insert substitute window appears. 2. - Page 95 ® FlyMarker mini 85/45 plus and 120/45 plus Operating Manual 3. Press F3. The Auto-numbering window appears. 4. Enter the start number. 5. Press Enter. 6. Enter the incrimination. The incrimination indicates the value by which the preset start number automatically increases after the command is executed.
-
Page 96: Logo Configuration/Insertion (Program Option K: Hpgl)
® FlyMarker mini 85/45 plus and 120/45 plus Operating Manual 5.4.4 Logo configuration/insertion (program option K: HPGL) ® 4.4.4.1 Install the logo on the FlyMarker mini A description about the logo creation can be found in the operating manual of the option HPGL (Order-No. - Page 97 ® FlyMarker mini 85/45 plus and 120/45 plus Operating Manual The File window appears. Press the Shift key. The level of the function key changes.. Press F9. switches to: The file storage of the USB-stick will be displayed.
- Page 98 ® FlyMarker mini 85/45 plus and 120/45 plus Operating Manual If FlyMarker is displayed, you see the file storage of the FlyMarker. In this case press F9 again to switch to the file storage of the USB-stick. Press F8. switches to: All logos which are saved on the USB-stick will be displayed.
- Page 99 ® FlyMarker mini 85/45 plus and 120/45 plus Operating Manual 4.4.4.2 Insert the logo into the marking file This function is only possible after entering the user or administrative password. (→ Chapter “Entering passwords”, page 21). The main menu appears. Press F4.
-
Page 100: Editable Shift Marking Configuration/Insertion (Program Option B: Komfort)
® FlyMarker mini 85/45 plus and 120/45 plus Operating Manual The Logo window appears. Enter the desired size, position (X/Y), angle, force and marking YES/NO. Press the ESC key. The main menu appears. The Logo substitute has been inserted. ® - Several logos can be saved on the FlyMarker mini. - Page 101 ® FlyMarker mini 85/45 plus and 120/45 plus Operating Manual 2. Use the arrow keys to select the Shift identification substitute. 3. Press F3. The Shift marking window appears. 4. Enter the start of Shift 1 (2 ... 5). 5. Press Enter. 6.
- Page 102 ® FlyMarker mini 85/45 plus and 120/45 plus Operating Manual Example: A shift begins at 22:00 (10 p.m.) and ends at 06:00 (6 a.m.): Start of shift 4 = 22:00:00 A shift begins at 22:00 (10 p.m.) and ends at 24:00 (midnight): Start of shift 1 = 00:00:01 Shift 4 continues from the day before.
-
Page 103: Prepositioning Configuration/Insertion (Program Option B: Komfort)
® FlyMarker mini 85/45 plus and 120/45 plus Operating Manual 5.4.6 Prepositioning configuration/insertion (program option B: KOMFORT) This function is only possible after entering the user or administrative password. (→ Chapter “Entering passwords”, page 21). The main menu appears. 1. Press F4. The Insert substitute window appears. - Page 104 ® FlyMarker mini 85/45 plus and 120/45 plus Operating Manual 3. Press F3. The Prepositioning window appears. 4. Use the arrow keys to select the Prepositioning mode. The possibilities are: Direct Starting point will be reached directly. Diagonally run. X–Y The marking pin is first prepositioned in the X direction and then in the Y direction.
-
Page 105: Multi-Marking Configuration/Insertion (Program Option B: Komfort)
® FlyMarker mini 85/45 plus and 120/45 plus Operating Manual 5.4.7 Multi-marking configuration/insertion (program option B: KOMFORT) This function is only possible after entering the user or administrative password. (→ Chapter “Entering passwords”, page 21). The main menu appears. 1. Press F4. The Insert substitute window appears. - Page 106 ® FlyMarker mini 85/45 plus and 120/45 plus Operating Manual 3. Press F3. The Multi-marking window appears. The thickness factor indicates how often a marking point is struck. Multi-marking makes marking more intensive. The marking time significantly increases. Thickness factor 1 = One marking strike per point Thickness factor 2 = Two marking strikes per point 4.
-
Page 107: Editable Time Configuration/Insertion (Program Option B: Komfort)
® FlyMarker mini 85/45 plus and 120/45 plus Operating Manual 5.4.8 Editable time configuration/insertion (program option B: KOMFORT) Configuration and insertion of the Time to edit substitute are done as described in Chapter “Configuring/inserting time”, page 88. The specified format applies exclusively to the marking’s current editable time substitute. Multiple insertions in different lines of text with different time formats are possible. - Page 108 ® FlyMarker mini 85/45 plus and 120/45 plus Operating Manual The Insert substitute window appears. Use the arrow keys to select the Device type substitute. Press F3. The Device type window appears. Use the arrow keys to select the Device type. The possibilities are: STATION For stationary operation...
-
Page 109: Read Keyboard (1/2/3/23) Configuration/Insertion (Program Option B: Komfort)
® FlyMarker mini 85/45 plus and 120/45 plus Operating Manual MOBILE For mobile operation Reference point Zero point X=0/Y=0 Press the ESC key. The main menu appears. The Device type substitute his specified. Chapter “Specifying system settings ”, page 131) 5.4.11 Read keyboard (1/2/3/23) configuration/insertion (program option B: KOMFORT) Through the substitute Read keyboard, the user is asked to make entries through the keyboard... - Page 110 ® FlyMarker mini 85/45 plus and 120/45 plus Operating Manual The Insert substitute window appears. Use the arrow keys to select the Read keyboard substitute. Press F3. The Read keyboard window appears. Enter the prompt text that should be displayed before marking. Example: “Please enter the item number.”...
- Page 111 ® FlyMarker mini 85/45 plus and 120/45 plus Operating Manual Select whether to preview the last scan ("Start") or not ("-"). By selecting "Start", the same barcode can be marked several times without having to be scanned again. Press Enter. Highlight YES/NO When YES is chosen, the text entered through the keyboard is marked right after confirmation with the Enter key.
-
Page 112: Message Configuration/Insertion (Program Option B: Komfort)
® FlyMarker mini 85/45 plus and 120/45 plus Operating Manual 5.4.12 Message configuration/insertion (program option B: KOMFORT) This function is only possible after entering the user or administrative password. (→ Chapter “Entering passwords”, page 21). The main menu appears. Press F4. The Insert substitute window appears. - Page 113 ® FlyMarker mini 85/45 plus and 120/45 plus Operating Manual The Message window appears. Enter the message text. Press Enter. Press the ESC key. The main menu appears. The Message substitute has been inserted. The message text is displayed and not highlighted. This function is used in association with the read keyboard substitute and when using a barcode Chapter “Read keyboard (1/2/3/23)
-
Page 114: Password (Program Option B: Komfort)
® FlyMarker mini 85/45 plus and 120/45 plus Operating Manual 5.4.13 Password (program option B: KOMFORT) This function is only possible after entering the user or administrative password. (→ Chapter “Entering passwords”, page 21). The main menu appears. Press F4. The Insert substitute window appears. - Page 115 ® FlyMarker mini 85/45 plus and 120/45 plus Operating Manual Press F3. The Password window appears. Now enter the password. Press Enter. Press the ESC key. The main menu appears. The Password substitute has been inserted. Password protection will be queried when loading the marking file.
-
Page 116: Mirror (Program Option B: Komfort)
® FlyMarker mini 85/45 plus and 120/45 plus Operating Manual 5.4.14 Mirror (program option B: KOMFORT) This function is only possible after entering the user or administrative password. (→ Chapter “Entering passwords”, page 21). The main menu appears. 1. Press F4. The Insert substitute window appears. - Page 117 ® FlyMarker mini 85/45 plus and 120/45 plus Operating Manual The Mirror window appears. 4. Use the arrow keys to select ON or OFF. 5. Press the ESC key. The main menu appears. The Mirror substitute has been inserted. The following text will now be mirrored.
- Page 118 ® FlyMarker mini 85/45 plus and 120/45 plus Operating Manual Example:...
-
Page 119: Save File (Program Option B: Komfort)
® FlyMarker mini 85/45 plus and 120/45 plus Operating Manual 5.4.15 Save file (program option B: KOMFORT) This function is only possible after entering the user or administrative password. (→ Chapter “Entering passwords”, page 21). The Save file command is mainly used in combination with the Auto numbering 1/2substitute. Chapter “Configuring/inserting auto-numbering”, page 94) Using the Save file substitute saves the marking file after every marking. - Page 120 ® FlyMarker mini 85/45 plus and 120/45 plus Operating Manual 2. Use the arrow keys to select the Save file substitute. 3. Press F3. The Save file window appears. 4. Enter the file name. 5. Press the ESC key. The Save file substitute has been inserted. The substitute must always be at the end of a marking file.
-
Page 121: Show/Edit The Marking Preview
® FlyMarker mini 85/45 plus and 120/45 plus Operating Manual Show/edit the marking preview This function is only possible after entering the user or administrative password. (→ Chapter “Entering passwords”, page 21). The main menu appears. 1. Press F5. The Marking preview window appears. 2. - Page 122 ® FlyMarker mini 85/45 plus and 120/45 plus Operating Manual The selected marking line is framed: 3. Press Enter to edit the selected marking line. Chapter ”Editing a marking file”, page 73) 4. Press the ESC key. The Marking preview window appears. The marking preview shows the X/Y values of the selected marking line.
- Page 123 ® FlyMarker mini 85/45 plus and 120/45 plus Operating Manual The X/Y position can now be changed directly with the arrow keys The step size can be chosen by pressing F5. The step size indicates by how many millimeters the text should be moved by the arrow keys (0.1 mm, 1 mm or 10 mm).
-
Page 124: Marking
® FlyMarker mini 85/45 plus and 120/45 plus Operating Manual Marking Crushing hazard! Never reach under the marking head during the marking process! Never reach into the marking head’s working area during the marking process! Body parts may be caught and crushed by the movement of the marking pin. - Page 125 ® FlyMarker mini 85/45 plus and 120/45 plus Operating Manual If necessary, charge and install the battery ( Chapter “Battery charging status”, page 43) Select and install the marking pin. ( Chapter “Selecting and installing the marking pin”, page 29) ...
- Page 126 ® FlyMarker mini 85/45 plus and 120/45 plus Operating Manual - The support plate has an anti-skid surface. - For rounded work pieces (such as pipes), FlyMarker mini must be exactly oriented to the prism of the support plate (axial = A or radial = B), depending on the type of marking.
-
Page 127: Selecting The Operating Language
® FlyMarker mini 85/45 plus and 120/45 plus Operating Manual During the reference run, the stylus is moved to the upper left border of the text field (reference position), the internal step counter (X/Y) is set to zero, and after that it is possible to move the specified position and do the marking. - Page 128 ® FlyMarker mini 85/45 plus and 120/45 plus Operating Manual The Language window appears. Select the operating language with the spacebar or the arrow keys. Press Enter. The operating language is set. Chapter “User interface touch display 3.5.7 The main menu appears. (...
-
Page 129: Teach-In
® FlyMarker mini 85/45 plus and 120/45 plus Operating Manual 1 = Display 9 = function keys 2 = On/Off button 10 = Insert key 3 = password request 11 = Short-Key Keys 4 = Enter button 12 = point 5 = Undo button 13 = space bar 6 = ESC key... - Page 130 ® FlyMarker mini 85/45 plus and 120/45 plus Operating Manual The main menu appears. 1. Press the change level key. The second level of the main menu appears. 2. Press F10. The Teach-in window appears. Because the stepper motors carry no current when at rest, a reference run must be initiated manually before setup.
- Page 131 ® FlyMarker mini 85/45 plus and 120/45 plus Operating Manual The possibilities are: 0.1 mm / 1 mm / 10 mm Use the arrow keys to move to X position. Use the arrow keys to move to the Y position. 4.
-
Page 132: Status Reports
® FlyMarker mini 85/45 plus and 120/45 plus Operating Manual 5.8.1 Status reports The following status reports appear in the Teach-in window: X/0 reference The marking head is in the X=0 reference position. The X/0 reference character is gray. Specifying system settings This function is only possible after entering the user or administrative password. - Page 133 ® FlyMarker mini 85/45 plus and 120/45 plus Operating Manual 2. Press F7. The Settings window appears. 3. Press F5. The System window appears. 4. Making system settings...
- Page 134 ® FlyMarker mini 85/45 plus and 120/45 plus Operating Manual Setting brightness Use the arrow keys to select the Brightness line. Enter the desired brightness into the window display as a two-digit number. Press Enter. Press the ESC key. Press OK to confirm the security question. The brightness is set.
- Page 135 ® FlyMarker mini 85/45 plus and 120/45 plus Operating Manual MOBILE For mobile operation Reference point Zero point X=0/Y=0 Press the ESC key. Press Enter. Press the ESC key. Press OK to confirm the security question. The device type has been set. Power management Chapter “Configuring power management”, page 41) Update...
-
Page 136: Troubleshooting
® FlyMarker mini 85/45 plus and 120/45 plus Operating Manual 6. Troubleshooting The following types of information may appear during marking operation: A warning appears. But the marking process is not interrupted. A heatsink’s temperature exceeds 85°. Example: Information is displayed and the marking process is definitively stopped. To continue, the marking process must be restarted. -
Page 137: Reference Run Not Made
The guide rods and/or limit switch are dirty. Solution: Check the guide rods and limit switch for dirt, and clean them, if necessary. ® If the problem keeps occurring, contact MARKATOR service. Chapter “Your contact at MARKATOR®”, page 2) Cause:... -
Page 138: Repairing Malfunctions
85/45 plus and 120/45 plus Operating Manual Repairing malfunctions If you cannot resolve errors yourself, contact ® MARKATOR service. Chapter “Your contact at MARKATOR®”, page 2) ® 6.2.1 FlyMarker mini cannot be turned on (display remains dark) Cause: The battery is not inserted precisely. -
Page 139: The Stylus Movement Gets Weaker
“Service” section, there is a page called “Notice of complaint”. ® This form can be filled in and send to the MARKATOR service team. This is the most effective and quickest way to find a solution for your complaint. -
Page 140: Maintenance
Use only a soft, dry, lint-free cloth. For heavier soil, a moist cloth can also be used. To ensure expert service, it is a good idea to have ® a maintenance contract with MARKATOR Chapter “Your contact at MARKATOR ® ”, page 2) Hot impact magnets and surrounding components are a burn hazard. -
Page 141: Daily Maintenance
® MARKATOR will provide a loaner device at a flat rate for the period of the general overhaul, if an agreement is made in a timely manner. ® Upon request, MARKATOR will be happy to make an appropriate offer. -
Page 142: Technical Data
® FlyMarker mini 85/45 plus and 120/45 plus Operating Manual 8. Technical data ® FlyMarker mini 85/45 plus Marking range (x/y): 85 x 45 mm Character heights: 1.0 to 29.9 mm, continuous in 0.1 mm increments Marking position: Flush left, flush right, centered and limited range Font: 5x7 and 9x13 Upper- and lowercase alphabet with umlauts, numbers 0 to 9... -
Page 143: Battery 4.0 Ah
® FlyMarker mini 85/45 plus and 120/45 plus Operating Manual Battery 4.0 Ah Battery type: Lithium-ion Nominal voltage: 18 VDC Nominal capacity: 4.0 Ah Number of cells: Weight: 0.670 kg Housing: Plastic Dimensions (length x width x height): 121 x 80,5 x 66 mm Storage temperature: -20°C…+60°C Operating temperature:... -
Page 144: Wear And Replacement Parts Flymarker® Mini 85/45 Plus
5163 00 005 Housing shell left with threaded insert for FlyMarker mini 85/45 plus 5163 00 006 Housing shell left with threaded insert for FlyMarker mini 85/45 plus for 5163 01 100 barcode scanner Carrying case FlyMarker mini 85/45 plus... - Page 145 5162 00 008 Housing shell left with threaded insert for FlyMarker mini 85/45 plus 5162 00 009 Housing shell left with threaded insert for FlyMarker mini 85/45 plus for 5162 01 010 barcode scanner Carrying case FlyMarker mini 85/45 plus...
-
Page 146: Exploded Drawing Flymarker® Mini 85/45 Plus
® FlyMarker mini 85/45 plus and 120/45 plus Operating Manual Exploded drawing FlyMarker® mini 85/45 plus... -
Page 147: Exploded Drawing Flymarker® Mini 85/45 Plus: Option Barcode Scanner
® FlyMarker mini 85/45 plus and 120/45 plus Operating Manual Exploded drawing FlyMarker® mini 85/45 plus: Option barcode scanner... -
Page 148: Exploded Drawing Flymarker® Mini 120/45 Plus
® FlyMarker mini 85/45 plus and 120/45 plus Operating Manual 8.10 Exploded drawing FlyMarker® mini 120/45 plus... -
Page 149: Exploded Drawing Flymarker® Mini 120/45 Plus: Option Barcode Scanner
® FlyMarker mini 85/45 plus and 120/45 plus Operating Manual 8.11 Exploded drawing FlyMarker® mini 120/45 plus: Option barcode scanner... -
Page 150: Port Data
® FlyMarker mini 85/45 plus and 120/45 plus Operating Manual 8.12 Port data 8.12.1 USB A (host) ® mini’s USB A port: Various USB devices can be connected through the FlyMarker FAT32 formated USB sticks can be inserted and operated. →... -
Page 151: Ethernet
® FlyMarker mini 85/45 plus and 120/45 plus Operating Manual 8.12.3 Ethernet ® mini’s Ethernet port is another port for PC communication. The FlyMarker... -
Page 152: Handling Lithium-Ion Batteries
For safety reasons, FlyMarker mini must always be sent for repair with batteries removed. Disposal ® It is prohibited to send used batteries to MARKATOR ® - Batteries and other FlyMarker mini components must not be discarded with household waste, and must be appropriately disposed of according to national, state and local regulations. -
Page 153: Storage
® FlyMarker mini 85/45 plus and 120/45 plus Operating Manual Storage - Do not store with damaged, used or discarded batteries. - The storage area can be ventilated. - Never smoke at the storage site. - Never consume food or beverages at the storage site. -
Page 154: Firefighting Measures
® FlyMarker mini 85/45 plus and 120/45 plus Operating Manual - It must generally ensured that aforementioned transport packaging regulations are observed, and that the contacts are secured against short circuits, so use our safety cap and a sealed plastic bag. - If you detect damage to the packaging, handle it with extreme caution and check to see whether the packaging needs to be replaced. -
Page 155: First Aid
® FlyMarker mini 85/45 plus and 120/45 plus Operating Manual First aid - Immediately put on chemical safety gloves and wipe up the leaked battery fluid with a piece of absorbent cloth. Breathe at the greatest possible distance from the leaked fluid. - If your skin comes into contact with the battery contents: Wash the skin thoroughly with soap and water. -
Page 156: Appendix
® FlyMarker mini 85/45 plus and 120/45 plus Operating Manual 10. Appendix 10.1 Barcode scanner Keyboard German Retrieve user-defined standard settings. Enter configuration Select the interface: USB-KBD Press the key barcode scanner manually! Keyboard language mode: German Press the key barcode scanner manually! Rule 1 Press the key barcode scanner manually! Rule 2... -
Page 157: Barcode Scanner Keyboard English
® FlyMarker mini 85/45 plus and 120/45 plus Operating Manual 10.2 Barcode scanner Keyboard English Retrieve user-defined standard settings. Enter configuration Select the interface: USB-KBD Press the key barcode scanner manually! Keyboard language mode: English Press the key barcode scanner manually! Rule 1 Press the key barcode scanner manually! Rule 2... -
Page 158: Barcode Scanner Keyboard English U.s
® FlyMarker mini 85/45 plus and 120/45 plus Operating Manual 10.3 Barcode scanner Keyboard English U.S. Retrieve user-defined standard settings. Enter configuration Select the interface: USB-KBD Press the key barcode scanner manually! Rule 1 Press the key barcode scanner manually! Rule 2 Press the key barcode scanner manually! Finish configuration... -
Page 159: Barcode Scanner Keyboard French
® FlyMarker mini 85/45 plus and 120/45 plus Operating Manual 10.4 Barcode scanner Keyboard French Retrieve user-defined standard settings. Enter configuration Select the interface: USB-KBD Press the key barcode scanner manually! Keyboard language mode: French Press the key barcode scanner manually! Rule 1 Press the key barcode scanner manually! Rule 2... -
Page 160: Index
® FlyMarker mini 85/45 plus and 120/45 plus Operating Manual 11. Index Administrator ....... 8, 12, 38 File manager ..........26 Allen wrench ..........9 Font ............75 auto-date ........... 90, 92 Function key ........22, 23 auto-numbering ........93 auto-time 87, 88, 89, 90, 92, 93, 95, 99, 102, 104, 106, 108, 111, 112, 113, 115, 118 Axial ........ - Page 161 ® FlyMarker mini 85/45 plus and 120/45 plus Operating Manual Marking .. 7, 11, 12, 28, 76, 78, 83, 120, 121, 125, 140 Marking command ......... 11 Radial ........73, 76, 77, 80 marking file ..11, 38, 56, 57, 58, 59, 60, 61, Read keyboard .......
-
Page 162: Declaration Of Conformity
® FlyMarker mini 85/45 plus and 120/45 plus Operating Manual 12. Declaration of Conformity MARKATOR ® Manfred Borries GmbH Phone: +49 (0)7144 85 75-0 Bunsenstraße 15 Fax.: +49 (0)7144 85 75-600 D-71642 Ludwigsburg E-Mail: info@markator.de Internet: http://www.markator.de...
Need help?
Do you have a question about the FlyMarker mini 85/45 plus and is the answer not in the manual?
Questions and answers
making double on screen