Table of Contents
Advertisement
Quick Links
Advertisement
Table of Contents

Related Manuals for BMC YH-600B Pro


Summary of Contents for BMC YH-600B Pro
- Page 1 Portable Diagnostic System YH-600B Pro User Manual ...
-
Page 2: Table Of Contents
YH‐600B Pro User Manual V1.0 Table of Contents CHAPTER 1: DEVICE INTRODUCTION AND OPERATION ..............1 1. Symbols .............................. 1 1.1 Control Buttons .......................... 1 1.2 Device Symbols ......................... 1 2. Warnings, Cautions and Important Tips ..................... 1 3. Contraindications ..........................2 4. Specifications............................2 5. - Page 3 YH‐600B Pro User Manual V1.0 10.1.6 Connecting the Main Device with the Respiration Kit ........14 10.2 Operation ..........................14 10.2.1 Accessing the Initial Interface ................15 10.2.2 Accessing the Standby Interface ............... 15 10.2.3 Accessing the “Record” Interface ............... 16 10.2.4 Accessing the “Setup” Interface ................. 18 10.2.5 Accessing the “Archives”...
- Page 4 YH‐600B Pro User Manual V1.0 3.2 Connection of YH-600B Pro and Computer ................32 3.3 Data Transmission ........................33 3.3.1 TF Card Data Transmission ................. 35 3.3.2 Bluetooth Data Transmission ................35 4. Data File Management ........................39 5. Data Playback ..........................40 5.1 Opening and Closing the Data File ..................40 5.2 Display of Recorded Data and Analysis Result ..............
-
Page 5: Chapter 1: Device Introduction And Operation
Authorized R Representativ ve in the Euro opean Comm munity European Un nion Approva No SpO arms Logo of BMC C Medical Co o., Ltd. Warnings, C Cautions an nd Important t Tips ARNING! dicate the po ossibility of inj... -
Page 6: Contraindications
YH‐600B Pro User Manual V1.0 3. Contraindications Depending on the skin condition or general state of health, the patient may experience sensitivity to the wrist belt or the self-adhesive pulse oximeter sensor. Discontinue use if an allergic reaction to the skin-contact materials occurs. 4. Specifications Range 0%~100% Accuracy... - Page 7 YH‐600B Pro User Manual V1.0 Atmospheric pressure Operation 860~1,060 hPa 700~1,060 hPa Storage/Transportation Power supply DC 1.5 V ±0.15 V(1×1.5 V R6 AA) Minimum record duration No less than 8 hours Data storage 64 records can be stored TF card Dimensions 78 mm × 60 mm × 21 mm (main device) Weight 75 g (main device without battery) Type of protection against electrical shocks...
-
Page 8: Intended Use
Heavy smokers with a high level of carbon monoxide (CO) in blood cannot use YH-600B Pro. • YH-600B Pro cannot be used on a water bed or a bed with an electric blanket, because these • electrical equipment will disturb the operation of YH-600B Pro. -
Page 9: Glossary
YH‐600B Pro User Manual V1.0 6. Glossary Snore Because of the respiratory tract’s airway limitation, sound is made when respiratory airflow gets through the narrow respiratory tract, which usually indicates that the patient is likely to have suffered in years from sleep apnea syndrome along with the increase of age. Apnea The performance of respiratory intermission during sleep is that the respiratory airflow drops to lower than 10% of the normal range and... -
Page 10: Model
YH‐600B Pro User Manual V1.0 7. Model Table 1-1 Monitoring Parameters and Components Model Monitoring Parameters Components YH-600B , pulse rate, airflow Main Device, Respiration Kit, Respiration waveform, thorax/abdomen Effort Belt, Effort Lead Cable, USB Data effort, body position, snore, wrist Cable and Bluetooth Data Transmission, TF movement (sleep/wake), CPAP Card, Pulse Oximeter Sensor, CPAP pressure... -
Page 11: Package Contents
This device should only be used with the tube and accessories manufactured or recommended by • BMC or with those recommended by your prescribing physician. The use of inappropriate tubes and accessories may affect the performance of the device and impair monitoring effects. -
Page 12: System Features
YH-600B Pro is powered by one 1.5 V AA battery. Testing was performed to demonstrate that the performance of YH-600B Pro in its intended environment is as safe and effective as that of the legally marketed predicate devices. The safety and effectiveness of YH-600B Pro have been verified through performance-related testing that consisted of Electrical Safety, Electromagnetic Compatibility, Mechanical and Environment Testing. -
Page 13: Instructions For Use
If any unexplained changes are noticed in the performance of this device, if the device is dropped • or mishandled, if water is spilled into the enclosure, or if the enclosure is broken, discontinue use and contact BMC. 9 / 49 ... -
Page 14: Setting Up And Wearing The Device
YH‐600B Pro User Manual V1.0 10.1 Setting up and Wearing the Device Figure 1-2 shows a user wearing YH-600B Pro. See sections 10.1.1~10.1.6 for detailed wearing instructions. Figure 1-2 Wearing YH-600B Pro 10.1.1 Installing the TF Card and Battery Push and pull the battery door according to Step 1. Insert the TF card into the slot and put a new AA battery with the positive and negative terminals on the correct sides according to Step 2. - Page 15 YH‐600B Pro User Manual V1.0 Figure 1-3 Inserting the TF card and battery WARNING! The battery may leak or explode if used or disposed of improperly. When the TF card and battery are correctly inserted into the device, a symbol indicating correct insertion of the TF card will appear in the standby interface, as shown in Figure 1-4. Figure 1-4 Symbol indicating correct insertion of TF card If the TF card is inserted incorrectly or not inserted, a red “X”...
-
Page 16: Wearing The Main Device
YH‐600B Pro User Manual V1.0 Figure 1-5 Symbol indicating incorrect insertion or absence of TF card CAUTION! When there is a red “X” symbol on the “TF card” icon in the standby interface, the user should • check whether the TF card is inserted incorrectly or not inserted. If it is inserted correctly, the TF card may be broken. -
Page 17: Wearing The Airflow Cannula
YH‐600B Pro User Manual V1.0 Figure 1-7 Connecting the respiration kit Step 1 Connect the effort lead cable and respiration effort belt; Step 2: Fasten the respiration effort belt around the body; Step 3 Insert the effort lead cable into the holes of the small respiration box, and hang the respiration kit on the respiration effort belt. -
Page 18: Wearing The Pulse Oximeter Sensor
YH‐600B Pro User Manual V1.0 10.1.5 Wearing the Pulse Oximeter Sensor As Figure 1-9 shows, insert the index finger until it reaches the bottom of the pulse oximeter sensor, tape the sensor onto the finger, and insert the data connector of the pulse oximeter sensor into the SpO port on the top of the main device. -
Page 19: Accessing The Initial Interface
YH‐600B Pro User Manual V1.0 Heavy smokers with high carbon monoxide (CO) blood content cannot use YH-600B Pro. • CAUTION! The device has no alarm system, and is thus unsuitable for situations that need an alarm system. • While working, the device should not be directly exposed to airflow sources (e.g. fan), otherwise •... -
Page 20: Accessing The "Record" Interface
YH‐600B Pro User Manual V1.0 Figure 1-11 Standby interface CAUTION! In all interfaces the screen will dim if there is no operation within the preset screen backlight timeout. Press any key in five minutes to light up the screen. The device will shut off automatically if there is no operation for five minutes.10.2.3 Accessing the “Record”... - Page 21 Shift Button simultaneously to exit the “Record” interface and return to the standby interface. The “Record” interface of YH-600B Pro, as shown in Figure 1-12. Figure 1-12 “Record” interface of YH-600B Pro (%): Blood oxygen saturation expressed in percentage PR(bpm):...
-
Page 22: Accessing The "Setup" Interface
The waveform of the signal is non-normalized so that the software can provide to the operator that the pulse rate value displayed is potentially incorrect. However, YH-600B Pro which does not store the waveform data just keeps waveform updating to give the implication of the detector in working state. -
Page 23: Accessing The "Archives" Interface
YH‐600B Pro User Manual V1.0 Figure 1-14 “Date Setup” interface CAUTION! Do not remove the battery when the device is working in the countdown mode, otherwise the countdown process will be interrupted. Countdown Setup, allowing users to set the device to start recording at a certain time •... -
Page 24: Accessing The "Tools" Interface
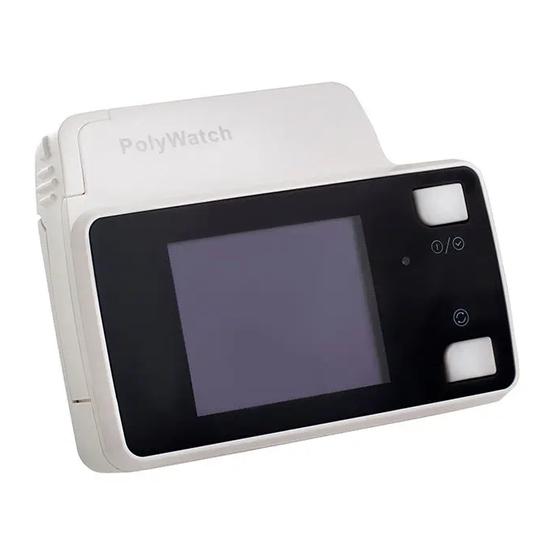
QR code, as shown in Figure 1-19. Figure 1-19 QR code interface Scan the QR code by intelligent terminal app “BMC PolyWatch” to view analysis results. When operations are done, press the On-Off/OK Button and Shift Button to exit the list of records and return to the standby interface. - Page 25 YH‐600B Pro User Manual V1.0 Figure 1-20“Transfer Data(BT) ” interface Users can switch among 11 languages in the “Language” interface, as shown in Figure 1-21. English French Chinese(Simplified) Polish Japanese Russian Spanish Portuguese Italian Korean Turkish Exit German Figure 1-21 “Language” interface The “Erase” interface shows a question– “Are you sure to erase All records?” To erase all records, select “Yes”, then press and hold the On-Off/OK Button and Shift Button simultaneously for...
-
Page 26: Turning Off The Device
YH‐600B Pro User Manual V1.0 CAUTION! The cyclic recording mode is adopted. Users do not need to delete data manually as new data will overwrite the oldest data automatically. 10.2.7 Turning Off the Device On the standby interface, press and hold the On-Off/OK Button for five seconds to turn off the device. -
Page 27: Troubleshooting
YH‐600B Pro User Manual V1.0 11. Troubleshooting Table 1-5 shows troubleshooting. Table 1-5 Troubleshooting Problem Possible Cause Solution(s) Battery installed incorrectly Check battery installation Device won’t start Battery exhausted Replace battery Screen flickers Low battery voltage Replace battery TF card is not inserted, is inserted Insert TF card properly or replace TF card alert incorrectly, or is broken... -
Page 28: Cleaning And Disinfection
YH‐600B Pro User Manual V1.0 12. Cleaning and Disinfection 12.1 Cleaning YH-600B Pro was designed to be simple and easy-to-use. Your YH-600B Pro will operate reliably with good care and regular maintenance. Cleaning instruction: Clean YH-600B Pro Main Device ① Turn off YH-600B Pro and take battery out of YH-600B Pro main device. -
Page 29: Disinfection
12.2 Disinfection If necessary, i.e. after infectious diseases, uses between patients or if parts have become unusually dirty, you can disinfect certain parts. Clean YH-600B Pro parts as instructed above. Disinfect YH-600B Pro as follows: ® We recommend CaviCide liquid for disinfection. -
Page 30: Disposal
YH‐600B Pro User Manual V1.0 for a minimum of 1 minute. Manually flush all lumens with large volumes (not less than 100 ml) of rinse water. ④ Remove the CPAP pressure tube and discard the rinse water. Always use fresh volumes of water for each rinse. -
Page 31: Emc Requirements
YH‐600B Pro User Manual V1.0 14. EMC Requirements Guidance and Manufacturer’s Declaration – Electromagnetic Emissions This device is intended for use in the electromagnetic environment specified below. The user of the device should assure that it is used in such an environment. Emissions Test Compliance Electromagnetic Environment - Guidance RF Radiated Emissions... - Page 32 YH‐600B Pro User Manual V1.0 Input Lines IEC for 5 cycles supply or from a battery 61000-4-11 70% U (30% dip in U for 25 cycles <5% U (>95% dip in UT) for 5 s Power 3 A/m 3 A/m Power frequency magnetic fields should be Frequency at levels characteristic of a typical location (50/60 Hz)
- Page 33 YH‐600B Pro User Manual V1.0 determined by an electromagnetic site survey, should be less than the compliance level in each frequency range. Interference may occur in the vicinity of equipment marked with the following symbol: Note 1: At 80~800 MHz, the higher frequency range applies. Note 2: These guidelines may not apply in all situations.
-
Page 34: Chapter 2: Polylogic Sleep Analysis Software
1. Installation 1.1 Software Installation ①Run the “SETUP.EXE” of YH-600B Pro in the installation CD and enter the setup page. ②Click “Next” to make the software auto-install. ③Click ‘Finish’ to quit when the installation is done. Double-click the new shortcut on desktop to launch the software. - Page 35 2) Connection of YH-600B Pro and Computer In the power off state of YH-600B Pro, connect one end of the USB data cable to the computer USB port, and the other end to YH-600B Pro Flow/COM port and then turn on YH-600B Pro. Patient information can be set on a computer in all interfaces except About Interface.
-
Page 36: Data Reception
3.2 Connection of YH-600B Pro and Computer In the power off status of YH-600B Pro, connect one end of the USB data cable to the computer USB port, and the other end to YH-600B Pro Flow/COM port and then turn on YH-600B Pro. The data can be transmitted to a computer in all interfaces except countdown interface and “Record”... -
Page 37: Data Transmission
Do not use the USB data cable for communication to computer while the device is recording. • Only the USB data cable offered by BMC can be used for YH-600B Pro communication to • computer, otherwise it may cause danger to the operator or the patient. - Page 38 ⑥Recording start time is set by the system at the beginning of the recording time which is confirmed by the internal clock. If YH-600B Pro clock is not correct, modify it in the above login screen. The recording end time defaults to 12 hours after the recording starts. In fact, in the process of data transmission, the system can automatically identify the actual end time of record.
-
Page 39: Tf Card Data Transmission
YH‐600B Pro User Manual V1.0 Note: If YH-600B Pro is used with CPAP, the CPAP noise could affect the accuracy of the snore testing results. WARNING! When the user wears the device, it is prohibited to connect the device to the computer through the •... - Page 40 YH‐600B Pro User Manual V1.0 locate the Bluetooth driver automatically. After the driver is installed successfully according to instructions, a Bluetooth shortcut will appear on the desktop. Note: Bluetooth adapter involved in the Bluetooth data transmission should be bought by the user. The following related image-text information is for reference only. 2) Bluetooth data transmission (1) Main device setting ①After an AA battery is installed, long-press the On-Off/OK Button...
- Page 41 YH‐600B Pro User Manual V1.0 Figure 2-9 Classic Bluetooth interface ③Double-click the sun icon in the classic interface to start searching for BF10 Bluetooth devices (Figure 2-10). Figure 2-10 Bluetooth searching interface ④Double-click the BF10 icon to highlight the serial port icon on the top of the classic interface, as shown in Figure 2-11 below.
- Page 42 YH‐600B Pro User Manual V1.0 device icon will turn green, as shown in Figure 2-12. At the same time, a virtual COM port will be created in the computer. Figure 2-12 turn green Note: Please remember the name of the virtual COM port, and make sure the communication port of the data analysis software is consistent with this COM port.
-
Page 43: Data File Management
YH‐600B Pro User Manual V1.0 Figure 2-14 Selecting the virtual COM port If another device is intended to connect to the computer, repeat the process of data reception. If no data transmission is needed, click "back" button in the communication window to return to the main interface. 4. -
Page 44: Data Playback
YH‐600B Pro User Manual V1.0 Figure 2-15 “Select Data File” dialog box 5. Data Playback In the sleep data management interface, select the sleep data file, and the system will enter the data playback interface. If the data have not been analyzed yet, the prompt of auto analysis will be shown on the screen. After opening the data file, the system will enter the data playback interface. - Page 45 YH‐600B Pro User Manual V1.0 parameters in the same period of time conveniently and may study the relationship between them easily (Figure 2-16). Figure 2-16 “Trend” interface The basic functions in the interface are: ①Parameter browse; ②Parameter deletion; ③Event location; ④Print; ⑤Analysis. All the operations may be completed through choosing the right option in the menu. Regarding the commonly used operation, besides the provided menu operation, they may also be done by clicking on the toolbar buttons.
- Page 46 YH‐600B Pro User Manual V1.0 by default is, the saturation of blood oxygen trend chart, the apnea event length trend chart, the respiratory rate trend chart, the number of snoring trend chart, CPAP pressure trend chart and the heart rate trend chart. The horizontal axis stands for the elapse of time. (2)Parameter deletion Parameters that can be deleted in the trend chart include blood oxygen, heart rate and respiratory rate.
- Page 47 H‐600B Pro Us er Manual V1 .0 Figu ure 2-17 “Raw w Data”interf face he following o operations m ay be carried d out in this i nterface. Print; ① Modify displa ay setup; ② Modify pape r speed; ③ Modify time d display; ④...
- Page 48 YH‐600B Pro User Manual V1.0 observe the waveform and its parameters. The two buttons are used to slightly adjust the time back and forth as to when the waveform shall be displayed, with five seconds as a pace. The two buttons are used for page turning with each page length depending on the present speed of the paper.
- Page 49 YH‐600B Pro User Manual V1.0 Figure 2-18 Respiration Event Edit ⑺ Marking function When the operator feels particularly interested in any recorded part and intends to relocate it on his/her next opening of the file, he/she may use this marking function, attaching different marks to different areas of interests.
- Page 50 YH‐600B Pro User Manual V1.0 The respiration event list may sort according to different statistical items, with just clicking on the corresponding statistical tags, and the list will be shown in the intended manner. Clicking on the list or using the〔↑〕 、 〔↓〕key on keyboard may choose any event in the respiration event list.
-
Page 51: Print Preview And Output
YH‐600B Pro User Manual V1.0 Figure 2-21 “Report” interface 6. Print Preview and Output When the waveform is in need of printing, the waveform page should be activated to display. Press button or click on preview from the “File” menu under this page to preview the present waveforms (Figure 2-22). -
Page 52: Help
YH‐600B Pro User Manual V1.0 Figure 2-23 Print and Preview of the report Similarly, selecting button in the toolbar, or Print from File menu will show up the window for preview options. The print work will be done after selecting the intended reports and pressing the button. -
Page 53: Chapter 3: Service
(1) year for main unit and three (3) months for all accessories from the date of sale by BMC Medical Co., Ltd. to the dealer. During the warranty period, BMC Medical Co., Ltd. will correct any defects in material or workmanship to conform to specifications, free of charge.
Need help?
Do you have a question about the YH-600B Pro and is the answer not in the manual?
Questions and answers