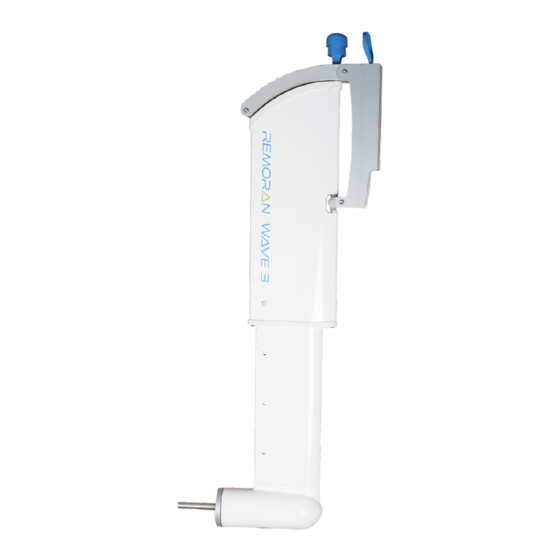
Remoran WAVE 3 Installation Instructions Manual
Hide thumbs
Also See for WAVE 3:
- Operating manual (44 pages) ,
- Manual (13 pages) ,
- Quick start manual (4 pages)
Table of Contents
Advertisement
Quick Links
FI
Asennusohjeet
EN
Installation instructions
SV
Installations instruktioner
FI
Lue käyttöohjeet kokonaisuudessaan huolellisesti ennen hydrogeneraattorin käyttöönottoa. Käyttöohje löytyy nettisivuiltamme:
EN
Read the entire operating instructions carefully before using the hydrogenerator. The instructions can be found on our website:
SV
Läs hela bruksanvisningen noggrant innan du använder hydrogeneratorn. Instruktionerna finns på vår webbplats:
Kytkentäkaavio
Connection illustration
Kopplingsschema
www.remoran.eu
FI
1. Asenna kisko veneeseen
EN
1. Install the rail on the boat
SV
1.Installera skenan på båten
FI
2. Kiinnitä turbiini ulkoyksikköön
EN
2. Attach the turbine to the outboard unit
SV
2. Fäst turbinen på den utvändiga enheten
FI
3. Kiinnitä laturi kuivaan tilaan
EN
3. Install the charger in a dry place
SV
3. Installera laddaren på en torr plats
FI
4. Poraa kaapelin läpivienti ja asenna liittimet
EN
4. Drill the feedthrough for the cable and install the connectors
SV
4. Borra genomströmningen och installera kontakterna
FI
5. Asenna generaattorikaapeli laturiin
EN
5. Install the generator cable to the charger
SV
5. Installera generatorkabeln i laddaren
FI
6. Asenna latausjohtimet laturiin
(Muista asentaa sulake ja häiriönsuojaferriitti)
EN
6. Install the charging cables in the charger
(Be sure to install a fuse and a ferrite filter)
SV
6. Installera laddningskablarna i laddaren
(Kom ihåg att installera en säkring och störningsskydd ferrit)
www.remoran.eu
www.remoran.eu
Advertisement
Table of Contents

Subscribe to Our Youtube Channel
Related Manuals for Remoran WAVE 3


Summary of Contents for Remoran WAVE 3
- Page 1 Installation instructions Installations instruktioner Lue käyttöohjeet kokonaisuudessaan huolellisesti ennen hydrogeneraattorin käyttöönottoa. Käyttöohje löytyy nettisivuiltamme: www.remoran.eu Read the entire operating instructions carefully before using the hydrogenerator. The instructions can be found on our website: www.remoran.eu Läs hela bruksanvisningen noggrant innan du använder hydrogeneratorn. Instruktionerna finns på vår webbplats: www.remoran.eu...
- Page 2 Bluetooth®-sanamerkki ja logot ovat Bluetooth SIG, Inc: n omistamia rekisteröityjä tavaramerkkejä, ja Remoran Oy käyttää niitä lisenssin alaisena. The Bluetooth® word mark and logos are registered trademarks owned by Bluetooth SIG, Inc. and any use of such marks by Remoran Oy is under license.
- Page 3 Kiskon asennus Rail installation Skena installation Asennusosat Liu’uta pultit paikoilleen Merkkaa reikien paikat Poraa reiät Ø 8 mm Lisää tiivistysmassa Mounting parts Slide the bolts into place Mark the locations of the holes Drill the holes Ø 8 mm Add Sealant Monteringshårdvara Skjut bultarna på...
- Page 4 Laturin asennus Charger installation Laddare installation Valitse ruuvin pituus alustan paksuuden Merkkaa laturin paikka kuivaan tilaan käyttäen Ruuvaa laturi kiinni. Laturin ympärille on jätettävä mukaan apuna mukana tulevaa sabluunaa jäähdytystä varten tilaa Select the lenght of the screws according to Mark the location of the charger in a dry place Screw on the charger.
- Page 5 Kaapeleiden kytkeminen Connecting the cables Koppla kablarna Varmista kaapeleiden oikeat napaisuudet (+ , -). Väärinasennuksessa latausyksikön rikkoutuminen on väistämätön. Latausjohtimissa ei saa olla jännitettä kytkentävaiheessa. Make sure the cables have the correct polarities (+, -). In the case of incorrect installation, breakage of the charging unit is inevitable.
- Page 6 Ulkoyksikön kiinnittäminen kiskoon Attaching the outboard unit to the rail Fäst utvändiga enheten på skenan Nosta lukituskahva yläasentoon Liu’uta ulkoyksikkö rungosta alas Lukitse ulkoyksikkö kiskoon Säätääksesi kulman oikeaksi, Lift the locking handle to the kiskoa pitkin painamalla kahva ala-asentoon purista kulmansäätönuppia ensin top position Slide the outboard unit down the Lock the outboard unit to the rail...
- Page 7 Laturin porausohje Charger installation guide Borranvisning för laddaren Mittakaava Scale A4 1:1 Skala UP/ YLÖS/ UPP 196 mm...
- Page 8 Remoran Oy Harventajankuja 3, FI-24130 Salo, Finland info@remoran.eu www.remoran.eu...
Need help?
Do you have a question about the WAVE 3 and is the answer not in the manual?
Questions and answers