
Related Manuals for Cookology CBID450


Summary of Contents for Cookology CBID450
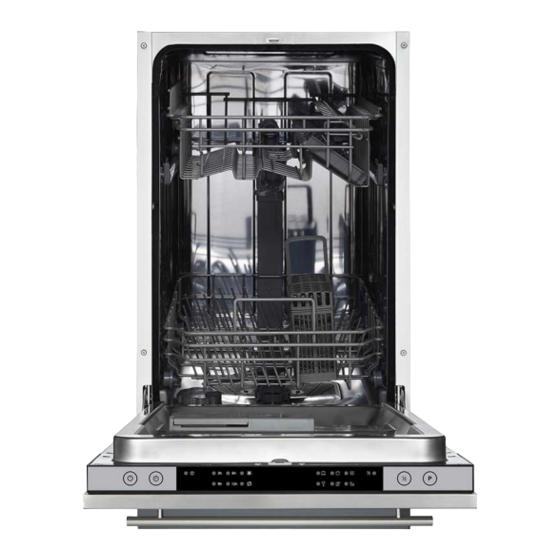
- Page 1 Instruction Manual DISHWASHER Please read this manual before use and save for future reference. MODEL: CBID450 PLEASE REGISTER YOUR NEW APPLIANCE AT WWW.COOKOLOGY.COM...
- Page 2 Installation and repair can only be carried out by a qualified technician This appliance is intended to be used in household and similar applications such as: -staff kitchen areas in shops, offices and other working environments; -farm houses; -by clients in hotels, motels and other residential type environments; -bed and breakfast type environments.
- Page 3 PARTS TO YOUR DISHWASHER VENTILATION To ensure your food is evenly cooked, remove the frying drawer halfway through cooking and turn or shake the items on the wire rack. Always make sure the air fryer is switched off when you remove the frying drawer. Reload it once the NOTE: drawer is back in the fryer and it will start cooking again within 10 minutes.
-
Page 4: Before Using Your Dishwasher
BEFORE USING YOUR DISHWASHER Set the water softener Loading the salt Into the softener Loading the basket Fill the dispenser LOADING SALT INTO THE SOFTENER If your model does not have any water softener, you may skip this section. Always use salt intended for dishwasher use. The salt container is located beneath the lower basket and should be filled as explained in the following: WARNING Only use salt specifically designed for dishwashers use! - Page 5 DISHWASHER BASKET TIPS! Adjusting the upper basket Type 1: The height of the upper basket can be easily adjusted to accommodate taller dishes in either the upper or lower basket. To adjust the height of the upper rack, follow these steps: Type 2: Folding back the cup shelves To make room for taller items in the upper basket, raise the cup rack upwards.
-
Page 6: Maintenance And Cleaning
MAINTENANCE AND CLEANING EXTERNAL CARE: The door and the door seal: Clean the door seals regularly with a soft damp cloth to remove food deposits. When the dishwasher is being loaded, food and drink residues may drip onto the sides of the dishwasher door. These surfaces are outside the wash cabinet and are not accessed by water from the spray arms. -
Page 7: Caring For The Dishwasher
It is necessary to clean the spray arms regularly for hard water chemicals will clog the spray arm jets and bearings. To clean the spray arms, follow the instructions below: CARING FOR THE DISHWASHER Frost precaution Please take frost protection measures on the dishwasher in winter. Every time after washing cycles, please operate as follows: Cut off the electrical power to the dishwasher at the supply source. -
Page 8: Installation
INSTALLATION Electrical requirements Please look at the rating label to know the rating voltage and connect the dishwasher to the appropriate power supply. Use the required fuse 10A/13A/16A, time delay fuse or circuit breaker recommended and provide separate circuit serving only this appliance. Electrical connection Ensure the voltage and frequency of the power being corresponds to those on the rating plate. -
Page 9: Position The Appliance
CONNECTIONS OF DRAIN HOSES Insert the drain hose into a drain pipe with a minimum diameter of 4 cm, or let it run into the sink, making sure to avoid bending or crimping it. The height of drain pipe must be less than 1000mm. The free end of the hose must not be immersed in water to avoid the back flow of it. - Page 10 BUILT IN INSTALLTION (Integrated Model) Step 1. Selecting the best location for the dishwasher The installation position of dishwasher should be near the existing inlet and drain hoses and power cord. Illustrations of cabinet dimensions and installation position of the dishwasher. Less than 5 mm between the top of dishwasher and cabinet and the outer door aligned to cabinet.
-
Page 11: Installation Steps
INSTALLATION STEPS Affix the condensation strip under the work surface of cabinet. Please ensure the condensation strip is flush with edge of work surface. (Step 2) Connect the inlet hose to the cold water supply. Connect the drain hose. Connect the power cord. Place the dishwasher into position. -
Page 12: Loading The Dishwasher
LOADING THE DISHWASHER QUICK USER GUIDE To ensure your food is evenly cooked, remove the frying drawer halfway through cooking and turn or shake the items on the wire rack. Always make sure the air fryer is switched off when you remove the frying drawer. Reload it once the drawer is back in the fryer and it will start cooking again within 10 minutes. -
Page 13: Control Panels
CONTROL PANELS Opera�on (Bu�on) Press this bu�on to turn on your dishwasher, When pressing Power this bu�on, corresponding indicator will be lit. Press the bu�on to set the delay �me. When pressing this bu�on, 2 Delay corresponding indicator will be lit. When you have about or less than half of full place se�ngs dishware to wash, you can choose this func�on to save energy and water. - Page 14 WATER SOFTNER The water softener must be set manually, using the water hardness dial. The water softener is designed to remove minerals and salts from the water, which would have a detrimental or adverse effect on the operation of the appliance. The more minerals there are, the harder your water is.
- Page 15 PREPARING AND LOADING THE DISHES Consider buying utensils which are identified as dishwasher-proof. For particular items, select a program with the lowest possible temperature. To prevent damage, do not take glass and cutlery out of the dishwasher immediately after the program has ended. For washing the following cutlery/dishes Are not suitable Cutlery with wooden, horn China or mother-of-pearl handles Plastic items that are not heat resistant...
- Page 16 Loading the upper basket The upper basket is designed to hold more delicate and lighter dishware such as glasses, coffee and tea cups and saucers, as well as plates, small bowls and shallow pans (as long as they are not too dirty). Position the dishesand cookware so that they will not get moved by the spray of water.
- Page 17 To ensure your food is evenly cooked, remove the frying drawer halfway through cooking and turn or shake the items on the wire rack. Always make sure the air fryer is switched off when you remove the frying drawer. Reload it once the drawer is back in the fryer and it will start cooking again within 10 minutes.
- Page 18 To ensure your food is evenly cooked, remove the frying drawer halfway through cooking and turn or shake the items on the wire rack. Always make sure the air fryer is switched off when you remove the frying drawer. Reload it once the drawer is back in the fryer and it will start cooking again within 10 minutes.
- Page 19 To ensure your food is evenly cooked, remove the frying drawer halfway through cooking and turn or shake the items on the wire rack. Always make sure the air fryer is switched off when you remove the frying drawer. Reload it once the drawer is back in the fryer and it will start cooking again within 10 minutes.
- Page 20 To ensure your food is evenly cooked, remove the frying drawer halfway through cooking and turn or shake the items on the wire rack. Always make sure the air fryer is switched off when you remove the frying drawer. Reload it once the drawer is back in the fryer and it will start cooking again within 10 minutes.
- Page 21 To ensure your food is evenly cooked, remove the frying drawer halfway through cooking and turn or shake the items on the wire rack. Always make sure the air fryer is switched off when you remove the frying drawer. Reload it once the drawer is back in the fryer and it will start cooking again within 10 minutes.
- Page 22 To ensure your food is evenly cooked, remove the frying drawer halfway through cooking and turn or shake the items on the wire rack. Always make sure the air fryer is switched off when you remove the frying drawer. Reload it once the drawer is back in the fryer and it will start cooking again within 10 minutes.
- Page 23 Problem Possible Causes What To Do Problem Possible Causes What To Do Spilled rinse-aid. Always wipe up rinse-aid spills The dishes Not enough detergent Use more detergent, or change immediately. are not clean. was dispensed. your detergent. Stained tub interior Detergent with Make sure that the detergent has no Items are blocking...
-
Page 24: Warranty
WARRANTY Your Cookology Appliance is covered by a 1 year guarantee from the date of purchase. If a fault develops during this period, please contact our customer service team to arrange support on making your claim. Please note: Upon receipt of your appliance, be sure to register your warranty by visiting our website and completing the form.
Need help?
Do you have a question about the CBID450 and is the answer not in the manual?
Questions and answers