
Related Manuals for Lowrance Endura Out&Back


Summary of Contents for Lowrance Endura Out&Back
- Page 1 Endura GPS ™ Operation Manual Sierra, Safari & Sierra, Safari Out&Back and Out&Back Operations Guide...
- Page 2 No part of this manual may be copied, reproduced, republished, transmitted or distributed for any purpose, without prior written consent of Lowrance. Endura™ is a trademark and Lowrance ® and Navico ® are registered trademarks of Navico, Inc. Accuterra ® is a registered trademark and NEXTMAP ® is a registered trademark of Intermap Technologies Corporation.
-
Page 3: Table Of Contents
Table of Contents Basic Operation ... 2 Adjusting the backlight: ...2 Restore Defaults ...3 Touchscreen vs. Arrow/Mark keys ...3 Working with Menus ...3 Page Settings/Data Fields ...4 Installing batteries...4 Mini-USB Cable and microSD card ...5 Loading files onto Endura: ...5 Pages ... -
Page 4: Basic Operation
Basic Operation Turning on Endura Hold down the POwEr key for three seconds to turn on Endura. The first time Endura is turned on, the select Language screen will appear. Touch the desired language. Turning off Endura Hold down the Power key for three seconds and the Standby menu will appear. -
Page 5: Restore Defaults
Restore Defaults Resets all device settings to factory defaults. To Restore defaults: Touch Settings on the Main menu. Select Restore Defaults. A confirmation message will appear. Touch Yes. Touchscreen vs. Arrow/Mark keys You can use the unit’s touchscreen to access menus and execute commands or do the same thing with the arrow keys. -
Page 6: Page Settings/Data Fields
Basic Operation Touch to display numeric keypad Alpha keypad Entering text/numerical values Touch desired characters. Entering text Touch Done tab when entry is & numbers completed. Page Settings/Data Fields You can choose the data types that will be displayed on the Map, Trip Computer, Elevation and Compass pages. -
Page 7: Mini-Usb Cable And Microsd Card
Installing battery cover Slide the cover at a slight angle to insert tabs into slots at the bottom of battery compartment. Once the battery cover is in place, turn the D-ring clockwise one-quarter turn. Mini-USB Cable and microSD card A mini USB cable is used to transfer data between Endura and a computer. -
Page 8: Map Page
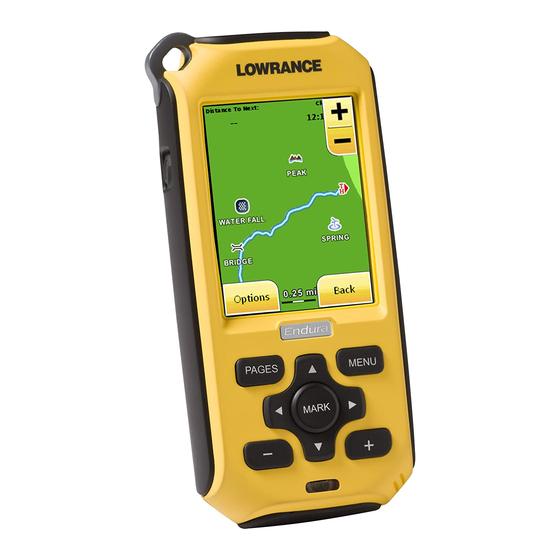
Pages The Safari and Sierra display Map, Satellite, Trip Computer, Elevation, Navigation and Compass pages. Elevation and Compass pages are displayed optionally on the Out&Back. See Settings in the Main Menu section for information on adding/removing pages. Latitude/Longitude Map options menu On the Map Page you can: •... -
Page 9: Map Options Menu
Map Options menu Map display mode, orientation, detail and page display settings are adjusted from the Map Options menu. Touch the Options tab on the Map page to access the Map Options menu. Display Mode Basemap Imagery Hybrid Orientation North up Course up Track up Detail Settings... -
Page 10: Satellite Page
Using the Satellite Page Access the GPS Settings menu, check satellite signal strength and position accuracy. waaS/EGNOS Touch GPS, WAAS/EGNOS or Simulated GPS to Enable/Disable the feature Simulated GPS WARNING: Simulated GPS simulates operation and allows you to travel a selected route. -
Page 11: Trip Computer
Trip Computer Data Fields Data Fields Using the Trip Computer page Use the Trip Computer menu to display desired trip information and then monitor it all in one place. Touch this option to select a data type for the selected data field Select Item Data reset all Trip Data Touch this option to reset trip data values to zero... -
Page 12: Elevation
View elevation history based on time or distance. From Elevation Page you can: • Set Barometric pressure sensor (Sierra and Safari only) or GPS as elevation source • Calibrate elevation using GPS data or by manually entering benchmark data •... -
Page 13: Nav Status Page
Nav Status Page Destination Navigation arrow shows bearing to destination Distance traveled Distance remaining to destination Touch screen to open Nav Status menu. using Nav Status Page Let the green arrow guide you to your destination or the next point in your trail or route. Show Details Displays details for the navigation target —... -
Page 14: Compass Page
Align the green arrow with the dark arrow to navigate to your destination or the next point in a trail or route. Heading Source Select Magnetic Sensor (Sierra and Safari only) or GPS as source Calibrate Compass Repeatedly rotate Endura in a Figure 8 pattern until calibration is complete... -
Page 15: Main Menu: Map/Find
Main Menu: Map/Find Main menu Press the MENu key to access the Main menu, touch Map to view the Map page. Find Used to search for items like waypoints, geocaches, points of interest, routes and trails and provides access to Goto/Navigation commands. Favorites A list of your commonly used waypoints, geocaches, trails, points of interest, addresses and routes. -
Page 16: Waypoints
Main Menu: Find Adding items to Favorites Select the desired item (waypoint, route, etc.) from the Find menu. More Options tab and touch Add to Favorites. (You may have to navigate through Touch the an internal menu before the More Options tab will be visible.) Waypoints Used to create, delete, edit/customize, categorize and navigate to waypoints. - Page 17 Main Menu: Find Navigating to waypoint View waypoint location on map Input waypoint name Input Latitude/Longitude Select category; Input Elevation choose icon Waypoint Edit Screen Return to previous screen Add to Favorites Input description Record a voice note...
-
Page 18: Geocaches
Main Menu: Find Geocaches Used to view, customize and navigate to geocaches. Geocaches can be uploaded onto Endura from geocaching web sites. To upload Geocaches: Plug the mini USB cable into the Endura and your computer. It will be shown as a mass storage device on your computer. -
Page 19: Trails
Trails Used to create, delete or navigate (forward or reverse) trails. GPX trails can be previously save trails from Endura or trails downloaded from community websites. Find menu Trails list Trail Options include: • Show trails on Map • Navigate forward or reverse (backtrack) •... -
Page 20: Points Of Interest
Main Menu: Find Points of interest Gives you access to a places database for restaurants, lodging, tourist sites, etc. Address Used to search for addresses and street intersections. NOTE: Address function is available on Sierra and optionally on Safari with accessory From Address screen you can: •... -
Page 21: Routes
Routes Allows you to create, delete, edit and navigate (forward or reverse) routes. Waypoints, Geocaches, Points of Interest and Addresses can be used in route creation. Additional route points can be added from the map. Creating a New Route Add Route New route Touch selected... -
Page 22: Navigating A Route
Main Menu: Find/Tools Navigating a Route Route Select from Routes List Tools Provides access to applications used to listen to music, view pictures and videos. The MP3 and video player are not available on Out&Back. MP3 Player Picture Viewer Video Player Video player Forward Navigate... -
Page 23: Main Menu: Tools
Trails, routes and GPX Files geocaches accessory Outdoor, marine or mapping files turn-by-turn mapping Music MP3 and WMA Video MPEG, AVI and WMV Picture JPEG and BMP To upload files: Plug the USB cable into the Endura and your computer. Endura will be shown as “Endura” (mini-USB) or “Endura SD Card”... -
Page 24: Main Menu Settings
Saving Timeout and Battery Type Used to add/remove pages from Pages the main page sequence Used to Calibrate Elevation and Elevation choose Elevation source (GPS or Barometric pressure) Used to select Heading Source Compass (Magnetic or GPS) and Compass Calibration... -
Page 25: Nav Options
Main Menu: Nav Options Nav Options Allows you to access the Endura’s navigation information from one location. Nav Options can only be accessed while you are navigating. The submenu is context sensitive, depending on navigation target.: trail, route, waypoint or geocache. Stop navigating confirmation screen Nav Status Screen... -
Page 26: Specifications
Waterproof IPx7 with rubbor armoring Waypoints, Routes & Trails Waypoints: 2000 (Max) Waypoints per route: 250 (Max) Routes: 60 (Max) Trails: 30 (Max) For more information, visit www.lowrance.com/endura Sierra Feature Preloaded Maps Premium Topo Contour Interval (feet) Add on Maps... - Page 28 *988-0161-54A* www.lowrance.com/endura *988-0160-54A* © Copyright 2009 All rights Reserved © Copyright 2009 Navico Holdings AS All Rights Reserved Navico Holding AS...
Need help?
Do you have a question about the Endura Out&Back and is the answer not in the manual?
Questions and answers