Advertisement
Quick Links
Download this manual
See also:
Instruction Manual
ULTRA DIGITAL WIRELESS 7" QUAD LCD
MONITORING SYSTEM
LW2600 SERIES - QUICk START GUIDE
Getting Started
*
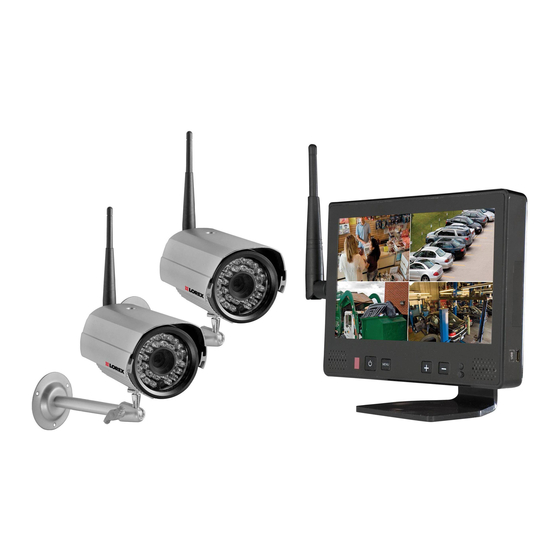
The Digital Wireless monitoring System
comes with the following components:
• Digital Wireless Color Cameras with
Sunshade*
• 7" LCD Monitor/Receiver
• Camera* Stands
• Wireless Antenna's for cameras*
• Power Adaptors for cameras* and
Monitor/receiver
• RCA Adaptor Cable
• RCA/BNC Adaptor
• Mounting Hardware
• Instruction Manual kits
* Number of cameras may vary by model.
Check your package for specific content
information.
Connect the LCD Monitor / Receiver to an Observation System /
OPTIONAL
DVR for recording or TV for large screen viewing**
Observation System or DVR with BNC:
1
Attach the included RCA adaptor cable at one end to
the RCA plugs from the LCD monitor and make sure
to match up the plug colors (Yellow = Video, White
= Audio). Take the included RCA/BNC adaptor and
attach it to the Yellow plug on the other end of the
RCA adaptor cable. Plug the BNC connector into an
Observation Monitor /DVR Video input. Connect audio
RCA plug (white) to audio input.
2
TV with RCA Input:
Connect the RCA Video and Audio ends of the RCA
adapter cable at one end to the LCD monitor and at
the other end to the RCA Video and Audio inputs of
your TV (Yellow = Video, White = Audio).
www.lorexcctv.com
NOTE: AVOID INSTALLING IN A LOCATION
WHICH REQUIRES THE WIRELESS SIGNAL
TO PASS THROUGH CEMENT, CONCRETE
AND METAL STRUCTURES. THIS WILL
REDUCE THE TRANSMISSION RANGE.
A.
Connect the Camera
2
1
Mount camera stand to
Connect the Wireless
the wall
Antenna to the camera.
B.
Setting up the LCD Monitor / Receiver
2
1
Attach the stand to the
Screw on the wireless antenna
back of the monitor.
to the side of the monitor.
1
** Requires
viewing/recording
2
device with RCA
Video or BNC Video
input. Viewing/
Recording device
sold separately.
Time
Under 20 Minutes*
* Installation time may vary
based on application and
camera location
3
Secure Camera to the
Stand.
3
Connect one end of Power Adaptor
to the LCD Monitor/Receiver and the
other end to an electrical outlet.
3
Turn on the Observation system, DVR or TV, and
switch to the video channel that the receiver has
been connected to.
Tip 1:
If your TV has a PIP feature, you can have the
camera images displayed in the PIP window. Check
your TV manual for info on PIP feature (if available).
Tip 2:
Connect to RCA input on a VCR, DVD recorder
or Surveillance DVR to record video from the
LW2602 system.
NOTE:
The purpose of the AV output is for convenience only. When using with large screen TV/Monitor, the picture
might be grainy as the camera limits video resolution to VGA (640x480 pixels). This is not a product defect. For
best performance use with TV/Monitor PIP (Picture in Picture) function. Check your TV/Monitor product manual to
see if this feature is available on your TV/Monitor. This allows you to view TV or other video source and see video
from the camera in a small window on the same screen.
LW2600 Series Quick Start Guide_R1
under 15 minutes
under 30 minutes
under 60 minutes
over 60 minutes
Skill Level
Hand Tools
Hardware
Hi Speed
Tools
Skills - Easy
Router
easy
Hand Tools
Plug & Play connections,
On screen set up
Skill Level
easy
Intermediate
advanced
4
Connect one end of the camera Power
Adaptor to the camera and the other
end to an electrical outlet.
Connect power adaptor to local
120V AC power outlet
4
Press the
power
button on the front panel
of the monitor to turn the
monitor ON.
NOTE: Place the LCD
Monitor/ Receiver in
a location that offers
clear reception with your
camera(s).
Page 1
Intermed
Advertisement

Subscribe to Our Youtube Channel
Summary of Contents for Lorex LW2602
-
Page 1: Connect The Camera
Connect to RCA input on a VCR, DVD recorder or Surveillance DVR to record video from the ** Requires LW2602 system. viewing/recording NOTE: The purpose of the AV output is for convenience only. When using with large screen TV/Monitor, the picture... - Page 2 Visit: www.lorexcctV.com and click on “warranty registration” ©2008 Lorex Technology Inc. As our product is subject to continuous improvement, Lorex Technology & subsidiaries reserve the right to modify product design, specifications, prices & warranty without notice and without incurring any obligation. E&OE ULTRA DIGITAL WIRELESS 7”...


Need help?
Do you have a question about the LW2602 and is the answer not in the manual?
Questions and answers