Table of Contents
Advertisement
Advertisement
Table of Contents

Related Manuals for Lorex LW1001


Summary of Contents for Lorex LW1001
-
Page 1: Instruction Manual
SURVEILLANCE SYSTEM MODELS: LW1000 Series LW1000 Series includes: LW1001, LW1002, LW1010, LW1012, LW1020, and LW1022 Copyright © 2008 Lorex Technology Inc. COLOR WIRELESS WITH INDOOR / OUTDOOR NIGHT VISION CAMERA(S) Instruction Manual English Version 4.0 www.lorexcctv.com... - Page 2 Thank you for purchasing the LW1000 Series Color Wireless Series Surveillance System. Lorex is committed to providing our customers with a high quality, reliable security product. http://www.lorexcctv.com This product broadcasts over public airways and its video and audio signals may be intercepted without CAUTION: TO REDUCE THE RICK OF ELECTRIC SHOCK REFER SERVICING TO QUALIFIED SERVICE PERSONNEL.
-
Page 3: Important Safeguards
Important Safeguards In addition to the careful attention devoted to quality standards in the manufacture process of your video product, safety is a major factor in the design of every instrument. However, safety is your responsibility too. This sheet lists important information that will help to assure your enjoyment and proper use of the video product and accessory equipment. - Page 4 Important Safeguards Service 13. Servicing - Do not attempt to service this video equipment yourself as opening or removing covers expose dangerous voltage or other hazards. Refer all servicing to qualified service personnel. 14. Conditions Requiring Service - Unplug this video product from the wall outlet and refer servicing to qualified service personnel under the following conditions.
-
Page 5: General Precautions
General Precautions 1. All warnings and instructions of this manual should be followed 2. Remove the plug from the outlet before cleaning. Do not use liquid aerosol detergents. Use a water dampened cloth for cleaning 3. Do not use this unit in extremely humid or wet places (i.e. Restaurant Kitchen, inside a Sauna, etc.) 4. -
Page 6: Table Of Contents
* Maximum open space transmission range. The actual range is dependent upon building materials and other obstructions in path of wireless signal. ** LW1001, LW1010, LW1020 requires a 2 *** USB Port and Yoics ONLY apply to LW1020 and LW1022 Models. -
Page 7: Getting Started
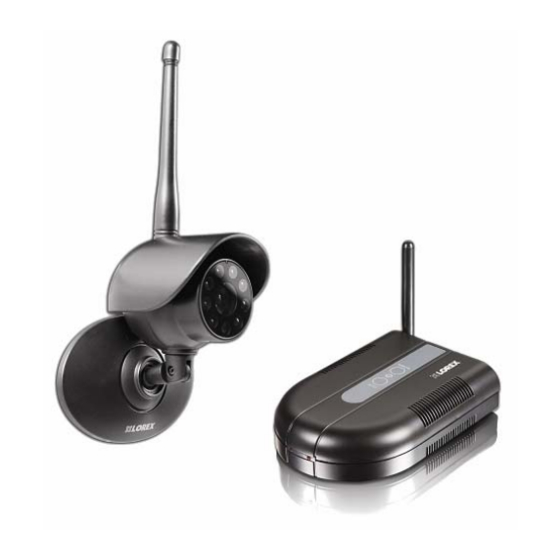
Getting Started The LW1001 and LW1002 come with the following components: 1 x WIRELESS RECEIVER 1 x POWER ADAPTOR (FOR RECEIVER) The LW1010, LW1012, LW1020, and LW1022 come with the following components: 1 x WIRELESS RECEIVER 1 x POWER ADAPTOR... -
Page 8: 1 X Wireless Receiver
Wireless Receiver Wireless Receiver 1. DC 9V (5V for LW1020/LW1022) INPUT – Connection port for the 9V/5V Power Adaptor (provided with this system). Connect the Power Adaptor to a power source. NOTE: It is recommended that the receiver be connected to a surge bar or similar to protect the equipment from damage. -
Page 9: Control Buttons
MANUAL button is pressed. Wireless Receiver Installation Installing the wireless receiver (for LW1001, LW1002, LW1010, LW1012, LW1020, and LW1022) For connecting to a TV/monitor <OR> recording on a VCR/DVD recorder. 1. Connect the AV Cable to the back of the receiver. Connect the other end of the Cable to the Video IN (Yellow) and Audio IN (White) ports on the TV, VCR or other viewing/recording devices with RCA inputs. -
Page 10: Camera Installation
When using multiple cameras, set each camera to different channels. The Receiver needs to be set to have 2 cameras switched to ON, to have all attached cameras functioning simultaneously. NOTE: The LW1001, LW1010, and LW1020 are expandable. To order additional cameras please visit our website at www.lorexcctv.com... -
Page 11: Installing The Camera
Power adaptor to prevent interruptions in the image, as the battery adaptor is intended as a temporary power solution. Wall Mounting Instructions (for the LW1001 and LW1002 ONLY) To mount the camera to a wall: 1. Measure and mark the positions for the 2 screw holes on the wall with a 0.90”... - Page 12 Wall Mounting Instructions (for the LW1010, LW1012, LW1020, LW1022 ONLY) To mount the camera to a wall: 1. Loosen the screw located on the side of the camera base using a slot head screwdriver. 2. Pull the camera free from the Stand. Mount the stand to the wall: •...
-
Page 13: Connecting Camera Power
4. Insert the Camera into the top slot of the stand. 5. Point the camera in the desired position. Tighten the side screw to secure the camera to the Stand. 6. Adjust the angle of the camera for a desired view. Connecting Camera Power The Camera can be powered either by using the provided Power Adaptor, or using a 9v battery (not included) and the Battery Adaptor Cable:... - Page 14 NOTE: Wireless cameras require a power source (either an electrical outlet or battery power) to operate. If you plan to permanently mount the camera in a location, it is recommended to use the included Camera Power adaptor to prevent interruptions in the image, as the battery adaptor is intended as a temporary power solution.
-
Page 15: Troubleshooting
The 2 camera is not showing up on Yoics. Solution (for LW1001, LW1002, LW1010, LW1012, LW1020, and LW1022) • Check all connections to the Camera. Make sure the adaptor is plugged in. • Make sure that the Cameras and Receiver are both ON. -
Page 16: Appendix #1 - Receiver Specifications
Appendix #1 - Receiver Specifications Appendix #1 - Receiver Specifications Specification Feature LW1001 / LW1002 Frequency 902MHz ~ 928MHz Signal / 48dB Noise Ratio Operating -10°C ~ 40°C Temperature Output RCA Audio / Video Humidity Less than 85% Current Approx. 100mA...
Need help?
Do you have a question about the LW1001 and is the answer not in the manual?
Questions and answers