Table of Contents
Advertisement
Advertisement
Table of Contents

Related Manuals for Cobra CIR 1000 A


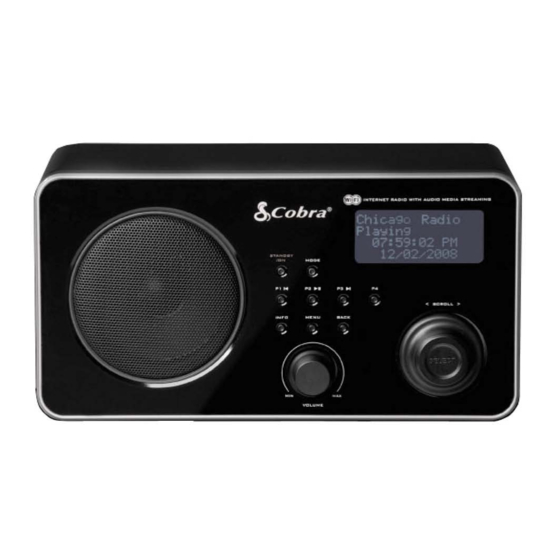
Summary of Contents for Cobra CIR 1000 A
-
Page 2: Safety Information
Safety Information The lightning flash with arrowhead symbol within an equilateral triangle is intended to alert the user to the presence of uninsulated "dangerous voltage" within enclosure that may be of sufficient magnitude to constitute a risk of electric shock to persons. The exclamation point within an equilateral triangle is intended to alert the user to the presence of important... - Page 3 damaged, liquid has been spilled or objects have fallen into the apparatus, the apparatus has been exposed to rain or moisture, does not operate normally, or has been dropped. 15. The apparatus shall not be exposed to dripping or splashing and no objects filled with liquids, such as vases, shall be placed on the apparatus.
-
Page 4: Table Of Contents
Contents Safety Information Package Content Internet Radio Quick Start Guide What you need before you can use your Internet Radio ... 3 Controls Overview (a) ... 4 Controls Overview (b)... 5 Connecting to wired network... 6 Connecting to wireless network... 8 Choosing a station ... -
Page 6: Internet Radio Quick Start Guide
Internet Radio Quick start Guide What you need before you can use your Internet Radio Before you use your Internet Radio, you need the following: LAN Setting: • Make sure the internet environment is ready and the network setting is available for LAN (ADSL or Cable Modem is highly recommended). -
Page 7: Controls Overview (A)
Controls Overview (a) Control Internet radio Press to scroll through Internet Radio, Music Player, FM Mode and Auxiliary Input. Press and hold to save Preset station Press to load Preset station a. Turn the knob to change options, press to select b. -
Page 8: Controls Overview (B)
Controls Overview (b) UNIT BACK VIEW Socket Description AUX IN Connects to the external audio device Headphone Connects to the headphone Connects to the LAN cable note 1: Designed to help inner airflow from the Loudspeaker to vent note 2: AC power cord door. -
Page 9: Connecting To Wired Network
Connecting to wired network Step 1 - Power up Radio First, connect to your Internet Radio adaptor and ensure the Power LED is lighting up. The Radio can be switched on or off with the STANDBY/ON button. Later, it will say: ... -
Page 10: Step 3 - Enter Internet Radio Mode
Step 3 – Enter Internet Radio mode 1. Press BACK repeatedly to access this mode. Or alternatively, simply press MODE until <Internet Radio Mode> shows in the display. Note: By pressing MODE, you can view Internet Radio, Music player, FM, and Auxiliary Input mode. Step 4 –... -
Page 11: Connecting To Wireless Network
Connecting to wireless network Step 1 – Choose Wlan Setting Note: a. Unless you set your internet to LAN connection, it will automatically choose WLAN connection, and then skip to step 2 below. b. If you have set it to LAN, you may need to do a small operation as follows: 1. - Page 12 Step 3 – Entering A Network In some cases the Radio may find more than one network. Rotate the Scroll knob to cycle through the name list, and press this knob when the name of your network is displayed ...
-
Page 13: How To Select A Station Through Podcasts
It should now successfully connect to your network. Note: a. WEP/WPA pass codes are case-sensitive. b. The Radio will automatically save the WEP/WPA code. Therefore , it is not necessary to re-enter it unless you perform a <Factory reset>. Or, if it says: If this happens, please follow these steps: A. -
Page 14: How To Add Station To 'My Favourites
How to add stations to ‘My favourites’ 1. visit website: http://www.wifiradio-frontier.com 2. Click on the register link. 3. To create account login, you need to input your radio’s Access Code (refer to page 10). Note: When visiting this website as a member, please remember your registered ‘Email address’ and ‘Password’... -
Page 15: How To Add Station To 'My Added Stations
How to add stations to ‘My Added Stations’ 1. visit website: http://www.wifiradio-frontier.com 2. Login as a member(see previous page to register). 3. You will now be able take advatage of various additional features and services offered by the Frontier Internet Radio Portal. -
Page 16: Choosing A Station
Choosing a station After your radio has successfully connected to the network, you are now ready to select a station. 1. Rotate the Scroll knob to <Stations>, and press to confirm. Note: There are five options available to select a station. 2. -
Page 17: Music Player Operation Mode
Music Player Operation Mode Note: To operate this function, please first read the appendix on page 27. 1. Switch your radio on and press MODE repeatedly until <Music Player Mode> appears. Or enter <MAIN MENU>, and rotate the Scroll knob to <Music Player>, and then press to confirm. The following is displayed: A. -
Page 18: Fm Operation Mode
FM Operation Mode 1. Press the MODE button repeatedly until <FM Mode> appears. Or enter <Main menu>, rotate the Scroll knob to <FM>, and then press to confirm. For initial use, it will start at the beginning of the FM frequency range (87.50MHz). Otherwise, the last FM station you listened to will be selected. -
Page 19: Setting Station Presets
Setting Station Presets Your radio can store 4 Internet station presets and 4 FM station presets respectively. To store the current station: Press and hold any one of the 1-4 button for 2 sec., and it will display ‘Preset stored’: Selecting a Preset station To select a stored station: 1. -
Page 20: Aux In Operation Mode
AUX IN Operation Mode 1. To listen to an external audio source, press the MODE button repeatedly until <Auxiliary Input Mode> appears in the display. Or enter <Main Menu>, and then rotate the Scroll knob to <Auxiliary Input>, and press to confirm. 2. -
Page 21: General Operations
General Operations Setting the Clock 1. At <Main menu> subdirectory, rotate the Scroll knob to <System setup>, and press to confirm. 2. Rotate the Scroll knob to <Time setup>, and press to confirm. 3. With the cursor pointing to <Set clock>, press to confirm. It will ask you to set the hour. 4. - Page 22 1. At step 2 on the previous page, rotate the Scroll knob to <Auto update>, and press to confirm. 2. Rotate the Scroll knob to <Update from NET>, and press to confirm. Greenwich Mean Time (GMT) ---------- for your clock settings 1.
-
Page 23: Sleep Function
Sleep Function 1. At <Main menu> subdirectory, r otate the Scroll knob to <Sleep>, and press to confirm. 2. Rotate the Scroll knob to define the sleep period between 0 – 90 minutes, and press to confirm. Note: a. The time interval is 15 minutes per step. b. -
Page 24: Setting Alarm
Setting Alarm Note: Before setting the alarm, please set the time first. 1. At <Main menu> subdirectory, r otate Scroll knob to <Alarms>, and press to confirm. Rotate Scroll knob to choose an alarm, and press to confirm. 3. With the cursor pointing to ‘Time: 12:00 AM’, press the Scroll knob to confirm. The setting principle is the same as ‘set time’. - Page 25 6. Finally, you need to rotate the Scroll knob to ‘Save’, and then press to confirm. The display will show “Alarm Saved” for 3 seconds, and will then return to current Radio station display. When the Radio is in standby mode, the Alarm icon ( ) will be displayed on-screen. ...
-
Page 26: Snooze Function
Snooze Function Note: The snooze function is an option related to the Alarm function. 1. At <Main menu> subdirectory, rotate the Scroll knob to <Snooze>, and press to confirm. 2. Rotate the Scroll knob to define the snooze period which is between 5 – 30 minutes, and press to confirm. -
Page 27: Sw Version And Radio Id
SW Version and Radio ID Note: This information may be required when dealing with technical issues. 1. It can be activated from <Main menu> <Info>, press to confirm. 2. With the cursor pointing to <SW version>, press to confirm. 3. -
Page 28: System Setup Operations
System Setup Operations Network setup The purpose of doing is: To enable you to scan again for connection to another wireless network, To let you manually configure the network parameters. To let you take your radio to another location where you want to use it. 1. -
Page 29: Factory Reset
Factory reset Note: doing this will completely erase WEP/WPA codes and all user settings, and return the Radio to its default factory settings. From <Main menu> <System setup> <Factory reset>, press to confirm. 2. Press the INFO button to reset. ... -
Page 30: Appendix
Appendix Step 1: Setting Up Media Sharing in WMP 11 After you download and install Windows Media Player 11 for Windows XP and connect your Radio to the network, you need to set up media sharing so that you can share music with your Radio. The following steps describe how to set up media sharing in Windows Media Player 11. -
Page 31: Step 2: Play Music On The Internet Radio
Check the “share my media to” box. In the list, click your Radio *, click Allow, the selected device will show a green tick and then click OK. If your device does not appear in the list of devices, perform the following steps; From the "Media Player"... -
Page 32: Set Up Media Sharing In Mac Os
Set Up Media Sharing in MAC OS Using the Radio with a MAC will require Windows File Sharing. MAC OS 9 and earlier versions of the OS will need extra software to use Windows File Sharing, but MAC OS X 10.2 and later versions have Windows File Sharing built into the OS. -
Page 33: Troubleshooting
Troubleshooting If you experience any trouble with your wireless Internet Radio, then you may find it useful to visit the help section on our webpage: http://www.wifiRadio-frontier.com If you have trouble connecting the Radio to your wireless network, these steps may help to resolve the problem: 1. -
Page 34: Specification And Trademark Info
Corporation in the United States and/or other countries. ® Cobra , Nothing Comes Close to a Cobra Cobra Electronics Corporation, USA. Cobra Electronics Corporation™ is a tradem Real and RealAudio ™ are trademarks or registered trademarks of RealNetworks, Inc. DESCRIPTION... -
Page 35: Licensing Information And Requirements
Licensing information and requirements mp3 format Thomson Licensing MPEG-4 HE-AAC Fraunhofer Real Audio RealNetworks Windows Media Microsoft Audio Windows Media Microsoft DRM 10 Upgrades Applicable to any upgrade "MPEG Layer-3 audio coding technology licensed from Fraunhofer IIS and Thomson" "MPEG-4 HE-AAC audio coding technology licensed by Fraunhofer IIS.
Need help?
Do you have a question about the CIR 1000 A and is the answer not in the manual?
Questions and answers