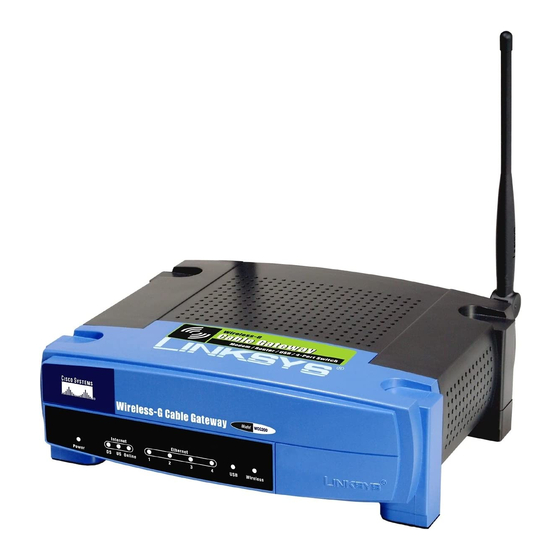
Linksys WCG200 Quick Installation
2.4ghz wireless-g cable gateway
Hide thumbs
Also See for WCG200:
- User manual (71 pages) ,
- Product data (2 pages) ,
- User manual (47 pages)
Table of Contents
Advertisement
Quick Links
1
®
A Division of Cisco Systems, Inc.
Package Contents
• Wireless-G Cable Gateway
• USB Drivers and User Guide CD
• Power Adapter
• CAT 5 Ethernet Network Cable (6 ft)
• USB Cable (6 ft)
• Quick Installation
• Registration Card
2.4
GHz
Wireless-G
54Mbps
Cable Gateway
Wireless
Quick Installation
Wireless
Model No.
Model No.
WCG200
Installing the Cable Gateway
A
Make sure that your PC and
Cable Gateway are turned off.
B
Make sure that you have TCP/IP
installed on your computer. If
you don't know what TCP/IP is or
you don't have it installed, refer
to "Appendix B: Installing the
TCP/IP Protocol" in the User
Guide.
C
Connect the coaxial cable
from your ISP/Cable Company
to the Cable Port on the back
of the Cable Modem. (See Fig-
C
ure C.) Connect the other end
of the coaxial cable in the
manner prescribed by your ISP/
Cable Company.
D
Determine which cable type
you will use to connect your
D
Cable Gateway to your PC.
Ethernet
E
USB
If you are using Ethernet
Cable, go to Step 2. If you are
using USB Cable, go to Step 3.
Connecting the Cable Gateway
2
to Your PC using Ethernet Port
A
A
Connect one end of an Ether-
Connect one end of an Ether-
net cable to your PC's Ethernet
net cable to your PC's Ethernet
adapter, as shown in Figure A.
adapter, as shown in Figure A.
B
B
Connect the other end of the
Connect the other end of the
A
cable to one of the LAN ports
cable to one of the LAN ports
on the back of the Cable
on the back of the Cable
Gateway, as shown in Figure B.
Gateway, as shown in Figure B.
If your PC's Ethernet
C
C
NOTE:
Make sure that there is an
Make sure that there is an
adapter is not set up, please
Ethernet cable connected
Ethernet cable connected
refer to the Ethernet
from the Cable Gateway to
from the Cable Gateway to
adapter's user guide for
every PC that you want on your
every PC that you want on your
more information.
local network.
local network.
D
D
Connect the power adapter to
Connect the power adapter to
the Cable Gateway, as shown
the Cable Gateway, as shown
in Figure C. Plug the other end
in Figure C. Plug the other end
of the power adapter into the
of the power adapter into the
electrical outlet, preferably a
electrical outlet, preferably a
B
surge protector.
surge protector.
E
E
Turn on the Cable Gateway.
Turn on the Cable Gateway.
F
F
Go to Step 5 to activate your
Go to Step 5 to activate your
account and finish the installa-
account and finish the installa-
tion.
tion.
D
IMPORTANT:
Make sure to go to
Step 5 and activate your account.
Connecting the Cable Gateway
3
to Your PC using USB Port
A
Connect one end of a USB
cable to your PC's USB port
and connect the other end of
the USB cable to the USB port
on the back of the Cable
Gateway, as shown in Figure A.
B
Connect the power adapter to
the Cable Gateway, as shown
A
in Figure B. Plug the other end
of the power adapter into the
electrical outlet, preferably a
surge protector.
C
Turn on the Cable Gateway.
Then, turn on your PC.
D
During the boot up process,
your computer should recog-
B
nize the device and ask for
driver installation.
E
Go to Step 4 to install the USB
driver.
4
Installing the USB Driver on your PC
Follow the instructions for the version of
Windows that is installed on your PC.
Windows 98
A
When the Add New Hardware
Wizard window appears, insert
the USB Drivers and User Guide
A
CD into your CD-ROM drive and
click Next.
B
Select Search for the best driver
for your device. Click Next.
C
Select CD-ROM drive as the only
location where Windows will
search for the driver software.
B
Click Next.
D
Windows will notify you that it has
found the driver and is ready to
install it. Click Next.
E
If asked for your Windows 98 CD-
ROM, insert it into the CD-ROM
drive and enter d:\win98 in the
box that appears (where "d" is
the letter of your CD-ROM drive.)
If your Windows files are on your
C
hard drive, try c:\windows\options
\cabs as the path.
F
A screen will indicate that the
driver has been installed. Click
Finish. When asked if you want to
restart your PC, remove all disks
and CD-ROMs from the PC and
click Yes. If Windows does not
D
ask you to restart your PC, Restart
anyway.
G
Driver installation is complete.
IMPORTANT:
Make sure to go to
Go to Step 5 to activate your
Step 5 and activate your account.
account.
Advertisement
Table of Contents

Summary of Contents for Linksys WCG200
- Page 1 USB Cable, go to Step 3. Wireless Quick Installation Wireless Model No. Model No. WCG200 Connecting the Cable Gateway to Your PC using Ethernet Port Connect one end of an Ether- Connect one end of an Ether- net cable to your PC’s Ethernet net cable to your PC’s Ethernet...
- Page 2 RMA (Return Merchandise Authorization) http://www.linksys.com/support FTP Site ftp://ftp.linksys.com Sales Information 800-546-5797 (800-LINKSYS) Linksys is a registered trademark or trademark of Cisco Systems, Inc. and/or its affiliates in the U.S. and certain other countries. Copyright © 2003 Cisco Systems, Inc. All rights reserved. WCG200-QI-30827NC-BW...


Need help?
Do you have a question about the WCG200 and is the answer not in the manual?
Questions and answers