Table of Contents
Advertisement
Quick Links
User Manual
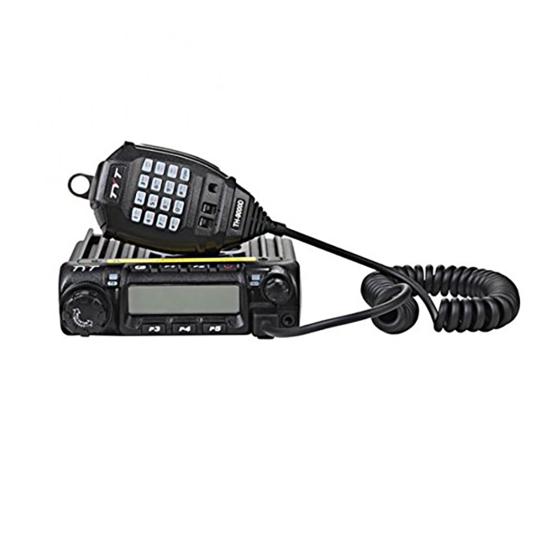
TH-9000D P ro,TH-9000D P lus
To customers
Thank you very much for using
two-way radios.
This product has a newly developed function menu
and humanism operation design, making it easy to use.
It will meet your requirement by the compact size and
reasonable price.
TYT Electronics Co., Ltd.
Advertisement
Table of Contents

Related Manuals for TYT TH-9000D Plus


Summary of Contents for TYT TH-9000D Plus
- Page 1 Thank you very much for using two-way radios. This product has a newly developed function menu and humanism operation design, making it easy to use. It will meet your requirement by the compact size and reasonable price. TYT Electronics Co., Ltd.
- Page 2 As you learn how to use Please observe the following precautions to prevent fire, personal injury, or transceiver this transceiver, you will find that TYT is pursuing "user friendliness". For example, damage: each time you change the menu no.
-
Page 3: Table Of Contents
Channel mode CONTENTS Adjusting Channel Through Selector Knob 21-22 New and Innovative Features Receiving Supplied Accessories/Optional Accessories 02-03 Transmitting 22-23 Supplied Accessories Transmitting Tone-Pulse Optional Accessories Transmitting Optional Signaling Initial Installation 04-13 Channel Edit Mobile Installation 04-05 Channel Delete DC Power Cable Connection 05-09 Shortcut Operations 24-29... - Page 4 Current Voltage Enquiry Voice Prompt Auto-Dialer Setup TOT (Time-out timer) 39-40 Transmitting Edited DTMF Tones in the Auto-dialer Memory APO (Auto power off) DTMF Transmitting Time 40-41 General Setting 30-45 Frequency Channel Step Setup Squelch Level Setup DTMF, DTMF ANI, 2Tone or 5Tone Signaling Scan Stop Time Setup 30-31 41-42...
-
Page 5: New And Innovative Features
Scan Skip New and Innovative Features Frequency/Channel Scan The mobile radio has nice housing, stoutness & stability, advanced and reliable Busy Channel Lockout functions, perfect & valuable. This mobile radio especially designs for drivers and it pursues Reverse TX/RX 49-50 company philosophy of innovation and practicality. -
Page 6: Supplied Accessories/Optional Accessories
Supplied Accessories/Optional Accessories Optional Accessories Supplied Accessories After carefully unpacking the transceiver, identify the items listed in the table below. We suggest you keep the box and packaging. Cloning Cable USB Programming Cable Cigar-Plug Connection Line [CP-50] [PC50] [TCC-01] 9000DU radio body Microphone [THM-03] Mobile Mounting... -
Page 7: Initial Installation Mobile Installation
Determine the appropriate angle of the transceiver, using the 3 screw hole positions on Initial Installation the side of the mounting bracket. Mobile installation To install the transceiver, select a safe, convenient location inside your vehicle that minimizes danger to your passengers and yourself while the vehicle is in motion. Consider installing the unit at an appropriate position so that knees or legs will not strike it during sudden braking of your vehicle. - Page 8 3. In order to avoid the risk of short circuit, please cut down connection with negative (-) of optional (For Cigar-Plug connection) cable. Connect one of the cables between the ACC battery, then connect with radio. terminal or a Cigar-Plug that operates with the vehicle ignition or ACC switch on the vehicle 4.
-
Page 9: Power Supply Voltage Display
The recommended current capacity of your power supply is 12A. cable and contact your autho- rized TYT dealer or an authorized TYT servi-cecenter for 1. Connect the DC power cable to the regulated DC power supply and ensure that the assistance. -
Page 10: Antenna Connection
The transceiver will return to its normal operation when the power is switched ON or repeat above operation. Note: Ω To get the best range from the external whip antenna (50 ) should be used. Important: The range of displayed voltage is only from 7V to16V DC, because the displayed Ant : Tx/ Rx 136-174&400-480Mhz , 0 dBi nominal (3dBi Max) value is estimated, please use a voltmeter when a more precise reading is desired. - Page 11 PC Connecting To utilize the optional TH-9000D software, you must first connect the transceiver to your PC then using an optional programming cable PC50 (via Data socket ). Error Please use TH-9000D software for programming. SP-01 Ground NOTE: Ask your dealer about purchasing a Programming Cable PC50. Microphone For voice communications, connect a microphone equipped with an 8-pin modular plug into the modular socket on the front of the main unit.
-
Page 12: Getting Acquainted Front Panel
Press key until icon appears then press the following key. Getting Acquainted FUNCTION Front panel Confirms the selective functions and exit Voice compander Store memory channel Delete memory channal Keypad lock Basic Functions FUNCTION Press key and following key together to activate following function: Pow(Power) Power on/Off FUNCTION... -
Page 13: Rear Panel
Rear panel FUNCTION Squelch level. In channel mode. Indicates the channel number in channel mode. Decimal point Channel skip. Decimal point Indicates the decimal point of frequency and the scanning function. Indicates the frequency or memory name. Signal is being received or monitor. FUNCTION Signal strength of receiving and transmitting. -
Page 14: Microphone
Microphone Display Mode Except setting as "CH" mode, others considered as 1. Display Mode: transceiver mode. Under this mode,press key to switch between Channel mode and VFO mode . A. Frequency + Channel mode: When set display as"FR",it enters into Frequency+Channel mode, new setting of channel operation and shortcut operation can be temporarily used by (Pic 1) user. -
Page 15: Basic Operations Switching The Power On/Off
Basic Operations Switching The Power On/Off PWR KEY according to the option selected during installation Press the switch or turn the ignition key to ACC (speed up) or ON (startup) position to power on radio . Press the keyfor 1s or turn the ignition key to OFF position to turn off. -
Page 16: Receiving
Please hold the microphone approximately 2.5-5.0cm from your lips, and then speak into NOTE: 5k, 6.25k, 8.33K,10k, 12.5k, 20k, 25k, 30k and 50k total nine step size available for the microphone in your normal speaking voice to get best timbre. this radio. -
Page 17: Channel Delete
Channel Delete 1. In VFO mode,presst for 1s to enter into frequency scan. 2. Turn selector knob or press Microphone [ 1. Under channel mode, turn selector knob to select channel which you want to delete. DOWN key tochange scan direction. 2. -
Page 18: Ctcss Scan
knob or press Microphone's [ ] to select desired DCS encode and decode. Voice Compander DOWN Compander function will decrease the background noise and enhance 15 audio clarity, 4. CTCSS:62.5-254.1, Total 51groups; DCS:000N-777I total 1024 groups. N is positive code, is inverse code. -
Page 19: Keypad Lockout
5. Turn selector knob or Mic's [ ] key to change offset frequency, offset Auto-Dialer Setup DOWN frequency changed as per stepping. This will automatically transmit pre-programmed and stored DTMF tones. And they are 6. Press any key except key to exit into standby. often used to remote control electronic devices or AUTOPATCH phone systems available NOTE: Under channel mode,this operation can be temporarily used by user. -
Page 20: General Setting
General Setting 1. Press and hold key for over 2s to enter into general setting menu. 1. Press and hold key for over 2s to enter general setting menu. 2.Press to choose No 2 menu,LCD displays"T-OFF" . 2. Press to select the desired function option. 3. -
Page 21: Sending 5-Tone Call
5. Press kdy to confirm and exit. 4. Total:16groups,00-16,Default:00. NOTE: Content and name of 2TONE will be edited by programming software. 5. Press key to confirm and exit. Signaling Combination setup This radio only query edited group or name.If there is corresponding name for 2TONE,this operation will display 2TONE corresponding name. -
Page 22: Band-Width Selection
NOTE: This setting will be set together with adding optional signaling and CTCSS/DCS. Disable this function,it is invalid to press PTT,current channel Band-width Selection only works in RX mode. 1. Press and hold key for over 2s to enter general setting Select suitable bandwidth in accordance with different local conditions. -
Page 23: Editing Channel Name
but dis-matching CTCSS/DCS.press [PTT] to emit error voice prompt and back to receiving Talk Around status. By Talk Around function,you can directly communicate with other radios in your group OFF: Busy channel lockout is disabled.It can transmit in any receiving status. in case the repeater is not activated or when you are out of the repeater range. -
Page 24: Radio's Dtmf Self Id Enquiry
8 Groups of Scrambler (Encryption) Voice Prompt An analog voice inversion scrambler can be equipped as optionals.This special audio process The prompting tone provides confirmation of entry, error status or malfunctions of the can offer a more confidential communication.Other radios at same frequency will receive transceiver. -
Page 25: Apo (Auto Power Off)
OFF:Disable TOT 4. Press key to confirm and exit.Default:50MS. Squelch level Setup 4. Press key to confirm and exit. Default:3. APO (Auto power off) Setting the radio to a tight squelch level, you can avoid unwanted signals or noise, but you Once APO is activated, the radio will be automatically switched off when the pre-set timer may not receive a weak signal. -
Page 26: Lcd Backlight
CO:it pauses once scanning a matching signal,signal disappeared 2. Press key to choose No.26 menu, LCD then resume scan. displays"TB--1750". SE:It stops once scanning a matching signal. 3. Turn selector knob to select the desired pilot frequency. 4. Press key to confirm the selection and exit.Default:TO. 1750HZ:Pilot frequency1750HZ LCD Backlight 2100HZ:Pilot frequency 2100HZ... -
Page 27: Power On Password Setup
Power On Password Setup Factory Default Enable this function,you have to insert a matching PIN to enter into normal status when If your radio seems to be malfunctioning, resetting the microprocessor may solve the radio is turned on. problem. When performing the reset, you may lose memory data and stored information. 1. -
Page 28: Microphone Operation
Function Setup By Microphone Keypad Microphone Operation squelch off :In standby, press key, the squelch is disabled when icon , flashed in LCD,Press again to enable DOWN squelch and the icon disappears. Switches between VFO and channel mode In standby,press key to switch between channel mode and Frequency mode (VFO). -
Page 29: Scan Skip
When first bit of Exa byte in frequency displays "D",it indicates Busy Channel Lockout DTMF function enable. BCLO is to disable transmitting while RX signal is received. Once the channel is busy When first bit of Exa byte in frequency displays "T",it indicates and you press PTT, the radio will beep as warning and get back to receiving. -
Page 30: Tot (Time-Out Timer)
ON:Enable Frequency Reverse 4. Press to confirm and exit. OFF:Disable Frequency Reverse NOTE:This function can be temporarily used in Channel mode. Once the radio is turned off 3. Press number keys to confirm and exit. or switched to another channel, the temporary setting will be erased and back to initial NOTE: This function can be temporarily used in Channel mode . -
Page 31: Lcd Backlight
BEEP--OF :turn off voice prompt Long-distance Anti-theft Alarm BEEP--ON :turn on voice prompt This function is mainly use for simple anti-theft alarm device in vehicles. When the 3. Press number key to exit and store. transceiver be removed in an improper manner,the transceiver will emit and transmit alarming LCD Backlight and background voice to system and other transceiver of the same frequency. -
Page 32: Cable Clone
4. When the alarm cable or is removed from the DATA jack or cut by improper sequence, the 3. Press master unit's [PTT] key, LCD displays "SD XXX", "XXX" indicates data volume in alarm function enable and will alarm as programmed. In alarming,the transceiver will stop transmitting. -
Page 33: Programmin Software Installing And Starting (In Windows Xp System)
NOTE: Even in same computer,the selective COM Port is different when USB cable Programming Software Installing and Starting (in windows XP system) connects with different USB port. Double click "TYT TH-9000D", then follow the You shall install software before connecting the USB cable line. Switch on transceiver installing instruction. -
Page 34: Maintenance
Trouble Shooting Maintenance Default Setting after Resetting(UHF) Problem Possible Causes and Potential Solutions TH-9000D DCS encode and decode (a) Power is on, nothing appears + and - polarities of power connection are reversed. VFO frequency 445.00MHz DCS code on Display. Connect red lead to plus terminal and black lead to 023N Memory channel 0-199... -
Page 35: Specifications
Receiver (ETSI EN 300 086 standard testing) Specifications General Wide band Narrow band Sensitivity (12dB Sinad) *0.25µV *0.35µV Frequency Range Tx: 144-148 ,Rx:136-174MHz (FCC 150MHz Version) Adjacent Channel Selectivity *70dB *60dB Intermodulation *65dB *60dB Number of Channels 200 channels Spurious Rejection *70dB *70dB Channel Spacing... -
Page 36: Attached Chart
1024 groups DCS Code. Attached Chart 50 groups CTCSS Tone Frequency(Hz) 67.0 79.7 94.8 110.9 131.8 156.7 171.3 186.2 203.5 229.1 69.3 82.5 97.4 114.8 136.5 159.8 173.8 189.9 206.5 233.6 71.9 85.4 100.0 118.8 141.3 162.2 177.3 192.8 210.7 241.8 74.4 88.5... - Page 38 RF Exposure Warning Statements: This equipment complies with FCC radiation exposure limits set forth for an uncontrolled environment. This equipment shall be installed and operated with minimum distance 20cm between the radiator & body. NOTE: N is positive code, is negative code, total: 232groups. FCC Warning NOTE: This equipment has been tested and found to comply with the limits for a Class B digital, pursuant to part 15 of the FCC Rules.
Need help?
Do you have a question about the TH-9000D Plus and is the answer not in the manual?
Questions and answers