
Related Manuals for Hoover HV-LHP8


Summary of Contents for Hoover HV-LHP8
- Page 1 8 kg Heat Pump Dryer Model Number HV-LHP8 INSTRUCTION MANUAL AFTER SALES SUPPORT (AU) 1300 886 649 (NZ) 0800 836 761...
-
Page 2: Table Of Contents
Contents General Safety Instructions Unpacking Product Overview Installation Instructions FAQs and Troubleshooting Guide Other Useful Information After Sales Support (AU) 1300 886 649 (NZ) 0800 836 761 | tempo.org/support... -
Page 3: General Safety Instructions
General Safety Instructions IMPORTANT SAFETY INSTRUCTIONS READ CAREFULLY AND KEEP FOR FUTURE REFERENCE Read this manual thoroughly before first use, the safety precautions enclosed herein reduce the risk of fire, electric shock and injury when correctly adhered to. Keep the manual in a safe place for future reference, along with any warranty information and your purchase receipt. - Page 4 General Safety Instructions (Cont.) Usage conditions and restrictions • Domestic use only: This appliance is intended for household use only. It is not suitable for commercial, industrial or trade use. Do not use it for anything other than its intended purpose (drying domestic quantities of washing), and only use it as described in this manual.
- Page 5 General Safety Instructions (Cont.) • WARNING! The lint filter must be in place when drying. It must be cleaned before or after each use. • Cool down: The final part of a clothes dryer cycle occurs without heat (cooling phase) to ensure that the items are left at a temperature that will not damage them. WARNING: Never stop the clothes dryer before the end of the drying cycle unless all items are removed quickly and spread out so the heat is dissipated.
- Page 6 General Safety Instructions (Cont.) CAUTION! The items listed below are UNSUITABLE for clothes drying. They can cause fire in the dryer or extensive damage. DO NOT place them in the clothes dryer. : Items containing foam rubber (also known as latex foam) or similarly textured rubber-like materials —...
-
Page 7: Unpacking
Unpacking CAUTION: VERY HEAVY! • A team lift or mechanical aid is required when moving and installing this appliance. • Keep the heat pump dryer as upright as possible during transportation. • This product has been packaged to protect it against transportation damage. Remove all packaging materials from inside and around the appliance. -
Page 8: Product Overview
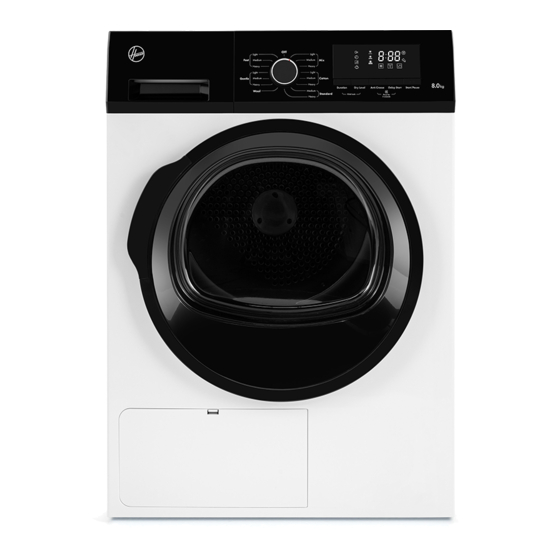
Product Overview Scope of delivery 8 kg heat pump dryer Other inclusions (not shown) Water container Water drain hose Control panel Documentation (not shown) Drum Instruction manual Door Quick start guide Lint filter BEFORE YOU START leaflet Maintenance cover Warranty certificate Levelling feet (one under each corner) NOTE: Due to continued product improvement, images and illustrations in this manual may vary slightly from the product purchased. -
Page 9: Installation
Installation Important notes regarding installation • Do NOT install the appliance: : behind a lockable door, sliding door or a door with a hinge on the opposite side of the dryer, in such a way that a full opening of the tumble dryer door is restricted : in a tight fitting cabinet, the appliance must not be built in : in an area where it will be exposed to temperatures below freezing. - Page 10 Installation (Cont.) Levelling the appliance The appliance must be installed level, otherwise its operation will be impaired. When you have placed the dryer in its permanent position, press on the top frame (in both directions) to ensure the appliance is level: it should not shake or wobble. Alternatively, use a spirit level to ensure the appliance is level.
- Page 11 Installation (Cont.) Earthing WARNING: This is a Category I electrical product which must be earthed. In the event of a malfunction or breakdown, earthing will reduce the risk of an electric shock by providing a path of least resistance for the electric current. This appliance is equipped with a cord having an equipment-earthing conductor and an earthing plug.
-
Page 12: Instructions
Instructions Control panel buttons (Fig. 4) 1 Program dial: Turn the program dial (knob) clockwise or anticlockwise to switch on the appliance and select the required program (see page 16 for details of the programs). 2 Off position: At the end of a program, turn the knob to the Off position to switch the machine off. - Page 13 Instructions (Cont.) Display icons and indicator lights (Fig. 5) Table 1: Display icons Shows the program duration and remaining time (in hours: minutes counted down), delay time (in hours counted down) and error codes. The buzzer light illuminates when the buzzer is set to on. If the symbol is crossed out, the buzzer is muted.
- Page 14 Instructions (Cont.) Before each drying Checking the machine Make sure you have read all safety precautions in this manual and are aware of the items (listed on page 6) that cause a hazard if placed in the clothes dryer. The clothes dryer is intended only for drying textile material that has been washed in water and well spin-dried.
- Page 15 Instructions (Cont.) Preparing the drying load Easy care items such • The laundry must be thoroughly spun before tumble drying. as shirts should be briefly pre-spun before drying. • To avoid a static charge when drying is completed, use either a fabric softener when you are washing the laundry or a fabric conditioner specifically for tumble dryers.
- Page 16 Instructions (Cont.) Table 2: Drying programs Default Category Program time Drying application / properties (hr:min) Light 1:32 Baby clothes and other small, more delicate items Medium 2:17 Shirts Cotton Cotton clothing and other cotton items – different drying Heavy 3:42 (D) levels are available Light 1:02...
- Page 17 Instructions (Cont.) This program was used for energy efficiency testing to the standard. It is the most suitable program for drying a normal cotton load at the rated load capacity. (C) When drying particularly large towels or bulky bathrobes, do not exceed 6 kg. If items are not completely dry at the end, add an extra drying time using the “Gentle - Light”...
- Page 18 Instructions (Cont.) Program options after Depending on the program, you can select a number of options you have before selected the program and pressing the Start/Pause button. Buzzer The buzzer can be set to ON or OFF; the default setting is ON. Use this function to mute the buzzer.
- Page 19 Instructions (Cont.) Step-by-step guide to using the dryer (a) Loading Open the door and load the dryer following the guidelines on page 15. The total weight of the load to be dried depends on the program chosen. All maximum load values are listed in Table 2 on page 16.
- Page 20 Instructions (Cont.) At the end of the program All drying programs end with a two minute cooling phase. If the laundry is not removed at the end of the cycle, the dryer runs an anti-crease phase (default: 10 minutes, adjustable up to 120 minutes), unless you open the door and remove the load. If you do not remove the laundry, the dryer will stop automatically at the end of the anti- crease phase.
- Page 21 Instructions (Cont.) Energy saving tips Compared with a traditional, vented type of dryer, this heat pump dryer is significantly more energy efficient, boasting a 7 start energy efficiency rating. To further reduce your energy consumption and help protect the environment, we recommend that you follow these hints: •...
-
Page 22: Faqs And Troubleshooting Guide
FAQs and Troubleshooting Guide Troubleshooting guide If your heat pump dryer has a fault, is not working properly, or you think it should work better, please use the list below to identify and solve any problems. If you cannot solve the problem, switch off the dryer and unplug it from the power supply. - Page 23 FAQs and Troubleshooting Guide (Cont.) Table 3: Heat pump dryer troubleshooting guide Problem Possible cause Solution There are Heavy, wet clothes tumbling in the These noises are normal. Make some strange drum can cause bumping noises sure your drying load is properly noises.
-
Page 24: Other Useful Information
Other Useful Information Cleaning and maintenance Keeping your heat pump dryer in good, clean condition will prolong its service life. WARNING! • Before cleaning or maintaining any part of the dryer, make sure it has cooled down and is unplugged from the power supply. •... - Page 25 Other Useful Information (Cont.) Cleaning the lint filter Fig. 11 To remove the filter, open the door to the clothes dryer, grip the lint filter case and pull it straight up and out of the drum (Fig. 11). Remove any lint, fibres and textile threads from the filter by hand or with a soft piece of cloth.
- Page 26 Other Useful Information (Cont.) Emptying the water container The water container collects all the water from the condenser (unless you have the drain hose connected). The water container needs to be emptied after every drying cycle, the tank full indicator will remind you to do so. This indicator will also illuminate if the water container is full while the dryer is in operation.
- Page 27 Other Useful Information (Cont.) Storage If you are not going to use the appliance for an extended period of time, unplug it and store it upright in the original packaging to protect it from dust. Store the unit in a dry place, out of children’s reach.
- Page 28 Warranty returns Should you for any reason need to return this product for a warranty claim, make sure to include all accessories with the product. Product does not work? If you encounter problems with this product, or if it fails to perform to your expectations, make sure to contact our After Sales Support Centre on (AU) 1300 886 649 or (NZ) 0800 836 761 for advice.
Need help?
Do you have a question about the HV-LHP8 and is the answer not in the manual?
Questions and answers