Table of Contents

Related Manuals for GOM ATOS COMPACT SCAN 5M


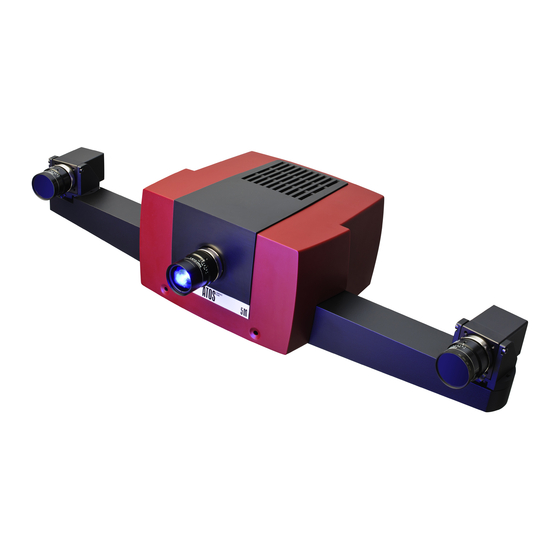
Summary of Contents for GOM ATOS COMPACT SCAN 5M
- Page 1 ATOS COMPACT SCAN User Manual - Hardware ATOS COMPACT SCAN 5M, 2M With Camera Supports 300 mm, 500 mm and SO GOM mbH Mittelweg 7-8 D-38106 Braunschweig E-Mail: info@gom.com Germany www.gom.com Tel.: +49 (0) 531 390 29 0 Fax: +49 (0) 531 390 29 15...
-
Page 2: Important Notes
Avoid such positions. Use the product only on a safe and steady ground. GOM reserves the right to revise this publication and to make changes in content from time to time without obligation on the • When measuring large objects, make sure you comply with part of GOM to provide notification of such revision or change. -
Page 3: Table Of Contents
Table of Contents Table of Contents 10.3 Calibration Using Calibration Panel CP 40 ___________ 29 10.3.1 Handling Instructions for Calibration Panel CP 40 _______ 30 10.3.2 Loading the Calibration Data _______________________ 31 Important Notes __________________________________ 2 10.3.3 Preparing the Calibration Process ___________________ 31 Symbols _______________________________________________ 2 10.3.4 Calibration Process _______________________________ 32 10.3.5 Calibration Result ________________________________ 32... - Page 4 Table of Contents Page 4 (40)
-
Page 5: Introduction
Types for Stationary Operation Introduction 1. Introduction This user information is intended for qualified personnel who is not or just a little familiar with the coordinate measurement technique but who has basic PC knowledge (windows-based programs and operat- ing systems). This user information is configured to the transfer of knowledge of system installation, sensor settings, changing the cam- era support and other hardware relevant information. -
Page 6: Types For Mobile Operation
• Stand for secure and steady hold of the ATOS sensor. Please only use stands which are released by GOM for this sen- sor type. Otherwise the stand with the sensor may fall over! • Calibration panel for high-precision calibration. -
Page 7: Sensor Types
Mainly, the sensors are constructed similarly and differ in the cameras and in the length of the camera support. Sensor Types and Technical Data System ATOS COMPACT SCAN 2M ATOS COMPACT SCAN 5M Rev. 01 Rev. 01 Measuring points per individual approx. 2 000 000 points approx. -
Page 8: Information About The Sensor
Sensor Types and Technical Data Information About the Sensor 4. Information About the Sensor Each configured ATOS sensor, in scan direction, has defined 3D areas within which a measuring object can be scanned. In the following, such a 3D area is called "measuring volume" (MV). The measuring volume determines the distance between sensor and measuring object and the set of lenses to be used. -
Page 9: Sensor Configurations
Sensor Configurations Information About the Sensor Sensor Configurations Standard calibration objects, Alternative calibration objects (CP = Panel, CC = Cross) [mm] [mm] [mm] [mm] [mm] [°] [mm] [mm] CP40/MV1000, CC30/MV1000x1000 1200 1200 x 900 x 900 0.481 1170 CP40/MV700, CC30/MV700 800 x 600 x 600 0.325 1170... -
Page 10: Definition Of Terms Referring To Atos Compact Scan 300 And 500
Definition of Terms Referring to Information About the Sensor ATOS COMPACT SCAN 300 and 500 Definition of Terms Referring to ATOS COMPACT SCAN 300 and 500 Camera position (approx. distance in mm) Camera lens right R Projector lens P Camera lens left L Camera angle Measuring distance (from ATOS label to the center of the measuring volume) -
Page 11: Lenses
Lenses Lenses 5. Lenses The lenses shown in this example may, in some cases, differ from those delivered in practice. Therefore, the statements made here have to be used correspondingly. All lenses are marked with L (left) or R (right) or P (projector). Left and right are defined from the sensor view in normal operating position. -
Page 12: Standard Control Elements And Led Indicators
Lenses Standard Control Elements and LED Indicators 6. Standard Control Elements and LED Indicators • Shows green light if the sensor is ready for operation. • Shows orange light while the operating system of the sensor starts. • Shows red light in the moment of being switched on or in case of a failure. You will find additional status information on the Web interface of the sensor, see 6.1. -
Page 13: Web Interface
Web Interface Standard Control Elements and LED Indicators Web Interface Help Sys- You reach the Web interface in the ATOS software under ► tem Analysis ► ATOS Sensor ► Analyze System ► Sensor Status ► Prerequisite: The sensor must be switched on and connected to the computer. The ATOS software is running but the sensor is not initialized ( Start screen of the Web interface Alternatively, you may also use the installed Firefox web browser. -
Page 14: Operation Of 3D Ball Head
Positioning of Sensor Operation of 3D Ball Head 7. Operation of 3D Ball Head Positioning of Sensor Always position the sensor using both of your hands (see figure be- low), one hand at one of the sensor handles and the other hand at the locking screw of the 3D ball head. -
Page 15: Mounting Direction Of Sensor On Locking Mechanism
Sensor Fixture Operation of 3D Ball Head Functional principle of the clamping mechanism You may adjust the clamping force any time with the knurled thumb screw 7.2.2 Mounting Direction of Sensor on Locking Mechanism Mounting direction of sensor Page 15 (40) -
Page 16: Fixture Of Sensor On Locking Mechanism
Sensor Fixture Operation of 3D Ball Head 7.2.3 Fixture of Sensor on Locking Mechanism Steps for fixing the sensor Loosen the locking lever , unlock the mechanism using the latch and move the sensor with the wedge plate to the stop. Clamp the wedge plate again with the help of the locking lever View of a correctly fixed sensor. -
Page 17: Sensor Setup
If you received the support for camera position 500 or SO later, the connection cables might not be long enough. In that case, contact the GOM support or your local distributor. Page 17 (40) -
Page 18: Initial Situation: Sensor In Position 300
Changing the Camera Positions (Step by Step) Sensor Setup All camera supports have factory-adjusted stops for the required camera angles. Never loosen these stops! 8.3.1 Initial Situation: Sensor in Position 300 ATOS COMPACT SCAN sensor without connection cable (front view) 8.3.2 Loosen Cameras from Support View from below... -
Page 19: Remove Camera Screws And Loosen Support
Changing the Camera Positions (Step by Step) Sensor Setup 8.3.3 Remove Camera Screws and Loosen Support View from below 8.3.4 Remove Camera Support 300 View from below Page 19 (40) -
Page 20: Insert Camera Support So
Changing the Camera Positions (Step by Step) Sensor Setup 8.3.5 Insert Camera Support SO Sensor view from below, SO camera support view from top 8.3.6 Fix Camera Support SO View from below Page 20 (40) -
Page 21: Insert Camera Screws
Changing the Camera Positions (Step by Step) Sensor Setup 8.3.7 Insert Camera Screws View from below 8.3.8 Fix Cameras Top view All camera supports have factory-adjusted stops for the re- quired camera angles. Never loosen these stops! Set the camera on the centering pins and stops and fix the cameras lightly at first. -
Page 22: Changed Sensor With Camera Support So
Changing the Camera Positions (Step by Step) Sensor Setup While holding the camera turned against the stop , fix the corre- sponding camera screws with a torque of max. 1.2 Nm. Max. 1.2 Nm Max. 1.2 Nm View from below. Rotation direction of the cameras (red arrow) when tightening the camera screws with max. -
Page 23: Set Up Sensor With Atos V7 Software
Set Up Sensor with ATOS V7 Software Sensor Setup Set Up Sensor with ATOS V7 Software You adjust the sensor using the workspace The software automatically identifies the connected sensor type. Using the icon Set Up Sensor, you may register in the software the requested measuring volume and the camera distances used, see 4.2. -
Page 24: Camera Angle
Set Up Sensor with ATOS V7 Software Sensor Setup For the setup work, you need special setup sheets. Setup-Sheet A is required for focus adjustments. Setup-Sheet B is required for aperture adjustments. Software dialogs help you to adjust the sensor: •... -
Page 25: Adjust The Laser Pointers
Set Up Sensor with ATOS V7 Software Sensor Setup 8.4.2 Adjust the Laser Pointers In addition to the target, the ATOS COMPACT SCAN sensors have two laser pointers (right and left) to determine the center of the meas- uring volume. The laser pointers always have to be readjusted if the measuring distance (see Sensor Configurations 4.1) changed. -
Page 26: Wireless Remote Control
Preparing the Remote Control Wireless Remote Control 9. Wireless Remote Control Your ATOS system will be delivered with a wireless remote control. Remote Control with Accessories 1 x wireless remote control. The remote control allows for measure- ments without using the mouse or key- board. -
Page 27: Explanation Of The Function Keys
Explanation of the Function Keys Wireless Remote Control Explanation of the Function Keys Key, Key Press: Function: Remote control on/off Snap images during calibration and start function Measure. Control the button functions in error dialogs according to the display. Control the button functions in error dialogs according to the display. Maximize or minimize the live view. -
Page 28: Sensor Calibration
How to Handle Calibration Objects Sensor Calibration 10. Sensor Calibration Calibration is a measuring process during which the measuring sys- tem with the help of calibration objects is adjusted such that the di- mensional consistency of the measuring system is ensured. During this process, the software determines geometrical parameters, for ex- ample position and orientation of each camera, based on the recorded camera images. -
Page 29: Calibration Conditions
Calibration Conditions Sensor Calibration 10.2 Calibration Conditions 10.2.1 When is Calibration Required? • Before starting measurements for the first time, the respective ATOS measuring volume needs to be calibrated. • Also, if the adjustment of the camera lenses or the position of the cameras with respect to each other is changed (e.g. -
Page 30: Handling Instructions For Calibration Panel Cp 40
Calibration Using Calibration Panel CP 40 Sensor Calibration The CP40 calibration objects consist of black points on a white back- ground. The larger points in the middle inform the ATOS software about the calibration panel type, e.g. calibration object CP 40 for measuring volume MV300. -
Page 31: Loading The Calibration Data
Calibration Using Calibration Panel CP 40 Sensor Calibration 10.3.2 Loading the Calibration Data When using a measuring volume for the first time, you need to load the corresponding calibration data into the ATOS software and cali- brate the sensor. If you purchased the measuring volume together with the complete ATOS system, the calibration data is already load- Insert the CD belonging to the calibration object into the computer and start the ATOS software. -
Page 32: Calibration Process
Calibration Using Calibration Panel CP 40 Sensor Calibration 10.3.4 Calibration Process After that the software will guide you through the individual calibration steps. In the first step, you are asked to place the sensor and the cali- bration object in the center of the measuring volume. Enable Automatic exposure time. -
Page 33: Calibration Using Calibration Cross Cc 30
Calibration Using Calibration Cross CC 30 Sensor Calibration 10.4 Calibration Using Calibration Cross CC 30 This section describes the calibration process using a calibration cross. The calibration with a calibration cross is necessary for ATOS COMPACT SCAN systems for mobile operation only! Due to the size of the cross you can only calibrate the sensor in a horizontal position. -
Page 34: Handling Instructions For Calibration Cross Cc 30
Calibration Using Calibration Cross CC 30 Sensor Calibration The calibration cross also contains the information of two scale bars (one on each cross axis). The scale bar information is a specified dis- tance between defined points. For each calibration cross there is the calibration certificate with the calibration data. -
Page 35: Preparing The Calibration Process
Calibration Using Calibration Cross CC 30 Sensor Calibration 10.4.3 Preparing the Calibration Process When you want to calibrate a measuring volume, the sensor is already set up (see section 8) and the ATOS software knows which measuring volume and which camera position you want to use. Based on this in- formation, the software determines the required focal lengths of the lenses. -
Page 36: Calibration Result
Calibration Using Calibration Cross CC 30 Sensor Calibration Please follow the instructions until the end of the calibration process. In order to capture the entire measuring volume, you need to move the sensor during calibration. For this, the following general rule ap- plies: You should move the sensor by 1/3 of the measuring volume height closer to the object and by 1/2 of the measuring volume height further away –... -
Page 37: Checking And Cleaning The Air Filter
Removing the Air Filter Checking and Cleaning the Air Filter 11. Checking and Cleaning the Air Filter Check the air filter of the sensor in regular intervals. We recommend cleaning the filter every 3 months or more often. You thus avoid a shutdown of the sensor due to overtemperature during operation. -
Page 38: Cabling, Network Port
Cabling Cabling, Network Port 12. Cabling, Network Port The complete data is transferred from the ATOS COMPACT SCAN sensor to the PC/Laptop (camera parameters, control) via a common GigE data link. 12.1 Cabling 12.1.1 Cabling with Laptop Page 38 (40) -
Page 39: Cabling With 19" Pc
Cabling, Network Port 12.1.2 Cabling with 19" PC Page 39 (40) -
Page 40: Network Port
GigE cards for the camera data links must not be changed. Please read more about that in the English language Knowledge base of the GOM support web site. (http://support.gom.com). Enter the search term windows 7 pcs in a network. Page 40 (40)
Need help?
Do you have a question about the ATOS COMPACT SCAN 5M and is the answer not in the manual?
Questions and answers