Dormakaba CS 80 MAGNEO Installation And Troubleshooting Manual
Automatic sliding door operator
Hide thumbs
Also See for CS 80 MAGNEO:
- Mounting and operation manual (32 pages) ,
- Owner's manual (12 pages)

Subscribe to Our Youtube Channel
Related Manuals for Dormakaba CS 80 MAGNEO


Summary of Contents for Dormakaba CS 80 MAGNEO
- Page 1 CS 80 MAGNEO Automatic sliding door operator Installation and Troubleshooting Manual DL3316-020 – 10-2022 | EN |...
-
Page 2: Table Of Contents
ON-WALL Operator Package MAGNEO configurations Appendix B – MANET recessed pull grips Technical data Safety-related information for the MAGNEO ON-WALL assembly with mounting and use of dormakaba glass MANET fittings MAGNEO ON-WALL assembly with MANET recessed pull grip 0 50 mm WOOD MANET recessed pull grip 0 60 mm Appendix C –... -
Page 3: Technical Data And Magneo Configurations
1.1.5 Cover page illustration. communications. Operation of this equipment in a Cover page documents the CS 80 MAGNEO residential area is likely to cause harmful interference in ON-WALL operator configurations. which case the user will be required to correct the interference at his/her expense. -
Page 4: Magneo On-Wall Assembly With Manet
Dark bronze DS3300-020 MAGNEO ON-WALL w/ MANET 1000 ML Mill DS3300-03A MAGNEO ON-WALL w/ MANET 1125 CL Clear DS3300-03B MAGNEO ON-WALL w/ MANET 1125 DB Dark bronze DS3300-030 MAGNEO ON-WALL w/ MANET 1125 ML Mill CS 80 MAGNEO DL3316-010 10-2022... - Page 5 DE3291-01X Extrusion, cover, 62 mm, 2086 DE3291-01X Extrusion, cover, 62 mm, 1836 DD4613-030 Logo plate, ESA slide -01X -02X -03X Part / Assembly Description TIPS AND RECOMMENDATIONS DK_kits. Reference Para. 1.14 for kit assembly overviews. CS 80 MAGNEO DL3316-010 10-2022...
-
Page 6: Magneo On-Wall Assembly With Wood
Dark bronze DS3300-050 MAGNEO ON-WALL w/ Wood 1000 ML Mill DS3300-06A MAGNEO ON-WALL w/ Wood 1125 CL Clear DS3300-06B MAGNEO ON-WALL w/ Wood 1125 DB Dark bronze DS3300-060 MAGNEO ON-WALL w/ Wood 1125 ML Mill CS 80 MAGNEO DL3316-010 10-2022... - Page 7 DE3291-01X Extrusion, cover, 75 mm, 2086 DE3291-01X Extrusion, cover, 75 mm, 1836 DD4613-030 Logo plate, ESA slide -04X -05X -06X Part / Assembly Description TIPS AND RECOMMENDATIONS DK_kits. Reference Para. 1.14 for kit assembly overviews. CS 80 MAGNEO DL3316-010 10-2022...
-
Page 8: Magneo On-Wall Assembly With Clamp
Dark bronze DS3300-080 MAGNEO ON-WALL w/ Clamp 1000 ML Mill DS3300-09A MAGNEO ON-WALL w/ Clamp 1125 CL Clear DS3300-09B MAGNEO ON-WALL w/ Clamp 1125 DB Dark bronze DS3300-090 MAGNEO ON-WALL w/ Clamp 1125 ML Mill CS 80 MAGNEO DL3316-010 10-2022... - Page 9 DE3291-01X Extrusion, cover, 75 mm, 2086 DE3291-01X Extrusion, cover, 75 mm, 1836 DD4613-030 Logo plate, ESA slide -07X -08X -09X Part / Assembly Description TIPS AND RECOMMENDATIONS DK_kits. Reference Para. 1.14 for kit assembly overviews. CS 80 MAGNEO DL3316-010 10-2022...
-
Page 10: Magneo On-Glass Assembly With Manet
Dark bronze DS3301-020 MAGNEO ON-GLASS w/ MANET 1000 ML Mill DS3301-03A MAGNEO ON-GLASS w/ MANET 1125 CL Clear DS3301-03B MAGNEO ON-GLASS w/ MANET 1125 DB Dark bronze DS3301-030 MAGNEO ON-GLASS w/ MANET 1125 ML Mill CS 80 MAGNEO DL3316-010 10-2022... - Page 11 DE3291-01X Extrusion, cover, 62 mm, 2086 DE3291-01X Extrusion, cover, 62 mm, 1836 DD4613-030 Logo plate, ESA slide -01X -02X -03X Part / Assembly Description TIPS AND RECOMMENDATIONS DK_kits. Reference Para. 1.14 for kit assembly overviews. CS 80 MAGNEO DL3316-010 10-2022...
-
Page 12: Magneo On-Glass Assembly With Wood
Dark bronze DS3301-050 MAGNEO ON-GLASS w/ Wood 1000 ML Mill DS3301-06A MAGNEO ON-GLASS w/ Wood 1125 CL Clear DS3301-06B MAGNEO ON-GLASS w/ Wood 1125 DB Dark bronze DS3301-060 MAGNEO ON-GLASS w/ Wood 1125 ML Mill CS 80 MAGNEO DL3316-010 10-2022... - Page 13 DE3291-01X Extrusion, cover, 62 mm, 2086 DE3291-01X Extrusion, cover, 62 mm, 1836 DD4613-030 Logo plate, ESA slide -04X -05X -06X Part / Assembly Description TIPS AND RECOMMENDATIONS DK_kits. Reference Para. 1.14 for kit assembly overviews. CS 80 MAGNEO DL3316-010 10-2022...
-
Page 14: Magneo On-Glass Assembly With Clamp
Dark bronze DS3301-080 MAGNEO ON-GLASS w/ Clamp 1000 ML Mill DS3301-09A MAGNEO ON-GLASS w/ Clamp 1125 CL Clear DS3301-09B MAGNEO ON-GLASS w/ Clamp 1125 DB Dark bronze DS3301-090 MAGNEO ON-GLASS w/ Clamp 1125 ML Mill CS 80 MAGNEO DL3316-010 10-2022... - Page 15 DE3291-01X Extrusion, cover, 75 mm, 2086 DE3291-01X Extrusion, cover, 75 mm, 1836 DD4613-030 Logo plate, ESA slide -07X -08X -09X Part / Assembly Description TIPS AND RECOMMENDATIONS DK_kits. Reference Para. 1.14 for kit assembly overviews. CS 80 MAGNEO DL3316-010 10-2022...
-
Page 16: Magneo In-Wall Assembly With Manet
Dark bronze DS3302-020 MAGNEO IN-WALL w/ MANET 1000 ML Mill DS3302-03A MAGNEO IN-WALL w/ MANET 1125 CL Clear DS3302-03B MAGNEO IN-WALL w/ MANET 1125 DB Dark bronze DS3302-030 MAGNEO IN-WALL w/ MANET 1125 ML Mill CS 80 MAGNEO DL3316-010 10-2022... - Page 17 In-wall mounting kit, MAGNEO DK3293-01G MANET kit, MAGNEO DK0109-001 Kit, Label, MAGNEO DD4613-030 Logo plate, ESA slide -01X -02X -03X Part / Assembly Description TIPS AND RECOMMENDATIONS DK_kits. Reference Para. 1.14 for kit assembly overviews. CS 80 MAGNEO DL3316-010 10-2022...
-
Page 18: Magneo In-Wall Assembly With Wood
Dark bronze DS3302-050 MAGNEO IN-WALL w/ WOOD 1000 ML Mill DS3302-06A MAGNEO IN-WALL w/ WOOD 1125 CL Clear DS3302-06B MAGNEO IN-WALL w/ WOOD 1125 DB Dark bronze DS3302-060 MAGNEO IN-WALL w/ WOOD 1125 ML Mill CS 80 MAGNEO DL3316-010 10-2022... - Page 19 In-wall mounting kit, MAGNEO DK3293-01G MANET kit, MAGNEO DK0109-001 Kit, Label, MAGNEO DD4613-030 Logo plate, ESA slide -04X -05X -06X Part / Assembly Description TIPS AND RECOMMENDATIONS DK_kits. Reference Para. 1.14 for kit assembly overviews. CS 80 MAGNEO DL3316-010 10-2022...
-
Page 20: Magneo In-Wall Assembly With Clamp
Dark bronze DS3302-080 MAGNEO IN-WALL w/ CLAMP 1000 ML Mill DS3302-09A MAGNEO IN-WALL w/ CLAMP 1125 CL Clear DS3302-09B MAGNEO IN-WALL w/ CLAMP 1125 DB Dark bronze DS3302-090 MAGNEO IN-WALL w/ CLAMP 1125 ML Mill CS 80 MAGNEO DL3316-010 10-2022... - Page 21 Clamp rail kit - 1000 mm DK3294-01_ Clamp rail kit - 875 mm DK0109-001 Kit, Label, MAGNEO DD4613-030 Logo plate, ESA slide -07X -08X -09X Part / Assembly Description TIPS AND RECOMMENDATIONS DK_kits. Reference Para. 1.14 for kit assembly overviews. CS 80 MAGNEO DL3316-010 10-2022...
-
Page 22: Magneo On-Ceiling Assembly With Manet
Dark bronze DS3303-020 MAGNEO ON-CEILING w/ MANET 1000 ML Mill DS3303-03A MAGNEO ON-CEILING w/ MANET 1125 CL Clear DS3303-03B MAGNEO ON-CEILING w/ MANET 1125 DB Dark bronze DS3303-030 MAGNEO ON-CEILING w/ MANET 1125 ML Mill CS 80 MAGNEO DL3316-010 10-2022... - Page 23 DE3292-01X Extrusion, cover, 75 mm, 2086 DE3292-01X Extrusion, cover, 75 mm, 1836 DD4613-030 Logo plate, ESA slide -01X -02X -03X Part / Assembly Description TIPS AND RECOMMENDATIONS DK_kits. Reference Para. 1.14 for kit assembly overviews. CS 80 MAGNEO DL3316-010 10-2022...
-
Page 24: Magneo On-Ceiling Assembly With Wood
Dark bronze DS3303-050 MAGNEO ON-CEILING w/ WOOD 1000 ML Mill DS3303-06A MAGNEO ON-CEILING w/ WOOD 1125 CL Clear DS3303-06B MAGNEO ON-CEILING w/ WOOD 1125 DB Dark bronze DS3303-060 MAGNEO ON-CEILING w/ WOOD 1125 ML Mill CS 80 MAGNEO DL3316-010 10-2022... - Page 25 DE3292-01X Extrusion, cover, 75 mm, 2086 DE3292-01X Extrusion, cover, 75 mm, 1836 DD4613-030 Logo plate, ESA slide -01X -02X -03X Part / Assembly Description TIPS AND RECOMMENDATIONS DK_kits. Reference Para. 1.14 for kit assembly overviews. CS 80 MAGNEO DL3316-010 10-2022...
-
Page 26: Magneo On-Ceiling Assembly With Clamp
Dark bronze DS3303-080 MAGNEO ON-CEILING w/ CLAMP 1000 ML Mill DS3303-09A MAGNEO ON-CEILING w/ CLAMP 1125 CL Clear DS3303-09B MAGNEO ON-CEILING w/ CLAMP 1125 DB Dark bronze DS3303-090 MAGNEO ON-CEILING w/ CLAMP 1125 ML Mill CS 80 MAGNEO DL3316-010 10-2022... - Page 27 DE3292-01X Extrusion, cover, 75 mm, 2086 DE3292-01X Extrusion, cover, 75 mm, 1836 DD4613-030 Logo plate, ESA slide -07X -08X -09X Part / Assembly Description TIPS AND RECOMMENDATIONS DK_kits. Reference Para. 1.14 for kit assembly overviews. CS 80 MAGNEO DL3316-010 10-2022...
-
Page 28: Magneo Kits
1.10 1.11 1.13 Fig. 1.14.3 DK3296-010 MAGNEO fixing set, In-wall mounting Ref.: Para. Fig. 1.14.7 DK3303-01_ MAGNEO solid door floor guide kit 1.10 Ref.: Para. 1.12 Fig. 1.14.4 DK3297-0x0 MAGNEO ON-WALL mount kit Ref.: Para. CS 80 MAGNEO DL3316-010 10-2022... - Page 29 Ref.: Fig. 1.14.15 DK3311-0x0 MAGNEO on-glass Para. mount kit Ref.: Para. Fig. 1.14.16 DK3361-010 MANET thru-hole fitting Fig. 1.14.13 DK3308-0xG MAGNEO vertical pull handle kit Fig. 1.14.17 DK3415-010 MANET floor guide Ref.: Para. 1.10 1.11 CS 80 MAGNEO DL3316-010 10-2022...
-
Page 30: General Information, Required Tools
The owner must also be presented • Long nosed pliers for wire connections to terminals. with the CS 80 MAGNEO Owner's Manual and to carefully explain how to perform the daily safety check • Adequate screws and wall anchors for the list. -
Page 31: Important Installation Instructions
If there are any questions about any items contained in these instructions, call the local dormakaba distributor for assistance. 10. Save these instructions for future reference. -
Page 32: Safety Instructions
4.4 Limitation of liability. ANSI/BHMA A156.10, A156.19 and A156.38 Low Energy Standards. The CS 80 MAGNEO must only be used according to its specified standard operation. WARNING dormakaba will not accept any liability for damages resulting from unauthorized modifications, unsafe or Danger spots at closing edges. - Page 33 CS 80 MAGNEO. cable or unplug it by mistake. Please keep this documentation for later reference. • Do not operate the CS 80 MAGNEO when the power cord is damaged. WARNING • Always pull at the plug and never at the cable when Using control elements, making adjustments unplugging the power supply.
-
Page 34: Functional Characteristics
When the system is delivered, the CS 80 MAGNEO is • When the installer connects the system to the power adjusted to AUTOMATIC mode. - Page 35 The door will stop immediately and reverse when the sensor detects an obstacle during the closing cycle. Door in closed position. This function is not activated while the door is in the closed position (then the sensor is deactivated). CS 80 MAGNEO DL3316-010 10-2022...
-
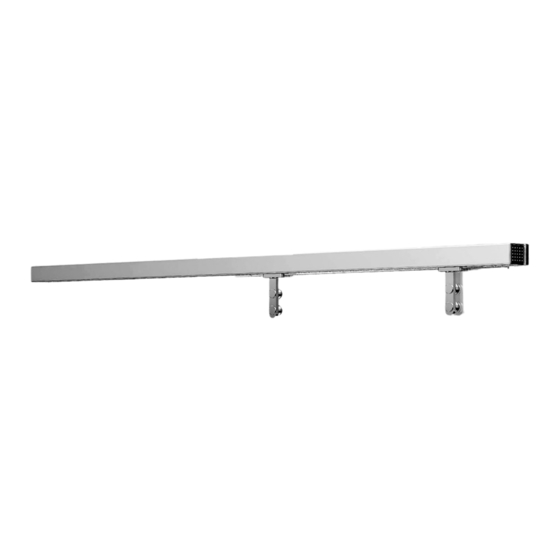
Page 36: System Overview
Do not modify the plug in any way. Driving direction Open Fig. 6.2 CS 80 MAGNEO control unit Table 6.2 CS 80 MAGNEO control unit Part / Description Assembly DIP switch LED indicator (green, yellow, red) -
Page 37: Before Mounting
(Max. 14" distance). Use only copper conductors for permanent connection, or use dormakaba optional power Fig. 7.1 Optional power cord receptacle installation. cord (refer to Para. 8.1.9 and 9.1.9 for Maximum 14”... - Page 38 1. Loosen screw in cover of power supply housing. 2. Remove cover (on the side where the connections are located). TIPS AND RECOMMENDATIONS Keep the cover and screw in a safe place. They will be reinstalled later in the installation. CS 80 MAGNEO DL3316-010 10-2022...
- Page 39 Control unit cover closing, securing end stop stop (Fig 7.7). 1. Close cover to the control unit. 2. Move the end stop to the end of the channel. 3. Tighten end stop screws. CAUTION The end stop must overlap. CS 80 MAGNEO DL3316-010 10-2022...
-
Page 40: Installation Instructions For On-Wall Mounting
“Closed” side Glass width Main closing edge Drill hole for recessed door grip (optional) Secondary closing edge Main closing edge Min. 2.76" Ø0.1.97” [Ø50 mm] hole CSink Ø2.05” [Ø52 mm] x 90⁰ Min 70 mm] CS 80 MAGNEO DL3316-010 10-2022... - Page 41 When using a glass clamping rail: of the system. X = door panel height + 4 1/2" [114 mm]. • When using dormakaba MANET single CAUTION point fixings: The distance between the bottom edge of the X = door panel height + 2 29/32" [74 mm].
- Page 42 Fig. 8.1.8 Shimming mounting bracket 1. In case of uneven walls the bracket must be shimmed so that it does not bend. 2. Use the enclosed shims (in different sizes) for this purpose (Fig. 8.1.8). CS 80 MAGNEO DL3316-010 10-2022...
- Page 43 • Door panel height + 3.1" [78 mm]. • When using dormakaba MANET single point attachments: Door panel height + 2.9" [74 mm]. 3. Align shim plate so that it is level and mark the drill holes.
- Page 44 (PE). WARNING The grounding wire must be connected to the PE terminal. 8.1.13 Connection of external accessories. 1. Connect all external accessories except for safety sensors. Refer to cable channel instructions. CS 80 MAGNEO DL3316-010 10-2022...
- Page 45 8.1.16 Door panel to wall maximum distance. Fig. 8.1.18 Door panel to wall minimum distance NOTICE The distance between the door panel and wall must not exceed 5/16" [7.94 mm]. .3125" max. [8 mm max.] CS 80 MAGNEO DL3316-010 10-2022...
- Page 46 The end stop may only be moved to the inside by a certain maximum dimension Y: 34.4" [875 mm] operator =>7.9" [200 mm]. 39.4" [1000 mm] operator =>9.5" [250 mm]. 48.2" [1125 mm] operator =>11.8" [300 mm]. CS 80 MAGNEO DL3316-010 10-2022...
- Page 47 48.2" [1125 mm] operator =>11.8" [300 mm]. 8.1.21 Attach dormakaba logo, install end caps. Fig. 8.1.22 Logo, end cap and power plug installation 1. Place dormakaba logo on cover. Logo is adhesive- backed. 2. Insert end caps into cover. TIPS AND RECOMMENDATIONS...
-
Page 48: Installation Instructions - In-Wall Mounting
9 Installation instructions – in-wall mounting Installation instructions Fig. 9.1.1 Minimum recess, in-wall mounting 9.1.1 Minimum recess for CS 80 MAGNEO operator. 2" [50 mm] The CS80 MAGNEO sliding door operator is also suitable for an "invisible" in-wall mounting. For this type of mounting, a recess with a minimum width of 2"... - Page 49 (Para. 9.1.4). CAUTION Never leave operator on mounting bracket without holding it in position, otherwise the bracket would be deformed. 2. Align operator so that it is parallel to wall. CS 80 MAGNEO DL3316-010 10-2022...
- Page 50 TIPS AND RECOMMENDATIONS • All connection cables must be routed to within close proximity to the operator. • Holes for cables must be adequately sized and must not have sharp edges. CS 80 MAGNEO DL3316-010 10-2022...
- Page 51 1. Close cover of control unit housing. 2. Secure the cover with control unit housing cover screw. 3. Move end stop to end of channel and tighten end stop screws.(Ref. Chapter 7, Fig. 7.7). CS 80 MAGNEO DL3316-010 10-2022...
- Page 52 1. Using the adjustment nuts, align door panel so that it is level. NOTICE The distance between the bottom edge of the door panel and the floor should be 1/4" [6.35 mm]. The distance must not exceed 5/16" [7.94 mm] CS 80 MAGNEO DL3316-010 10-2022...
- Page 53 5/16" [7.94 mm]. 9.1.20 Connection of external accessories. 1. Connect all external accessories except for safety sensors. Refer to cable channel instructions. 9.1.21 Continue with system commissioning. Reference Chapter 13. .3125" max. [8 mm max.] CS 80 MAGNEO DL3316-010 10-2022...
-
Page 54: Connection Diagrams
27 Vdc, max. 700mA Safety sensor for main closing edge Remove jumper before sensor is installed Safety sensor test +27 V DC External activator (e.g. pushbutton/radar motion detector) +27 V DC Internal activator (e.g. pushbutton/radar motion detector) CS 80 MAGNEO DL3316-010 10-2022... -
Page 55: Cable Channel
Cables for external accessories (sensors, pushbuttons, Fig. 11.1. Wire routings in cable channel etc.) must be routed inside the cable channel as shown in Fig. 11.1. 2 " 0 .2 5 0 " 5 0 m m 6 m m CS 80 MAGNEO DL3316-010 10-2022... -
Page 56: Connection Of Closing Edge Protection
Set DIP switch 1 to ON and DIP switch 3 to OFF. Sensors connected to both main and secondary closing edges: • Set DIP switch 1 to ON and DIP switches 2 and 3 to OFF. CS 80 MAGNEO DL3316-010 10-2022... -
Page 57: Commissioning
As there are higher forces in Full-Energy • The LED is ON green following the learning cycle. mode, the closing edges must be protected The CS 80 MAGNEO is now ready for operation and by safety sensors. operates in the Low-Energy mode. •... - Page 58 Installation and Troubleshooting Manual Chapter 13 Fig. 13.1.2 CS 80 MAGNEO control unit Table 13.1.2 CS 80 MAGNEO control unit Part / Description Assembly DIP switch LED indicator (green, yellow, red) Fig. 13.1.3 DIP switch Potentiometer, hold-open time Terminals, connections for external...
-
Page 59: Operating Instructions
14 Operating instructions 14.1 Opening the door in AUTOMATIC function. 14.4 Express function. When the system is delivered ,the CS 80 MAGNEO is The door can be moved manually into its driving adjusted to AUTOMATIC function. direction without extra resistance. - Page 60 In case the LED light indicator illuminates for one second (yellow light), the system has performed more than 200,000 cycles. dormakaba service should be contacted to have the system checked. CS 80 MAGNEO DL3316-010 10-2022...
-
Page 61: Daily Safety Checks
NOTICE checklist is Para. 15.1 has to be performed after the first commissioning of the system by trained staff Power to the CS 80 MAGNEO must be turned (staff trained by dormakaba). OFF and secured against unintended and unauthorized power on before performing •... -
Page 62: Troubleshooting
Switch power off and on. The red LED light indicator Defective control unit. illuminates permanently. Replace operator. Switch power off and on. The red LED light indicator blinks Defective control unit. twice at certain intervals. Replace operator. CS 80 MAGNEO DL3316-010 10-2022... - Page 63 Start learning cycle (Chapter 13). Readjust door panel connection and The door panel vibrates when the floor guide if required. Turn the The guide mechanism is under tension. moving. nuts several times in order to fix the door panels. CS 80 MAGNEO DL3316-010 10-2022...
-
Page 64: Appendix A - Magneo Single Manet On-Wall Operator Package
B. End caps - painted silver. maximum width requirements, refer to Local, State, C. MANET panel hanging hardware - stainless steel. National or AHJ Building Code. Typical package options. Contact dormakaba Architectural Services for A. Concealed lock. (DK3588-010) additional information: B. Electronic bolt kit. - Page 65 36" [914] CLEAR OPENING WIDTH SHOWN DOOR PANEL WIDTH = CLEAR OPENING WIDTH + 5" [127] 2 1/2" [64] TYP. DOOR PANEL OVERLAP BOTTOM GUIDE FINISHED FLOOR FRONT ELEVATION LEFT HAND SLIDE OPEN DOOR SHOWN CS 80 MAGNEO DL3316-010 10-2022...
- Page 66 1 1/4" [26] [32] TYP. TYP. 5/16" ± 3/32" [3] ADJUSTMENT MAX. RECESSED DOOR GRIP (OPTIONAL) 2 1/16" [52] BOTTOM GUIDE DOOR PANEL DETAIL 3/8" [10] - 1/2" [13] 3/16" 1/4" SOLID TEMPERED GLASS SECTION 1 CS 80 MAGNEO DL3316-010 10-2022...
- Page 67 (REFER TO CHART) Ø 1 1/4" [32] Ø 1" [26] COUNTERSINK TYP. 2 15/32" TYP. [63] 2 5/32" [55] 5" [127] SHOWN 2 3/4" [70] MIN. Ø 2 1/16" [52] RECESSED DOOR GRIP (OPTIONAL) 41 1/8" [1045] CS 80 MAGNEO DL3316-010 10-2022...
- Page 68 (REFER TO CHART) Ø 1 1/4" [32] Ø 1" [26] COUNTERSINK TYP. 2 15/32" TYP. [63] 2 5/32" [55] 5" [127] SHOWN 2 3/4" [70] MIN. Ø 2 1/16" [52] RECESSED DOOR GRIP (OPTIONAL) 41 1/8" [1045] CS 80 MAGNEO DL3316-010 10-2022...
- Page 69 1/2" GLASS = MAX. 27 ft² 88.58" [2250] 32.48" [825] 39.33 [999] Recessed door grip. Fig. A.7 Recessed door grip Ø 2 1/2" Ø 1 11/16" [64] [43] Ø 1 15/16" [49] 1/8" RECESSED DOOR GRIP CS 80 MAGNEO DL3316-010 10-2022...
-
Page 70: Appendix B - Manet Recessed Pull Grips
Installation and Troubleshooting Manual Appendix B Appendix B – MANET recessed pull grips B.1 Safety-related information for the mounting and use of dormakaba glass fittings Follow these instructions in addition to the Installation B.1.3 Maintenance and Maintenance Instructions in order to avoid damage 1. - Page 71 CAUTION Do not use thinners! Fig. B.2.1 Sliding door and wall Preassembled 1 3/4” Fig. B.2.3 Preparation of the recessed pull grip Sliding door Wall Fig. B.2.4. Recessed pull grip installation CS 80 MAGNEO DL3316-010 10-2022...
- Page 72 Fig. B.3.1 Glass clamping area Setscrew for 8 mm glass is enclosed. Fig. B.3.3 Preparation of recessed pull grip 1.1 1.1 With 8 mm of glass, install the setscrew! Fig. B.3.4 Recessed pull grip installation 2.2 Tighten by hand. CS 80 MAGNEO DL3316-010 10-2022...
- Page 73 1. Carefully pull out carrier until the attachment screws of the "stop" are visible. 2. Remove end stop screws; remove end stop. Reference Para. C2.2 through C2.9 for step by step instructions. CS 80 MAGNEO DL3316-010 10-2022...
- Page 74 Fig. C2.4 Plastic bracket with lock bolt 1. Insert plastic bracket with lock bolt. 2. Use the 4 supplied countersunk holes to secure the bracket to the carrier. 3. Push carrier back into track rail. CS 80 MAGNEO DL3316-010 10-2022...
- Page 75 Locking device cable +27 V DC Fig. C2.5a Locking cable Fig. C2.5b Locking cable routing 96 95 1 Fig. C2.5c Locking cable routing Fig. C2.5d Locking cable terminal installation 96 95 1 96 95 1 CS 80 MAGNEO DL3316-010 10-2022...
- Page 76 1. Push carrier back into position. 2. Screw down with the supplied special key. Fig. C2.9 Secure connection cable C2.10 Secure connection cable to track rail. 1. Secure connection cable to track rail. 2. Fix in position. CS 80 MAGNEO DL3316-010 10-2022...
-
Page 77: Commissioning
Fig. C3.1 Control unit terminal strip and DIP switch ON OFF CAUTION Connection diagram (Fig. C3.2) for use with qualified staff only! Fig. C.3.2 CS 80 MAGNEO Connection diagram for locking device and actuator Connector Power fail locking Locking cable AUTOMATIC... -
Page 78: Appendix D - Additional Set For Safety
Fig. D.2 End caps removal 1. Use flat blade screwdriver to unsnap cover from operator. 2. Remove cover. Remove cover. Fig. D.3 Cover removal 1. Use flat blade screwdriver to unsnap cover from operator. 2. Remove cover. CS 80 MAGNEO DL3316-010 10-2022... - Page 79 ArtMotion Top side Lower side Sensor wiring routing. Cover with sensor installation. Reference sensor manufacturer wiring documentation Fig. D.6 Sensor and cover installation and Fig. C3.2 for wiring. Fig. D.5 Sensor wiring routing on cover CS 80 MAGNEO DL3316-010 10-2022...
- Page 80 ACTIV8 ONE ON ArtMotion Sensor wiring routing. Fig. D.8 Sensor wiring routing Cover end cap installation. Fig. D.9 Sensor wiring 3/8” x 3/4” 10 x 20 mm If necessary, notch end cap in area of cable route CS 80 MAGNEO DL3316-010 10-2022...
- Page 81 Refer to ACTIV8 installation instructions for operation instructions. Fig. D.11 ACTIV8 sensor wiring ACTIV8 ONE ON Brown Green Main closing edge Pink Green Blue 24 VDC Gray Brown Yellow Opening pulse White Test input Blue Pink Yellow Gray White CS 80 MAGNEO DL3316-010 10-2022...
- Page 82 D.12 Art Motion sensor wiring. Refer to Art Motion installations instructions for operation instructions. Fig. D.12 Art Motion sensor wiring External activator +24VDC White Brown Green Opening pulse Yellow Internal activator White +24VDC Brown Green Opening pulse Yellow CS 80 MAGNEO DL3316-010 10-2022...
- Page 83 Installation and Troubleshooting Manual Appendix D D.13 ACTIV8 sensor wiring. Refer to ACTIV8 installations instructions for operation instructions. Fig. D.13 ACTIV8 sensor wiring CS 80 MAGNEO DL3316-010 10-2022...
- Page 84 1. Use box cutter to cutout end cap switch cover for Mode switch. CAUTION Use caution when using box cutter! E.4 Install Mode switch in end cap cutout. Fig. E.5 Install Mode switch into end cap cutout CS 80 MAGNEO DL3316-010 10-2022...
- Page 85 E.5 Install and terminate program switch wiring. 1. Remove jumper between terminals 31 and 3. Discard jumper. 2. Install end cap into CS 80 MAGNEO. As end cap is installed, route program switch wiring to terminal strip. 3. Strip 1/4" [6 mm] of insulation from ends of wires.
- Page 86 USA, Inc. 1 Dorma Drive, Drawer AC Reamstown, PA 17567 T: 717-336-3881 www.dormakaba.us F: 717-336-2106...
Need help?
Do you have a question about the CS 80 MAGNEO and is the answer not in the manual?
Questions and answers