Table of Contents
Advertisement
Quick Links
Advertisement
Table of Contents

Related Manuals for thomann Harley Benton TE-LH


Summary of Contents for thomann Harley Benton TE-LH
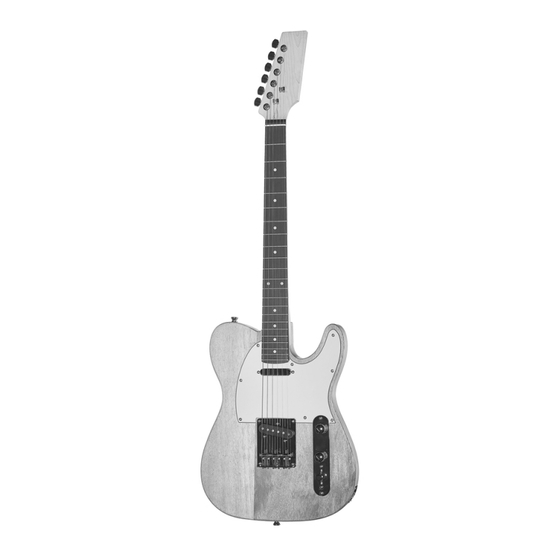
- Page 1 Electric Guitar Kit T-Style, TE-LH Electric Guitar Kit...
- Page 2 Thomann GmbH Hans-Thomann-Straße 1 96138 Burgebrach Germany Telephone: +49 (0) 9546 9223-0 Internet: www.thomann.de 13.09.2022, ID: 115991, 542097 (V3)
-
Page 3: Table Of Contents
Table of contents Table of contents Safety instructions......................... 5 Scope of delivery........................6 Assembly instructions......................7 3.1 Cutting out headstock....................7 3.2 Painting body and neck....................7 3.3 Mounting the machine head..................8 3.4 Mounting the string retainers.................. 10 3.5 Mounting the guitar neck..................10 3.6 Wiring the potentiometers, pickups and switches........... - Page 4 Electric Guitar Kit T-Style, TE-LH Electric Guitar Kit...
-
Page 5: Safety Instructions
Safety instructions Safety instructions DANGER! Danger for children Ensure that plastic bags, packaging, etc. are properly disposed of and are not in the reach of babies and young children. Choking hazard! Ensure that children do not detach any small parts (e.g. knobs or the like) from the product. -
Page 6: Scope Of Delivery
Scope of delivery Scope of delivery Thank you for buying this guitar kit. All the wood, hardware and electrical compo‐ nents of the guitar are contained in this package. The picture below shows the individual items included in the delivery. The assembly is described in detail in the following sections. -
Page 7: Assembly Instructions
Assembly instructions Assembly instructions Useful tools and materials Provide the following tools and materials for the assembly of the guitar: Phillips screwdriver Rubber mallet Ring wrench Pliers Varnish and accessories Needle files Sandpaper Body and neck should by all means be painted before assembly. When applying spray lacquer or paint, you must wear a dust mask. -
Page 8: Mounting The Machine Head
Assembly instructions Neck finish The guitar neck is sealed with a thin layer of matt lacquer before delivery and is ready to use. If you still want to treat the neck with coloured or clear lacquer, proceed as follows. Carefully mask off the fingerboard and all frets before painting. Make sure that all sur‐ faces are free of dust and dirt. - Page 9 Assembly instructions Turn the neck and fasten all the machine heads finger-tight to the front of the head‐ stock with the washers and nuts provided. Tighten the nuts on the front with an appropriate spanner, then tighten the screws on the back firmly to fasten the tuners. Electric Guitar Kit T-Style, TE-LH Electric Guitar Kit...
-
Page 10: Mounting The String Retainers
Assembly instructions 3.4 Mounting the string retainers Screw the two string retainers to the front of the head plate in the holes provided next to the tuners. The string retainer with the thicker spacer must be inserted into the hole that is closer to the saddle. Ensure the string retainers can still move freely. - Page 11 Assembly instructions Turn the guitar over and position the neck plate over the four bolt holes at the rear of the body, then screw the four wood screws provided through the neck plate, body and pilot holes in the neck until everything fits tightly. Electric Guitar Kit T-Style, TE-LH Electric Guitar Kit...
-
Page 12: Wiring The Potentiometers, Pickups And Switches
Assembly instructions 3.6 Wiring the potentiometers, pickups and switches The pickups and potentiometer plate are connected via cable connectors. As illustrated, run the cable connector for the bridge pickup through the recess into the cable channel as far as the recess for the potentiometer plate. Electric Guitar Kit T-Style, TE-LH Electric Guitar Kit... - Page 13 Assembly instructions Run the cable for earthing the strings (stripped, without connectors) through the channel in the recess for the potentiometer plate and into the recess for the bridge pickup. Next, pull the cable out of the hole far enough to ensure sufficient contact with the metallic surface when the bridge is installed.
- Page 14 Assembly instructions Place the body on a suitable working surface. Use a soft pad in order to avoid damage to the surface. Insert the bridge with the pickup into the cutout on the body as illustrated. Ensure the pickup sits in the centre of the hole and is aligned with the pre-drilled screw holes.
-
Page 15: Mounting The Pickguard, Output Jack And Potentiometer Plate
Assembly instructions 3.7 Mounting the pickguard, output jack and potentiometer plate First, adjust the width of the recess for the guitar neck on the pickguard with a needle file and/or sandpaper. Note the positions of the mounting holes for the pick‐ guard! Run the cable from the neck pickup into the recess for the potentiometer plate. - Page 16 Assembly instructions Position the pickguard over the front of the body so that the neck pickup is seated in the correct recess. Screw the pickguard onto the body using the screws provided. Connect the pickup connector to the connectors for the potentiometer plate. Insert the output jack into the hole provided on the edge of the guitar body.
- Page 17 Assembly instructions Set the holder for the output jack in place and check whether the jack protrudes. It should stick out over the holder enough that it can be screwed firmly in place with the nut provided, but no further than necessary. Correct the position if necessary by turning the counter nut inside appropriately.
-
Page 18: Mounting The Strap Buttons
Assembly instructions 3.8 Mounting the strap buttons Screw the strap buttons into the pre-drilled holes in the body as shown. Electric Guitar Kit T-Style, TE-LH Electric Guitar Kit... -
Page 19: Strings, Neck Relief, String Height And Pickups
Assembly instructions 3.9 Strings, neck relief, string height and pickups Stringing The strings are threaded from the bridge towards the neck over the corresponding saddle. Wrap the string end around the tuner several times and pull each string hand-tight at first. Be sure that each string is in the correct position on the saddle and in the correct string retainer. - Page 20 Assembly instructions Adjusting the neck relief The neck is equipped with a steel truss rod that can be used to adjust the relief to your preferences. After tuning the strings, check the relief by pressing on the low E string at the first and twelfth fret.
- Page 21 Assembly instructions Adjusting the position of the strings Once the neck has the desired relief, you can use the screws for each saddle to adjust the string position to suit your taste. Here, too, the lower the strings, the easier they are to fret, but they will buzz more easily when the guitar is played.
- Page 22 Assembly instructions Adjusting the pickups The pickups should be set so that all the strings sound equally loud when played. Adjust the height of the pickups by using the lateral adjustment screws and listening to the sound. The minimum distance between each string and its pickup is two milli‐ metres.
-
Page 23: Protecting The Environment
Protecting the environment Protecting the environment Disposal of the packaging material For the transport and protective packaging, environmentally friendly materials have been chosen that can be supplied to normal recycling. Ensure that plastic bags, packaging, etc. are properly disposed of. Do not just dispose of these materials with your normal household waste, but make sure that they are collected for recycling. - Page 24 Notes Electric Guitar Kit T-Style, TE-LH Electric Guitar Kit...
- Page 25 Notes Electric Guitar Kit T-Style, TE-LH Electric Guitar Kit...
- Page 26 Notes Electric Guitar Kit T-Style, TE-LH Electric Guitar Kit...
- Page 28 Musikhaus Thomann · Hans-Thomann-Straße 1 · 96138 Burgebrach · Germany · www.thomann.de...
Need help?
Do you have a question about the Harley Benton TE-LH and is the answer not in the manual?
Questions and answers