Table of Contents
Advertisement
Advertisement
Table of Contents

Related Manuals for thomann DP-25


Summary of Contents for thomann DP-25
- Page 1 DP-25 digital piano user manual...
- Page 2 Musikhaus Thomann e.K. Treppendorf 30 96138 Burgebrach Germany Telephone: +49 (0) 9546 9223-0 email: info@thomann.de Internet: www.thomann.de 13.02.2012...
-
Page 3: Table Of Contents
Operating elements......................12 Demo songs..........................13 Voices ............................16 Split mode..........................17 Layer mode..........................19 Metronome..........................21 Transpose..........................22 Octave shift ..........................23 Song recording........................24 Edit functions......................... 28 MIDI functions........................30 Appendix..........................39 Technical specifications....................49 Protecting the environment................... 50 DP-25... -
Page 4: General Notes
General notes General notes This user manual contains important information on the safe operation of the device. Read and follow all safety notes and all instructions. Save this manual for future refer‐ ence. Make sure that it is available to all persons using this device. If you sell the device to another user, be sure that they also receive this manual. -
Page 5: Safety Instructions
Keep the device away from naked flames. NOTICE! Operating conditions This device has been designed for indoor use only. To prevent damage, never expose the device to any liquid or moisture. Avoid direct sunlight, heavy dirt, and strong vibrations. DP-25... - Page 6 Safety instructions NOTICE! External power supply The device is powered by an external power supply. Before connecting the external power supply, ensure that the input voltage (AC outlet) matches the voltage rating of the device and that the AC outlet is pro‐ tected by a residual current circuit breaker.
-
Page 7: Introduction
The digital piano represents not only the latest technology, it even looks very ele‐ gant, that makes it an eye catcher wherever you set it up. We wish you a lot of fun with your new instrument and hope, that you will enjoy it for many years. DP-25... -
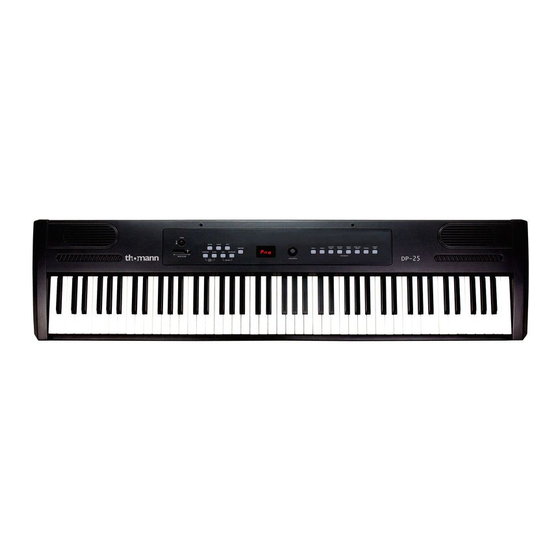
Page 8: Operating Panel And Connections
Operating panel and connections Operating panel and connections Operating panel 1 Power ON/OFF (on/off switch) 2 MASTER VOLUME (volume control) 3 LED display 4 Rotary control[DATA CONTROL] 5 Button [REVERB] 6 Button [CHORUS] 7 Button [SPLIT] 8 Button [TRANSPOSE] 9 Button [OCTAVE] 10 Button [SONG] 11 Button [METRONOME] digital piano... - Page 9 13 VOICE SELECT: PIANO 1, PIANO 2, ELECTRIC PIANO 1, ELECTRIC PIANO 2, CHURCH ORGAN, ROCK/JAZZ ORGAN, STRINGS, UPRIGHT BASS Connections 14 DC 12 V (input socket) 15 PHONES (headphones) 16 LINE OUT L/R 17 PEDAL 18 MIDI IN/OUT DP-25...
-
Page 10: Setup And Switch On
Setup and switch on Setup and switch on Unpack and check carefully there is no transportation damage before using the unit. Keep the equipment packaging. To fully protect the device against vibration, dust and moisture during transportation or storage use the original packaging or your own packaging material suitable for transport or storage, respectively. -
Page 11: Connections
When plugging in headphones the speakers will be muted. Thus, the sound is only played from the headphones. DC 12 V input socket Connect the supplied power supply unit here. Only use the power supply unit, that was provided with the piano. DP-25... -
Page 12: Operating Elements
Operating elements Operating elements Power ON/OFF (on/off switch) Press the [POWER] button in the upper left corner of the operating panel. The button remains pressed when the unit is switched on. It is released to its original position when the unit is switched off. FUNCTION button Use the [FUNCTION] button to select the operating mode. -
Page 13: Demo Songs
Press the [VOICE SELECT] button for the desired voice. The [SONG] button and the respective [VOICE SELECT] button will flash; the display shows Demo song Voice Display PIANO 1 PIANO 2 ELECTRIC PIANO 1 ELECTRIC PIANO 2 CHURCH ORGAN ROCK/JAZZ ORGAN STRINGS UPRIGHT BASS DP-25... - Page 14 Demo songs Stop playback To stop the demo song playback press the [SONG] button again. To replay the cur‐ rent song from the beginning, press the flashing [VOICE SELECT] button again. The display shows Demo song list PIANO 1 Waltz Op. 69, no. 2 by Frédéric Chopin Improvisation La Campanella (etude no.
- Page 15 To adjust the effect depth hold the [CHORUS] button down while turning the [DATA CONTROL] knob to select the desired setting (0-127). The current value will be shown in the display, e.g. DP-25...
-
Page 16: Voices
Voices Voices This digital piano offers 8 built-in voices to choose from, which include several piano sounds as well as other instruments. You can select these digitally sampled sounds separately, or layered to produce the sound of 2 voices simultaneously. Or you assign different voices to the left and right hand. -
Page 17: Split Mode
If you press another [VOICE SELECT] button in split mode, it will only affect the left keyboard area. Change the right hand voice Exit split mode by pressing the [SPLIT] button again. Then select the desired voice and press the [SPLIT] button again, to re-enter split mode. DP-25... - Page 18 Split mode Change the left hand volume Press the [FUNCTION] button to enter edit mode. Then press the B 0 key to assign the [DATA CONTROL] to the left hand volume function. Turn the rotary control [DATA CONTROL] until the desired value (0 – 127) is displayed, while striking any piano key in the left area to hear the effect.
-
Page 19: Layer Mode
Setting the second voice volume Press the [FUNCTION] button to enter edit mode. Press piano key A 0 to adjust the volume. The display shows Turn the rotary control [DATA CONTROL] until the desired value (0 – 127) is shown in the display. DP-25... - Page 20 Layer mode If split mode is active while selecting layer mode, the main voice will only be assigned to the keyboard area to the right of the split point. The left hand voice remains unchanged as it was set in split mode. MIDI considerations The main voice will be transmitted on the selected main MIDI send channel.
-
Page 21: Metronome
Press the [FUNCTION] button and press the piano key for the metronome time signature E Rotate the [DATA CONTROL] knob until the desired time signature is displayed. A 4/4-time is displayed as “4.4“. Tempo and time signature can not be changed during recording. DP-25... -
Page 22: Transpose
Transpose Transpose This function allows to raise or lower the whole keyboard pitch by 12 semitones up or downwards in semitone increments. Turn on To turn the transpose function on, press the [TRANSPOSE] button. The display shows Set the pitch Use the rotary control [DATA CONTROL] to select the desired value;... -
Page 23: Octave Shift
Use the rotary control [DATA CONTROL] to set the desired pitch. The selected value will be displayed, e.g. The [OCTAVE] button lights up as long as this function is activated. To turn off this function just press this button again. Then the piano returns to the default setting. DP-25... -
Page 24: Song Recording
Song recording Song recording The built-in recorder function lets you record two individual tracks. Thus, you can record the first part on one track and another part on a second track while the first part is played. Recording a track Press [SONG] and [METRONOME] button simultaneously. - Page 25 Press the [METRONOME] button. The metronome stops, but the recording continues. If you press the [METRONOME] button again, the metronome will be switched on again. You can also switch the metronome on and off in record waiting mode, before the recording begins. DP-25...
- Page 26 Song recording Deleting all song recorder data Press the buttons [SONG] and [METRONOME] simultaneously. Thus, the metronome will be started and the song recorder is set to record waiting mode. The display shows Turn the [DATA CONTROL] knob, until the display shows When you start playing all previously recorded notes on tracks 1 and 2 will be deleted, and what you're currently playing will be recorded on track 1.
- Page 27 If there are no recordings on both tracks 1 or 2, nothing will be played. The [SONG] button flashes three times rapidly, the playback mode will be can‐ celled, and the digital piano returns to normal play mode. The display shows the currently selected voice. DP-25...
-
Page 28: Edit Functions
Edit functions Edit functions In edit mode you can use the rotary control [DATA CONTROL] to adjust several values. If you don't use the rotary control [DATA CONTROL] for 10 seconds, it will return to its standard function of metronome tempo setting. Use the control buttons on the keyboard to select the function that should be assigned to the rotary control [DATA CONTROL]. - Page 29 Press the piano button for the desired setting (A 3, F 3, B 3 or F3). The current setting is shown in the display. The following figure shows the location of the keys (see also Ä ‘Functions key chart’ on page 46). DP-25...
-
Page 30: Midi Functions
MIDI functions MIDI functions MIDI (Musical Instrument Digital Interface) is the standard interface for electronic musical instruments and computers to communicate, control and synchronize with each other. MIDI transmissions consist of digital codes, that contain information about which notes are played on which instrument, in which pitch, intensity and duration, as well as control codes for volume, vibrato, entry, and time signature. - Page 31 Main MIDI send channel (C#2) The main MIDI send channel can be changed by raising or lowering of the channel number. Press the [FUNCTION] button, to enter edit mode. Press the piano key C 2. The display briefly shows DP-25...
- Page 32 MIDI functions Use the rotary control [DATA CONTROL] to select the desired main MIDI send channel. The display shows the current value e.g. The MIDI channels for the split and layer voices are used relative to the main MIDI send channel as follows Send channel for split voice = main MIDI send channel + 1 Send channel for layer voice = main MIDI send channel + 2 Piano keys for numeric date input (G5,...
- Page 33 6 will send out the MIDI commands Reset All Controllers and All Notes Off on all MIDI channels (1 to 16). This can be very helpful for clearing "stuck notes" when controlling external MIDI devices or software. Press the [FUNCTION] button, to enter edit mode. DP-25...
- Page 34 MIDI functions Press the piano key F When resetting the piano, the MIDI commands Reset All Controllers and All Notes Off will also be sent out, but only on channel 1 (for detailed infor‐ mation see also Ä ‘Piano reset’ on page 47). Default key F5 Use the default key in edit mode, to reset the following parameter to their default values:...
- Page 35 [DATA CONTROL]. Press the input key C7 to send the MIDI command. Sending MIDI program changes using the rotary control [DATA CONTROL] Press the [FUNCTION] button, to enter edit mode. Press the piano key F 1. The display briefly shows DP-25...
- Page 36 MIDI functions The digital piano returns to the normal play mode and the assignment of the rotary control [DATA CONTROL] has so been changed, that every time you turn the knob, a MIDI program change will be sent. The display shows the current MIDI program number (0 - 127), e.g.
- Page 37 Sending a single specific bank MSB (rotary control knob assignment remains unchanged) Press the [FUNCTION] button, to enter edit mode. Press the piano key B DP-25...
- Page 38 MIDI functions Enter the bank MSB value you want to send using the keys for numeric input. As an alternative to entering via the function keys for numeric inputs, you can select the bank MSB value in this step also using the rotary control [DATA CONTROL].
-
Page 39: Appendix
0, 1, 5, 6, 7, 10, 11, 32, 64, 65, 66, 67, 80, 81, 91, 93, 100, 101, 121 Program Change True # 0-127 8 voices only on DP-25, PGM= ******** System Exclusive Yes* Yes* *The controller recognizes and responds to GM device inquiries. - Page 40 Appendix Function Sent Received Remarks ALL Notes OFF Active Sensing System Reset Notes MIDI channel modes POLY OFF MONO ON OMNI ON Mode 1 Mode 3 OMNI OFF Mode 2 Mode 4 Data control assignments and MIDI CC The [METRONOME] button flashes three times, when the [ DATA CONTROL] rotary con‐ list trol was reassigned its default function (metronome tempo adjustment).
- Page 41 Bank Select (fine) Modulation Wheel (fine) Breath controller (fine) Foot Pedal (fine) Portamento Time (fine) Data Entry (fine) Volume (fine) Balance (fine) Pan position (fine) Expression (fine) Effect Control 1 (fine) Effect Control 2 (fine) 46-63 046, 047, 048...063 DP-25...
- Page 42 Appendix Continuous controller-Nr. Controller name Display Default value Hold Pedal (on/off) Portamento (on/off) Sostenuto Pedal (on/off) Soft Pedal (on/off) Legato Pedal (on/off) Hold 2 Pedal (on/off) Sound Variation Sound Timbre Sound Release Time Sound Attack Time Sound Brightness Sound Control 6 Sound Control 7 Sound Control 8 Sound Control 9...
- Page 43 Yes – for each voice Reverb depth Default setting for each voice Yes – for each voice Chorus on/off Yes – for each voice Chorus depth Default setting for each voice Yes – for each voice Touch response sensitivity NORMAL DP-25...
- Page 44 Appendix Parameter Factory default setting Retained after powering off Split point Main voice volume Layer voice volume Split voice volume Metronome volume Tuning Tempo Layer mode voice — — Split mode voice 8 - upright bass Layer mode on/off Split mode on/off After powering up the following data will be sent to the sound engine, the USB MIDI interface, and the MIDI output: Bank change MSB=0, LSB=0, PGM=0 - Setting internal sound engine to piano...
- Page 45 –64 (–100 Cent) to 63 (+100 Cent) in 128 MIDI steps 1 tone is equivalent to 200 cents, therefore the range –100 to +100 cents is equiva‐ lent to 1 semitone up and downwards. Please note that this is shown in midi steps – 64 to 63. DP-25...
- Page 46 Appendix Functions key chart digital piano...
- Page 47 Thus, the piano is in the same condition as when you used it for the first time. Please note that anything you have recorded in the song recorder will be erased by this procedure! Turn off the digital piano using the [POWER] switch. DP-25...
- Page 48 Appendix Turn on the digital piano using the [POWER] switch while simultaneously pressing the buttons [REVERB] and [CHORUS]. ð All segments of the display are lit, all LEDs light up. Release the [REVERB] and [CHORUS] buttons. ð The digital piano is now ready to be played, it is in normal play mode. All LEDs show the default condition.
-
Page 49: Technical Specifications
MIDI in, MIDI out, sustain pedal, line out (L/R), headphones 2 × YDT816, 4 Ω, 10 W Speakers Operating voltage AC 230 V, 50 Hz Dimensions (W x D x H) 1143 mm × 515 mm × 310 mm Weight 17.1 kg DP-25... -
Page 50: Protecting The Environment
Protecting the environment Protecting the environment Disposal of the packaging material For the transport and protective packaging, environmentally friendly materials have been chosen that can be supplied to normal recycling. Ensure that plastic bags, packaging, etc. are properly disposed of. Do not just dispose these materials with your normal household waste, but make sure that they are fed to a recovery. - Page 52 Musikhaus Thomann e.K. · Treppendorf 30 · 96138 Burgebrach · Germany · www.thomann.de...
Need help?
Do you have a question about the DP-25 and is the answer not in the manual?
Questions and answers
my DP25 has stopped working. It's plugged in correctly but does not turn on. Is there a fuse box on the piano