Table of Contents
Advertisement
Quick Links
Advertisement
Table of Contents

Related Manuals for Starck Sefam S.Box Duo S


Summary of Contents for Starck Sefam S.Box Duo S
- Page 1 S.Box™ Duo S.Box™ Duo...
- Page 2 Download the FREE application on your Smartphone or on your tablet With SEFAM Access, you can: Easily adjust your S.Box Duo S or your S.Box Duo ST, Easily monitor the evolution of the effectiveness of your treatment and other parameters of your health and well-being, ...
-
Page 3: Table Of Contents
ONTENTS Before you start ............................4 Safety guidelines ............................4 When traveling ..............................5 Recommended use ............................5 Contraindications............................6 Adverse effects .............................. 6 Components of the system ......................... 6 Description ............................. 7 Device Overview ............................. 7 Definition of symbols ............................ 8 Installation .............................. -
Page 4: Before You Start
Before you start Please read this manual carefully before using your S.Box Duo S or S.Box Duo ST to understand the usage constraints of the device. Safety guidelines Means in this manual that there is a risk of danger of injury or accident to WARNING: yourself or others. -
Page 5: When Traveling
Do not leave unnecessary lengths of the tube on the bed because they could wrap around your head or neck. Keep the device away from children and pets. The Health Industry Manufacturers Association (HIMA) recommends maintaining a minimum separation of 15 cm between a cordless phone and a pacemaker in order to avoid possible interference with the pacemaker. -
Page 6: Contraindications
The device can also be used with the following optional accessories. Contact your Home Care Provider for more information on the available accessories. When using them, follow the instructions given with the accessories. S.Box cigarette cable (24 VDC) S.Box by Starck carrying case Fine filter (disposable) S.Box heated humidifier ... -
Page 7: Description
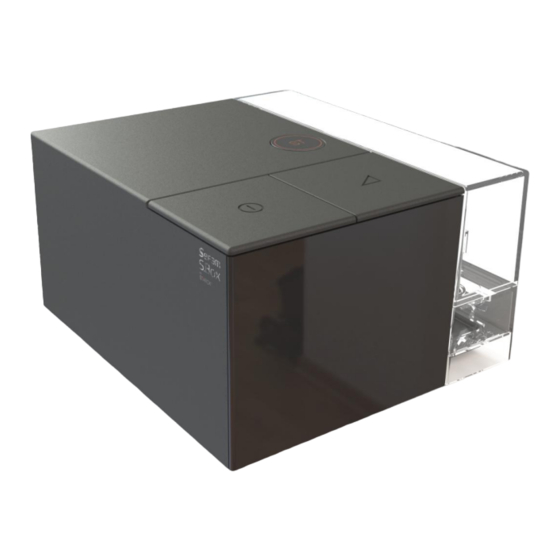
Description Device Overview Figure 1 – Front view Figure 2 – Rear view of a device with a humidifier Figure 3 – Rear view of a device with a side cover Figure 4 – View of the heater plate and accessory location To switch the device on and off. -
Page 8: Definition Of Symbols
Heater plate (if humidifier is included): Base of the heated humidifier used to heat the water in the humidifier chamber. Humidifier chamber (if included): Humidifier chamber in which the maximum water level is indicated. Side cover (if included): Outlet elbow connector: Swivel connector for connecting the tube. -
Page 9: Installation
Installation Standard installation of the device The apparatus must be positioned on a flat and stable surface. It comes with a pre-mounted side cover and according to the chosen configuration, it can also be delivered with a heated humidifier that replaces the pre-mounted side cover. -
Page 10: Installation For Power Via The Cigarette Lighter Socket
4. Connect the breathing tube: Connect the end of the flexible tube to the angled outlet connector on the back of the device (Mark 14 in Figure 2). If you have a S.Box heated tube with ATC, insert its power cable lead into the corresponding socket on the device (Mark 9 in Figure 2). -
Page 11: Use
Filling the humidifier chamber (if installed) 1. Unplug the S.Box Duo S or S.Box Duo ST device from the power supply or electrical power grid. 2. To separate the humidifier chamber from the device, press the button to unlock the humidifier chamber (mark 4 in Figure 1) and at the same time, pull the humidifier chamber away from the device using the integrated handle. -
Page 12: Stopping Of Treatment
If your device is equipped with a heated humidifier, it starts automatically when the appliance is switched on. You can increase or decrease the humidification level using the touch key , (see "How to set the device" page 16). WARNING: After a power failure, the appliance will recover the same parameters and operating mode as the ones before the power failure occured (start / standby). -
Page 13: Using An Sd Card
Using an SD card An SD card is used to store the most recent compliance data memorized by the machine, or to update the settings of your device. Follow the instructions given by the Home Care Provider before using this card. -
Page 14: Transporting The Device
Transporting the device Unplug the power supply and disconnect all accessories from the device. Pack the apparatus and the accessories in the travel bag. Device with heated humidifier If your device is equipped with a humidifier, press the button to unlock the humidifier chamber and at the same time, pull the chamber using the integrated handle. -
Page 15: Information And Settings
Information and settings User interface description The two mechanical buttons on the top of the device are used to manage its operation: Start / standby button : switches the device on or off. Ramp button : deactivates or activates the ramp function when the device is in operation. When the device is in operation, information appears on the touch screen in front and you may be able to adjust certain settings. - Page 16 Description of symbols displayed Symbol Meaning Symbol Meaning Status bar GSM mobile phone network status. Wi-Fi Communication activated. Flashes quickly during the Flashes quickly during the transmission. transmission. Airplane mode Oximeter connected USB connection active (Bluetooth Ramp active (T RAMP) disabled) Inspiratory pressure Operation mode...
-
Page 17: How To Set The Device
How to set the device The setting can be done via the touch keys if the unit is in standby or in use (depending on settings). 1. Heating capacity of the S.Box heated tube with ATC (if installed) Views of the display: You can decrease or increase the displayed Tap the touch key value of the heating power by tapping the... - Page 18 4. Settings menu To access the settings, tap the touch key when the device is in standby mode. In the following sequence of settings: Tapping on allows you to decrease or increase the value of the parameter or to deactivate or activate the displayed function, ...
- Page 19 Views of the display: Brightness ❹ You can decrease or increase the brightness of Tap the touch key the display by tapping the touch key as many times as needed. Possible settings: 01 to 10. BT (Bluetooth wireless communication) ❺ You can deactivate (OFF) or activate (ON) this Tap the touch key function by tapping the key...
- Page 20 The symbol blinks slowly at the top of the screen. Only when the Wi-Fi module is installed inside the S.Box Duo S or S.Box Duo ST device and the Wi-Fi connection activated, you can access the WPS automatic configuration which allows connecting to the local network.
- Page 21 Notes: This display appears only if the Bluetooth communication has been previously enabled or if a PolyLink module is present in the device and the BLE communication enabled. Follow the instructions in the user guide to install the oximeter and oximetry sensor (if present), and wait for the communication to take place (approximately one minute).
- Page 22 5. Information menu The compliance information can be viewed but not modified. To access it, tap the touch key when the device is in standby mode. In the following sequence: allows accessing a memorised compliance period, then compliance information recorded during this period and technical information about the device.
- Page 23 Views of the display: ❹ Average level of unintentional leakage in the mask during the period of use. Tap the touch key Possible displayed information: LK: OK, LK: NOK. The value shown on the right indicates each time the number of the last 24-hour periods of use.
- Page 24 Technical information concerning the device: Views of the display: ❽ Accessing technical information Tap the touch key concerning the device. Tap the key to display the information. ❾ Identification number of six digits specific to Tap the touch key the patient is automatically assigned by the device.
- Page 25 Tap the touch key to exit the menu. 6. Status menu This menu is accessible when the device is in operation and when a PolyLink system or an oximeter 3150 has been installed and linked. The information may be visualised consecutively but may not be modified.
- Page 26 Views of the display: Status of the thoracic effort sensor ❹ Tap the touch Possible displays: THO: XX and THO: _ _ _. button (XX = 01 to 10) If THO: _ _ _ is displayed, check that PolyLink effort/position kit is turned on, the thoracic effort sensor is connected and that its tension is correct.
- Page 27 7. Viewing the clock during the treatment When the S.Box Duo S or S.Box Duo ST device is working, the delivered pressure is displayed. Tap the to view the clock, and vice versa to come back to the delivered pressure. View of the display: View of the display: Tap the touch key...
-
Page 28: Using The Device With Oxygen Enrichment (Optional)
Using the device with oxygen enrichment (optional) WARNING: Always follow the instructions of the medical professionals or the Home Care Provider in case of using oxygen. The source of oxygen should be placed more than one meter away from the device. ... -
Page 29: Cleaning And Maintenance
Cleaning and Maintenance No specific maintenance other than periodic cleaning is required. Please refer to the instructions for use of your mask, the breathing tube, the S.Box heated tube with ATC and the communicating accessory used for more details on cleaning and maintaining them. WARNING: Unplug the device from the power supply. -
Page 30: Monthly
Notes: The different parts of the humidifier chamber can also be cleaned in a dishwasher (maximum 70 ° C). Do not leave stagnant water in the chamber in order to prevent the development of micro-organisms. Washable filter Remove the air intake grid. -
Page 31: In Case Of Problems
In case of problems Helpful tips Problem Possible cause Suggestion Your nose is cold The room temperature Increase the room temperature. is too low. The air delivered is too Ask your Home Care Provider to provide you with cold. a S.Box heated tube with ATC. Runny nose. - Page 32 Problem Possible cause Suggestion Discomfort due to Device pressure. Adjustment of nasal pressure takes some time. excessive pressure Use the pressure increase ramp to help you fall sensation. asleep (see section "Ramp" page 12). Relax and breathe slowly through your nose. The device is set in The pressure levels were prescribed by your BPAP (bilevel) mode.
-
Page 33: Displayed Messages
Displayed messages Message on the Possible cause Proposed solution display The mask is Check the connection between the mask, the breathing tube and the device. This message disconnected. disappears once you breathe into your properly reconnected mask or press the button. -
Page 34: Technical Characteristics
Technical characteristics Performance of the device Pressure range: 4 cmH O to 20 cmH O in CPAP mode 3 cmH O to 25 cmH O in BPAP (bilevel) mode Adjustable by steps of 0.5 cmH Maximum pressure at the patient-side connection port in single fault condition: 40 cm H Maximum adjustable pressure:... -
Page 35: Conditions Of Use
Values determined under ATPD (Ambient Temperature and Pressure, Hygrometry) conditions. Conditions of use Pressure range: 700 hPa to 1060 hPa Temperature: +5°C to +40°C with side cover +5°C to +35°C with humidifier Relative humidity: Between 15 % and 90 % without condensation Approximately 0 ... -
Page 36: Physical Characteristics
Power supply Power supply class II: Input voltage: 100 – 240 VAC, 50 - 60 Hz MDS-090BAS24 A (outlet depending on the Power supply provided: country) Input current: 2 - 1 A Output voltage: 24 V WARNING: Use only the plug-in power supply provided with the device ... -
Page 37: End-Of-Life Disposal Of The Device
CEI 60601-1-2:2014 + A1:2020: Medical electrical equipment – Part 1-2: General requirements for basic safety and essential performance – Collateral Standard: Electromagnetic disturbances – Requirements and tests. IEC 60601-1-6:2010: Medical electrical equipment - Part 1-6: General requirements for basic safety and essential performance - Collateral standard: Usability ... - Page 38 38 Technical characteristics S.Box Duo S and S.Box Duo ST...
- Page 40 Contact of your Home Care Provider Manufacturer: Manufacturing plant: SEFAM SEFAM 144 AV CHARLES DE GAULLE 10 ALLEE PELLETIER DOISY 92200 NEUILLY SUR SEINE 54600 VILLERS-LES-NANCY FRANCE FRANCE : M-164DFU03-80-Version 2 2021-08...
Need help?
Do you have a question about the Sefam S.Box Duo S and is the answer not in the manual?
Questions and answers